DLC supports access via role-based SSO. Using Okta as an example, this document describes how to access DLC and configure related permissions through role-based SSO.
Overview
1. When an enterprise requires cross-team collaboration to analyze mass data (for example, financial risk control and retail sales forecasting), traditional account management models face two major challenges:
Low efficiency: Data analysts need to repeatedly log in to multiple systems, such as DLC and BI, which requires time-consuming password memory and switchover.
Loss of control over permissions: The manual allocation of database or table permissions is prone to errors, and the untimely reclamation of resigned employee permissions may cause data leakage.
2. Okta Application: an enterprise-grade identity and access management platform that addresses these pain points through a role-based SSO solution. It seamlessly integrates with your existing enterprise account system, enabling employees to conveniently access DLC via single sign-on. Furthermore, it automatically maps data permissions through pre-configured, granular roles.
Creating a Role SSO
Entering the Okta App
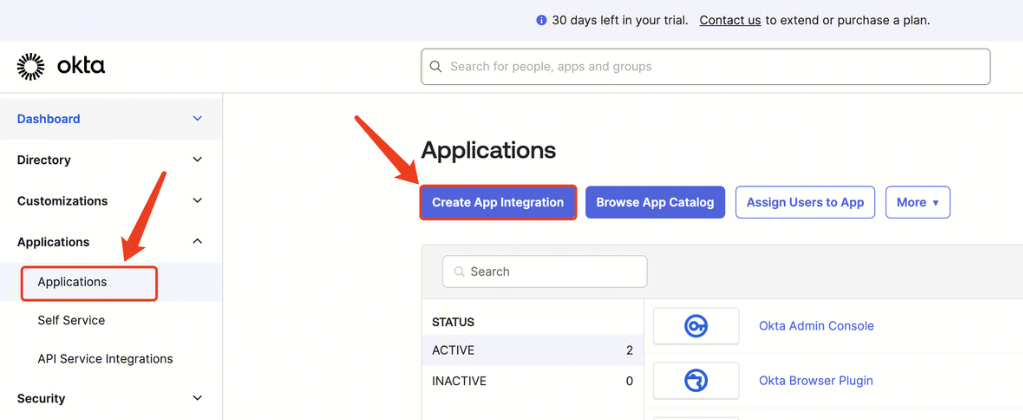
Go to the Okta website, log in as an administrator, select Applications, click Create App Integration, select SAML 2.0, click Next, and enter Create SAML Integration.
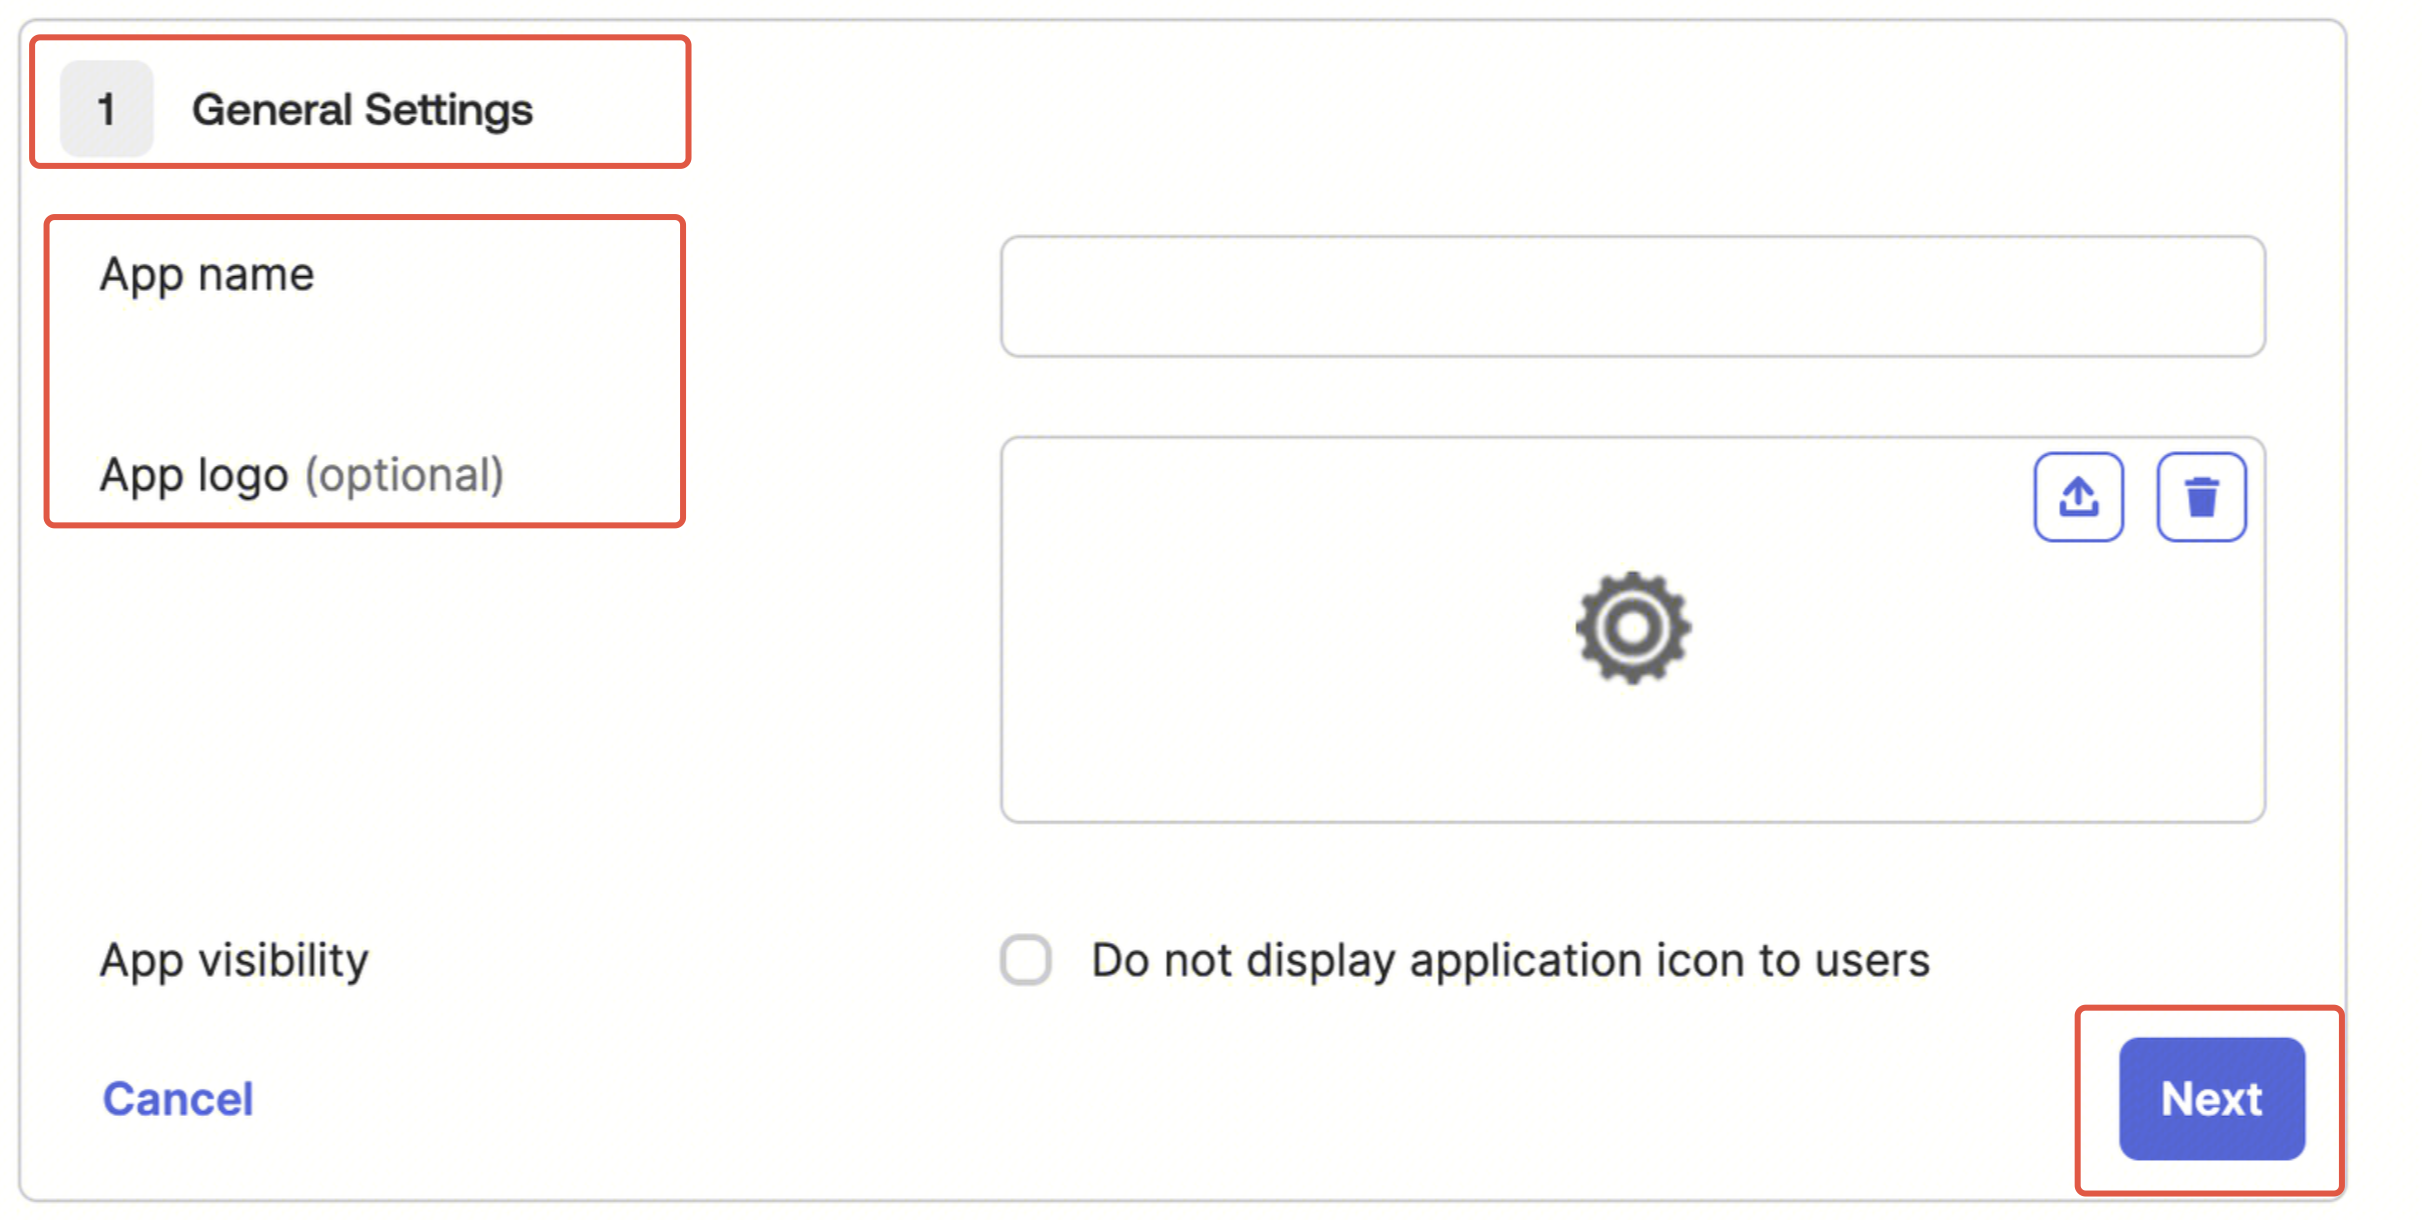
1. General Settings: Fill in the app name, upload the app logo, and click Next.
2. Configure SAML:
Fill in the single sign-on URL:
https://cloud.tencent.com/login/saml Fill in the audience URL (SP Entity ID):
cloud.tencent.com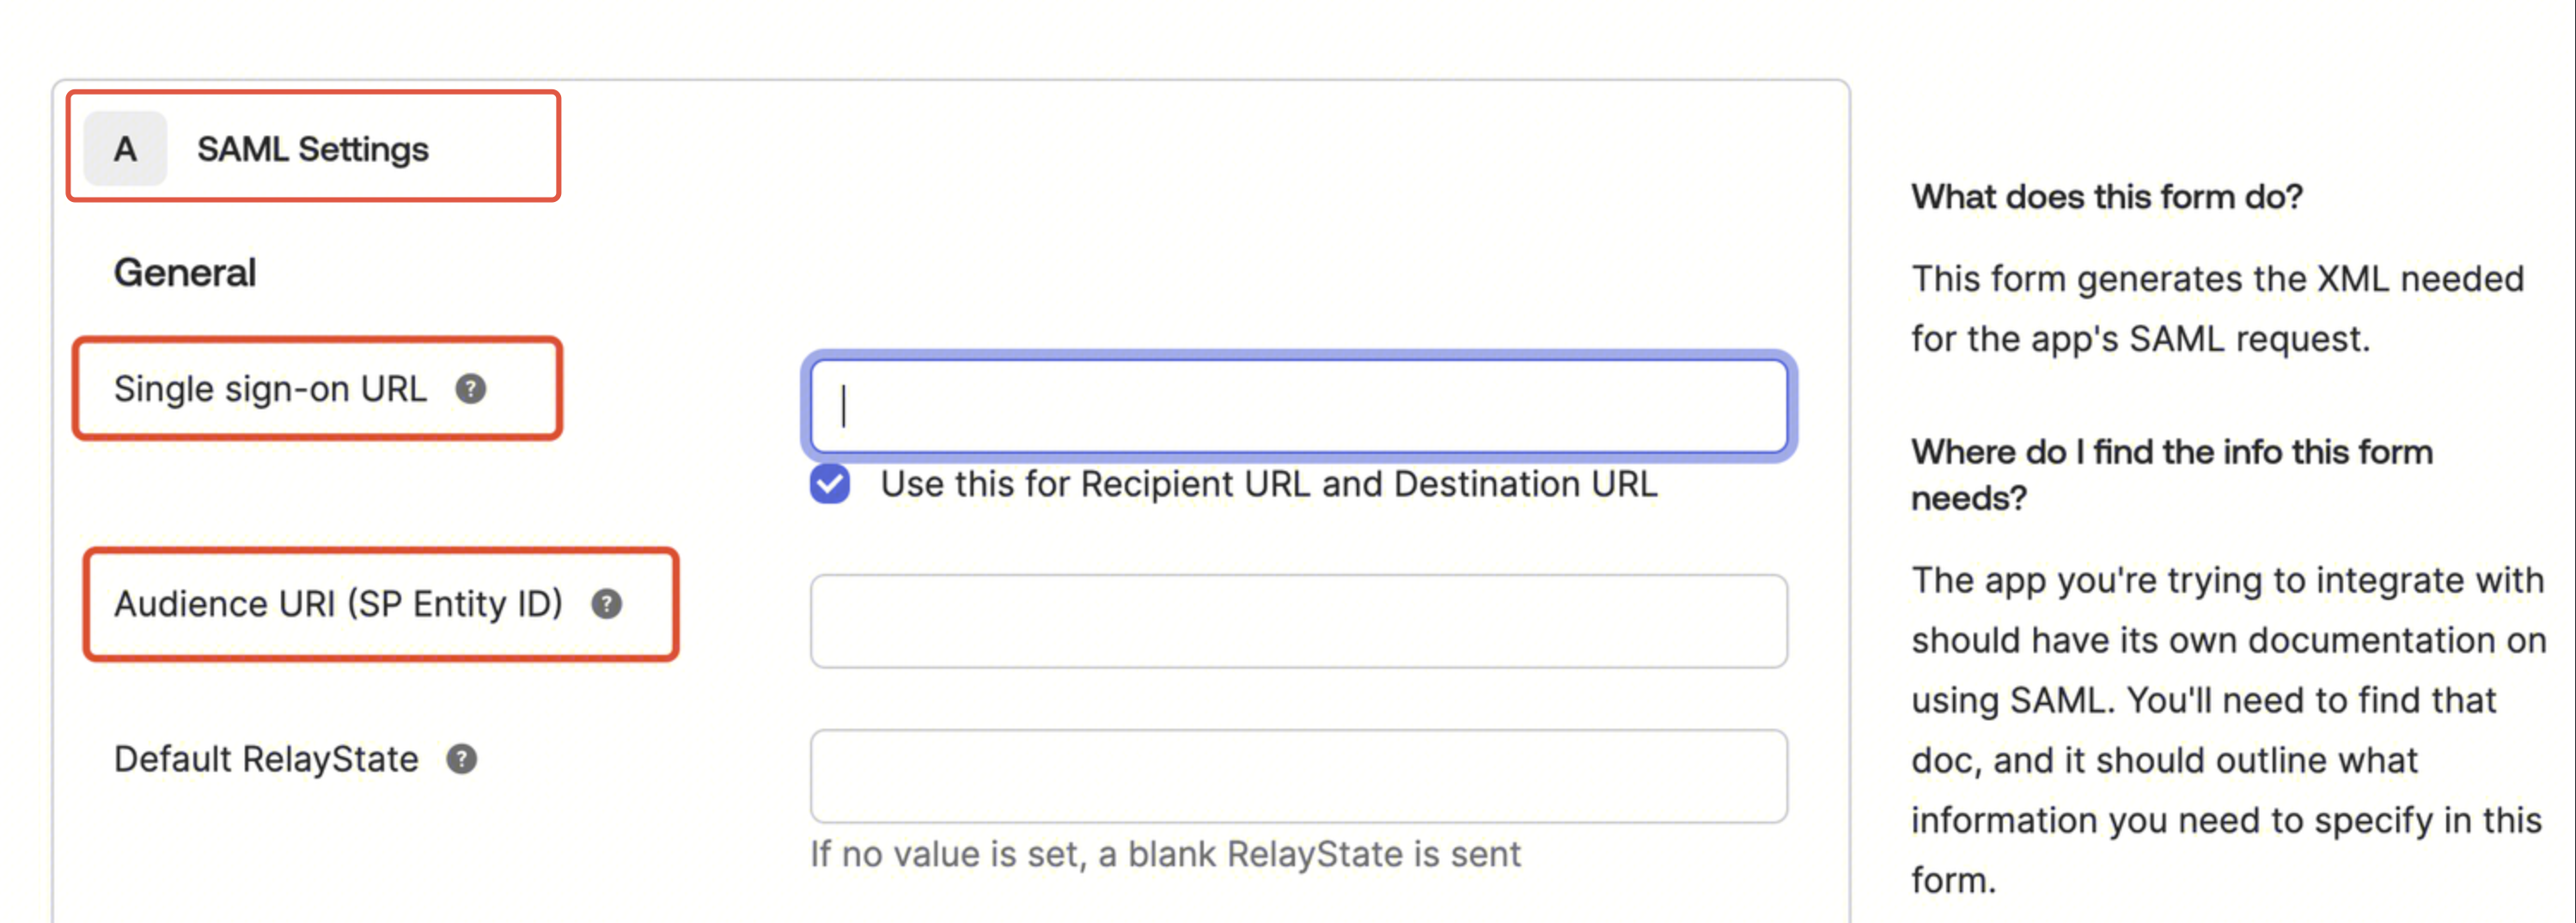
Fill in the Attribute Statements with the following content, then click Next after completing.
Name | Value |
https://cloud.tencent.com/SAML/Attributes/Role | qcs::cam::uin/{AccountID}:roleName/{RoleName},qcs::cam::uin/{AccountID}:saml-provider/{ProviderName} |
https://cloud.tencent.com/SAML/Attributes/RoleSessionName | okta |
Note:
Replace {AccountID} with your Tencent Cloud account ID. Choose Tencent Cloud Account Center > Account Information to check.
Replace {ProviderName} with the SAML identity provider name you created in Tencent Cloud. Here it can be freely named. Ensure it matches the identity provider name in Creating an Identity Provider.
Replace {RoleName} with the name of the role you created for the identity provider in Tencent Cloud. Here it can be freely named. Ensure it matches the role name in Creating a Role.
Creating a Metadata Document
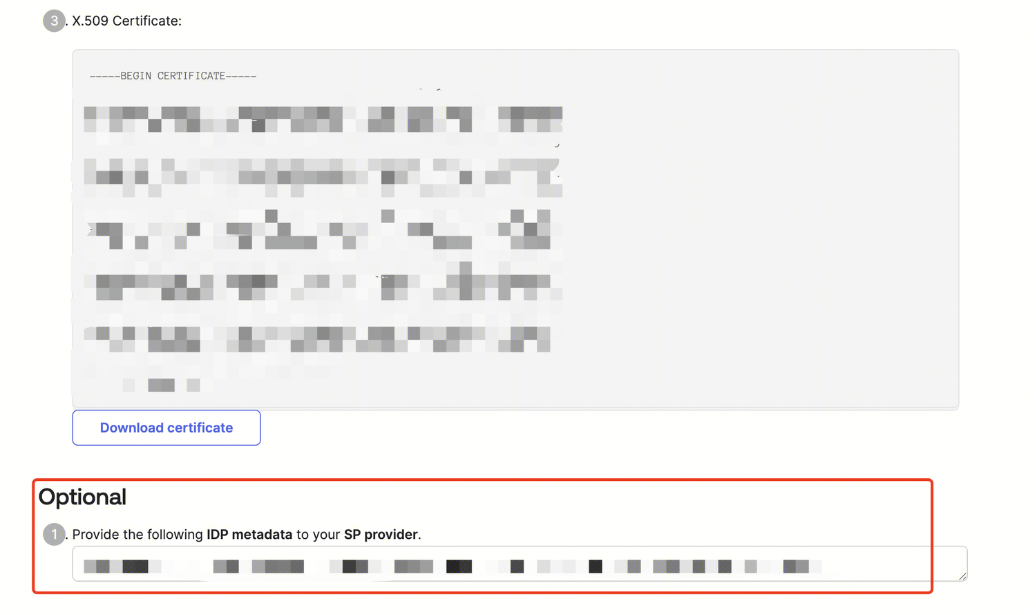
1. Enter the previously created Okta app, select Sign On, and click View SAML setup instructions.
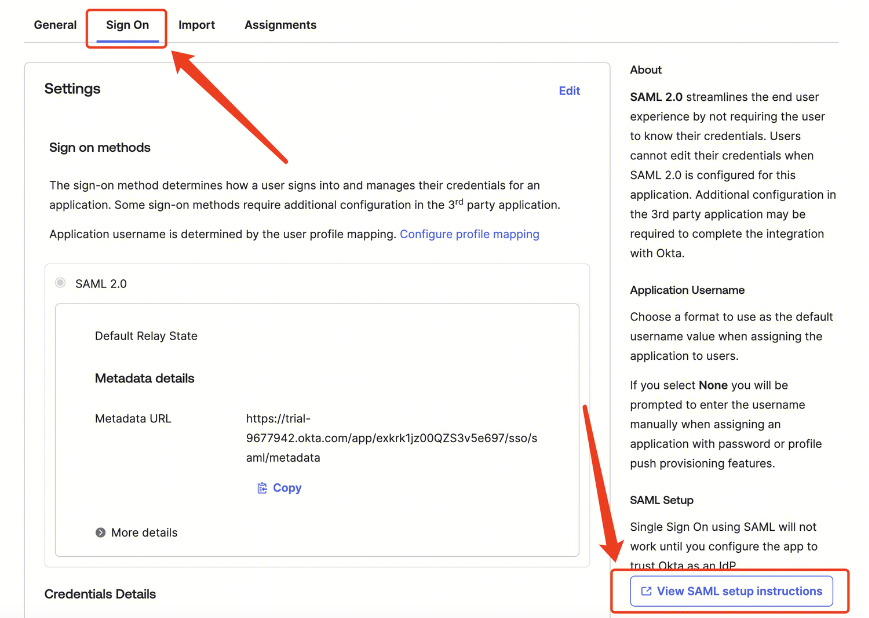
2. Select all content in the dialog box, locally create an XML file, and copy the selected content to this file. This file is the metadata document.
Creating an Identity Provider
Note:
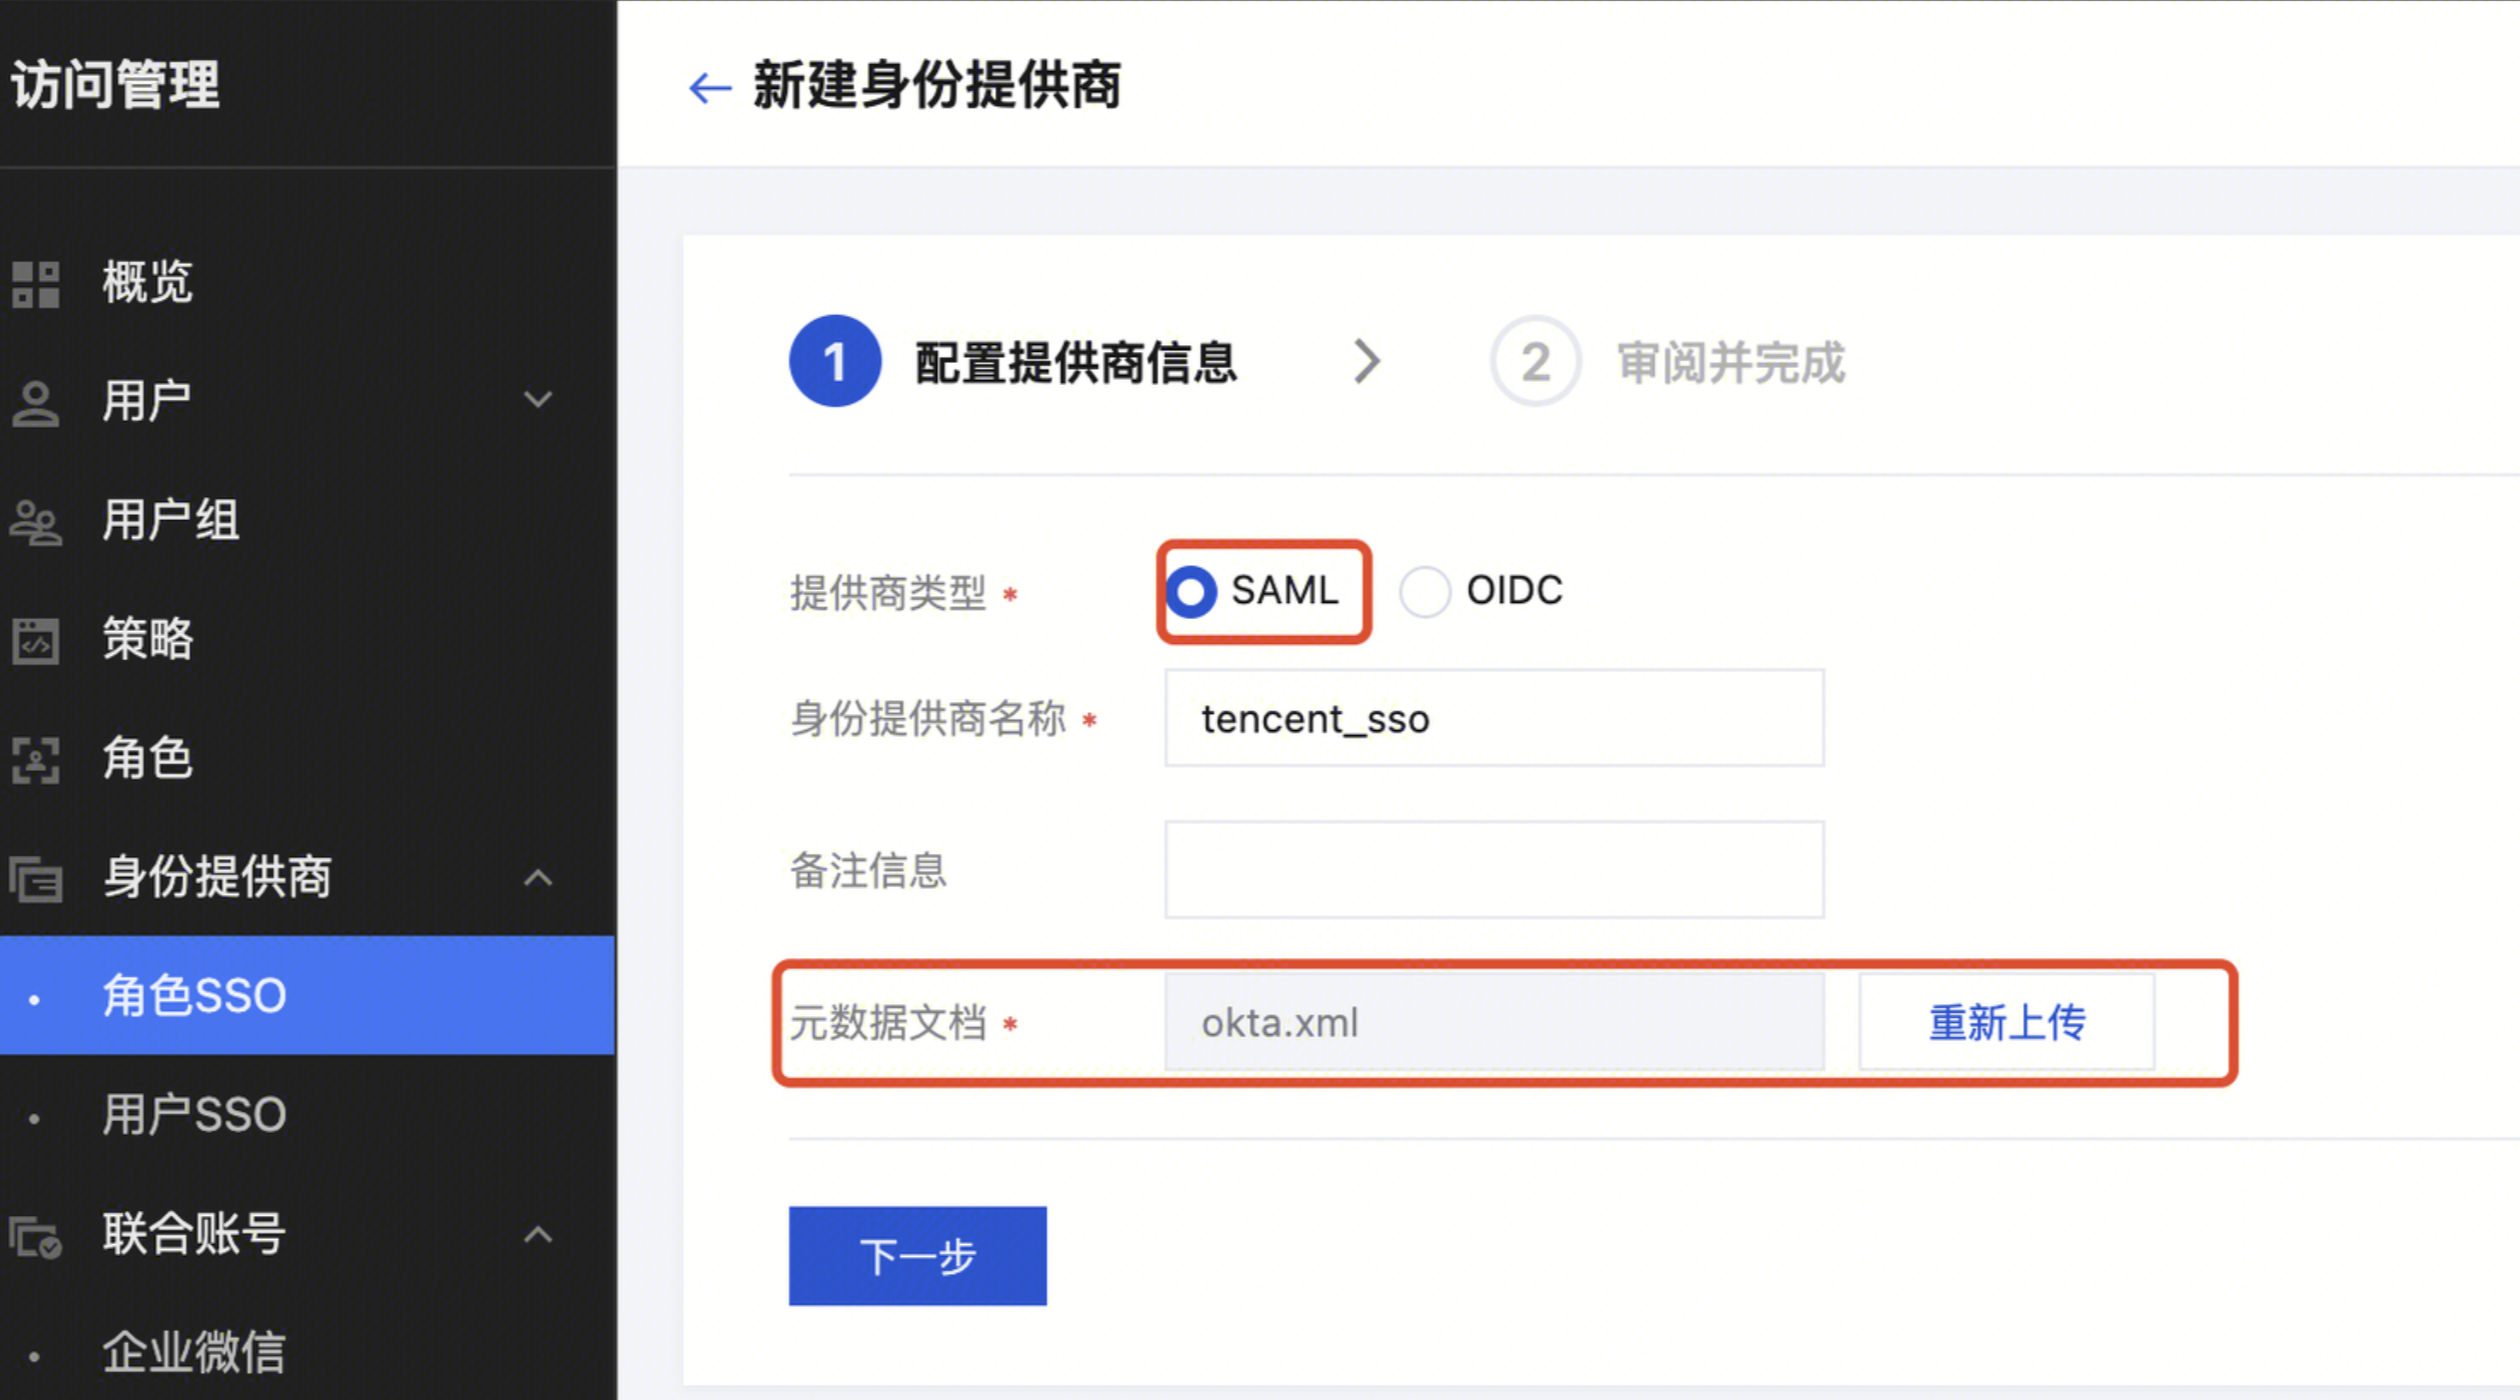
1. Enter the CAM console, choose Identity Provider > Role SSO from the left sidebar, and click Create Provider.
2. Select SAML as the provider type, input the provider name, and upload the generated metadata document from Creating a Metadata Document. Click Next, and then click Finish after confirming the information.
Creating a Role
Note:
1. Enter the Account Information > CAM page, select Role in the left sidebar, click Create Role, and select Identity Provider.
2. On the Inputting the Role Carrier Information page, select SAML as the identity provider type, select the identity provider (Okta), and then click Next.
3. On the Configuring a Role Policy page, select the permission to configure for the role account, and then click Next.
4. On the Configuring a Role Tag page, input the role name and click Finish.
Logging in to Tencent Cloud Using a Role Account
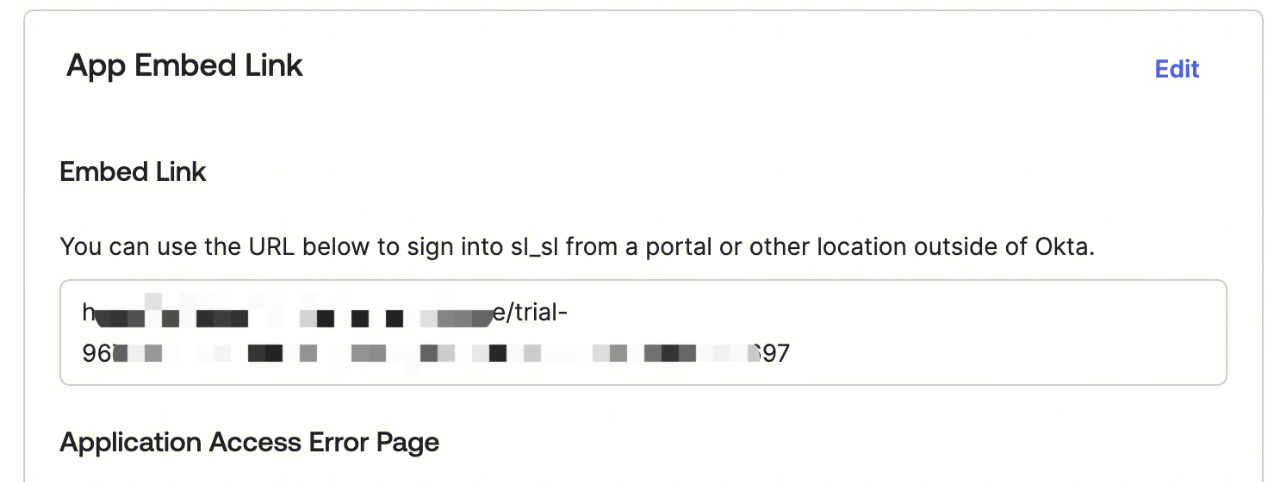
Go back to the Okta console, enter the Okta app interface created in step one, go to General, and use the Embed Link to enable role SSO login to the Tencent Cloud console.
Configuring DLC Permissions
Note:
All permissions of DLC used by a Tencent Cloud account are divided into two parts: DLC API access permissions and DLC data access permissions.
Configuring the DLC API Access Permission
Note:
• Access to the DLC APIs is managed through CAM. Only accounts with CAM product permissions can adjust permissions in CAM.
• In the scenario where role SSO login is used, the permission for accessing DLC APIs needs to be granted to the role created in Creating a Role through CAM. If the permission has already been granted in Creating a Role, this step can be skipped.
1. Enter the Account Information > CAM page, select Roles in the left sidebar, and click the role name to adjust permissions in the role list.
2. Click the Associate Policy button on the permissions page. It is recommended to associate the QcloudDLCFullAccess policy. After associating this policy, a role user will have the permission to all DLC APIs. Click OK to complete the CAM permission configurations.
Configuring the DLC Data Access Permission
Note:
DLC data permissions are managed internally by DLC, and only DLC administrators can adjust and configure the permissions.
When role-based SSO is used to log in to DLC, DLC supports binding permissions to the role ID created in Creating a Role.
1. Obtain the account ID for role SSO.
Method 1: Log in to the DLC console using role-based SSO, click your personal account in the upper-right corner of the console, and obtain the role ID.
Method 2: Go to DLC Console > CAM using your root account or an account with CAM permissions, click Roles in the left sidebar, click the target role in the role list, and then go to the role information details page to view and obtain the target role ID.
2. Log in to the DLC console using a DLC administrator account. Click User and Permission Management in the left sidebar, and then click Add User.
3. Enter the Adding Authorized Users page, select Manually Create a User. Fill in the obtained role ID as the user ID, enter the username, select user type and specify whether to bind to the working group, and then click Submit.
4. On the User and Permissions Management page, view newly created users. Click Edit under the right operation column of the target user. On the Edit User Information page, configure the user's data catalog, database table, and row-level permissions.