Overview
By setting recording templates and applying them to the corresponding Recording Schedule, data can be uploaded to the cloud. There are two types: Real-time Cloud Upload Template and Recording Cloud Upload Template.
Solution Scenario
\ | Real-time Cloud Upload Template | Recording Cloud Upload Template |
Scenario Differences | Device Real-time Data Upload to Cloud | Local Recording to Cloud (i.e., recordings stored in IPC camera storage cards or NVR hard drives) |
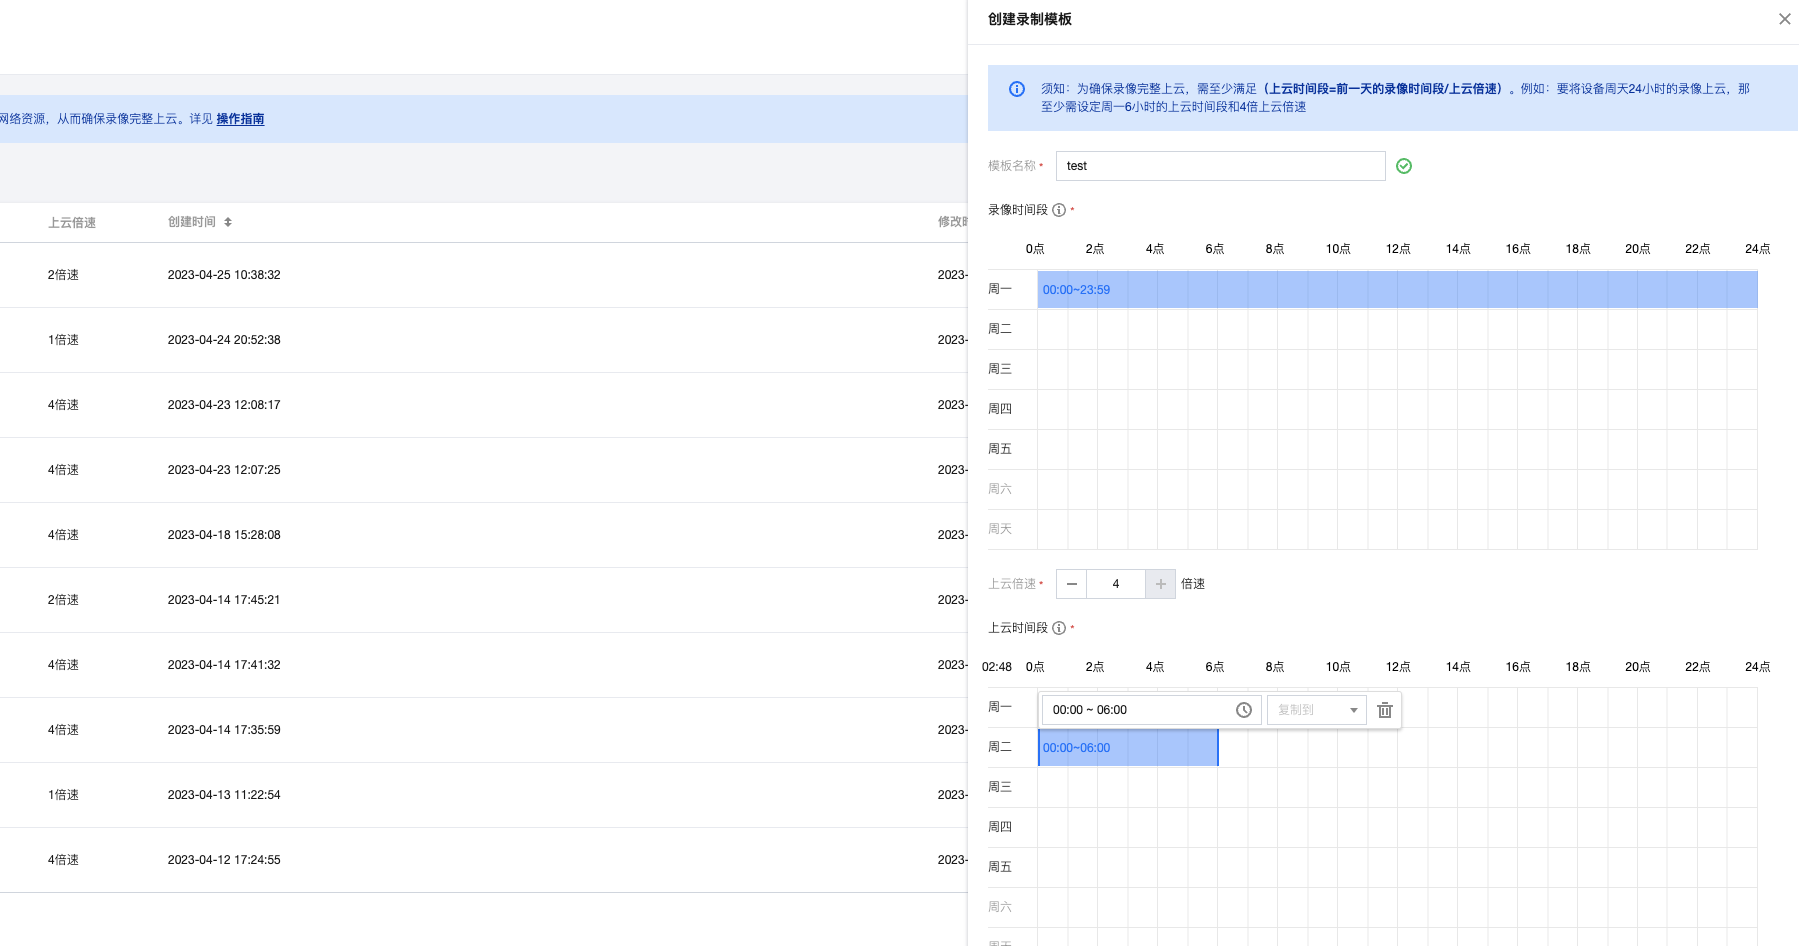
Concept | The platform executes immediately within the specified cloud upload time period | First set the recording time period (i.e., the local recording you want to upload to the cloud) Then set the cloud upload time period (i.e., the off-peak hours evaluated by the customer, such as early morning/night) and the cloud upload speed ratio Note: The platform will upload data from the device's previous day's recording time period to the cloud at the specified speed during the cloud upload time period. Therefore, to ensure data integrity, the template setting should at least meet the requirement of (Cloud Upload Time Period = Previous Day's Recording Time Period / Cloud Upload Speed Ratio) |
Best Practice | -- | For example: If you want to upload and store 24 hours of continuous recording from a hotel NVR device on Sunday, here are two recommended settings: 1. Assume (off-peak) cloud upload time period is Monday 00:00–06:00; cloud upload speed ratio: 4x. 2. Assume (off-peak) cloud upload time period is Monday 00:00–08:00, 20:00–24:00; cloud upload speed ratio: 2x. |
Notes | -- | It is recommended to set the cloud upload time to be about 10% longer to avoid data pulling incompleteness due to network fluctuations. When you find that the cloud recording is incomplete, you should first check if the local recording on the device is incomplete. |
Operation Steps
Real-time Cloud Upload Template
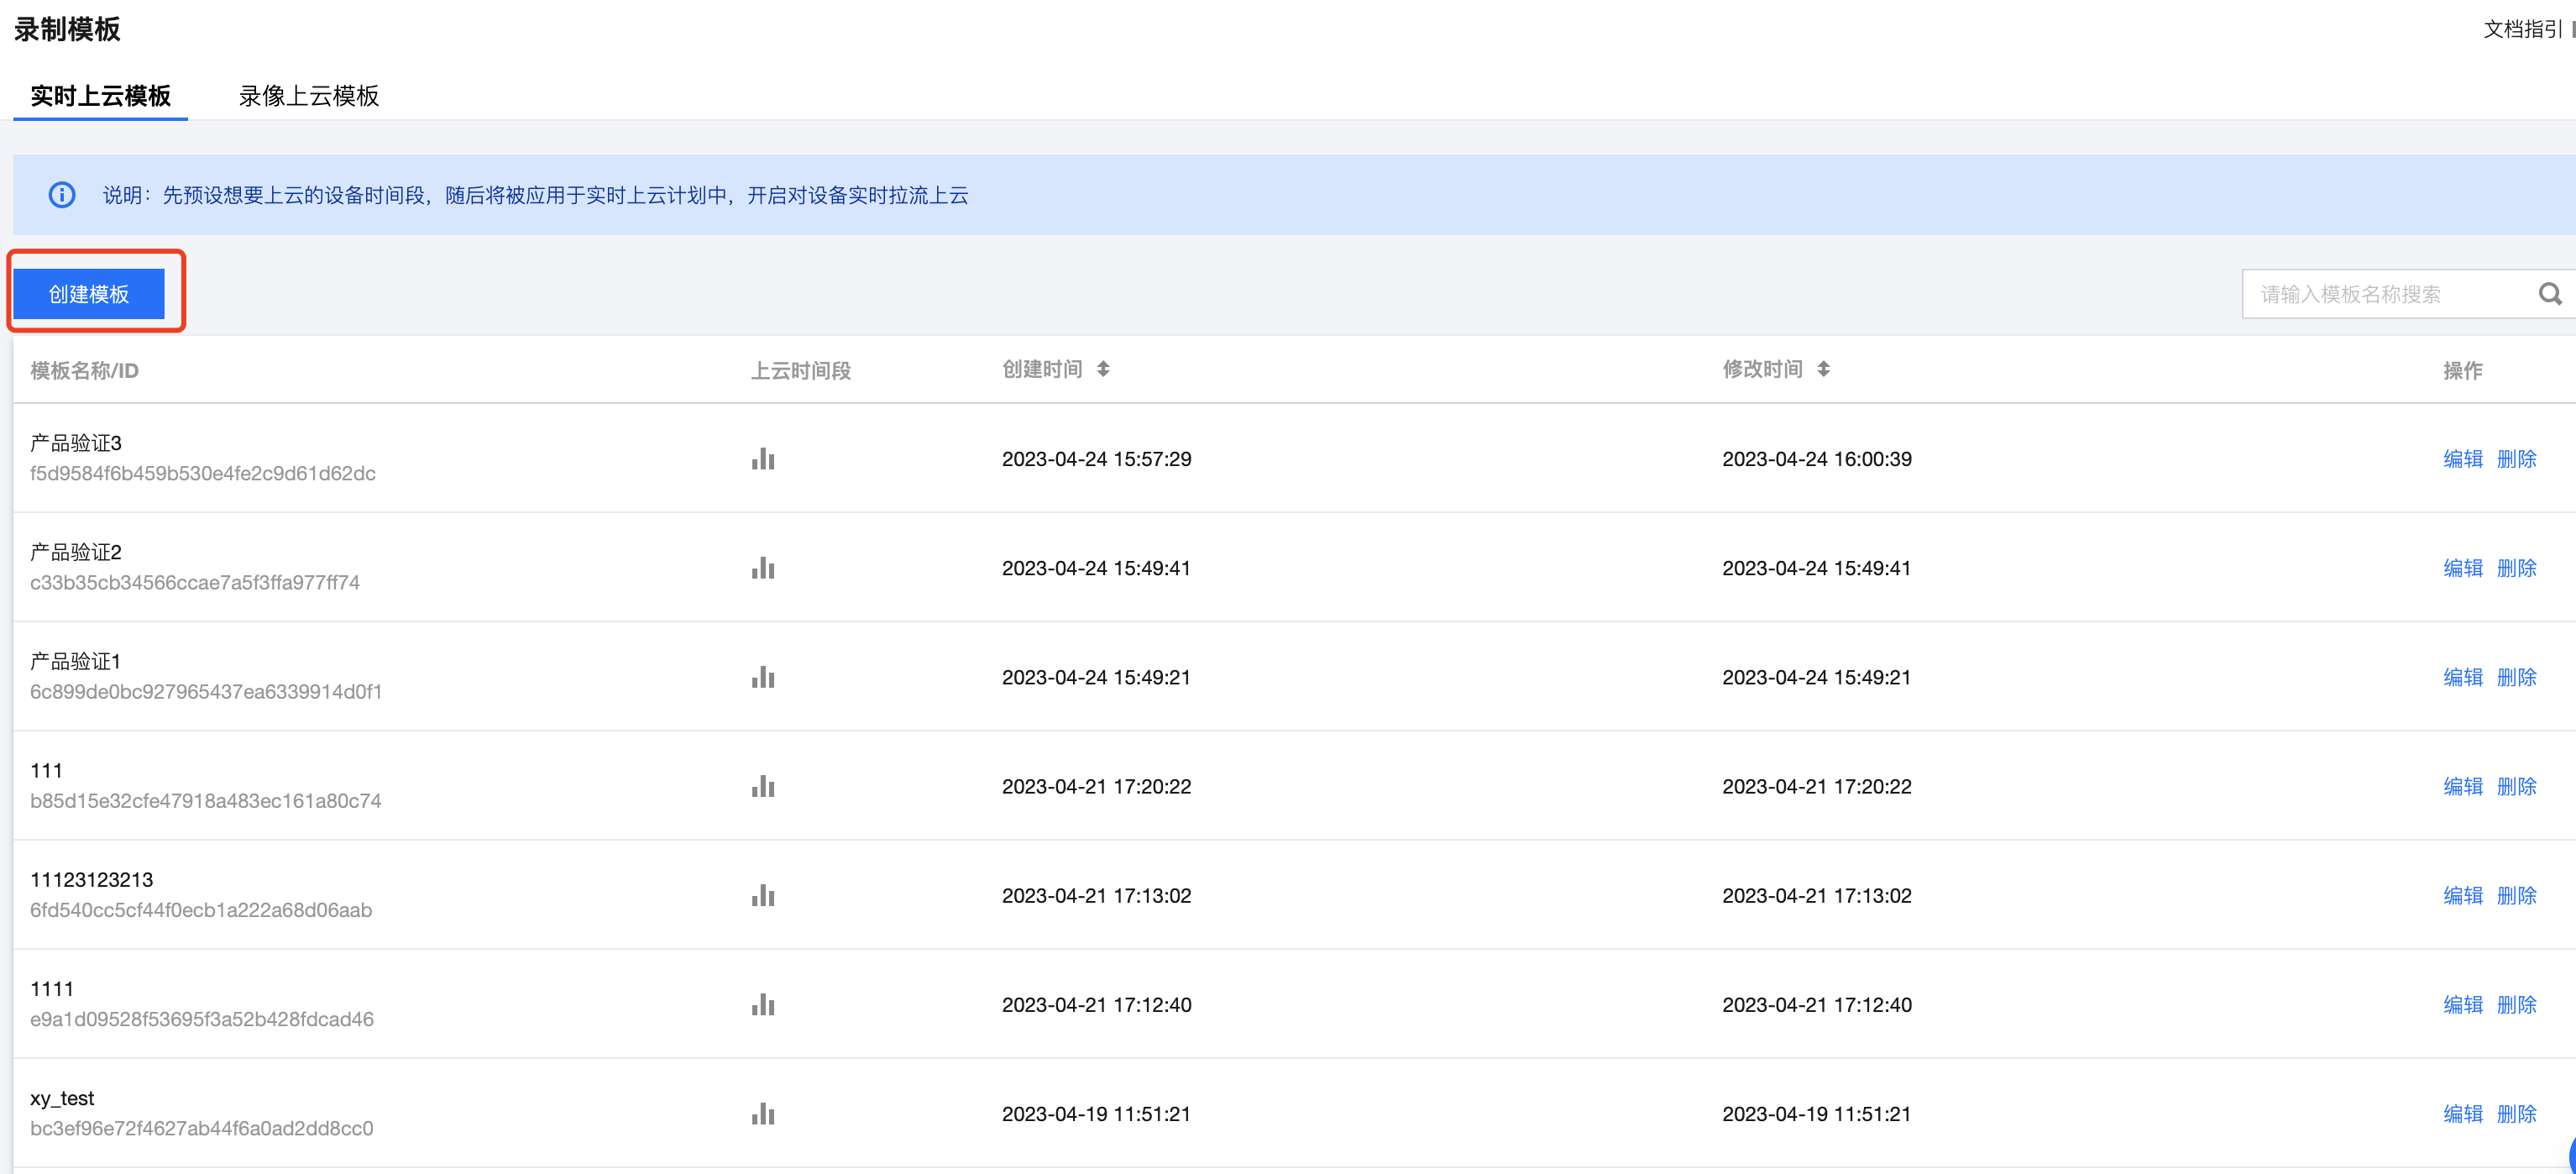
1. Click the Create Template button at the top left.<1>.
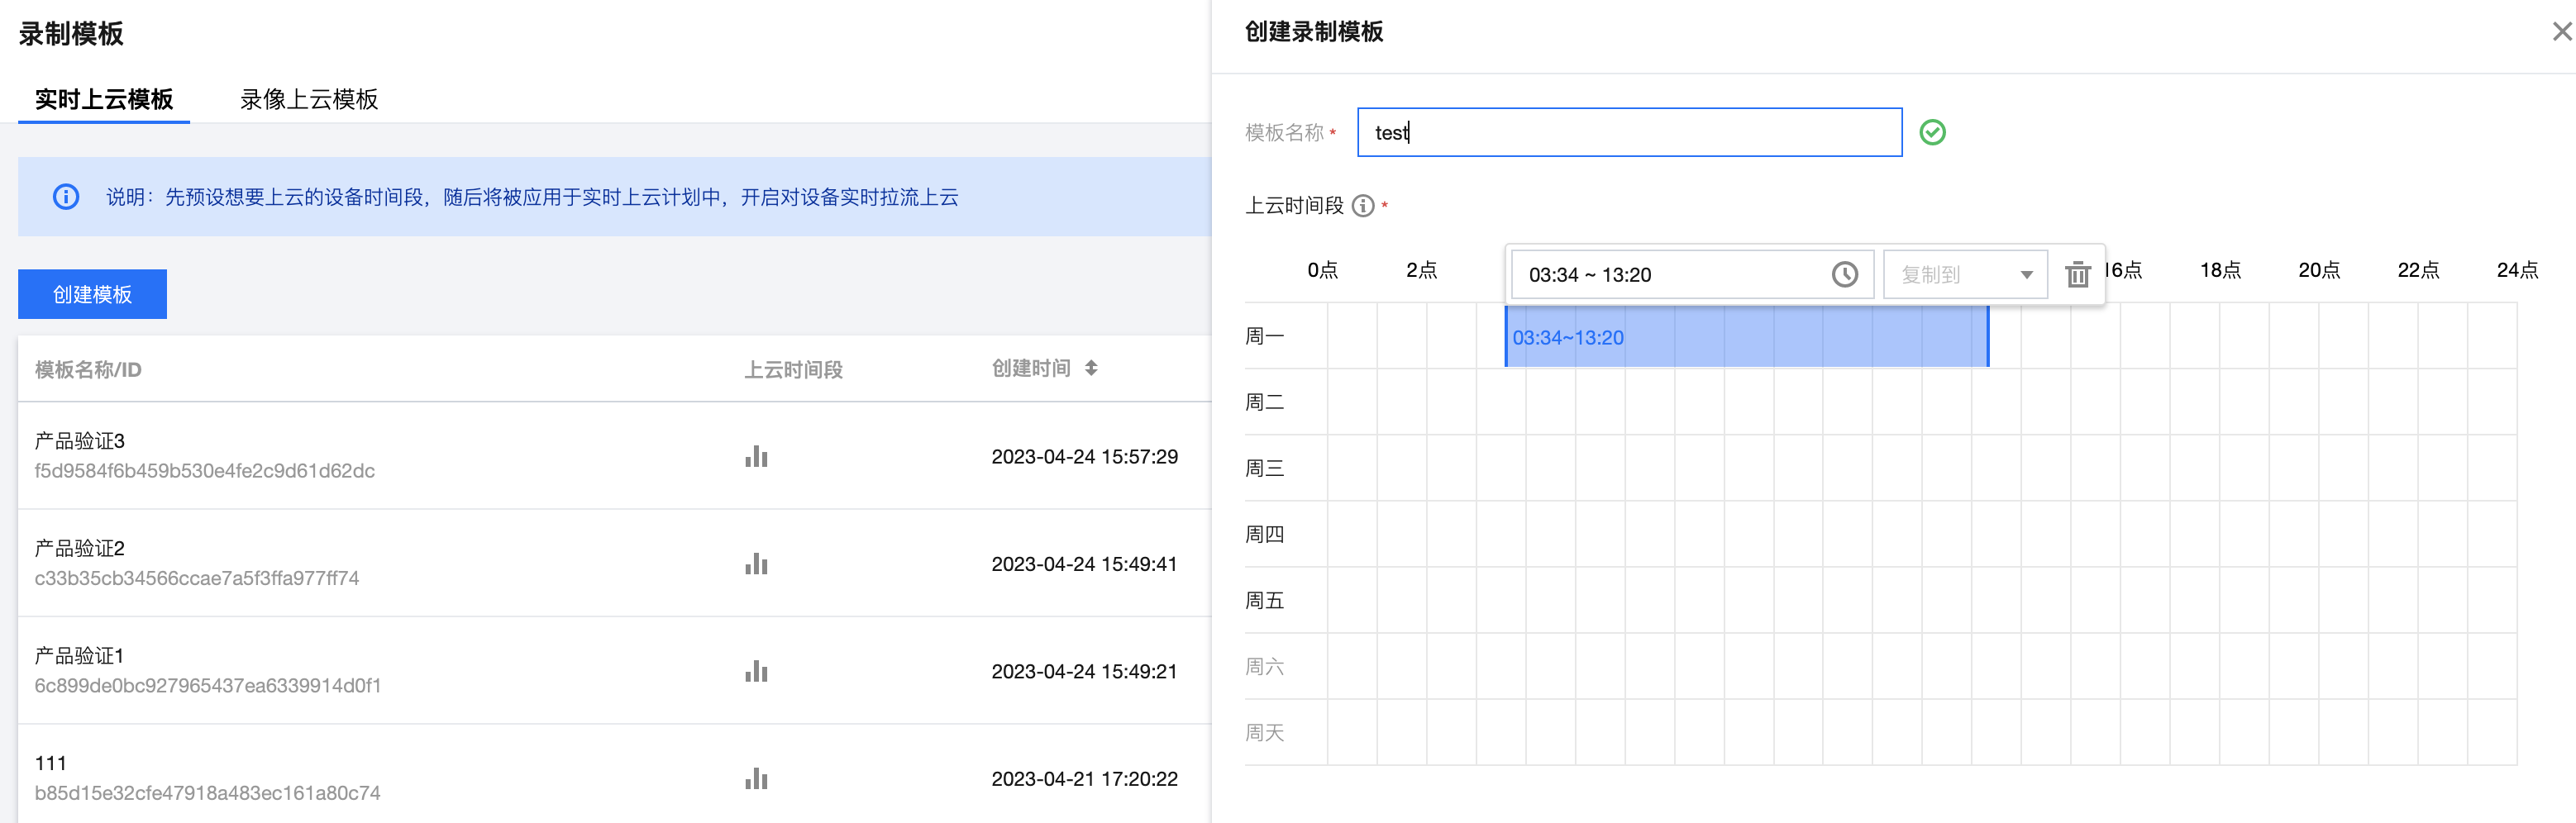
2. Left-click and drag to select the cloud upload time period you want to set (each time period is a minimum of 10 minutes).
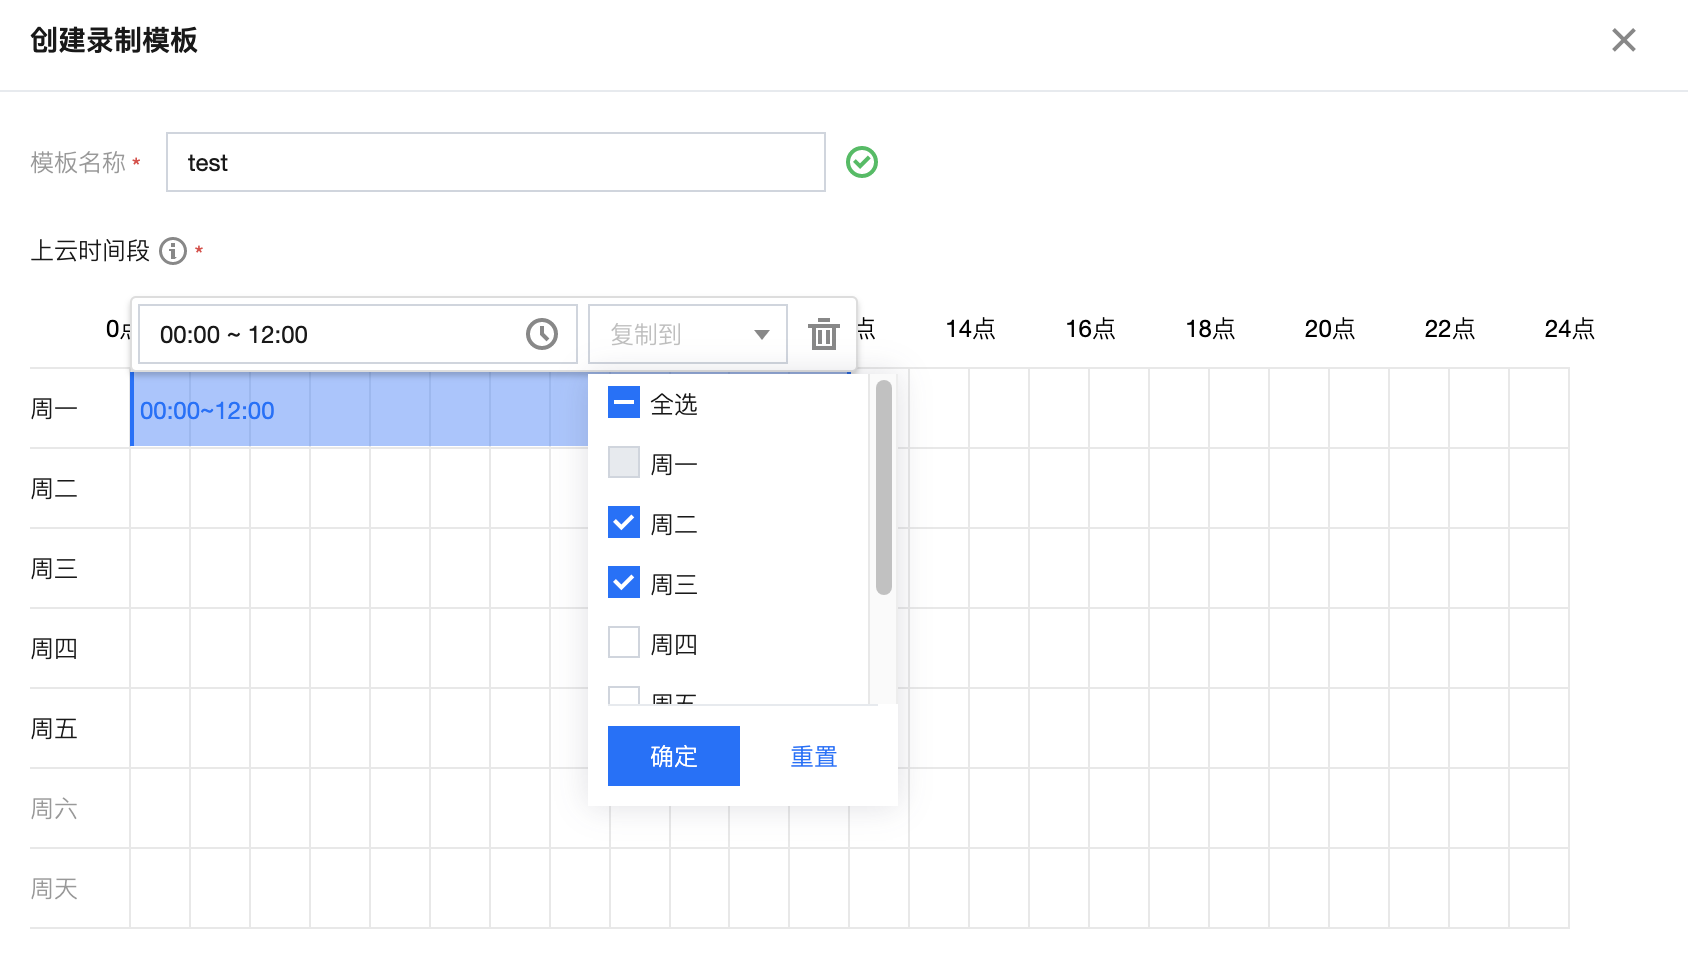
3. After completing the drag, you can click the set time period to correct the specific time (supports minute-level granularity correction) and copy it to other dates, then confirm and submit.
Recording Cloud Upload Template
1. Click the Create Template button at the top left.<1>.
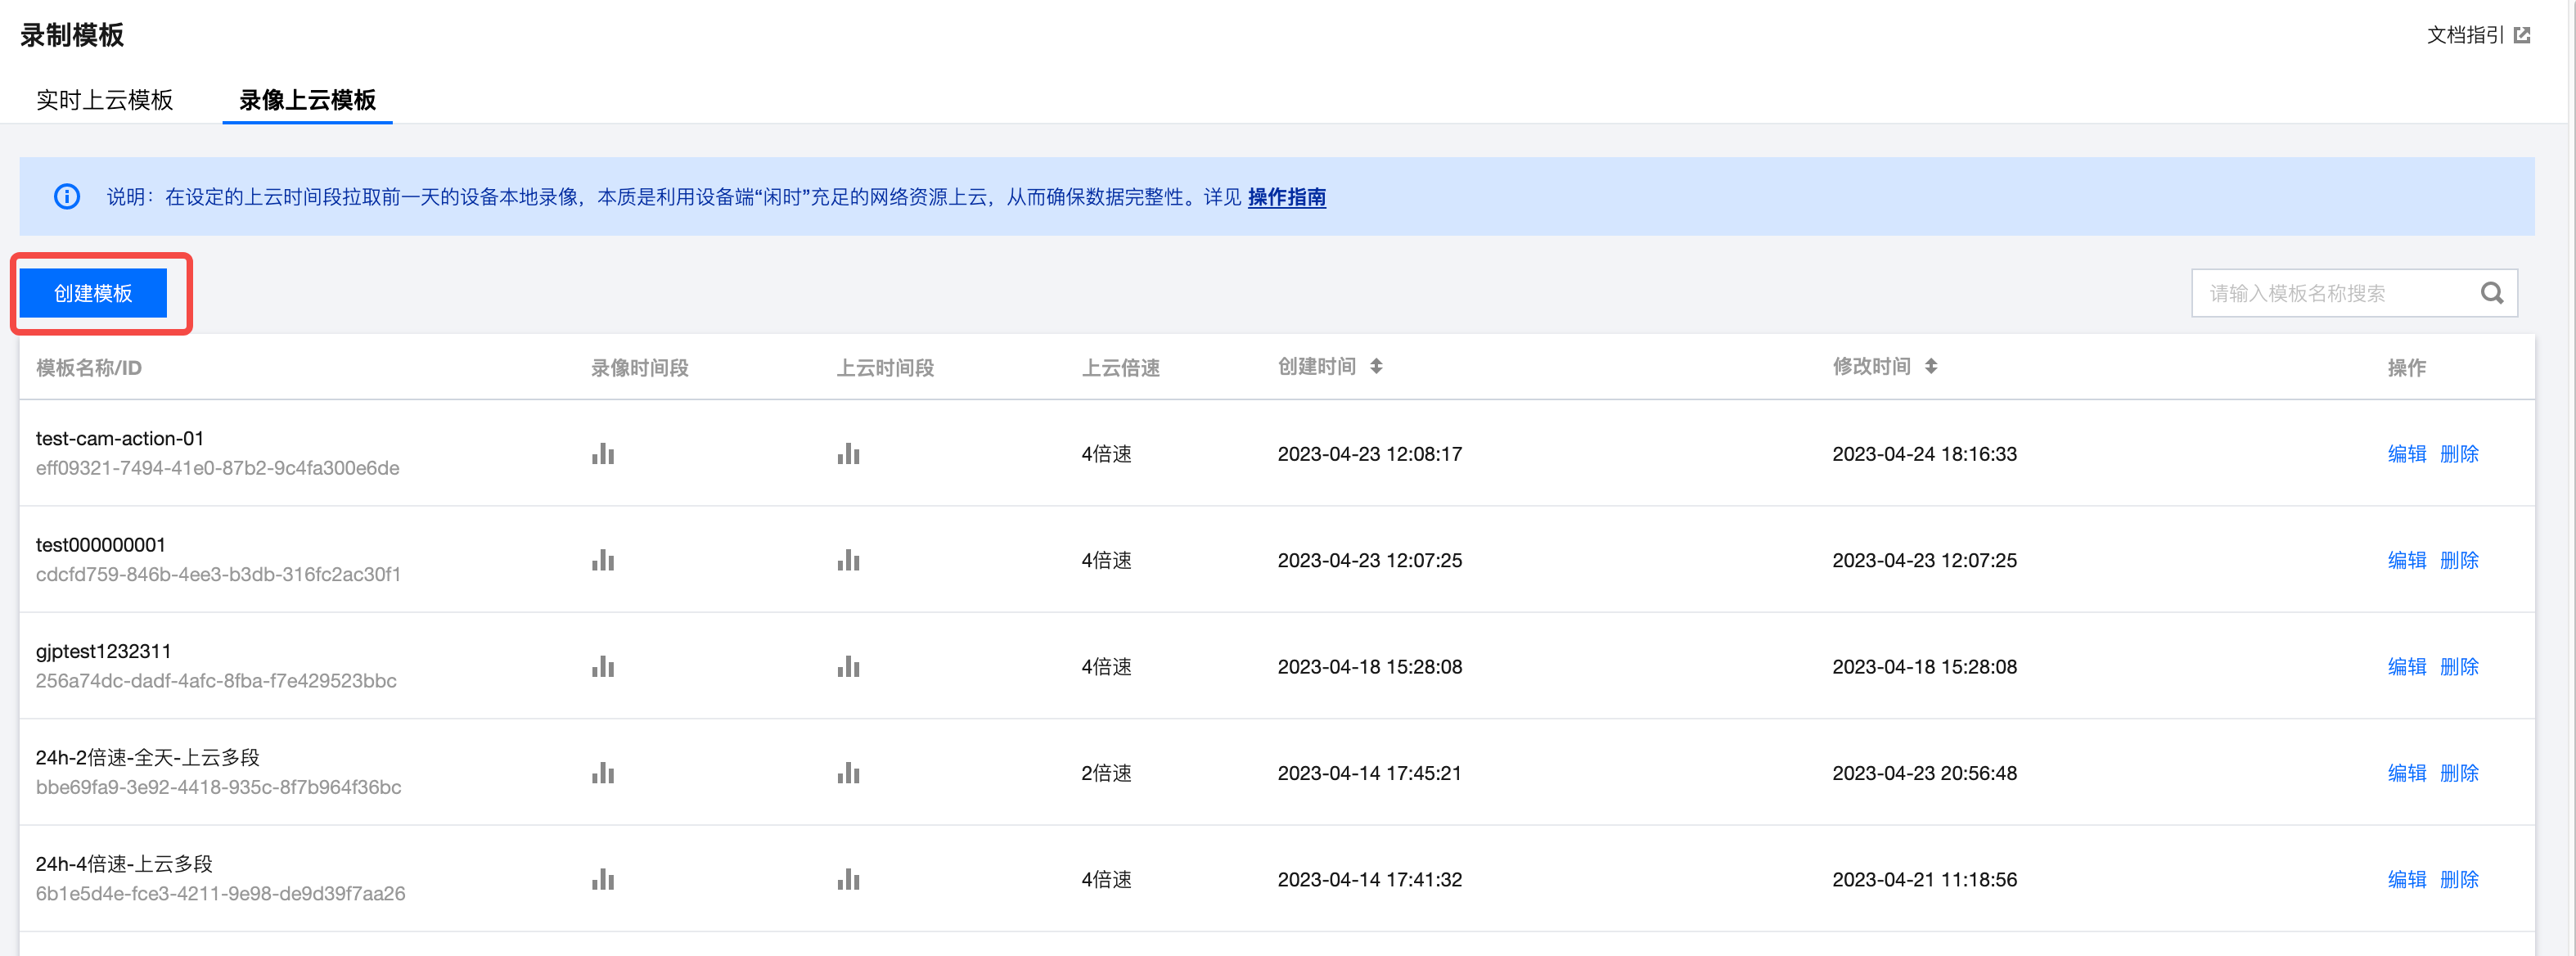
2. According to your own situation, first set the recording time period, then set the cloud upload time period and the cloud upload speed, and finally complete the creation.
Note:
The recording time period refers to the local recordings on the device that you want to upload to the cloud; the cloud upload time period refers to the time when the platform will perform the data pulling; the cloud upload speed refers to the speed at which the platform performs the data pulling. The platform will pull the data of the device corresponding to the previous day's recording time period at the specified speed during the cloud upload time period.
The setting must meet at least ( Cloud Upload Time Period = Previous Day's Recording Time Period / Cloud Upload Speed), otherwise, the template cannot be created successfully. For example, if you want to upload 24-hour recordings of the device on Sunday, assuming there are 6 hours of idle cloud upload time on Monday, the cloud upload speed needs to be set to 4 times (it is recommended to set the cloud upload time to be about 10% longer to avoid data pulling incompleteness due to network fluctuations).