本文为您详细介绍如何在 CODING 项目管理中导入与导出事项。
进入项目
1. 登录 CODING 控制台,单击立即使用进入 CODING 使用页面。
2. 单击团队首页左侧的项目,进入项目列表页,选择目标项目。
3. 单击进入左侧菜单栏中的项目协同功能。
功能介绍
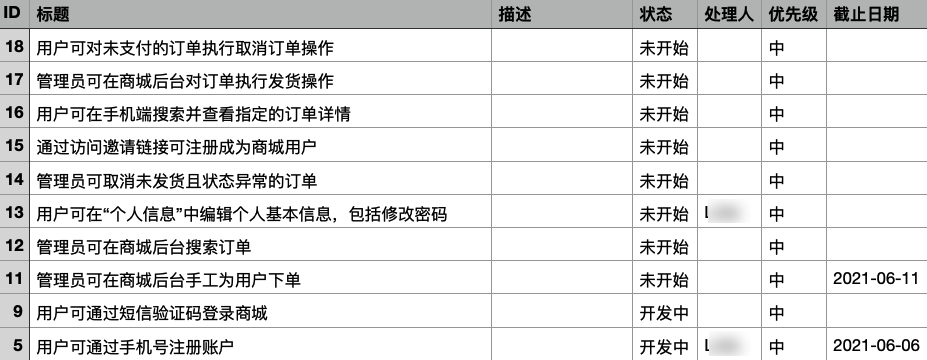
史诗、需求、任务、缺陷统称为事项,支持批量导入导出。可以在事项列表右上角菜单内选择导入事项、导出当前筛选事项,并按照 CODING 提供的模板进行操作。下文将以需求为例,演示如何进行事项的导入与导出。
导入事项
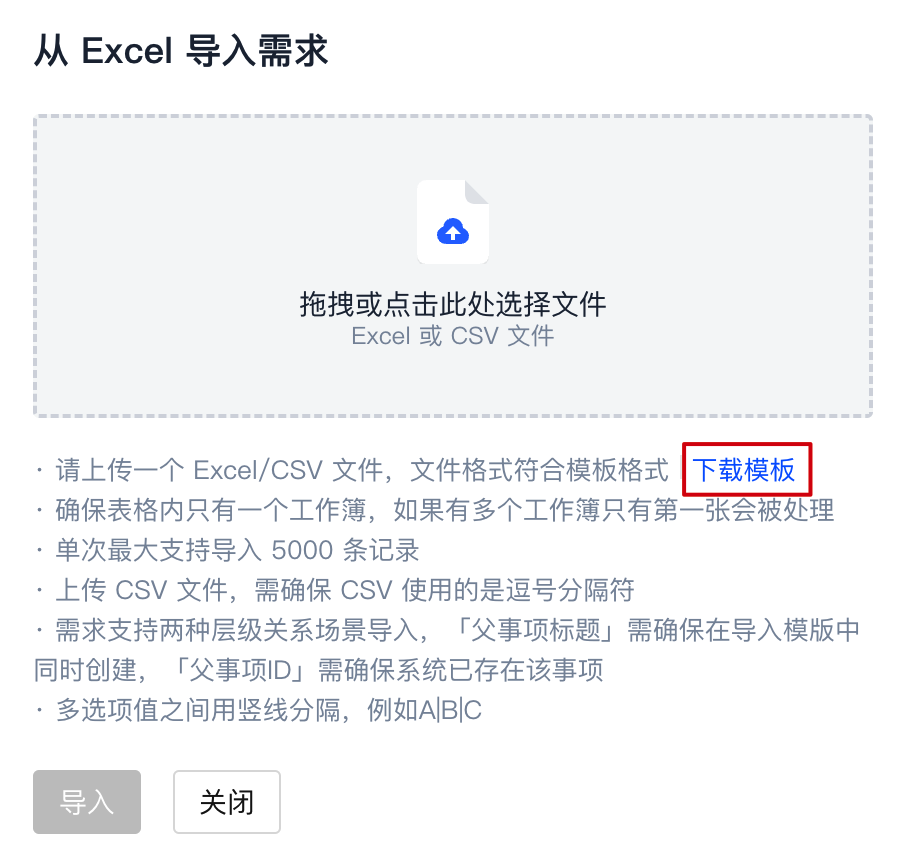
1. 在需求列表页右上角菜单内选择导入需求 > 需求。

2. 单击下载模板,请根据如图所示导入要求或模板所述的导入规则进行填写。
说明:
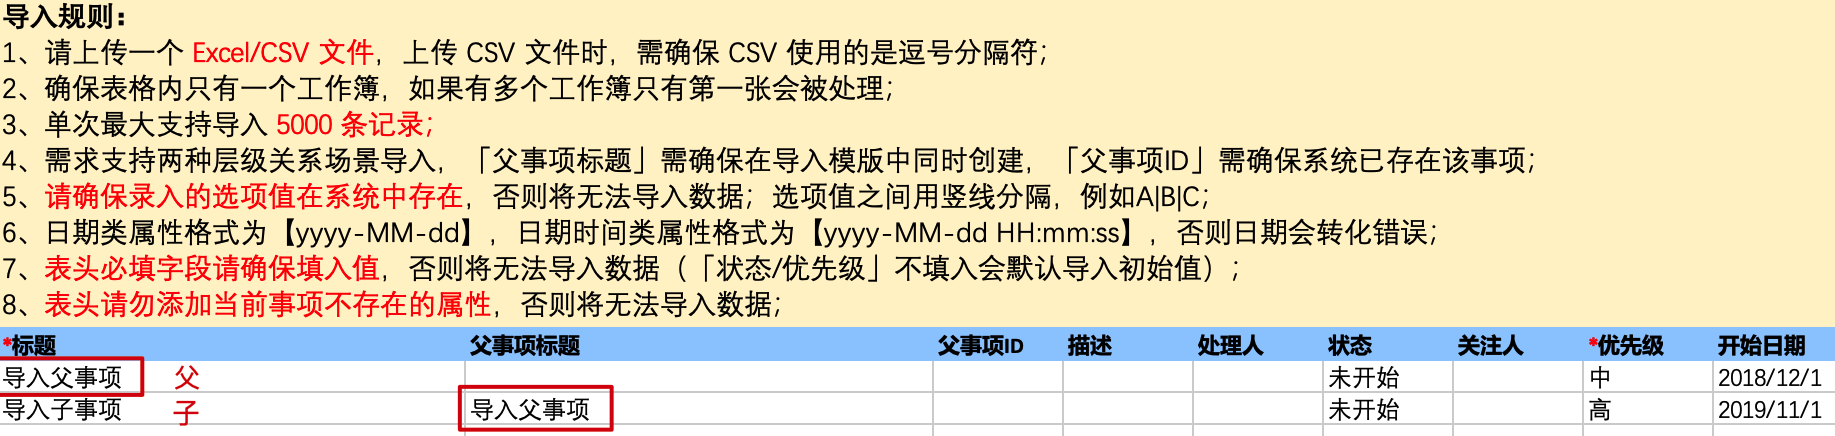
需求支持导入父子级关系,导入模板中“父事项标题”和“父事项ID”属性见下文说明。
父事项标题:在导入表格中同时创建父子事项关系时,子事项需关联的父事项标题。
父事项ID:用于向系统已有事项导入子事项,ID 需输入纯数字,不能包含 #。
一行数据中两个属性仅需填写一个,因为只能存在唯一父事项,两个属性不可同时填写。
3. 模板包含标题(必填)、描述、处理人、状态、优先级、截止时间等信息(根据事项类型属性进行匹配),填写完成后,上传 Excel/CSV 文件。
注意:
事项属性用于快速说明此事项目前的状态、截止日期、处理人、优先级等信息。若事先在项目内设置了必填属性,在导入事项时将忽略此规则;若事先在项目内设置了属性默认值,导入事项时将自动填充默认值。详情请参见 自定义事项属性。
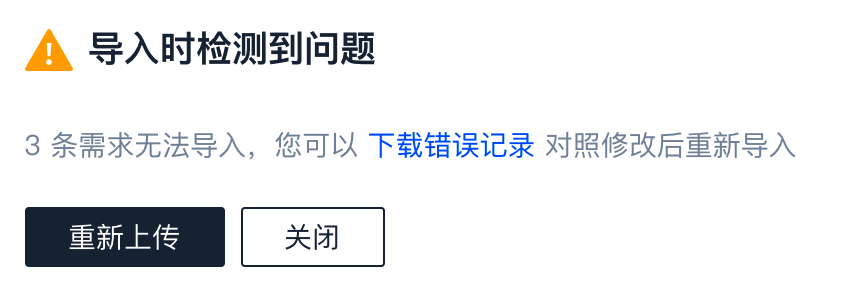
4. 查看导入结果。
导入完成后,导入界面将提示或通过系统通知告知。若导入失败,可根据指引下载错误记录,对照修改后重新导入。

导出事项
1. 在事项列表页右上角菜单内,可以根据需要进行筛选后,导出当前筛选需求。
注意:
树状视图下,会同步导出需求下的子任务。
如需导出筛选后的全部事项,在页面右上角点击「···」。点击下拉菜单中的「导出当前筛选需求」。

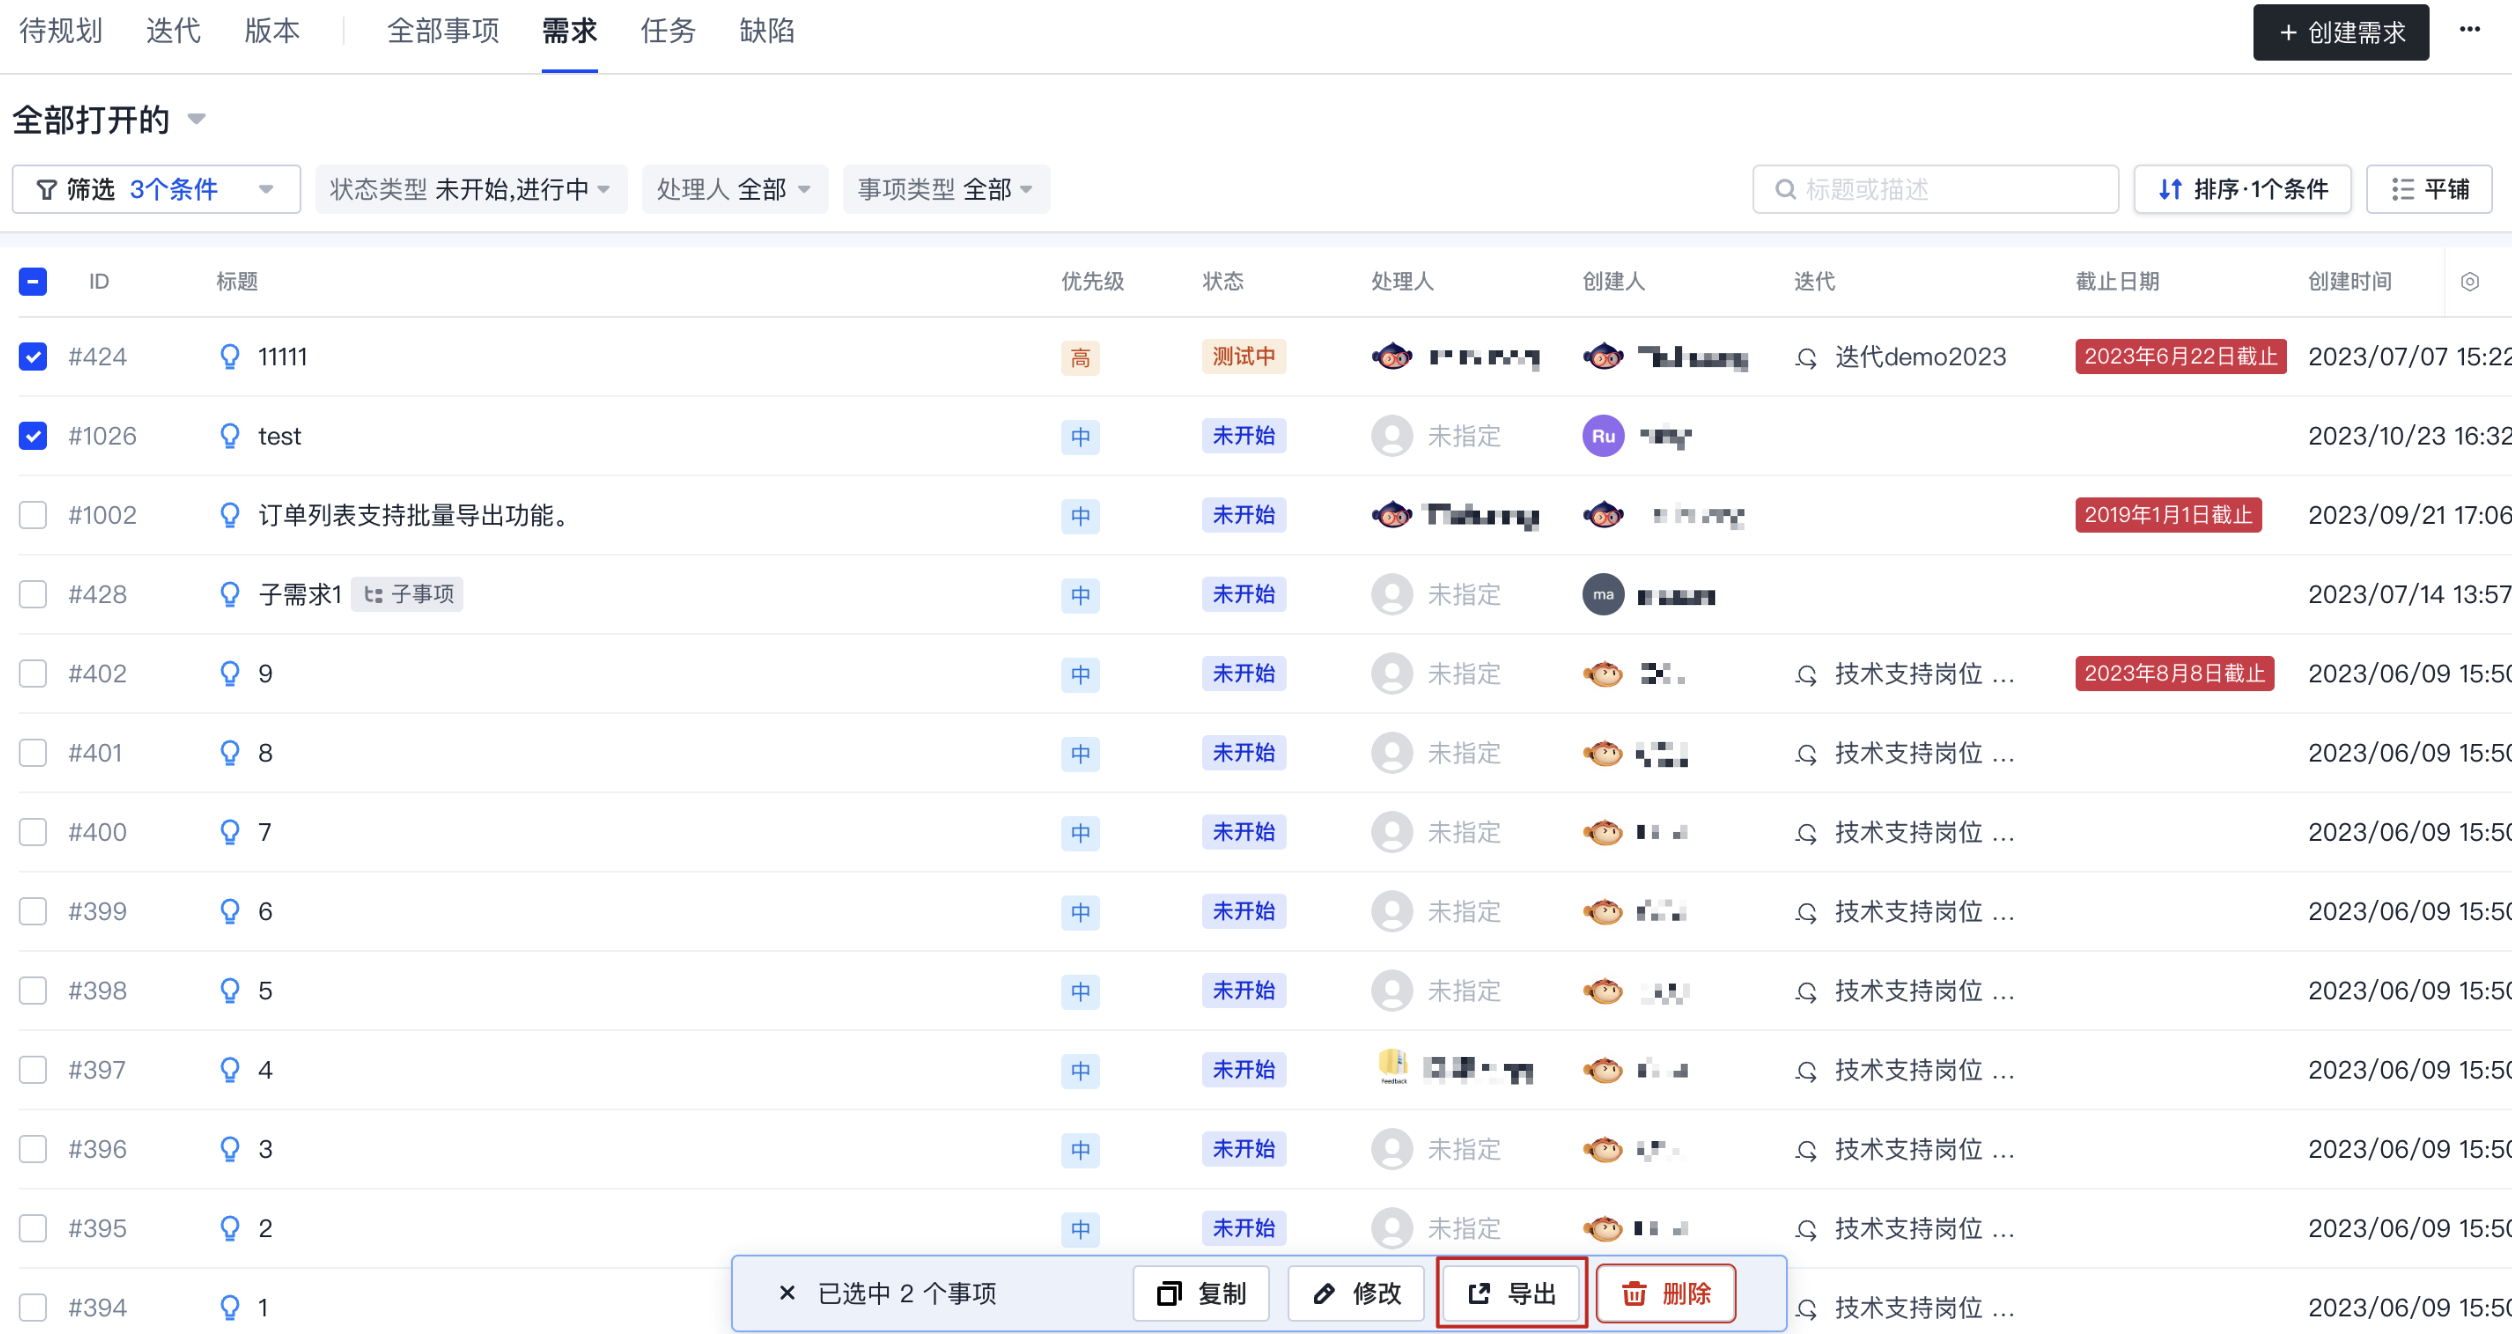
如需导出筛选后的部分事项,在页面右下角点击「批量操作」。选中事项后,点击「导出」。
2. 导出成功后即可单击下载文件,并查看导出结果。