本文为您详细介绍如何应用配置方案。
进入项目
1. 登录 CODING 控制台,单击前往团队进入 CODING 使用页面。
2. 单击团队首页左侧的项目,进入项目列表页,选择目标项目。
3. 单击进入左侧菜单栏中的项目协同功能。
修改当前项目方案或准备应用其他配置方案将进入迁移检查过程。系统将在此过程中逐步验证事项类型、事项状态、事项属性与事项层级对应关系,直到新旧方案间不存在未解决的冲突差异,经确认无误后才会在项目中正式启用新的配置方案。
操作步骤
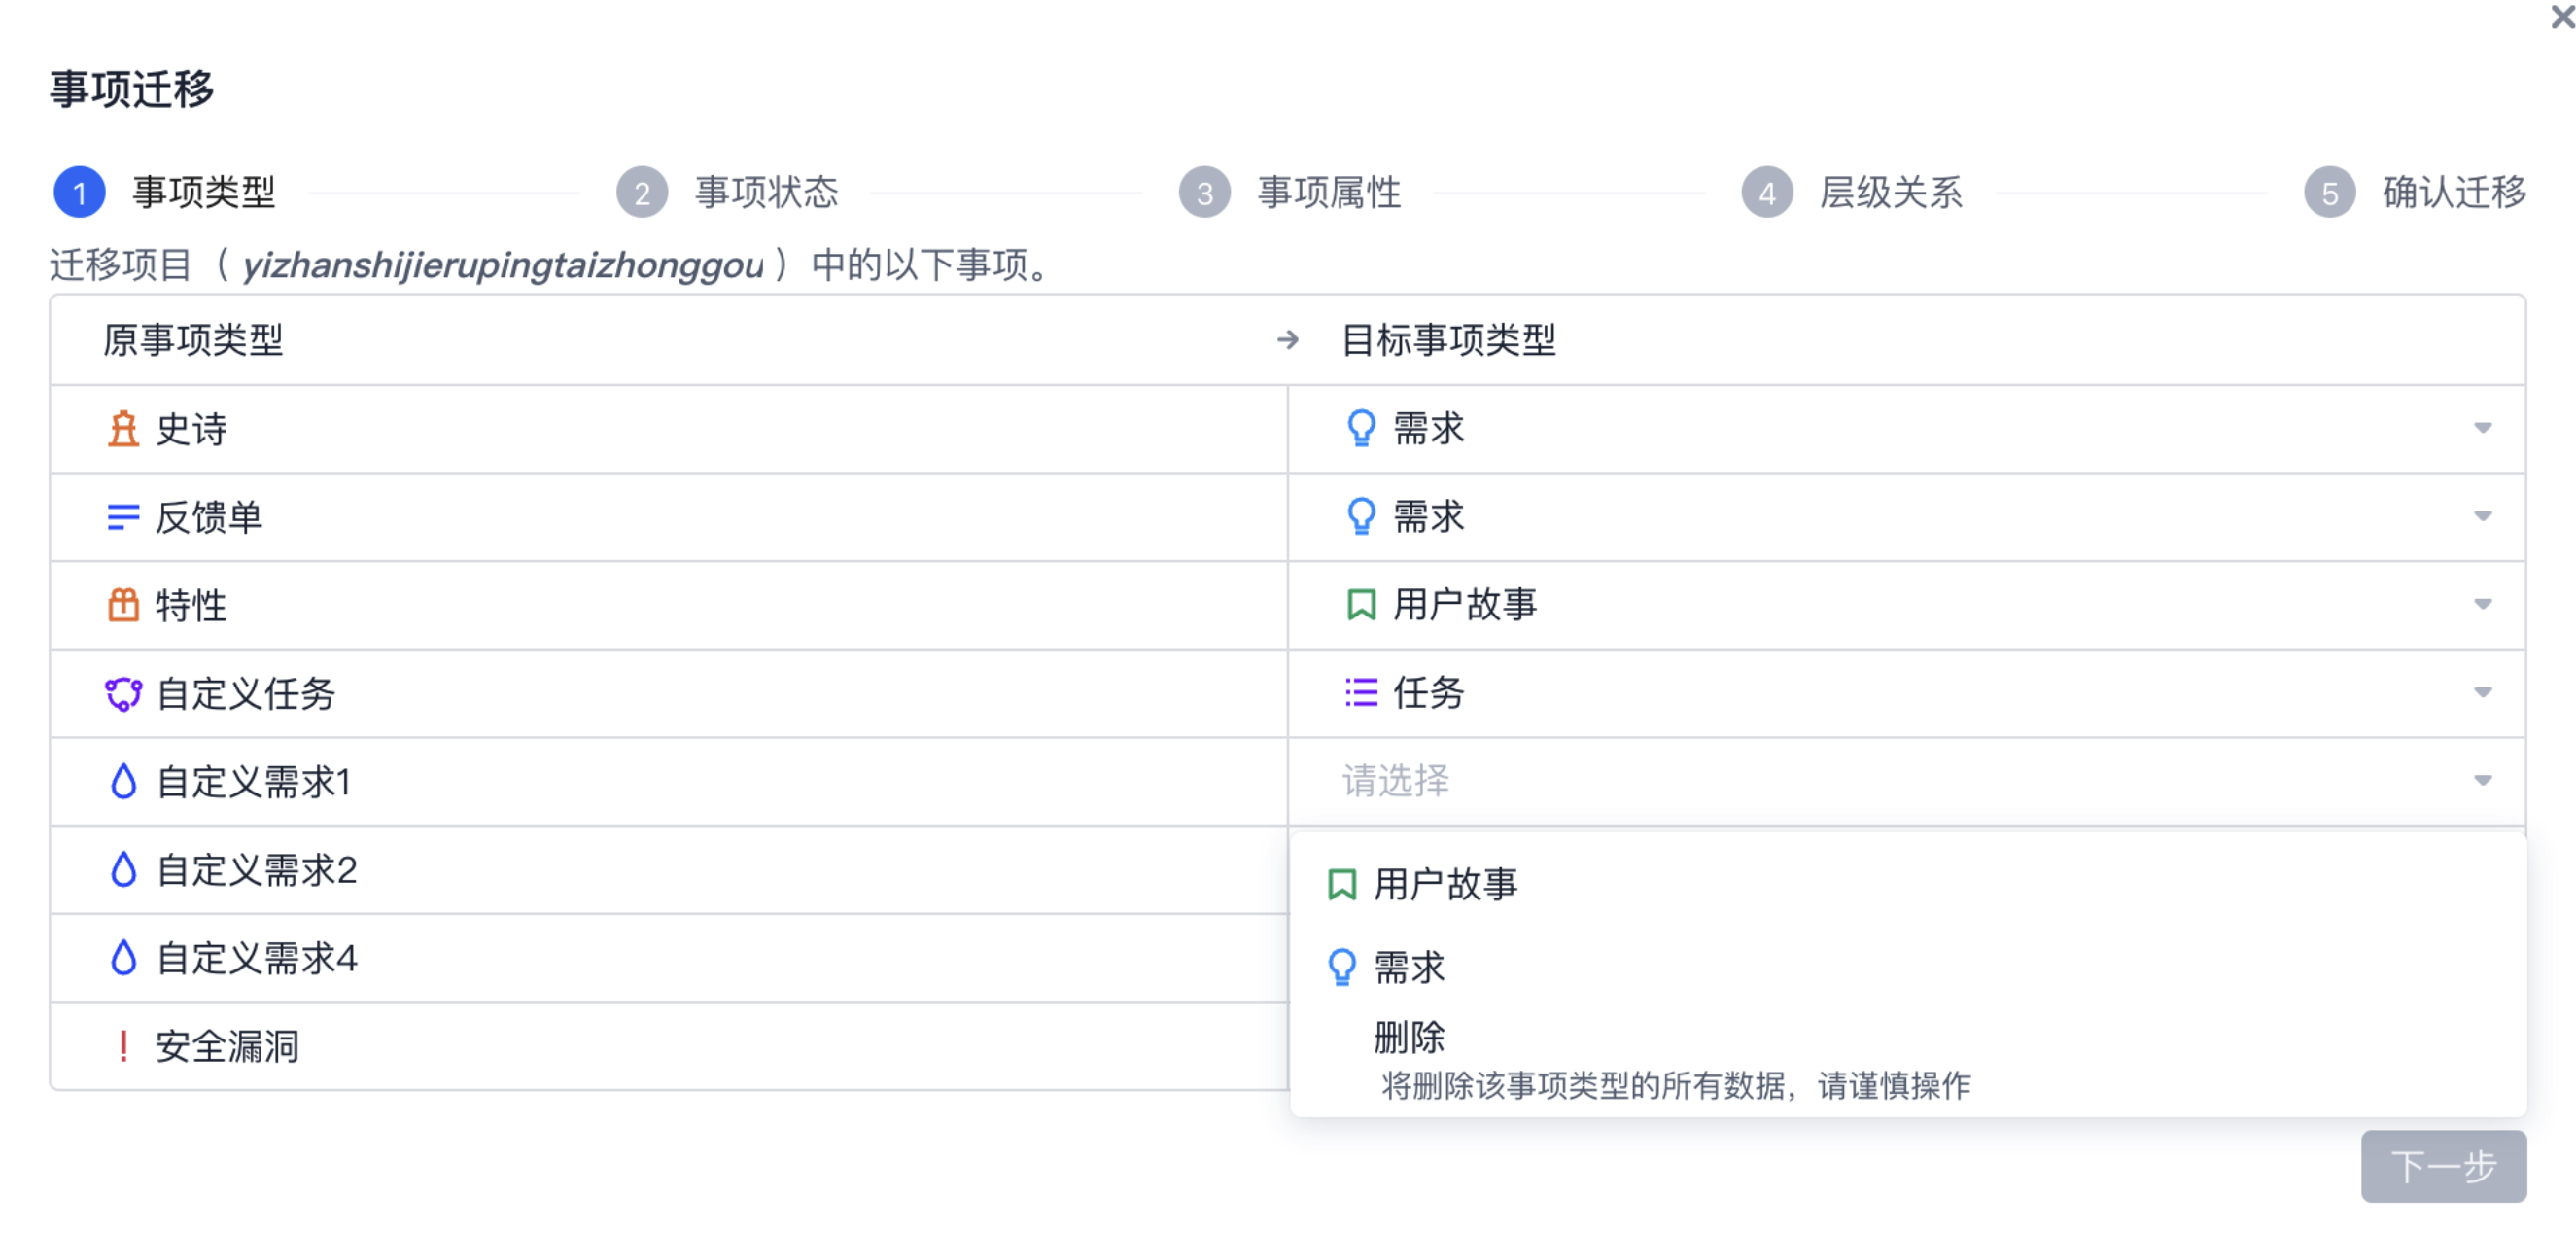
步骤1:检查事项类型
此步骤将检查与确认旧版方案中的事项类型与新版方案事项类型的对应关系。若在新版方案中移除了某个事项类型,迁移完成后曾归属于该类型下的事项也会被删除。
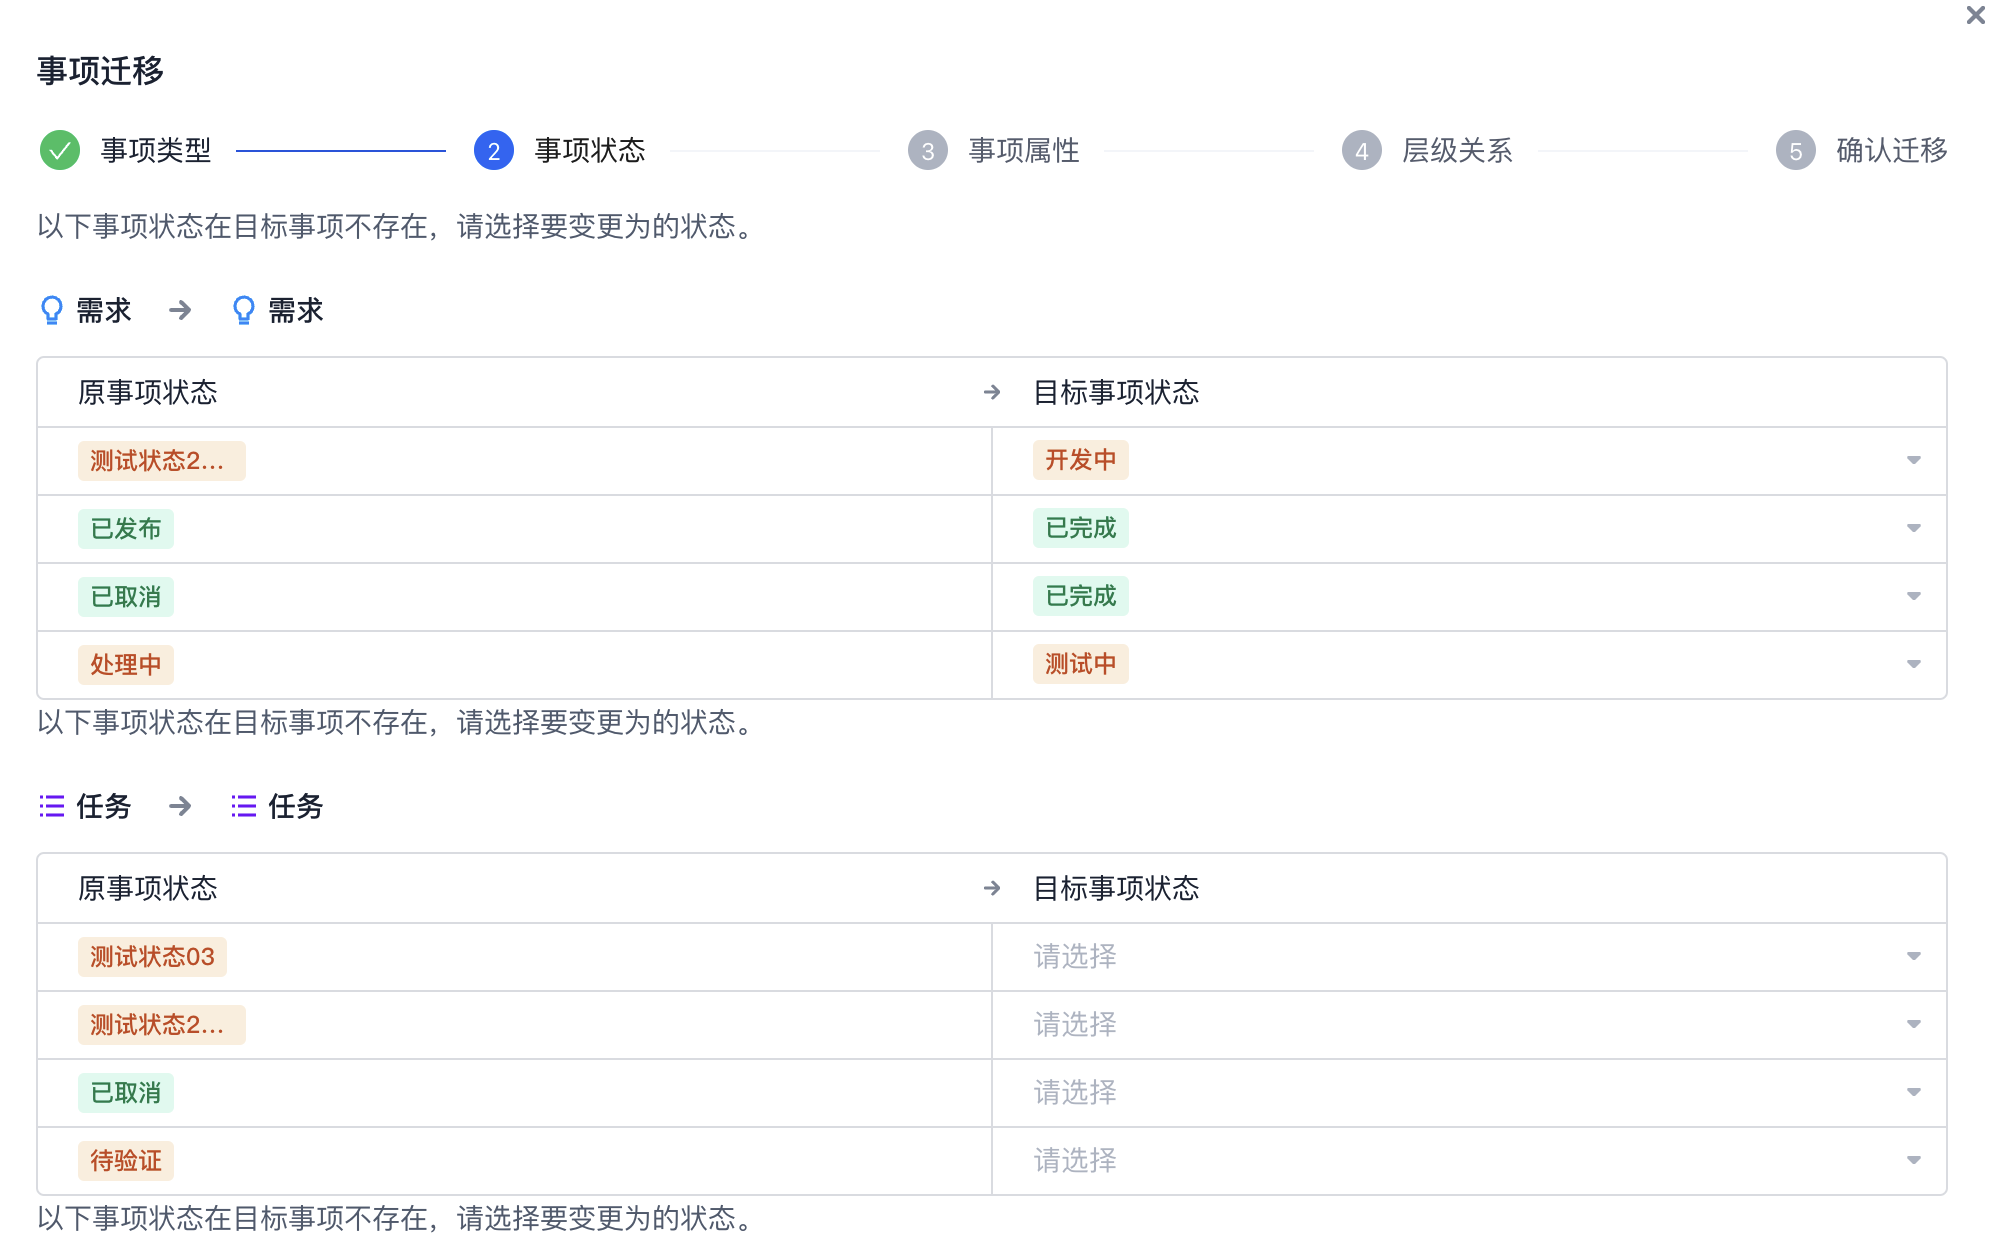
步骤2:迁移事项状态
此步骤将检查事项状态,您可以在此过程中比对与指定新旧方案间的事项状态对应关系。
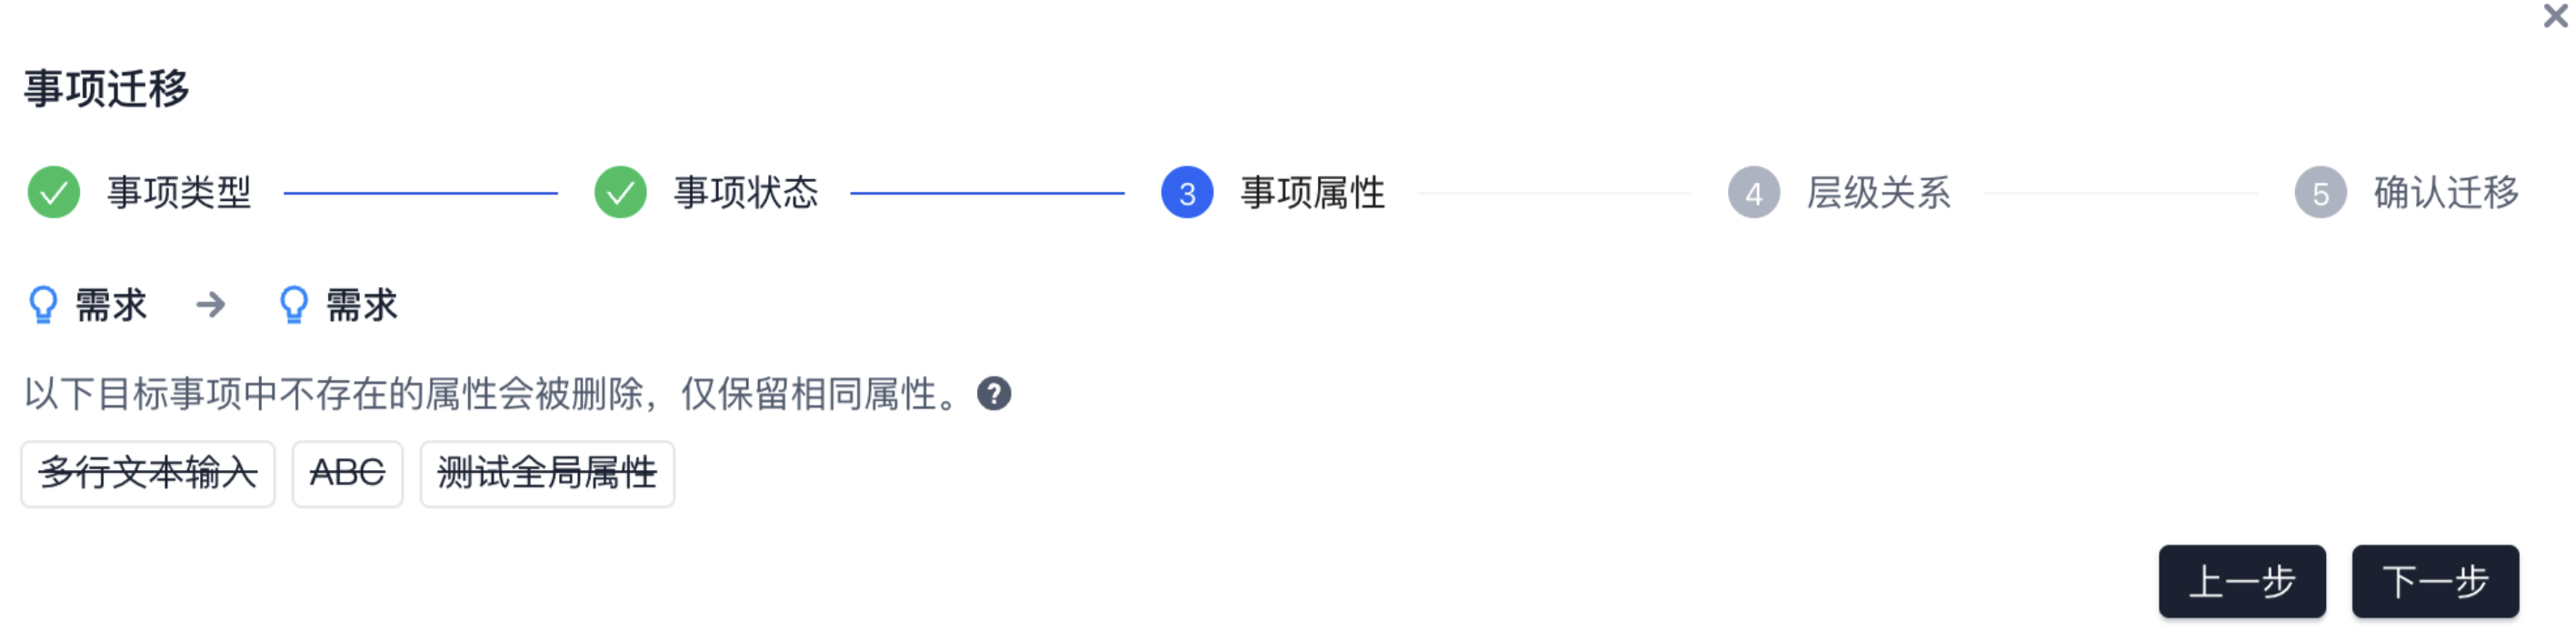
步骤3:迁移事项属性
此步骤将检查与比对新旧方案间属性的对应关系,您可以在此步骤中迁移属性间的对应关系。若新旧方案中存在相同菜单属性但选项值不同,则需设置在新旧方案间属性的对应关系。若新方案中不存在旧方案的事项属性,那么此属性将会被自动删除。
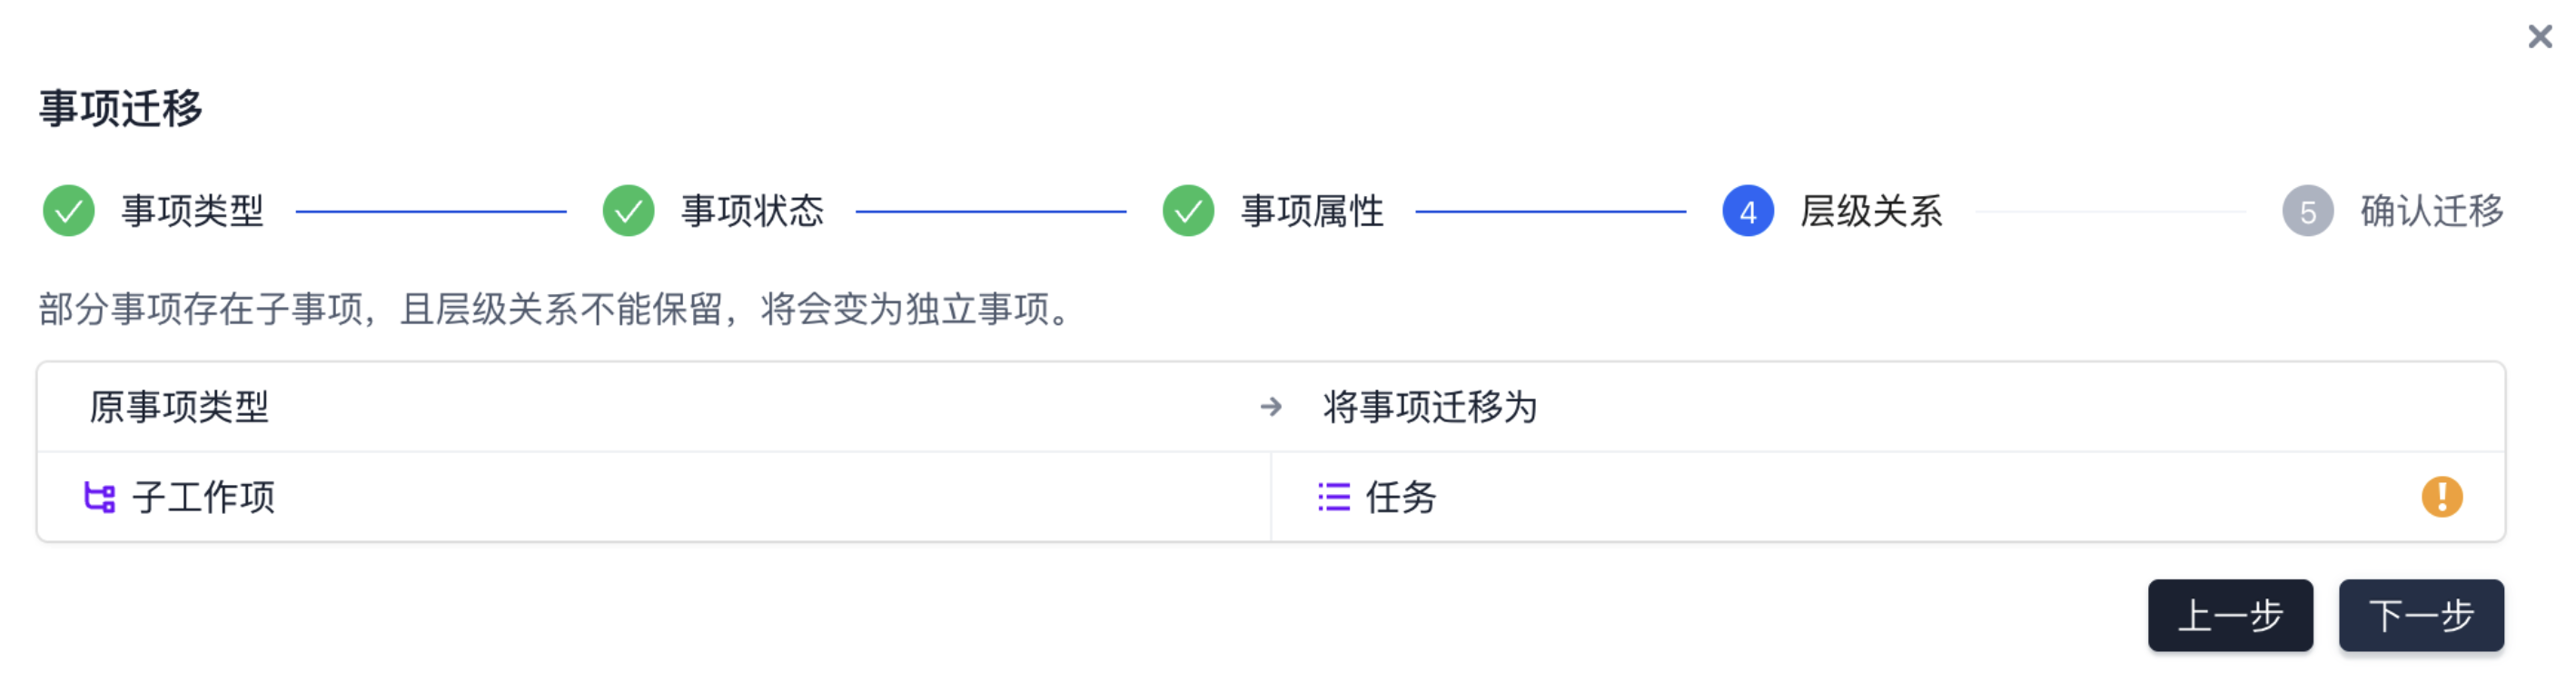
步骤4:检查分解关系

步骤5:验证并确认
此步骤为最后确认环节。需要输入当前登录用户的账户密码,验证通过后将执行数据转换任务。在此过程中当前项目的协同功能暂不可用。