说明:
本文为您介绍如何使用自定义节点。
前提条件
进入项目
1. 登录 CODING 控制台,单击团队域名进入 CODING 使用页面。
2. 进入目标项目后,选择左侧导航栏的持续集成。
功能介绍
在实际的开发项目中,所涉及的开发环境可能是多种多样的。当默认节点的构建环境无法承载项目的运行要求时,例如需使用 macOS Xcode 构建 iOS 应用,那么就可以通过接入自定义类型节点(物理机/虚拟机/容器等)运行特定任务。
注意:
使用自定义节点相当于将您的构建机纳入 CODING 的管控范围。为了保障您的机器和内网的安全,请务必妥善保管您的用户名和密码,并建议开启登录二次认证。在必要时,您还需要制定构建机内网的安全策略,以确保您的机器和内网不受到未经授权的访问和攻击。
接入节点
目前支持 macOS、Windows、Linux 环境接入至构建计划节点池。
推荐配置
CPU 8 核或以上。
内存 16 GB 或以上。
环境依赖
Python 3.6, Python 3.7, Python 3.8, Python 3.9
Git ≥ 2.8
Java 8, Java 11
Jenkins
Windows:进入
C:/ 目录,创建 codingci/tools 目录。在其中下载 jenkins.war 、jenkins_home.zip 文件,并在 tools/ 目录解压 jenkins_home.zip 文件。Linux:进入
/root/ 目录,创建 codingci/tools 目录。在其中下载 jenkins.war 、jenkins_home.zip 文件,并在 tools/ 目录解压 jenkins_home.zip 文件。macOS:进入
~/ 目录,创建 codingci/tools 目录。在其中下载 jenkins.war 、jenkins_home.zip 文件,并在 tools/ 目录解压 jenkins_home.zip 文件。说明:
macOS
命令接入
1. 进入构建节点,选择接入新节点 > macOS,接入方式选择 Bash,在接入配置中选择对应节点池,单击生成接入配置并复制。
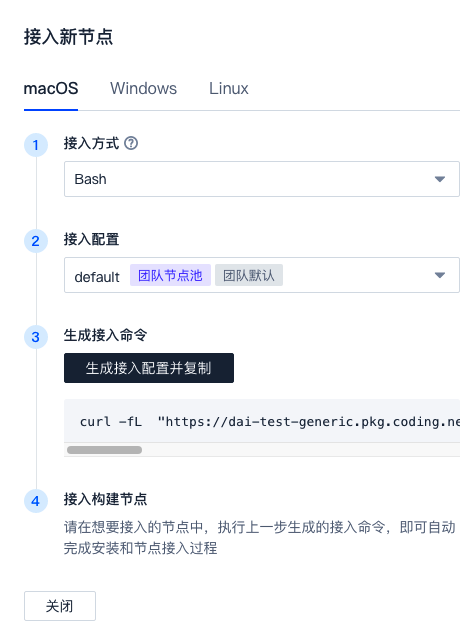
2. 在终端中输入命令后,等待服务下载完成。安装完成后可以使用以下命令进行验证:
qci_worker version
命令接入的默认安装目录为
/root/codingci。手动接入
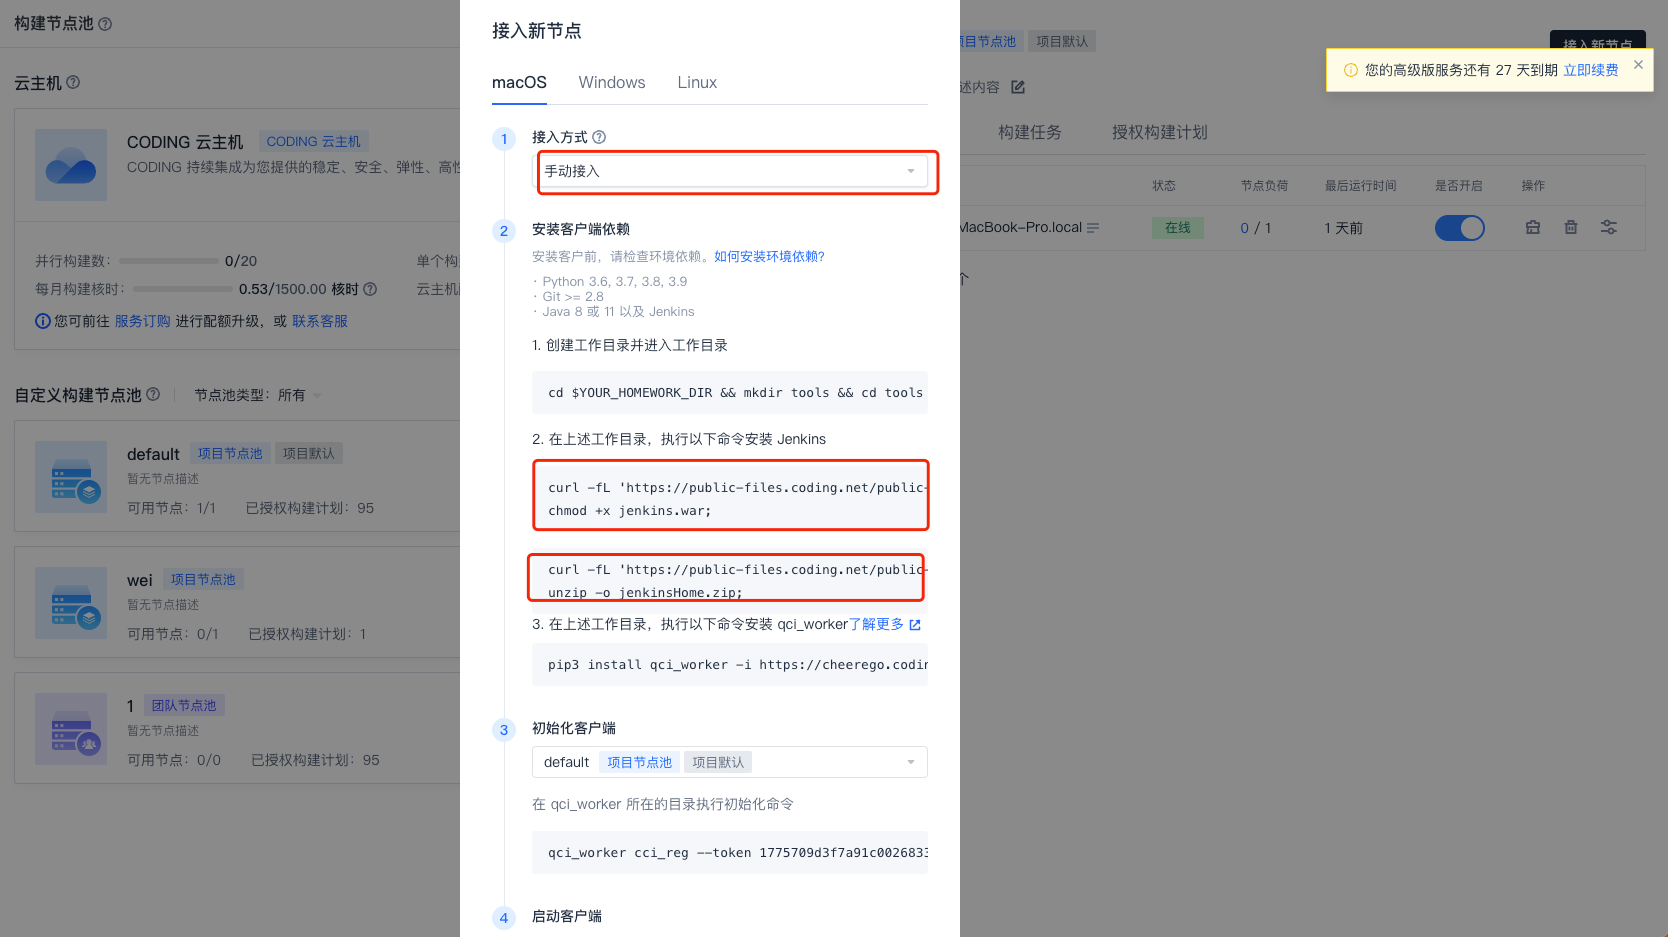
1. 接入方式选择手动接入,按照提示在终端中输入命令安装客户端,即安装
Worker 服务。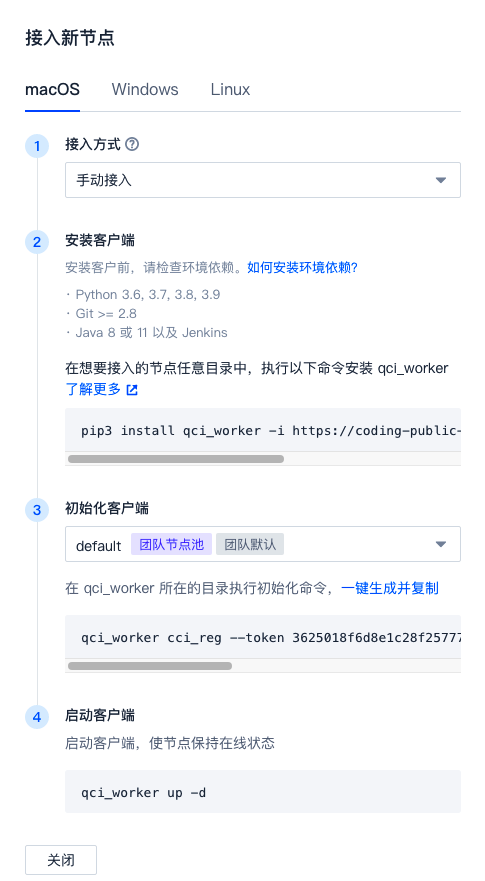
2. 选择拟接入的节点池,单击一键生成并复制,生成初始化命令。
3. 在终端中执行已自动生成的客户端启动命令,让构建节点保持在线状态。
Windows
命令接入
1. 选择持续集成 > 构建节点中,单击右上角的接入新节点,选中 Windows,选择 Powershell 接入方式。
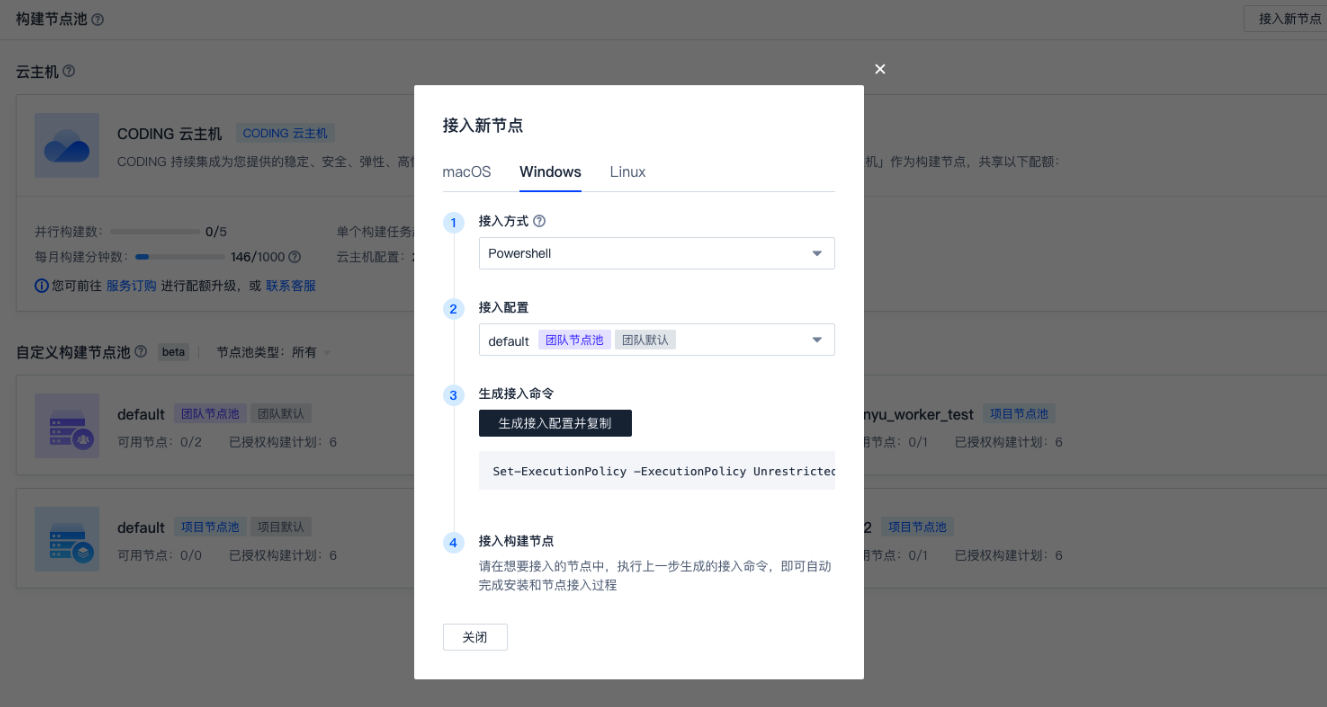
2. 安装完成后可以使用以下命令进行验证:
qci_worker version
命令接入的默认安装目录为
/root/codingci。手动接入
1. 接入方式选择手动接入,按照提示在终端中输入命令安装客户端,即安装
Worker 服务。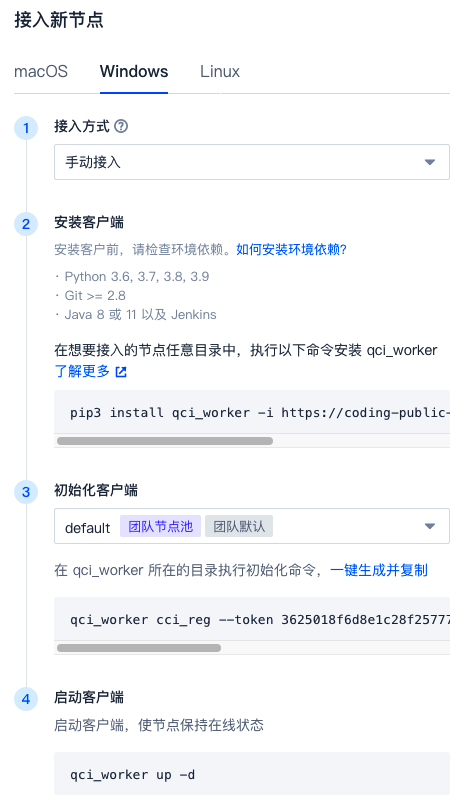
2. 选择拟接入的节点池,单击一键生成并复制,生成初始化命令。
3. 在终端中执行已自动生成的客户端启动命令,让构建节点保持在线状态。
Linux
命令接入
1. 选择持续集成 > 构建节点中,单击右上角的接入新节点,选中 Linux,选择 Bash 接入方式。设置完成后在 Linux 环境中运行已生成的接入配置命令。

2. 安装完成后可以使用以下命令进行验证:
qci_worker version
命令接入的默认安装目录为
/root/codingci。手动接入
1. 接入方式选择手动接入,按照提示在终端中输入命令安装客户端,即安装
Worker 服务。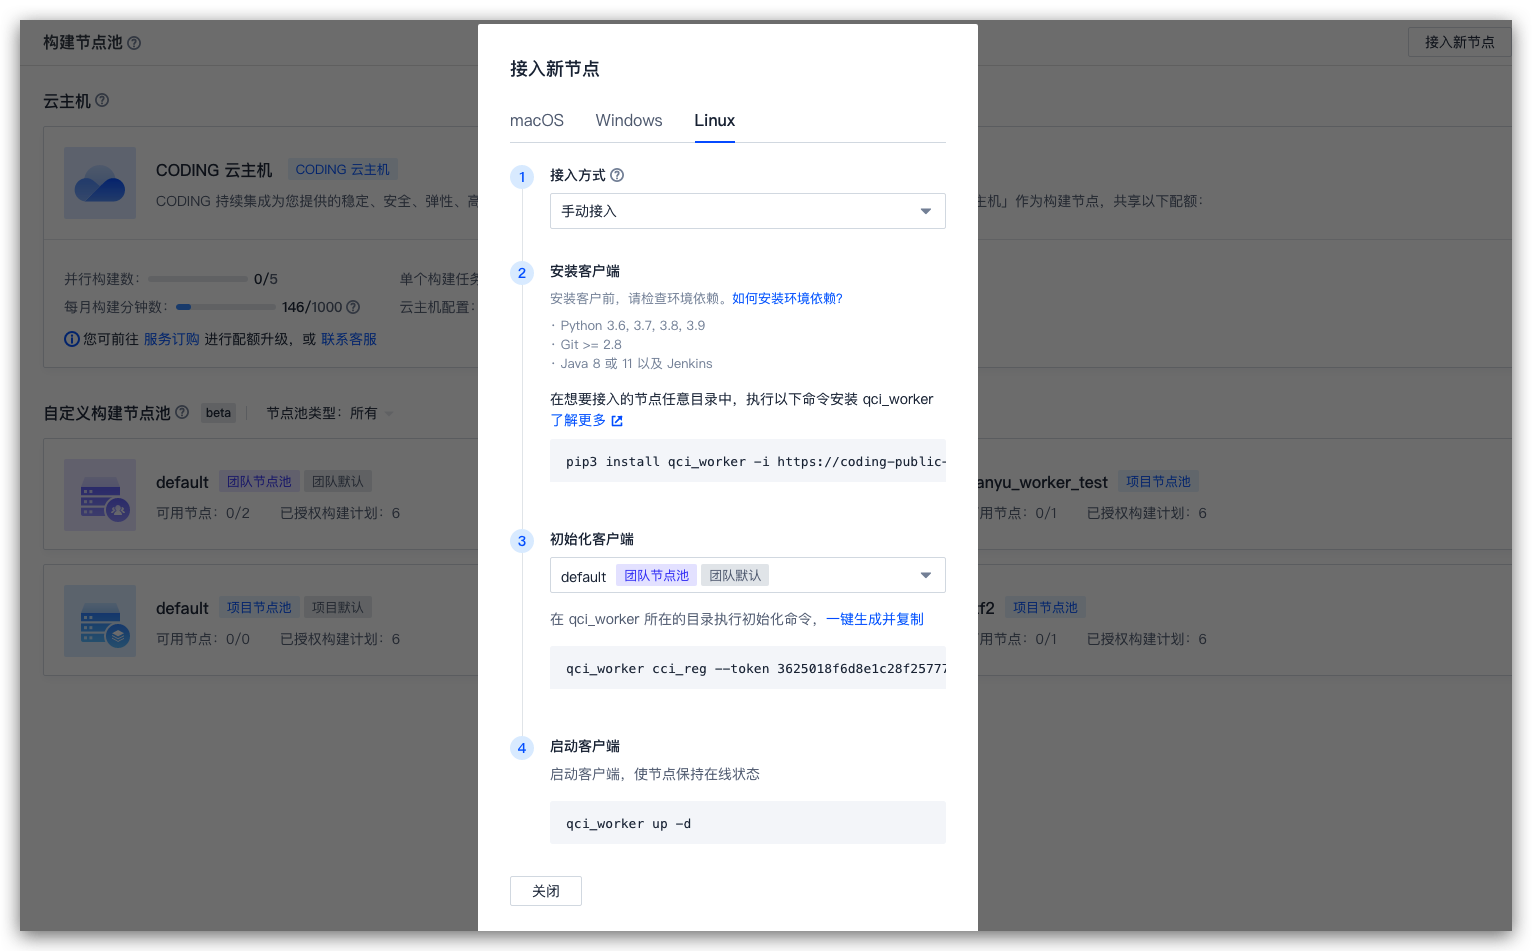
2. 选择拟接入的节点池,单击一键生成并复制,生成初始化命令。
3. 在终端中执行已自动生成的客户端启动命令,让构建节点保持在线状态。
启动守护进程
安装完成后,在构建节点上需要运行守护进程,用以监听并获取由 CODING 后台下发的 CI 任务。以下为运行 / 删除命令行:
# 在后台运行qci_worker up -d# 在前台运行qci_worker up# 暂时停止运行qci_worker stop


