本文档介绍如何通过控制台一键迁移的方式将您的源端服务器在线迁移至腾讯云 CVM。
操作场景
一键迁移是 在线迁移 的敏捷方案,免去登录源端服务器、下载工具等复杂操作,可一键批量创建迁移任务,将源端操作系统、服务程序等同步至腾讯云。一键迁移对 Linux 操作系统和 Windows 操作系统均适用,同时支持通过腾讯云云服务器控制台的 在线迁移 页面查询迁移进度。
注意事项
在开始执行操作前,请您务必仔细阅读以下信息,忽略该信息可能对您的业务造成影响。
控制台一键迁移功能在迭代优化中,目前仅支持部分场景(阿里云 ECS、亚马逊 AWS EC2和腾讯云 CVM)使用。如不满足您的需求,推荐您使用 在线迁移:客户端导入迁移源,其具备更强的兼容性。
迁移目标是云服务器时,开始迁移后目标云服务器将进入迁移模式,请不要对目标云服务器进行重装系统、关机、销毁、重置密码等操作,直至迁移完成退出迁移模式。
迁移目标是云服务器镜像时,开始迁移后将在您的账户下创建一台名为 do_not_delete_csm_instance 的中转实例,请不要对中转实例进行重装系统、关机、销毁、重置密码等操作,直至迁移完成系统会自动销毁本次创建的中转实例。中转实例将会产生一定的费用,包含实例费用和云盘费用,需要您账户余额大于10元,若余额不足可前往 充值,详细费用说明见 计费说明。
迁移流程
通过控制台一键迁移进行在线迁移的流程如下图。
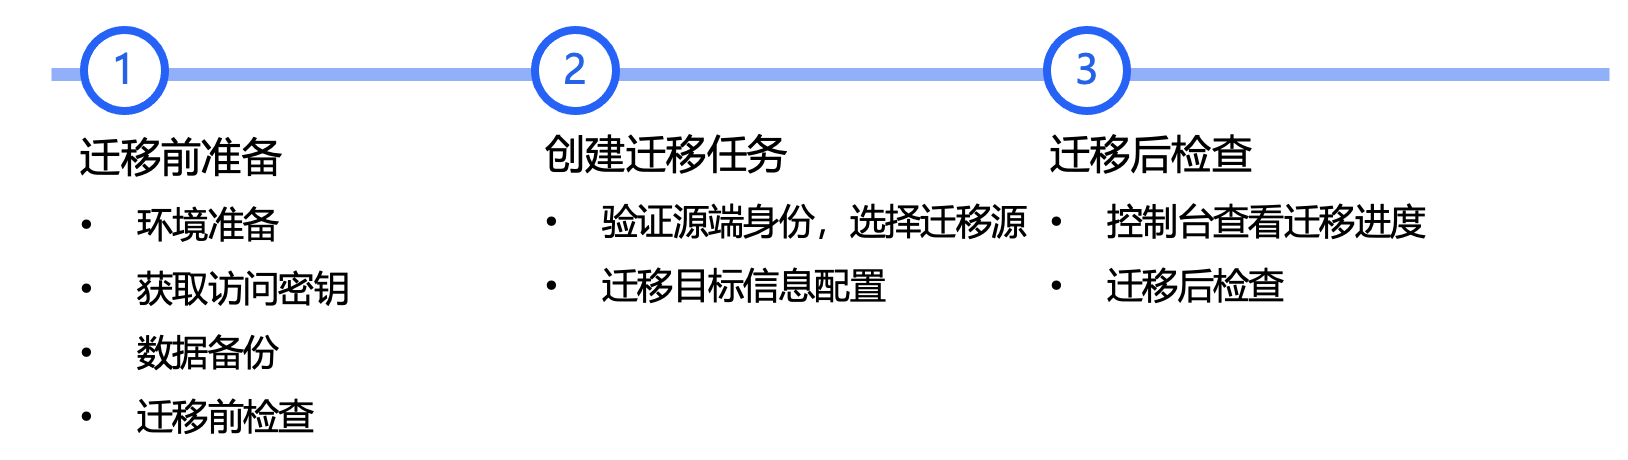
迁移步骤
步骤一:迁移前准备
环境准备
源端服务器已完成云助手的安装(例如,阿里云 ECS 云助手)。
配置源端服务器的网络,您可以选择配置公网 IP、VPC 网络(不支持经典网络)。
获取访问密钥
说明:
若您使用子账号进行控制台迁移,则需要使用主账号登录 访问管理控制台 授予以下权限:
迁移目标为云服务器实例时,子账号需要 QcloudCSMFullAccess 和 QcloudCVMFullAccess 权限。
迁移目标为云服务器镜像时,子账号需要 QcloudCSMFullAccess 、QcloudCVMFullAccess 和 QcloudCVMFinanceAccess 权限。
为了保障您的账号安全,请您在密钥使用完后及时删除或者关闭权限。
在源端云平台获取访问密钥。例如,
获取阿里云 AccessKeyID 和 AccessKeySecret 的步骤如下
:1.1.1 登录阿里云 RAM 控制台,进入身份管理 > 用户 页面。
1.1.2 单击创建用户,访问方式选择使用永久 AccessKey 访问(选择其他访问方式不生效),确定创建后请及时保存 AccessKeyID 和 AccessKeySecret 信息。详细操作请参见 创建 RAM 用户。
1.1.3 在用户列表为刚刚创建的用户添加权限,只读访问云服务器服务(ECS)的权限(AliyunECSReadOnlyAccess)和管理 ECS 云助手服务的权限(AliyunECSAssistantFullAccess)。详细操作请参见 为 RAM 用户授权。
说明:
为了保障您的账号安全,请您在密钥使用完后及时删除或者关闭权限。
数据备份(可选)
建议您暂停服务器上的应用程序并进行数据备份,以避免迁移时对现有应用程序可能产生的影响。
源端服务器:可以选择源端服务器快照功能等方式备份数据,源端服务器是指待迁移的服务器。进行 Windows 系统迁移时,建议您暂时关闭杀毒软件,以免误杀迁移工具而导致迁移失败。
目标云服务器:可以选择 创建快照 等方式备份目标云服务器数据。
目标云服务器检查
若迁移目标为云服务器,则需检查目标云服务器。
目标云服务器 | 存储空间:目标云服务器的云硬盘(包括系统盘和数据盘)数量要大于或等于源端服务器磁盘数量,目标云服务器云硬盘容量大小要大于或等于源端服务器磁盘容量大小。为方便起见,建议目标云服务器云硬盘的数量和容量大小与源端服务器保持一致。 安全组:安全组中开放80、443和3389端口。 带宽设置:建议尽可能调大两端的带宽,以便更快迁移。迁移过程中,会产生约等于数据量的流量消耗,如有必要请提前调整网络计费模式。 |
步骤二:创建迁移任务
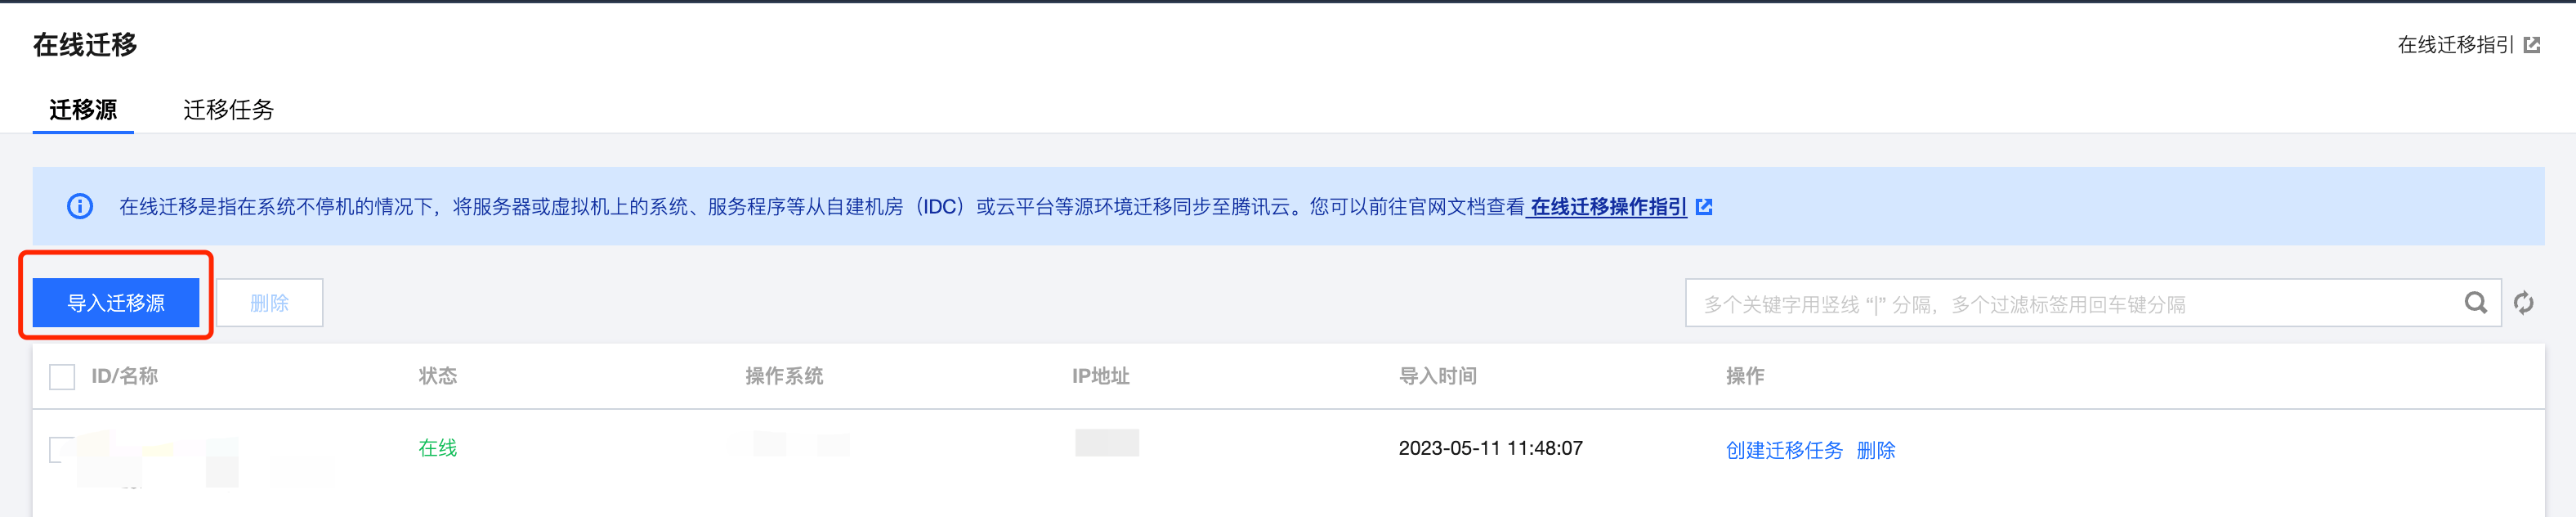
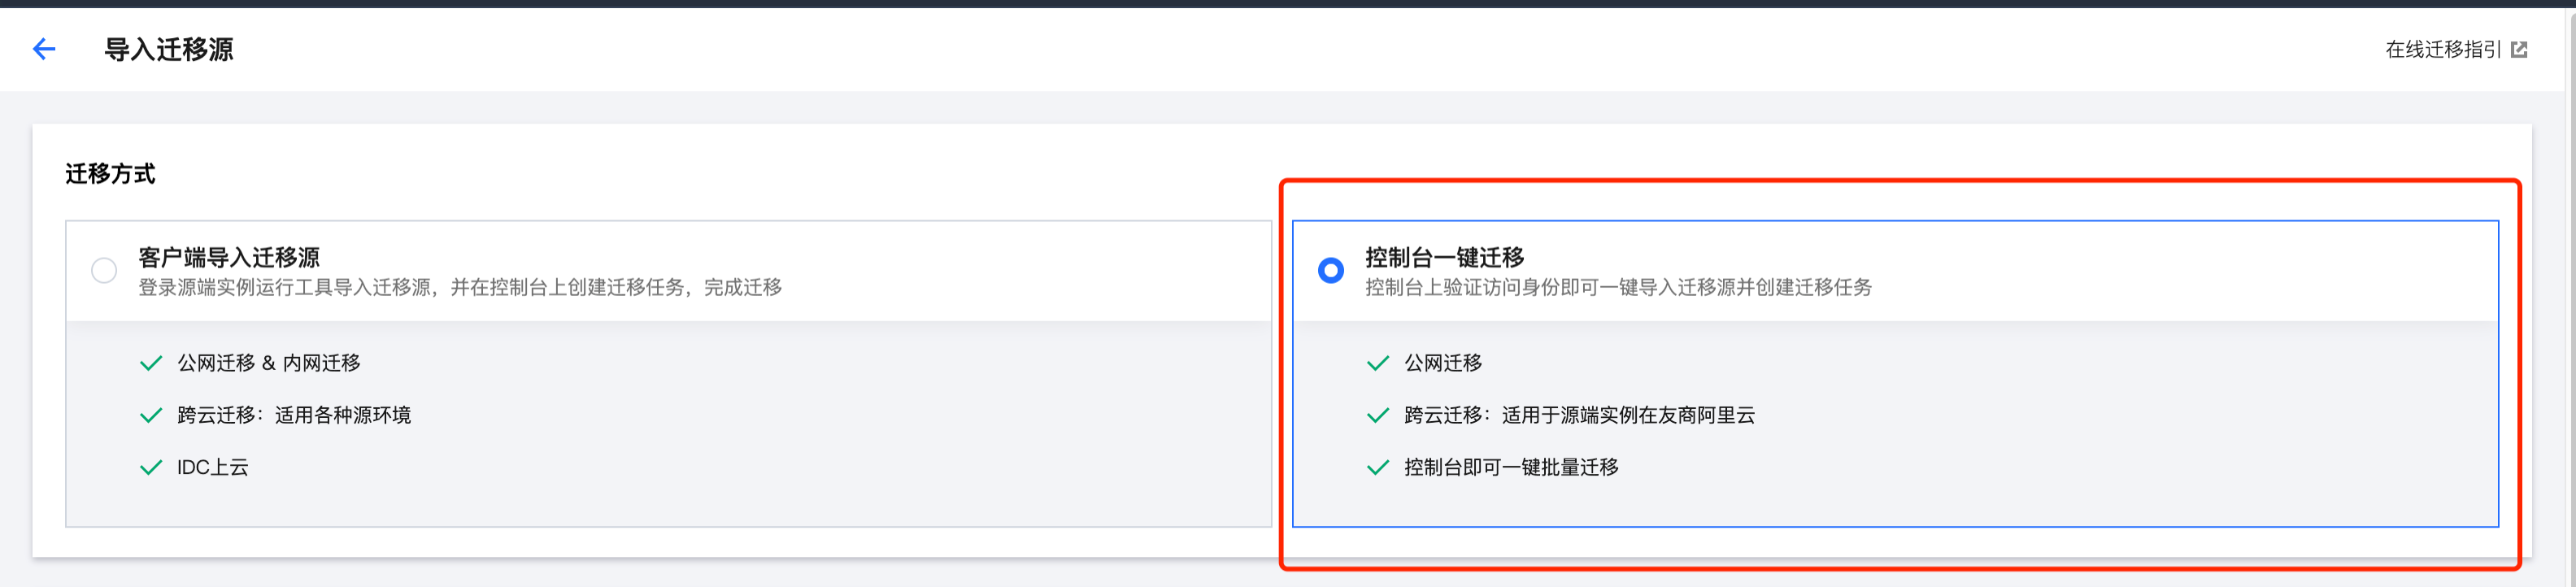
2. 选择控制台一键迁移选项,即可开始批量创建迁移任务。
3. 设置任务
填写任务名称和任务描述。
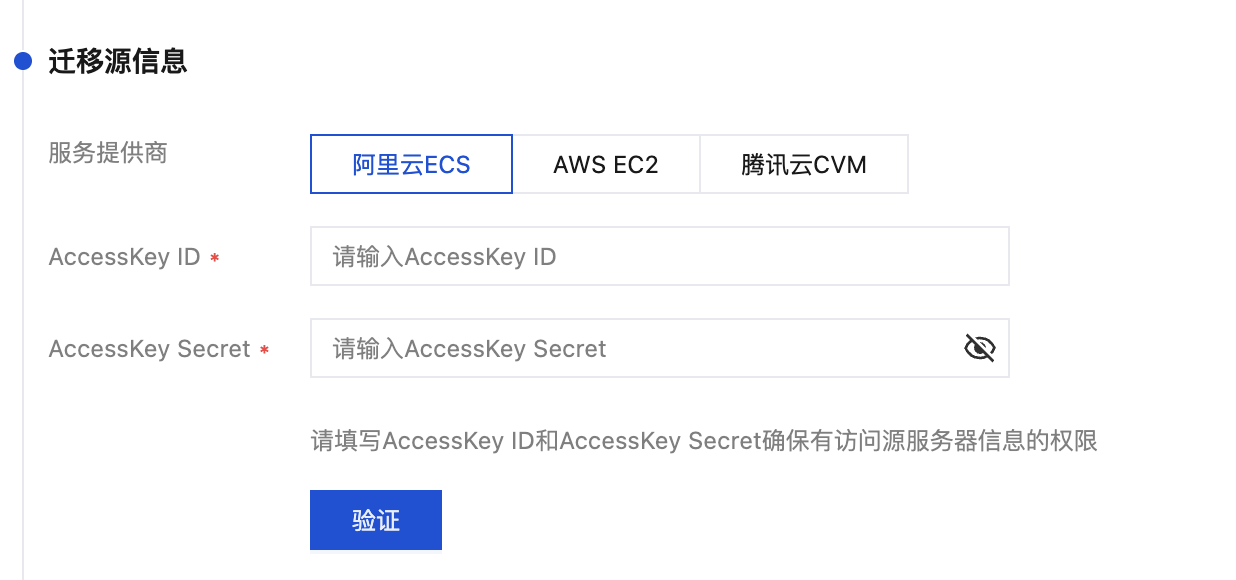
4. 配置迁移源信息
注意:
请保管好您的密钥,建议迁移完成后删除或禁用密钥。
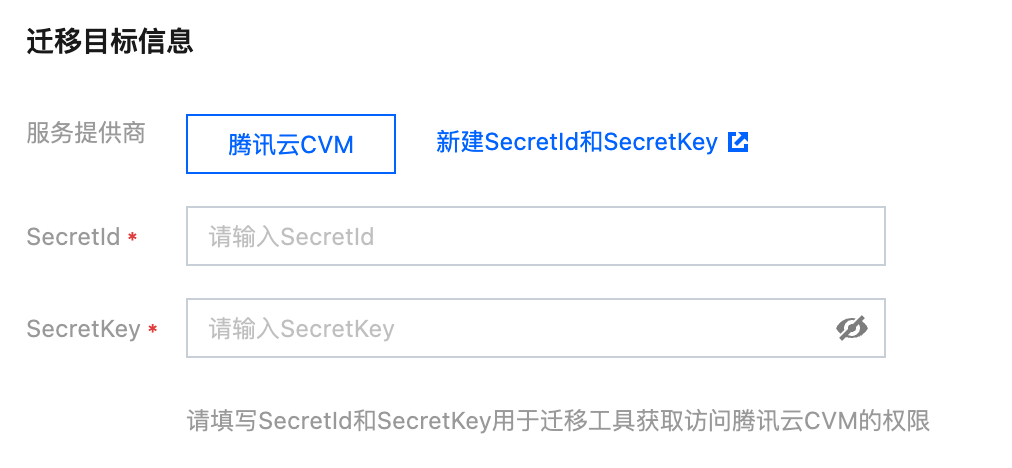
5. 配置迁移目标
当前目标端服务提供商已默认选择腾讯云 CVM,需要您输入腾讯云 API 密钥的 SecretId 和 SecretKey(获取方式)用于获取腾讯云 CVM 的权限。您可以在 API 密钥管理 直接复制密钥信息,请核实 API 密钥正确,否则会导致迁移失败。
注意:
请保管好您的密钥,建议迁移完成后删除或禁用密钥。
6. 配置迁移信息
6.1 迁移源信息验证成功后,您可以单击添加迁移源进入弹窗选择待迁移的实例。
6.2 在弹窗左上角选择对应地域后,即可获取该地域下的实例列表。地域名称后的数字标识实例数,方便选择对应的地域。
6.3 勾选需要迁移的实例即可将其添加到右侧已选择列表中。
说明:
支持多实例、多地域进行批量迁移,您可多次添加迁移源。
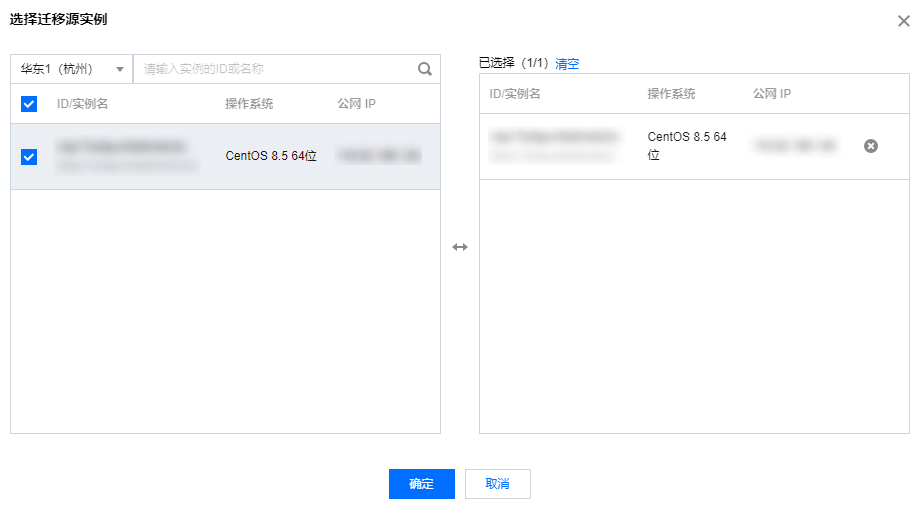
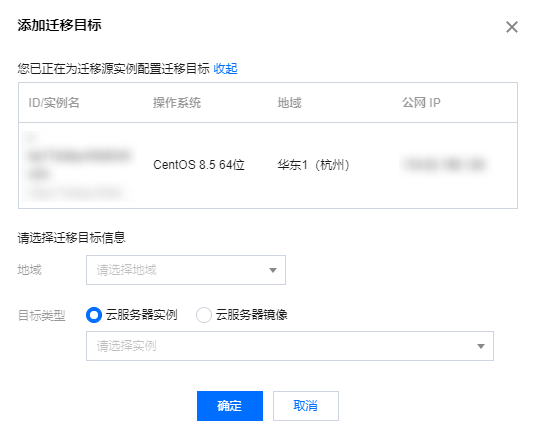
6.4 单击确定后,在迁移源信息列表即可显示待迁移的实例信息。您可以单击操作列的添加目标信息进行迁移目标信息配置。

6.5 在添加迁移目标弹窗中,进行地域和迁移目标类型配置:
配置选项 | 是否必填 | 说明 |
目标地域 | 是 | |
目标类型 | 是 | 设置迁移源迁移至腾讯云的目标类型。 云服务器镜像:迁移任务完成之后将为迁移源生成目标腾讯云镜像。 镜像名称:为迁移源生成的目标腾讯云镜像名称。镜像名称在目标地域重复时,迁移任务会自动添加任务 ID 到镜像名称中。 云服务器实例:选择一台目标地域的云服务器实例作为迁移目标。 目标实例:建议目标云服务器的操作系统尽量和源端服务器的操作系统类型一致。例如,源端服务器为 CentOS 7 系统时,选择一台 CentOS 7 系统的云服务器作为迁移目标。 注意: |
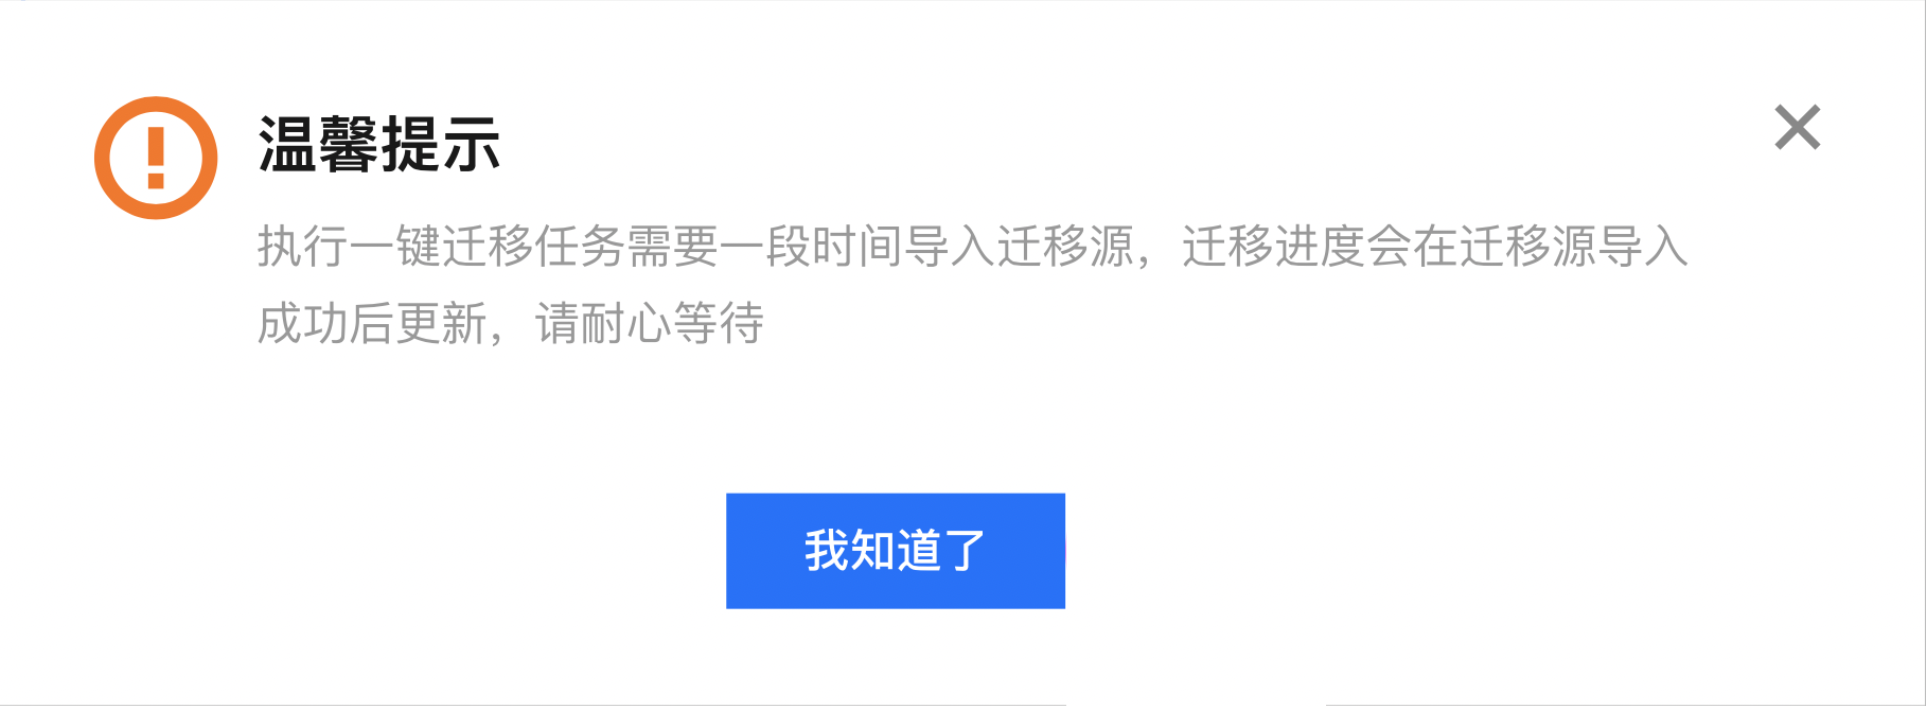
7. 单击新建并启动迁移任务,会进入温馨提示,请关注:
任务在迁移源上执行需要一定时间,所以您需要等待片刻后才能在控制台查看进度。若超过10分钟,迁移任务列表仍未显示新任务,可能是源端环境异常或信息错误无法导入迁移源,这时控制台可能不会提示失败原因,请重新创建任务或者改用 在线迁移:客户端导入迁移源。
步骤三:迁移后检查
1. 查看迁移状态和进度
确认新建任务后,迁移任务会自动执行,您可在 迁移源页面 查询迁移源信息并查看任务进度。
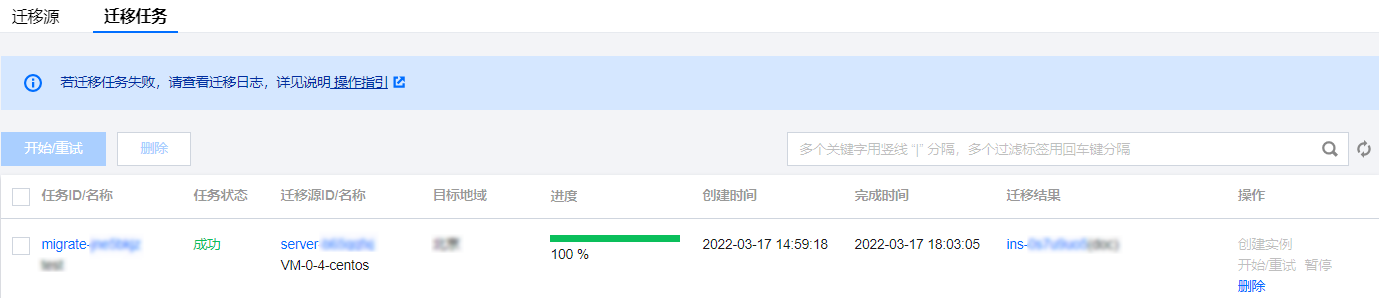
2. 等待迁移任务结束
当迁移任务状态为成功时,表示成功完成迁移。如下图所示:
说明:
由于传输数据耗时受源端服务器数据大小和网络带宽等因素影响,请耐心等待迁移任务的完成。
迁移任务开始之后,可在迁移任务所在行单击暂停停止迁移任务。
迁移工具支持断点续传,暂停任务之后,单击开始/重试即可从上次暂停点继续迁移。
迁移任务仅支持在数据传输阶段暂停,在控制台的迁移任务中单击暂停后,迁移工具会在数据传输阶段暂停数据传输。
如果迁移过程耗时太长,且需停止本次迁移,您可以先暂停迁移任务,并单击删除,即可取消本次迁移任务。
3. 迁移后的检查
迁移结果失败:
或者检查日志文件(默认为迁移工具目录下的 logs/log 文件)的错误信息输出或者参考 服务器迁移类常见问题 进行排查和修复问题。修复后在迁移任务操作列单击开始/重试,即可重新开始迁移任务。
迁移结果成功:
若迁移目标为云服务器,请检查目标云服务器能否正常启动、目标云服务器数据与源端服务器是否一致、网络是否正常或者其他系统服务是否正常。
若迁移目标为云服务器镜像,可单击迁移任务所在行的云服务器镜像 ID,进入 云服务器镜像页面 查看该镜像信息,您可使用该镜像创建云服务器。


