操作场景
说明:
为节约存储空间,云数据库 MySQL 的物理备份和逻辑备份文件,都会先经过 qpress 压缩,后经过 xbstream 打包(xbstream 为 Percona 的一种打包/解包工具)进行压缩与打包。
本文介绍的恢复方式仅适用于 Linux 平台,暂不支持 Windows 平台。
Windows 平台恢复数据请参考 命令行工具迁移数据。
支持的实例版本:MySQL 双节点、三节点。
操作步骤
步骤1:下载备份文件
1. 登录 MySQL 控制台,在实例列表,单击实例 ID 或操作列的管理,进入实例管理页面。
2. 在实例管理页面,选择备份恢复 > 数据备份列表页, 选择需要下载的备份,在操作列单击下载。
3. 在弹出的对话框,推荐您复制下载地址,并 登录到云数据库所在 VPC 下的 CVM(Linux 系统)中,运用 wget 命令进行内网高速下载,更高效。
说明:
您也可以选择本地下载直接下载,但耗时较多。
wget 命令格式:wget -c '备份文件下载地址' -O 自定义文件名.xb
示例如下:
wget -c 'https://mysql-database-backup-bj-118.cos.ap-beijing.myqcloud.com/12427%2Fmysql%2F42d-11ea-b887-6c0b82b%2Fdata%2Fautomatic-delete%2F2019-11-28%2Fautomatic%2Fxtrabackup%2Fbk_204_10385%2Fcdb-1pe7bexs_backup_20191128044644.xb?sign=q-sign-algorithm%3Dsha1%26q-ak%3D1%26q-sign-time%3D1574269%3B1575417469%26q-key-time%3D1575374269%3B1517469%26q-header-list%3D%26q-url-param-list%3D%26q-signature%3Dfb8fad13c4ed&response-content-disposition=attachment%3Bfilename%3D%2141731_backup_20191128044644.xb%22&response-content-type=application%2Foctet-stream' -O test0.xb
步骤2:解包备份文件
使用 xbstream 解包备份文件。
说明:
xbstream 工具下载地址请参见 Percona XtraBackup 官网。Percona XtraBackup 的主版本号应与您的云数据库 MySQL 版本号对应,例如,MySQL 5.7 对应 Percona XtraBackup 2.4,MySQL 8.0 对应 Percona XtraBackup 8.0。
数据库版本为 MySQL 5.6、MySQL 5.7时,推荐使用 Percona-XtraBackup-2.4.26 及以上的版本,安装介绍请参见 Percona XtraBackup 2.4。
数据库版本为 MySQL 8.0时,推荐使用 Percona-XtraBackup-8.0.30-23 及以上的版本,安装介绍请参见 Install Percona XtraBackup 8.0 overview。
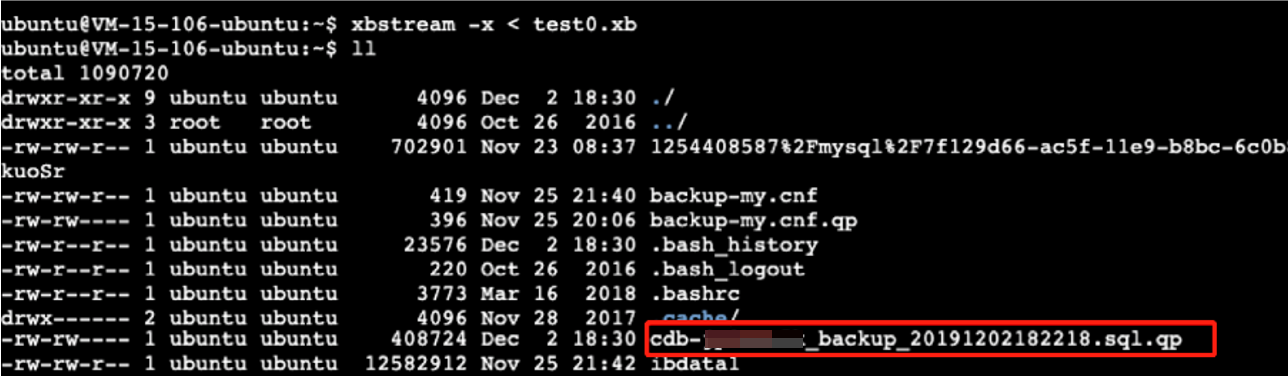
xbstream -x < test0.xb
说明:
test0.xb替换为您的备份文件。解包结果如下图所示:
步骤3:解压备份文件
1. 通过如下命令下载 qpress 工具。
wget -d --user-agent="Mozilla/5.0 (Windows NT x.y; rv:10.0) Gecko/20100101 Firefox/10.0" https://docs-tencentdb-1256569818.cos.ap-guangzhou.myqcloud.com/qpress-11-linux-x64.tar
说明:
2. 通过如下命令解出 qpress 二进制文件。
tar -xf qpress-11-linux-x64.tar -C /usr/local/binsource /etc/profile
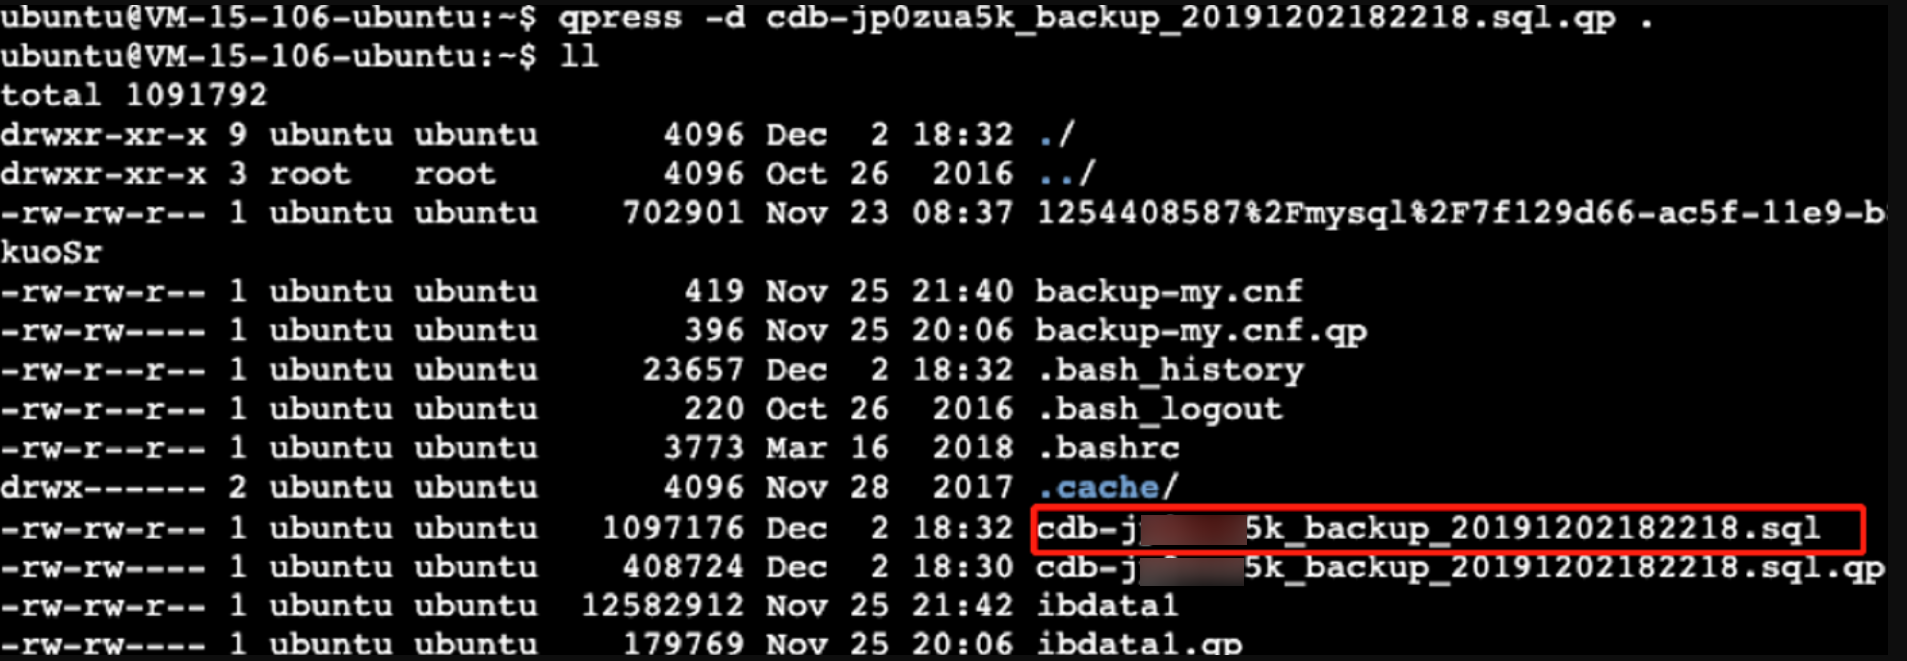
3. 使用 qpress 解压备份文件。
qpress -d cdb-jp0***5k_backup_20191202182218.sql.qp .
说明:
请根据解压时间,找到
.sql.qp后缀的备份文件,并将cdb-jp0***5k_backup_20191202182218替换为该文件名。解压结果如下图所示:
步骤4:导入备份至目标数据库
注意:
在导入时如果存在权限问题(提示 SET GLOBAL 为禁止操作)报错,可注释 SQL 文件中的:
SET GLOBAL INNODB_STATS_AUTO_RECALC=ON */;, 或者直接删除 SET GLOBAL 那条语句。
考虑到云数据库 MySQL 的稳定性和安全性,云数据库 MySQL 限制了 super、shutdown、file 权限,有时在云数据库 MySQL 上执行 SET 语句时,会出现如下的报错:
#1227-Access denied;you need(at least one of)the SUPER privilege (s) for this operation执行如下命令导入 SQL 文件至目标数据库:
mysql -uroot -P3306 -h127.0.0.1 -p < cdb-jp0***5k_backup_20191202182218.sql
说明:
本文以导入本地3306端口的 MySQL 为例,您可根据实际情况替换。
cdb-jp0***5k_backup_20191202182218.sql替换为通过 qpress 实际解压出的 sql 文件。


