操作场景
当您需要将磁盘属性为数据盘的弹性云硬盘挂载到另一台云服务器上使用时,您可以主动地从云服务器卸载该弹性云硬盘,并将其挂载到其他云服务器上。卸载弹性云硬盘并不会清除该硬盘上的数据。
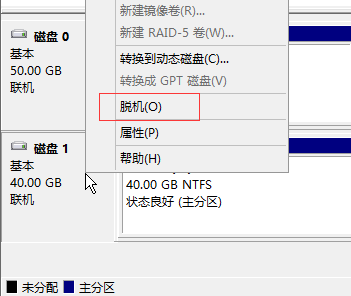
目前支持卸载磁盘属性为数据盘的弹性云硬盘,不可卸载系统盘和非弹性云硬盘。卸载云硬盘前需先执行
umount(Linux)或脱机(Windows)操作,否则可能会导致该云服务器再次挂载弹性云硬盘时无法识别。前提条件
卸载数据盘前,请确保您已了解以下注意事项和前提条件:
暂停读写操作:停止对目标云硬盘的所有文件系统读写操作,避免未完成读写的数据丢失。
无进程占用:确认没有进程占用该云硬盘(Linux 系统可通过 lsof 等命令检查,Windows 系统可检查任务管理器进程),否则可能导致卸载后系统异常。
操作步骤
步骤一:在操作系统中卸载云硬盘
1. 登录云服务器实例。
2. 执行以下命令查看数据盘挂载信息。
df -h
回显信息示例如下:

3. 执行以下命令卸载(umount)数据盘文件系统。
以卸载数据盘(/dev/vdb)文件系统为例:
umount /dev/vdb
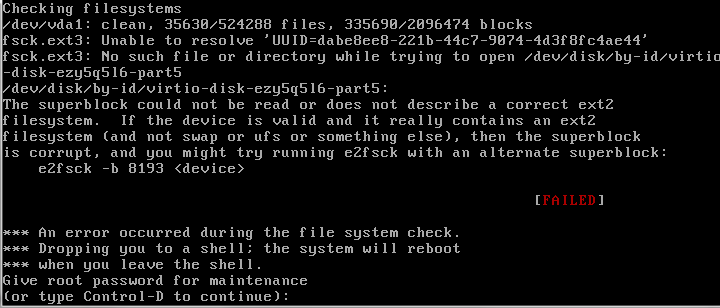
若云硬盘未被执行正常的 umount 操作,而被强制卸载,关机时和开机时可能会出现如下图所示的问题:
4. 检查 /etc/fstab 中是否配置数据盘文件系统自动挂载信息。
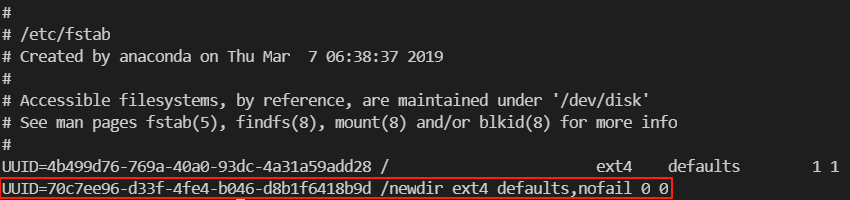
cat /etc/fstab
回显信息示例如下:找到需卸载的云硬盘初始化时添加的自动挂载信息,示例中显示/etc/fstab文件中已配置该盘自动挂载在newdir目录下。
5. 若存在自动挂载信息:
5.1 执行以下命令,使用 VI 编辑器打开 /etc/fstab 文件。
vi /etc/fastab
5.2 按
i 进入编辑模式。5.3 删除或注释当前硬盘相关开机自动挂载配置,取消开机自动挂载该硬盘。
在该示例中,在自动挂载信息行前添加
#,表示注释掉这条自动挂载信息。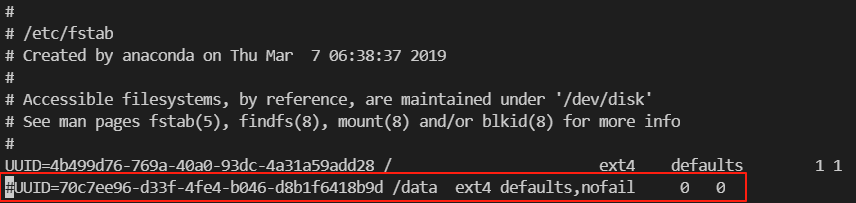
5.4 修改完成后按 Esc 键,输入
:wq后按回车键保存并退出。6. 如果您在云服务器内创建了逻辑卷管理(Logical Volume Manager,LVM),直接从控制台卸载云硬盘会造成部分 device 数据残留在子机内存中,当子机内部有应用尝试遍历或者访问该设备时,将会出现系统错误。因此,需要提前执行以下操作(本例假设基于 /dev/vdb1 创建了逻辑卷 /dev/test/lv1,挂载在 /data 目录下):
6.1 执行
umount /data 命令,在子机内部 umount 对应磁盘挂载点。6.2 执行
lvremove /dev/test/lv1 命令,移除逻辑卷(Logical Volume,LV)。 如果有多个 LV,请依次移除所有 LV。 6.3 执行
vgremove test 命令,移除卷组。 6.4 执行
pvremove /dev/vdb1 命令,移除物理卷。 6.5 修改 /etc/fstab 文件,避免下次启动继续挂载对应 LV。
完成以上操作后进入步骤二。
步骤二:在控制台或使用API卸载云硬盘
1.
登
录 云硬盘控制台。2. 您可以通过以下方式卸载云硬盘:
单个卸载:单击状态为使用中的目标云硬盘所在行的更多 > 卸载。
批量卸载:勾选多个状态为使用中的目标云硬盘,单击列表上方的卸载。

3. 在弹出的卸载云硬盘提示框中,确认警告事项,单击确定,完成卸载。


