Help & Documentation>SSL Certificates>Certificate Application>Formal Certificate Submission Process>OV (Organization Validated) and EV (Extended Validation) SSL Certificate Material Submission Process

OV (Organization Validated) and EV (Extended Validation) SSL Certificate Material Submission Process

Last updated: 2023-12-13 18:02:45

Scenario

Upon successful purchase of the OV (including OV Pro Edition) and EV (including EV Pro Edition) SSL certificates (see Purchase Process for details), relevant materials need to be submitted. Once the CA organization's certification review is approved, the certificate will be officially issued, and you can download the paid certificate for installation.

Preparations

1. Log in to the SSL Certificate Service console and navigate to the Pending Submission management page.
2. Select the certificate for which you need to submit materials and click Submit Materials.

Instructions

Note
The information required varies slightly depending on the type of domain certificate. This operation uses a multi-domain certificate as an example.

Step 1. Enter a domain name

Select one of the following CSR generation methods as needed.
Choose the "Generate CSR Online" method and perform the operation to generate CSR online (recommended, as it can generate both CSR and private key).
Choose the "Paste CSR" method and perform the Paste CSR operation (self-upload, private key cannot be generated).

Generating the CSR online

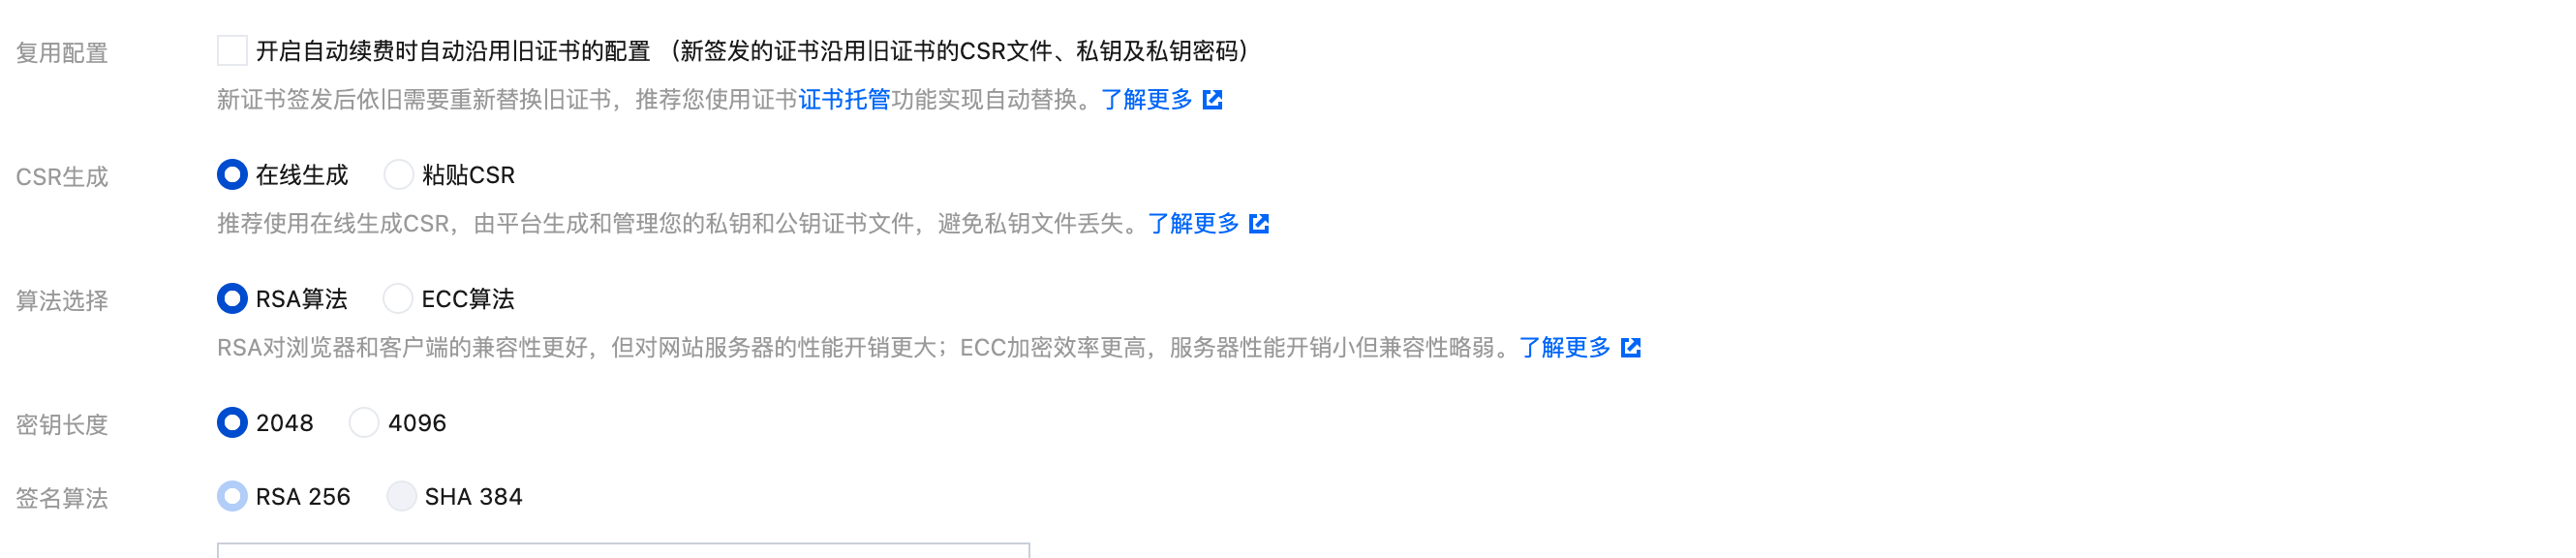
1. Enter the domain information as shown below:

The main parameter information is as follows:
Algorithm: Choose the type of encryption algorithm for your certificate based on your actual needs.
Key Length: Select the key length for your certificate based on your actual needs.
Bound domain: Enter the single domain name to which the certificate is bound. For example, tencent.com or ssl.tencent.com.
Note
Some certificate brands support binding IP addresses. For details, see SSL Certificates Supporting IP Address Binding.
Private Key Password: Optional. The password cannot be modified once entered or recovered, so please keep it in mind.
Note
If you need to deploy Tencent Cloud services such as CLB or CDN, don′t set the private key password.
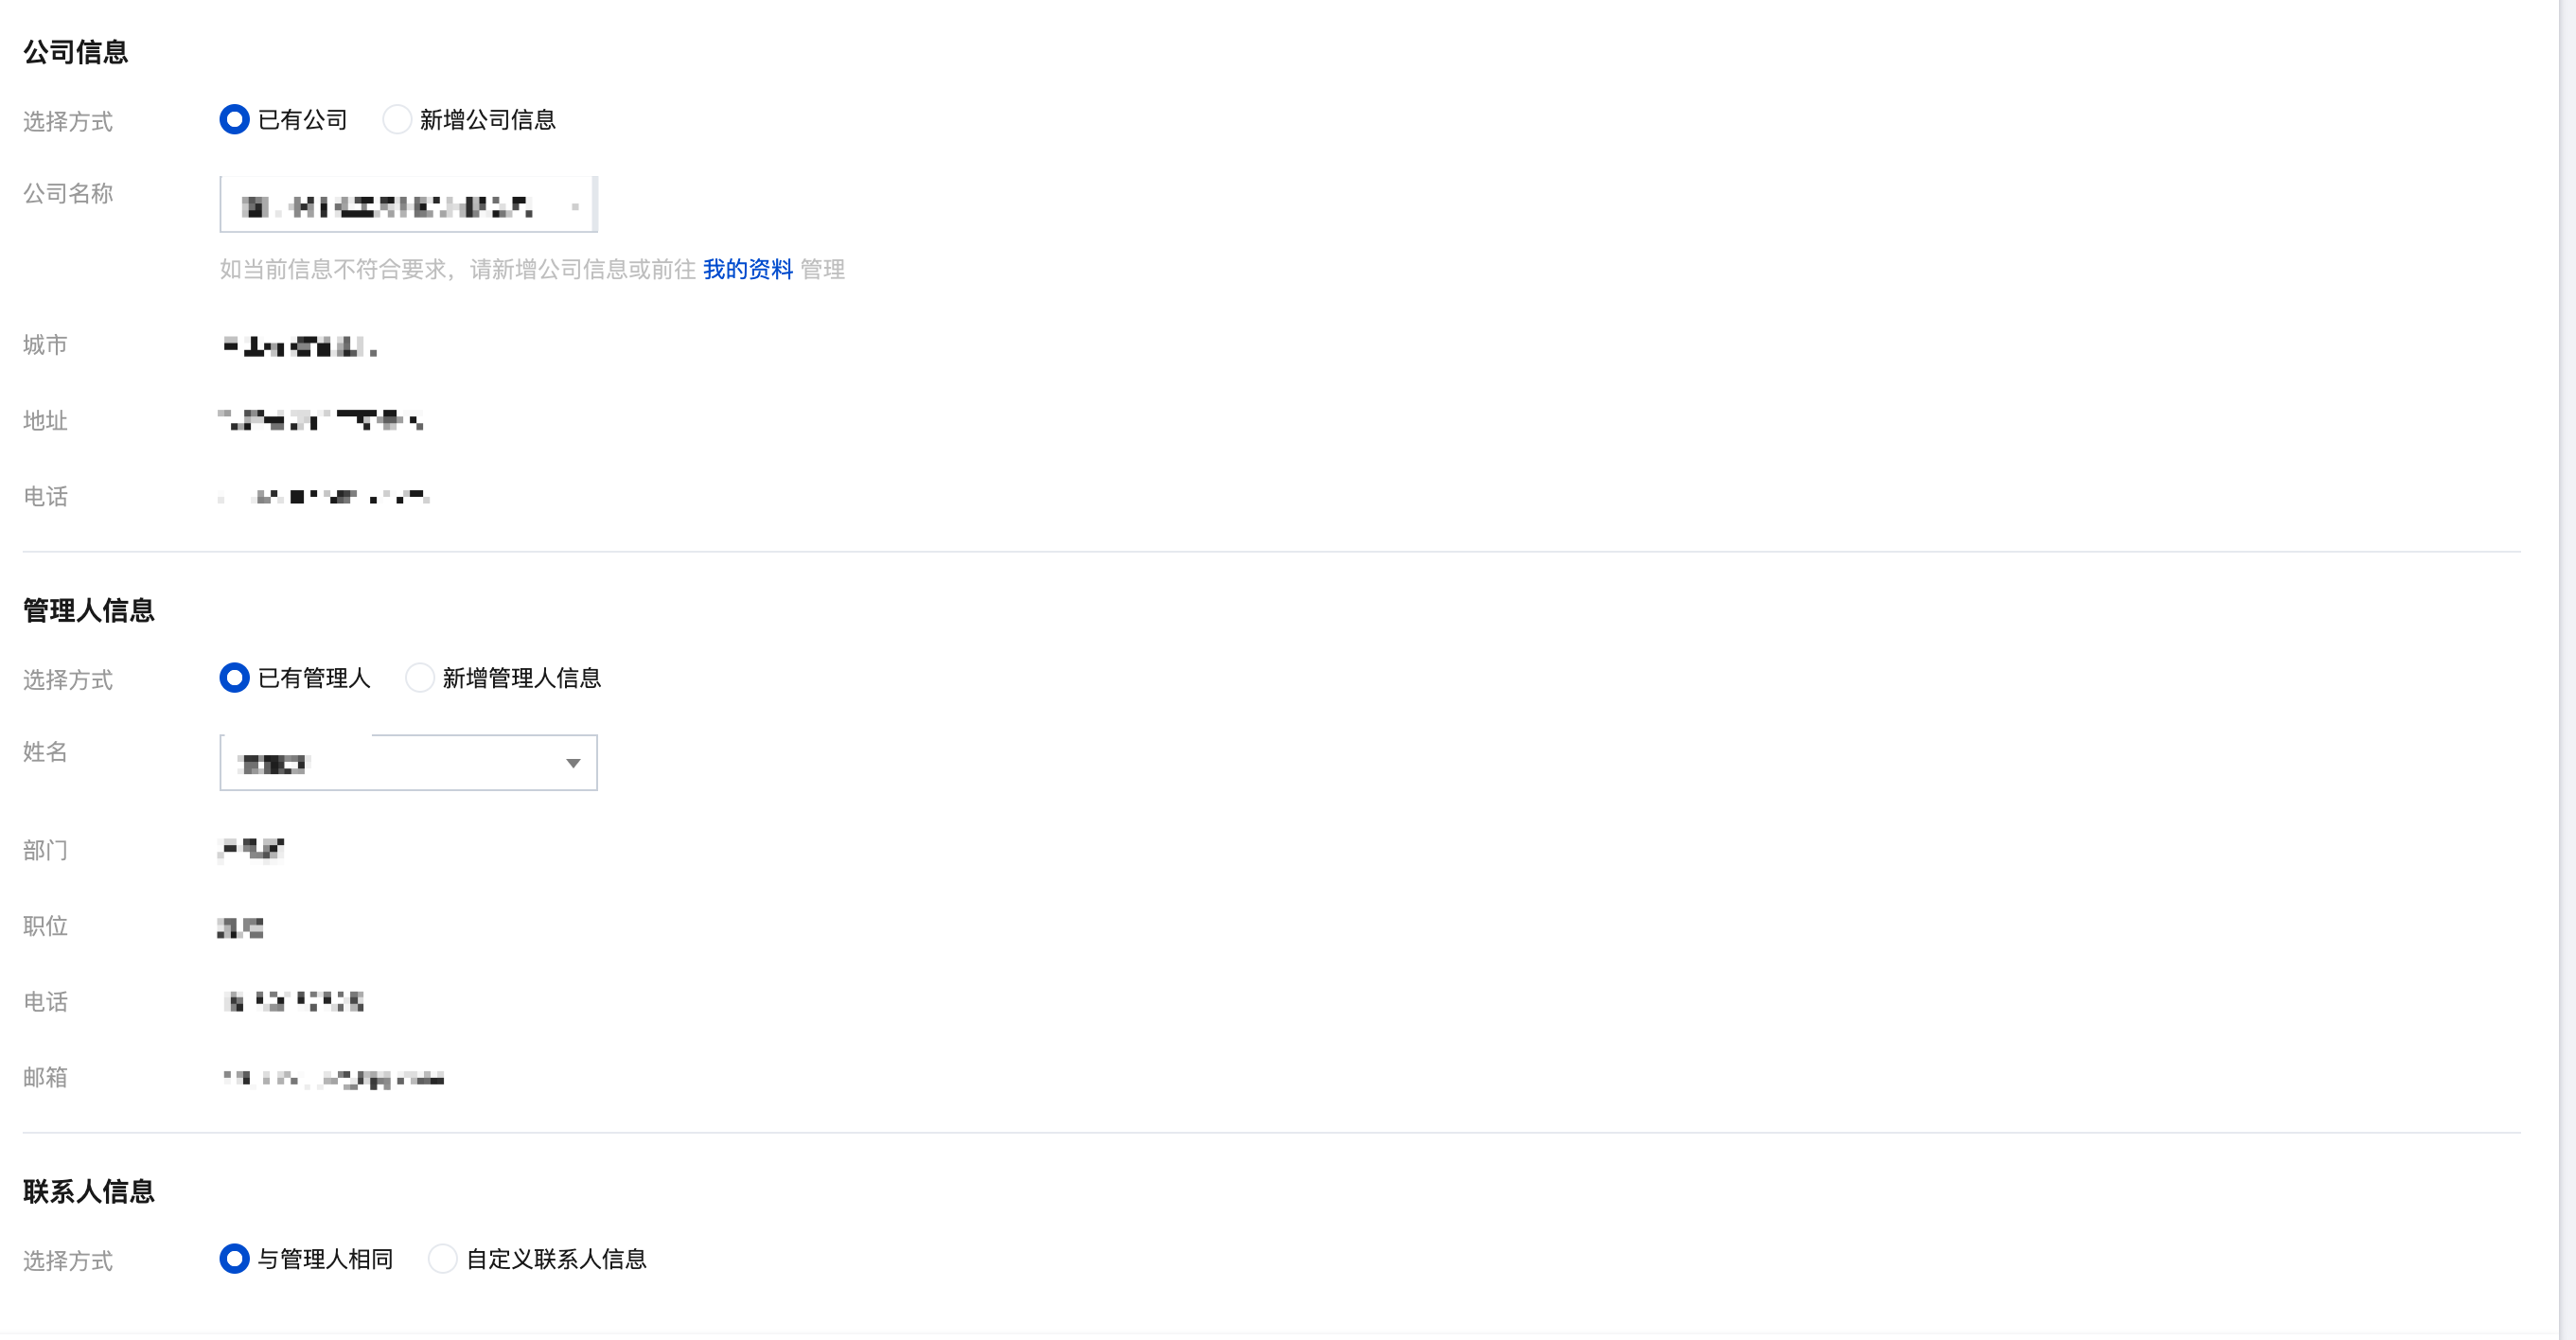
2. Enter your organization information.
Existing Organization: Select Existing Organization to directly use the organization's information.
New Organization information: Enter full name, department, city, address, and landline number of your organization.
3. Enter the Admin information.
Existing Admin: Select Existing Admin to directly use the administrator's information.
New Admin Information: Please provide the accurate name, position, phone number, and email of the administrator.
4. Enter contact information. You may select Same as the admin.
5. Click Next to proceed to Step 2.

Pasting the CSR

1. Paste the prepared CSR information into the text box to identify your domain information. Then, fill in the organization information (you can select "Existing Organization"), administrator information (you can select "Existing Administrator"), and contact information (you can check Same as Administrator). As shown in the figure below:


2. Click Next to proceed to Step 2.

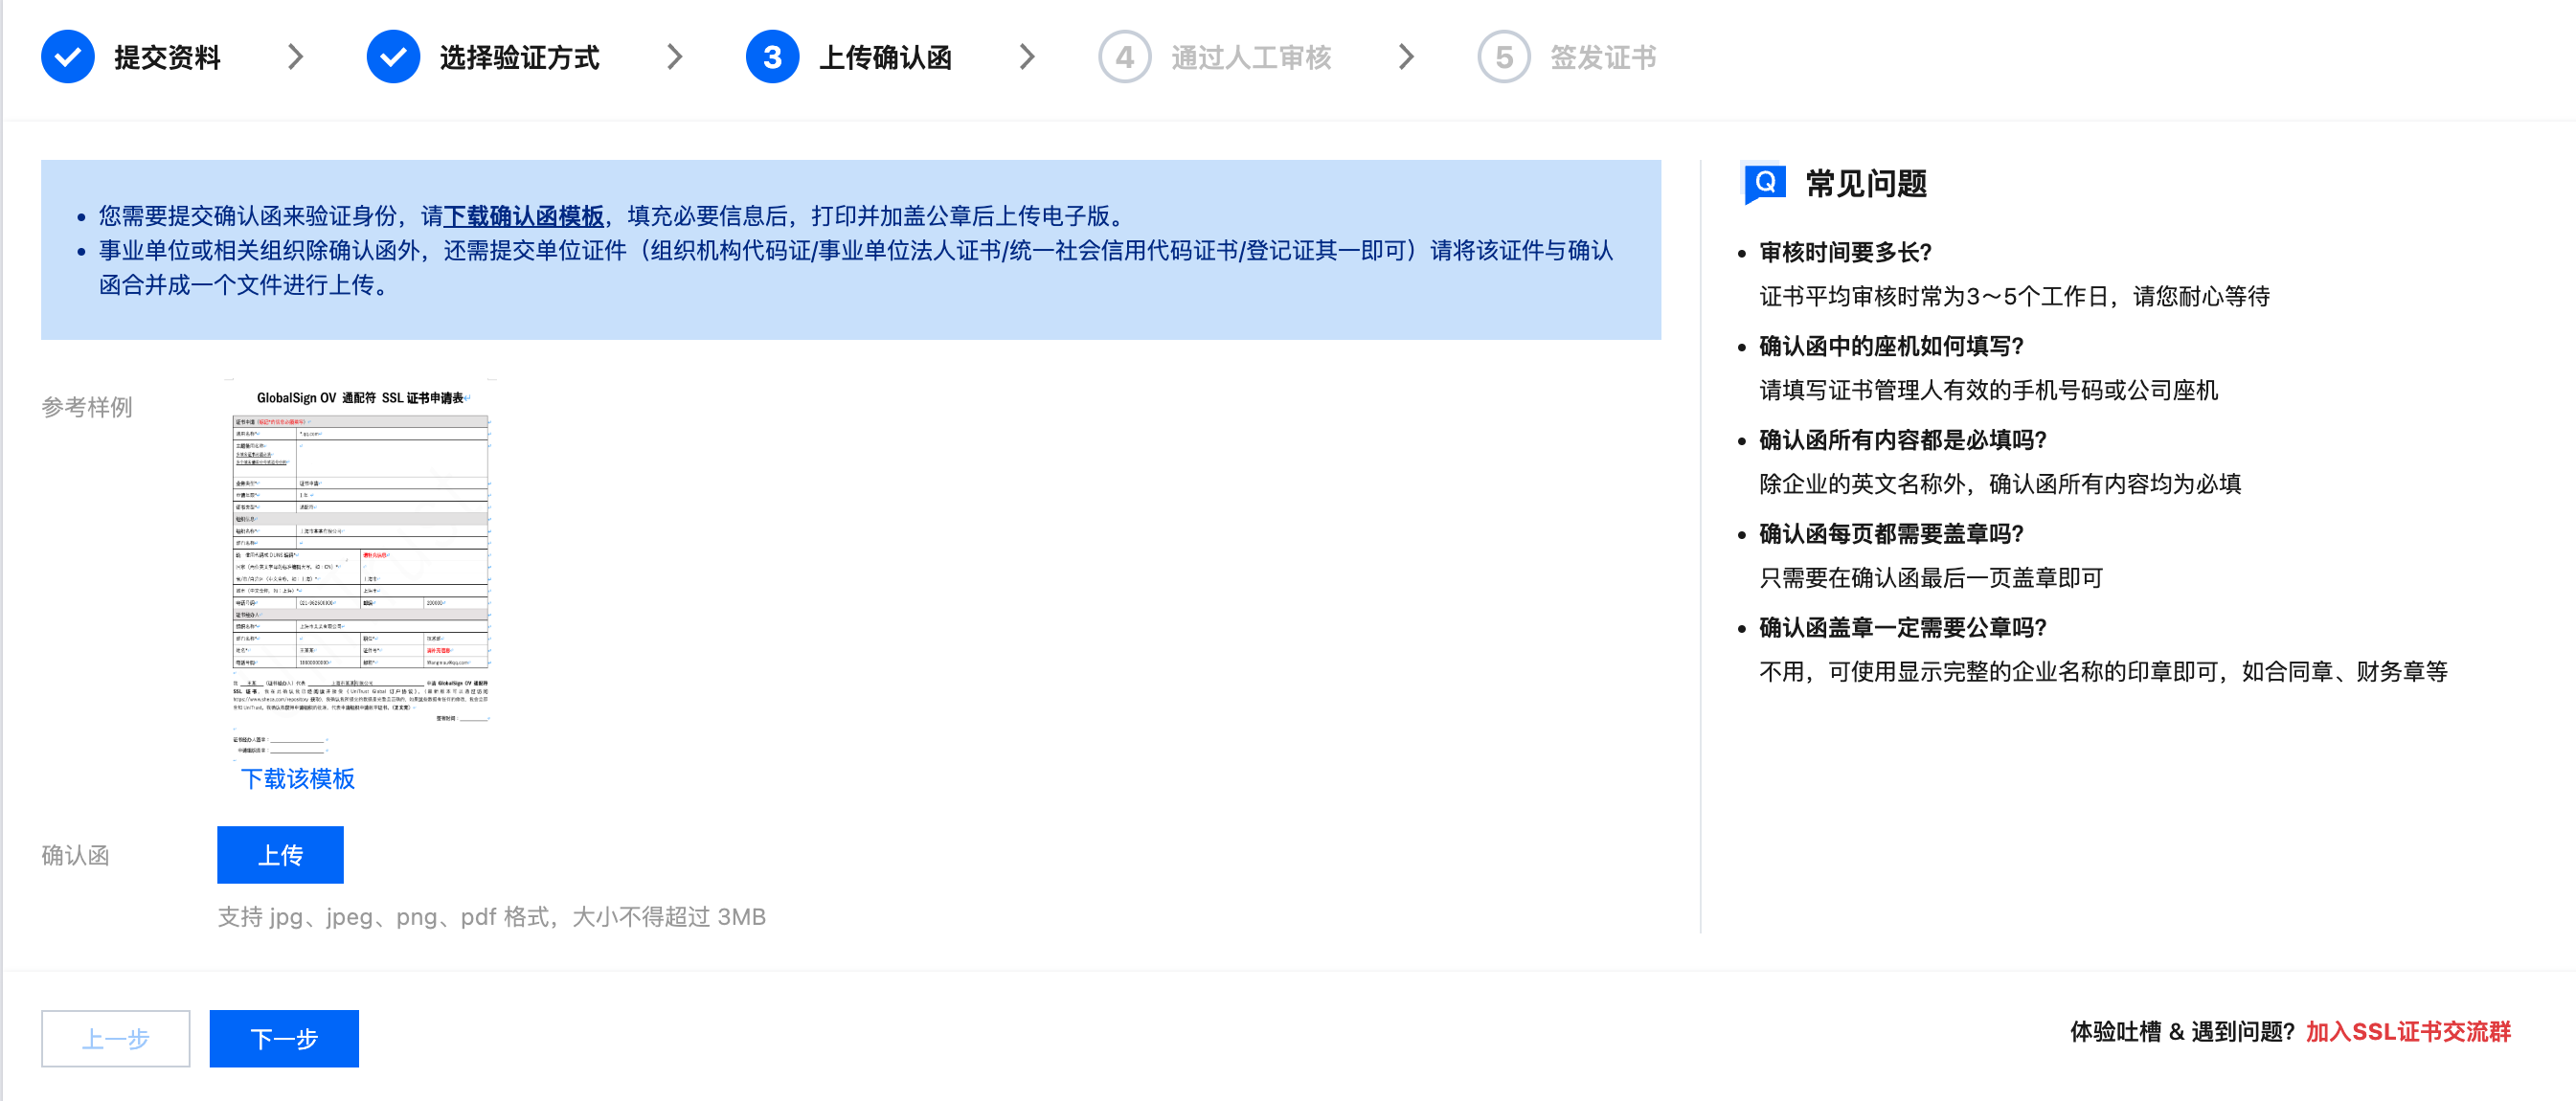
Step 2: Upload the Confirmation Letter

Note
If you use the organization and administrator information in My Profile that has been reviewed, the confirmation letter can be omitted.
For GlobalSign certificates, the confirmation letter still needs to be uploaded when you submit the information.
For GlobalSign EV certificates, the CA will email you the documents required for review in 2–3 business days after you submit the information, and you do not need to upload them to the console.
1. Click Download Confirmation Letter Template and fill in the necessary information.
2. Fill out, attach your organization's official seal on and scan the confirmation letter.
3. Click Upload to upload the confirmation letter, then click Next.
Note
The confirmation letter can be a JPG, PNG, or PDF file of up to 1.4 MB.
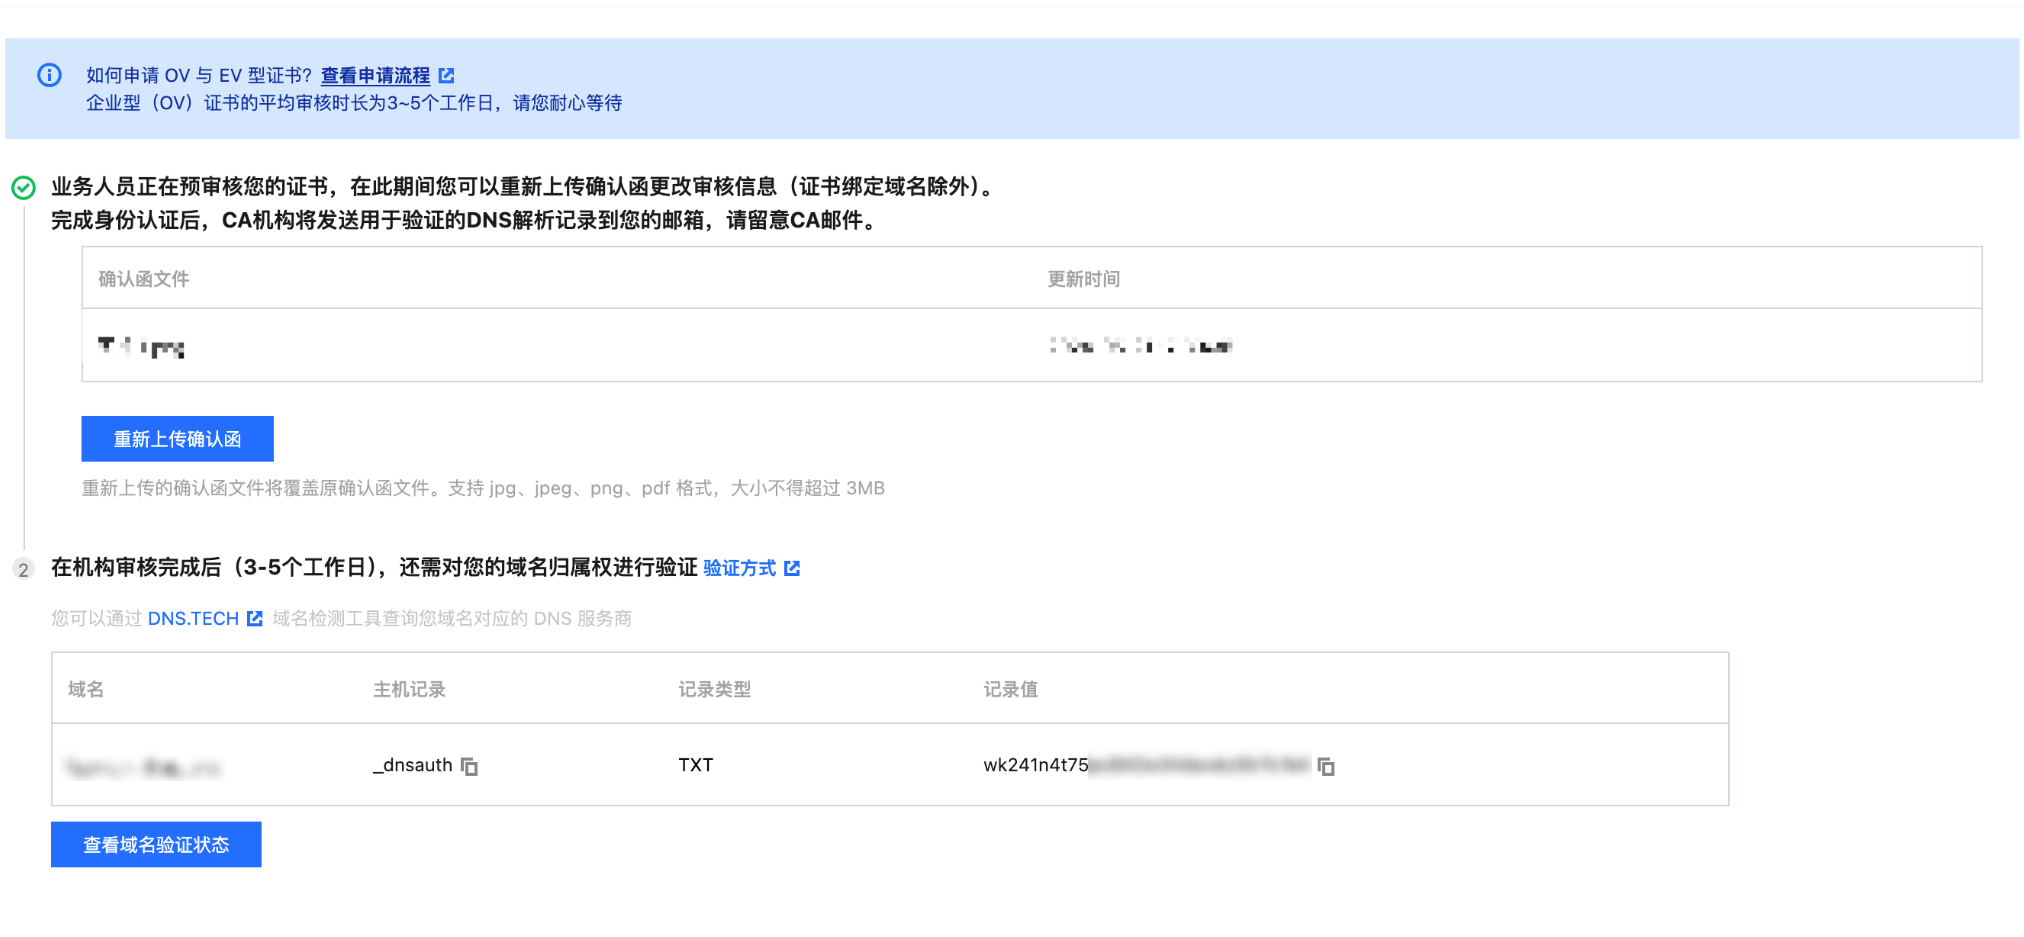
During the manual review of the confirmation letter, you can re-upload it to modify the information.
4. In the pop-up window indicating "Upload Confirmation Letter Successful", click Confirm and wait for the business personnel and the CA organization to confirm and review the submitted materials offline.

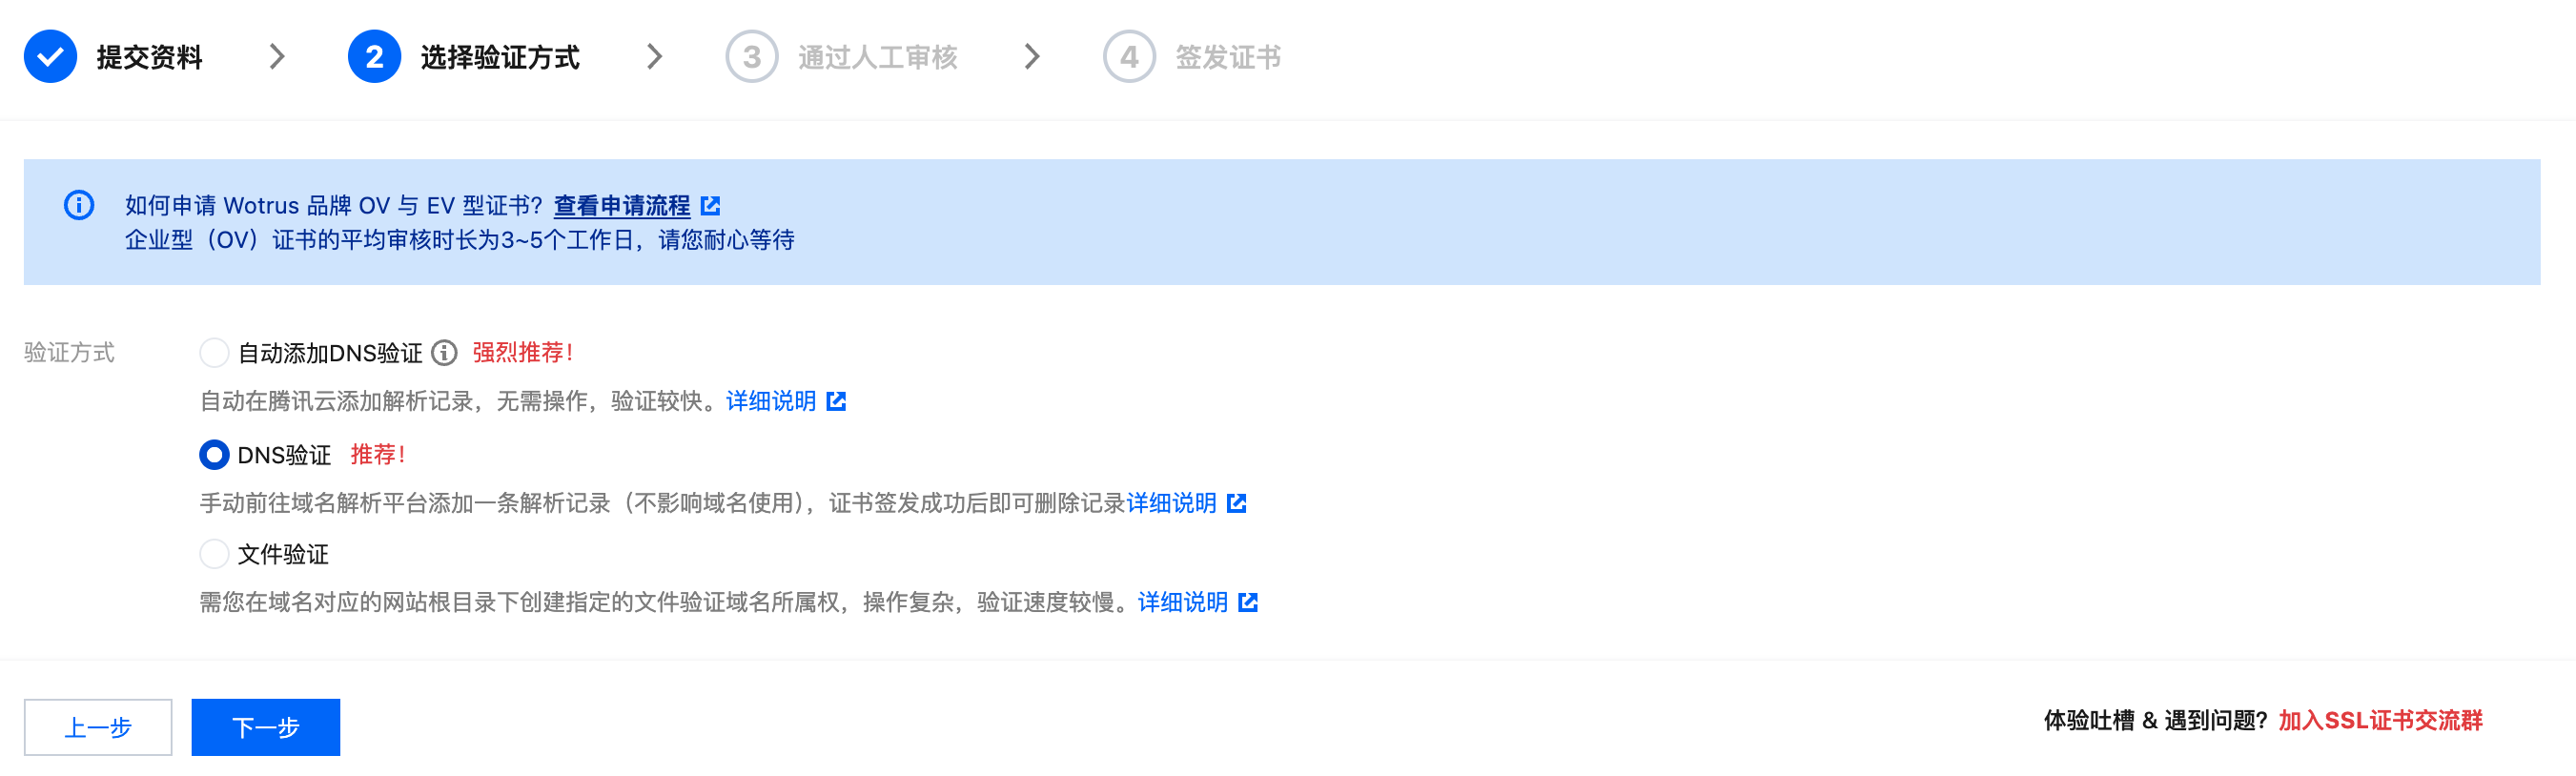
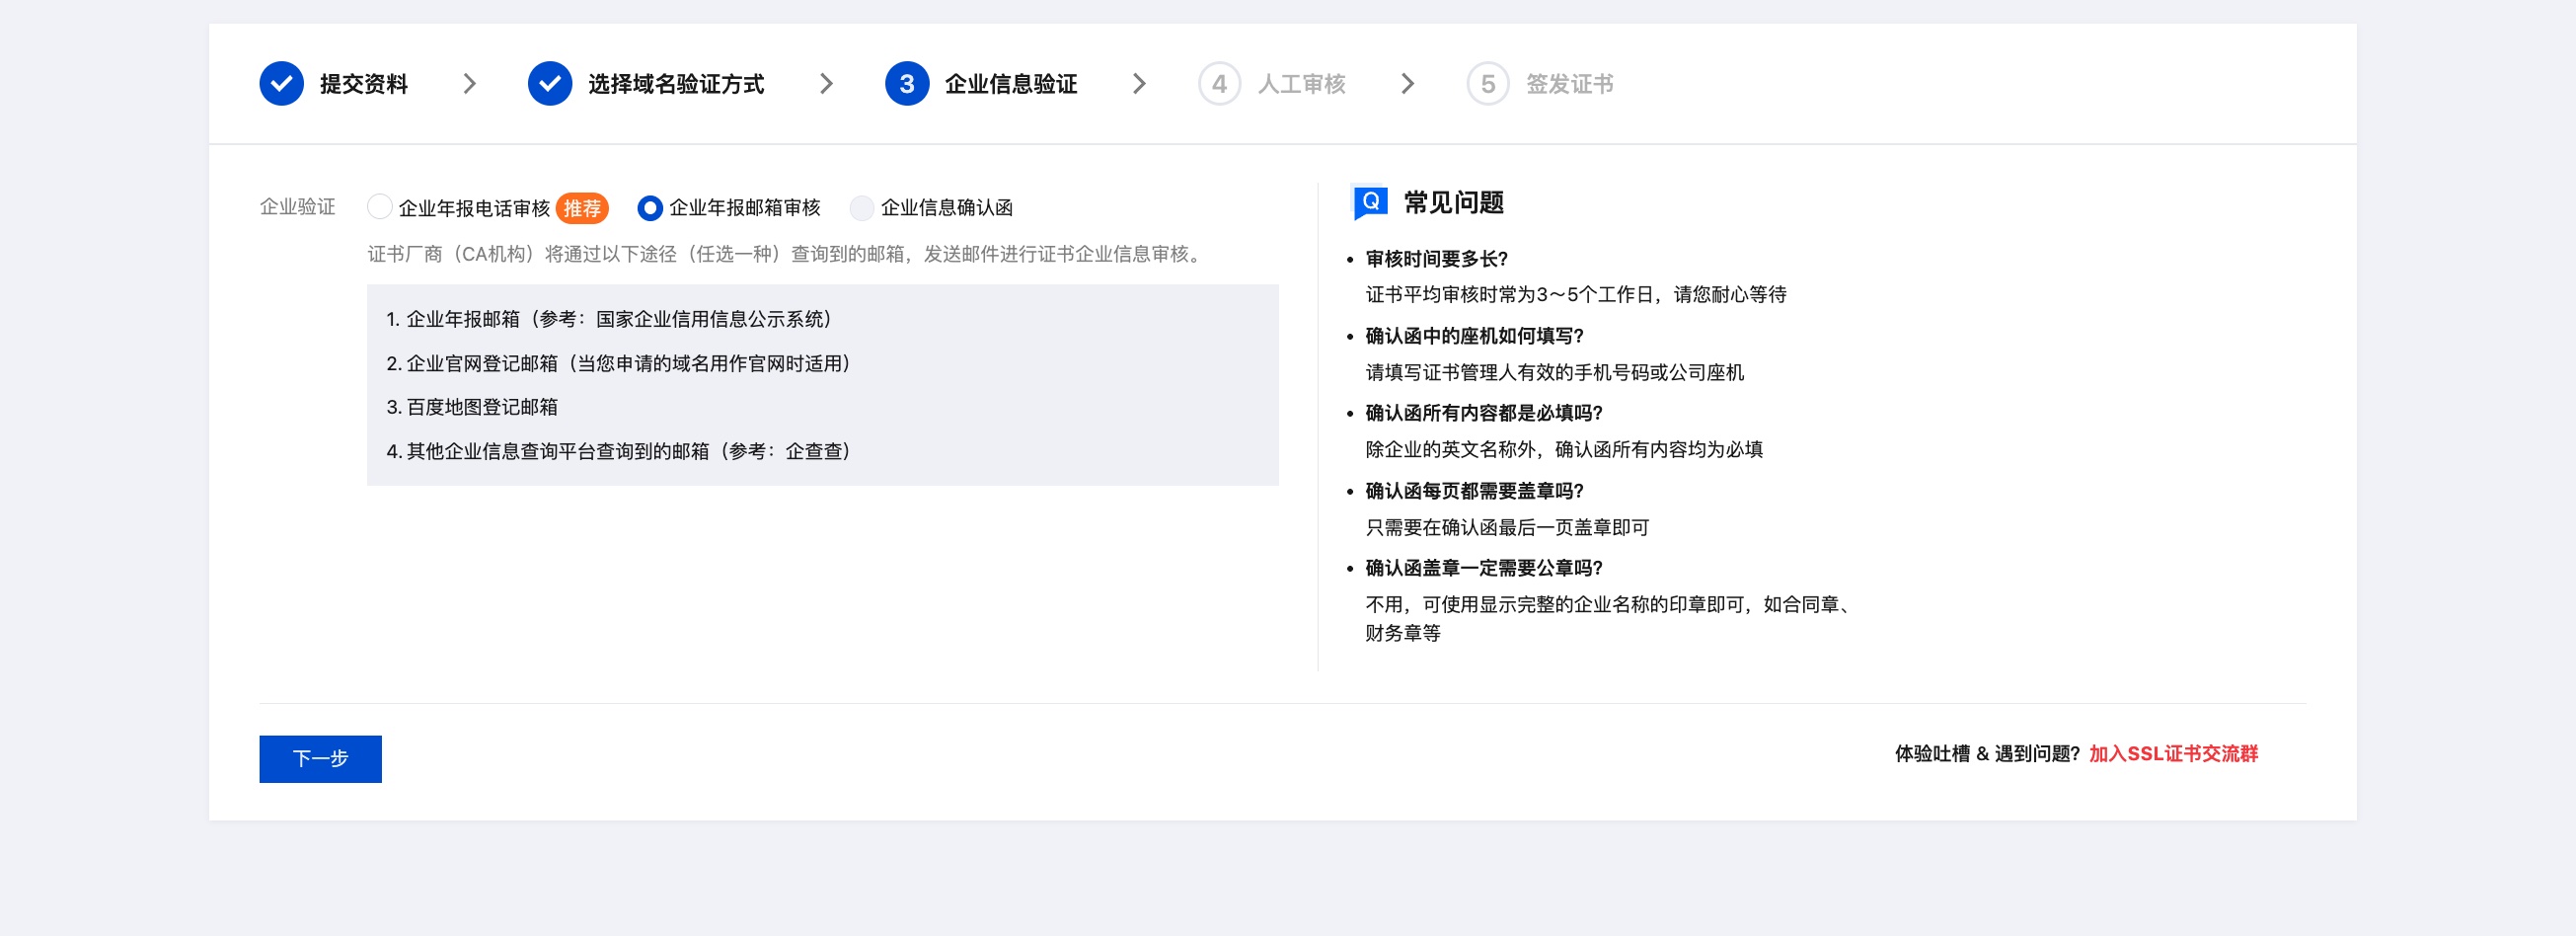
Step 3. Wait for CA to review

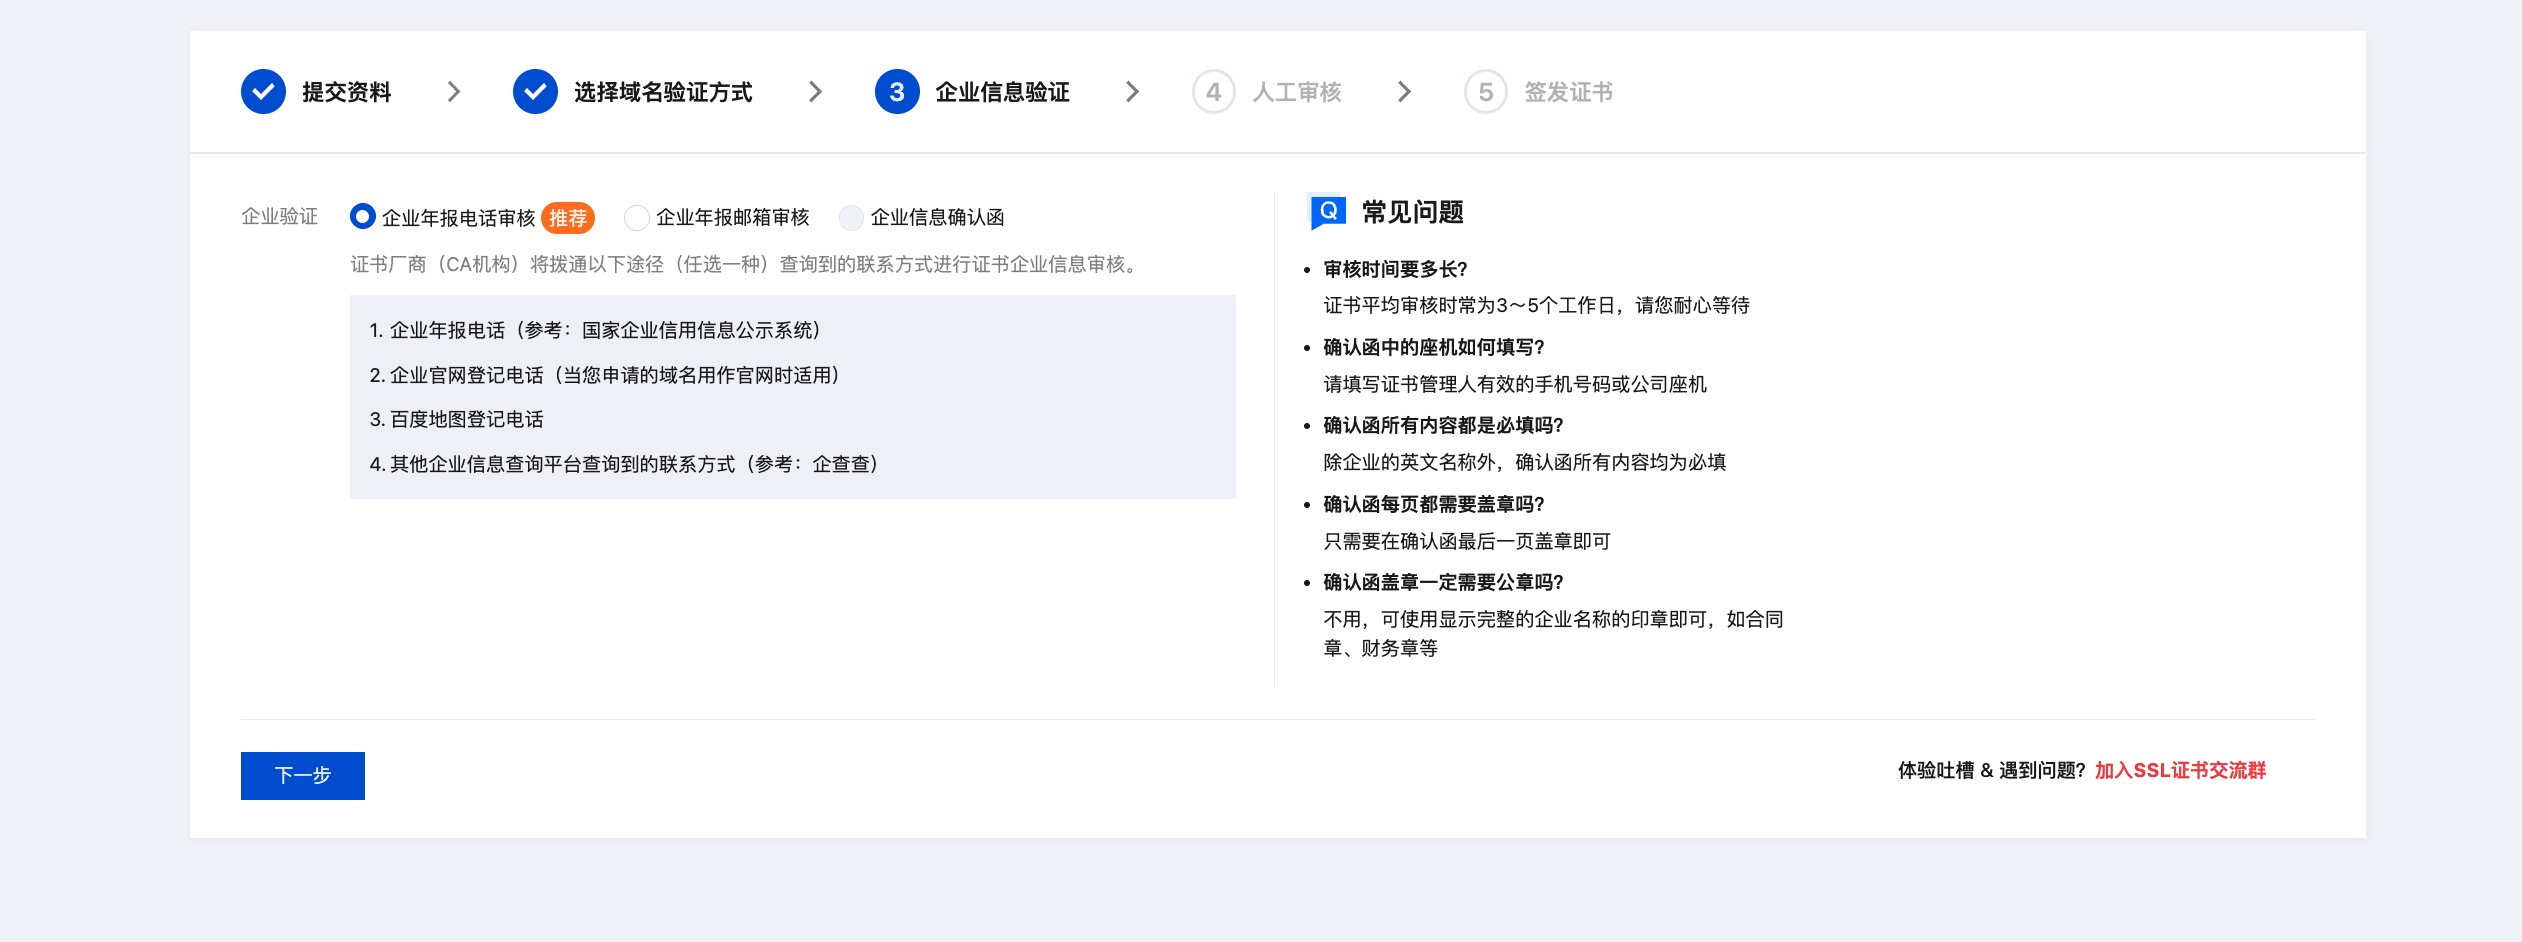
After you upload the confirmation letter, the CA will contact you via your email and phone calls for identity verification.
Note
It takes 3−5 business days to review OV certificates, and 5−7 business days to review EV certificates.

Step 4. Wait for CA to issue the certificate

After the review is completed, the CA will issue your certificate. You can download and install it.