相关资源
对象存储 COS 的 XML C++ SDK 源码下载地址:
GitHub 代码仓库:COS C++ SDK V5 GitHub
SDK 快速下载地址:COS C++ SDK V5 Latest
示例 Demo 地址:COS C++ SDK V5 示例
SDK 更新日志请参见 Changelog
说明:
环境配置与准备
依赖库:Poco、OpenSSL。
COS C++ SDK 支持以下操作系统与编译器环境:Linux、macOS、Windows,其它操作系统请自行修改 CMakeLists.txt 文件进行编译适配。
您需要获取一个腾讯云 API 密钥,该密钥是您使用 COS SDK 各项功能的前提。
安装 SDK
编译选项
在根目录下的 CMakeLists.txt 文件可以配置编译选项,有以下编译选项,可根据需要进行设置:
option(BUILD_UNITTEST "Build unittest" OFF) #配置编译单元测试option(BUILD_DEMO "Build demo" ON) #配置编译 demo 测试代码option(BUILD_SHARED_LIB "Build shared library" OFF) #配置编译动态库
说明:
编译 Linux 版本 SDK
1. 安装编译工具及依赖库:
yum install -y gcc gcc-c++ make cmake openssl# cmake 版本要求大于2.8
2. 编译及安装 Poco 库:
说明:
Poco 版本推荐使用 1.9.4,当 OpenSSL 版本大于 1.0 版本时,推荐使用 1.12.4 版本。
# 下载 Poco 源码并解压wget https://github.com/pocoproject/poco/archive/refs/tags/poco-${version}-release.zipunzip poco-${version}-release.zip # 解压# 进入 Poco 主目录并执行编译cd poco-poco-${version}-release./configure --omit=Data/MySQL,Data/ODBCmkdir cmake-buildcd cmake-buildcmake ..cmake --build . --config Release -j8sudo cmake --build . --target install
注意:
上述命令执行完成后会将 Poco 动态库安装到 /usr/local/lib 目录中,所有头文件会被复制到 /usr/local/include/Poco 目录中,在生产环境使用时,请将库文件和头文件拷贝至您的工程中,保证程序能找到对应的动态库和头文件。
3. 编译 SDK,下载 XML C++ SDK 源码 到您的开发环境,并执行以下命令:
# 推荐下载使用最新版本, 如 v5.5.19wget https://github.com/tencentyun/cos-cpp-sdk-v5/archive/refs/tags/v5.5.19.zipunzip v5.5.19.zipcd cos-cpp-sdk-v5-5.5.19# 如果要编译 Demo, 接下来两个命令必须执行cp -R /usr/local/include/Poco ./third_party/include/cp /usr/local/lib/libPoco* ./third_party/lib/linux/poco/# 编译 SDKmkdir buildcd buildcmake ..# cmake .. -DBUILD_DEMO=ON # Demo 默认编译,该命令可禁止 demo 编译make -j8
说明:
在执行 cmake 时,可通过添加选项 -DBUILD_DEMO=OFF 禁止 Demo 程序编译,可以通过 -DBUILD_SHARED_LIB=ON 指定编译 SDK 动态库。
只依赖 libPocoCrypto、libPocoFoundation、libPocoJSON、libPocoNet、libPocoNetSSL、libPocoUtil和 libPocoXML 库文件,也可修改上述复制命令,只复制上述库文件到指定目录。
4. 编辑并运行测试 demo:
说明:
如果不需要测试 demo,可跳过此步骤。demo 程序代码位于 SDK 目录下的 demo 目录,demo 代码文件名是自解释的,可根据需要修改对应的 demo 文件。
vim demo/cos_demo.cpp # 修改 demo 中的存储桶名以及测试代码cd build && make # 编译 demols bin/cos_demo # 生成的可执行文件在 bin 目录vim bin/config.json # 修改密钥和园区cd bin && ./cos_demo # 运行 demo
5. 使用 SDK:
编译生成的库文件在 build/lib 目录中,静态库名称为
libcossdk.a,动态库名称为 libcossdk-shared.so。使用时,请将库拷贝至您的工程中,同时将 include 目录拷贝至您的工程中的 include 路径下。编译 Windows 版本 SDK
1. 安装 visual studio 2017:
安装 visual studio 2017 开发环境。
2. 安装 CMake 工具:
3. 安装 OpenSSL:
4. 编译 Poco 库:
说明:
Poco 版本推荐使用 1.9.4,当 OpenSSL 版本大于 1.0 版本时,推荐使用 1.12.4 版本。
# 下载 Poco 源码并解压wget https://github.com/pocoproject/poco/archive/refs/tags/poco-${version}-release.zipunzip poco-${version}-release.zip # 解压# 进入 Poco 主目录并执行编译cd poco-poco-${version}-release./configure --omit=Data/MySQL,Data/ODBCmkdir cmake-buildcd cmake-buildcmake ..cmake --build . --config Release --target install -j8
注意:
编译成功后,会得到 Poco 的动态链接库和静态库,分别位于 cmake-build/bin 和 cmake-build/lib 中。执行
cmake .. 时可以通过指定 -DCMAKE_INSTALL_PREFIX=${自定义安装目录} 来设置安装目录,默认安装到 C:\\Program Files (x86)\\Poco 目录。5. 编译 SDK:
ii. 打开 Windows 的命令行,进入 C++ SDK 的源码目录下,执行以下命令:
mkdir buildcd build# cmake .. #生成 Win32 makefilecmake -G "Visual Studio 15 2017 Win64" .. -DBUILD_DEMO=OFF # 生成 Win64 makefile, 不编译 demo
说明:
cmake -G 参数与 Windows 实际环境和 cmake 版本相关,如使用其他版本 Visual Studio,请使用其他参数(不同 cmake 版本可以指定的构建工具参数可能不同,下方列出的是 cmake 3.23.0版本对应的命令。执行
cmake -h命令可在输出内容的 Generators 里看到支持的构建工具版本以及用法,如果未包含请升级 cmake)。参数列表:
Visual Studio 版本 | cmake 命令 |
Visual Studio 2022 | cmake -G "Visual Studio 17 2022" .. 可以通过-A 参数指定架构,如 cmake -G "Visual Studio 17 2022" -A x64 .. |
Visual Studio 2019 | cmake -G "Visual Studio 16 2019" .. (可以通过-A 参数指定架构参考2022示例) |
Visual Studio 2017 | cmake -G "Visual Studio 15 2017 Win64" .. |
Visual Studio 2015 | cmake -G "Visual Studio 14 2015 Win64" .. |
Visual Studio 2013 | cmake -G "Visual Studio 12 2013 Win64" .. |
Visual Studio 2012 | cmake -G "Visual Studio 11 2012 Win64" .. |
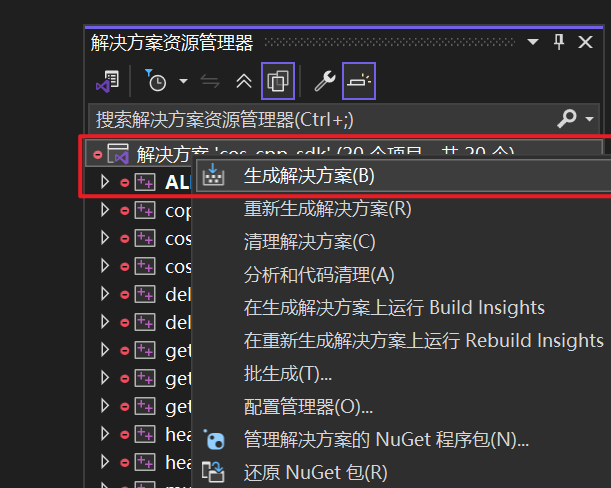
iii. 使用 visual studio 2017 打开解决方案文件,并执行编译。
6. 编辑并运行测试 demo:
说明:
如果不需要执行测试 demo,可跳过此步骤。
demo 程序代码位于 SDK 目录下的 demo 目录,demo 代码文件名是自解释的,可根据需要修改对应的 demo 文件,修改 demo 代码后执行编译:
# 复制 openssl 动态链接库和静态库到指定目录cp ${OpenSSL安装目录}/bin/libcrypto-*.dll ${SDK目录}/third_party/lib/${target}/openssl/cp ${OpenSSL安装目录}/bin/libssl-*.dll ${SDK目录}/third_party/lib/${target}/openssl/cp ${OpenSSL安装目录}/lib/VC/${target}/MD/openssl.lib ${SDK目录}/third_party/lib/${target}/openssl/cp ${OpenSSL安装目录}/lib/VC/${target}/MD/libssl.lib ${SDK目录}/third_party/lib/${target}/openssl/cp ${OpenSSL安装目录}/lib/VC/${target}/MD/libcrypto.lib ${SDK目录}/third_party/lib/${target}/# 复制 poco 的动态链接库和静态库到指定目录cp ${Poco安装目录}/bin/Poco*.dll ${SDK目录}/third_party/lib/${target}/poco/cp ${Poco安装目录}/lib/Poco*.lib ${SDK目录}/third_party/lib/${target}/poco/# 复制相关头文件到指定文件cp -R ${OpenSSL安装路径}/include/openssl ${SDK目录}/third_party/include/cp -R ${Poco安装目录}/include/Poco ${SDK目录}/third_party/include/# 开始编译cd build# cmake .. #生成 Win32 makefilecmake -G "Visual Studio 15 2017 Win64" .. -DBUILD_DEMO=ON # 默认编译 demo,—DBUILD_DEMO=ON 可以不指定
说明:
上述命令中的变量
${target} 在 64 位系统中是 “x64”,在 32 位系统中是 “Win32”。只依赖 libPocoCrypto、libPocoFoundation、libPocoJSON、libPocoNet、libPocoNetSSL、libPocoUtil 和 libPocoXML 库文件,也可修改上述复制命令,只复制上述库文件到指定目录。
7. 使用 SDK:
编译生成的库文件在 build/Release 目录中,静态库名称为
cossdk.lib。使用时,请将库拷贝至您的工程中,将 include 目录拷贝至您的工程中的 include 路径下,同时参考第 6 步将相关依赖的库文件和头文件复制到您的工程的对应目录中,使得 SDK 能找到这些文件。编译 macOS 版本 SDK
1. 安装编译工具及依赖库:
brew install gcc make cmake openssl
2. 编译 Poco 库:
说明:
Poco 版本推荐使用 1.9.4,当 OpenSSL 版本大于 1.0 版本时,推荐使用 1.12.4 版本。
# 下载 Poco 源码并解压wget https://github.com/pocoproject/poco/archive/refs/tags/poco-${version}-release.zipunzip poco-${version}-release.zip # 解压# 进入 Poco 主目录并执行编译cd poco-poco-${version}-release./configure --omit=Data/MySQL,Data/ODBCmkdir cmake-buildcd cmake-buildcmake ..cmake --build . --config Release -j8sudo cmake --build . --target install
注意:
上述命令执行完成后会将 Poco 动态库安装到 /usr/local/lib 目录中,所有头文件会被复制到 /usr/local/include/Poco 目录中,在生产环境使用时,请将库文件和头文件拷贝至您的工程中,保证程序能找到对应的动态库和头文件。
3. 编译 SDK:
cd ${cos-cpp-sdk}mkdir buildcd buildcmake .. -DBUILD_DEMO=OFF # 不编译 demomake -j8
4. 编辑并运行 demo:
说明:
如果不需要测试 demo,可跳过此步骤。
demo 程序代码位于 SDK 目录下的 demo 目录,demo 文件名是自解释的,可根据需要修改对应的 demo 文件,修改 demo 代码后执行编译:
# 复制 Poco 的动态链接库和静态库到指定目录cp /usr/local/lib/libPoco* ${SDK目录}/third_party/lib/macOS/poco/# 复制相关头文件到指定文件cp -R /usr/local/include/Poco ${SDK目录}/third_party/include/# 开始编译cd buildcmake .. -DBUILD_DEMO=ON # 默认编译 demo,—DBUILD_DEMO=ON 可以不指定make -j8
说明:
只依赖 libPocoCrypto、libPocoFoundation、libPocoJSON、libPocoNet、libPocoNetSSL、libPocoUtil 和 libPocoXML 库文件,也可修改上述复制命令,只复制上述库文件到指定目录。
5. 使用 SDK:
编译生成的库文件在 build/lib 目录中,静态库名称为
libcossdk.a,动态库名称为 libcossdk-shared.dylib。使用时,请将库拷贝至您的工程中,将 include 目录拷贝至您的工程中的 include 路径下,同时参考第 4 步将相关依赖的库文件和头文件复制到您的工程的对应目录中,使得 SDK 能找到这些文件。初始化 COS 服务
下面为您介绍如何使用 COS C++ SDK 完成一个基础操作,如初始化客户端、创建存储桶、查询存储桶列表、上传对象、查询对象列表、下载对象和删除对象。
注意:
关于文章中出现的 SecretId、SecretKey、Bucket 等名称的含义和获取方式请参见 COS 术语信息。
建议用户使用子账号密钥 + 环境变量的方式调用 SDK,提高 SDK 使用的安全性。为子账号授权时,请遵循 最小权限指引原则,防止泄露目标存储桶或对象之外的资源。
如果您一定要使用永久密钥,建议遵循 最小权限指引原则 对永久密钥的权限范围进行限制。
设置 API 访问密钥
如果您需要使用临时密钥访问 COS,请参见如下代码:
#include "cos_api.h"#include "cos_sys_config.h"#include "cos_defines.h"int main(int argc, char *argv[]) {//通过参数方式或配置文件方式均可初始化,您可以根据业务选择不同方式qcloud_cos::CosConfig config(appid, "secret_id", "secret_key", "region");// 临时密钥的 secret_id 和 secret_key,临时密钥生成和使用指引参见 https://cloud.tencent.com/document/product/436/14048config.SetTmpToken("xxx");qcloud_cos::CosAPI cos(config);}
如果您需要使用永久密钥访问 COS,请参见如下代码:
#include "cos_api.h"#include "cos_sys_config.h"#include "cos_defines.h"int main(int argc, char *argv[]) {qcloud_cos::CosConfig config("./config.json"); // 用配置文件方式初始化// 或者直接用构造函数参数初始化//qcloud_cos::CosConfig config(appid, "secret_id", "secret_key", "region"); // 永久密钥qcloud_cos::CosAPI cos(config);}
指定配置文件
在创建 CosConfig 时,也可以通过配置文件来对 SDK 进行配置,请参见如下代码:
#include "cos_api.h"#include "cos_sys_config.h"#include "cos_defines.h"int main(int argc, char *argv[]) {qcloud_cos::CosConfig config("./config.json"); // 用配置文件方式初始化qcloud_cos::CosAPI cos(config);... ...return 0;}
配置文件可参考 SDK 的 demo 目录下的 config.json 文件,配置文件各字段介绍如下:
配置字段 | 描述 | 是否必选 |
SecretId | 是,通过代码或在配置文件中指定 | |
SecretKey | 用户的 SecretKey,建议使用子账号密钥,授权遵循最小权限指引原则,降低使用风险 | 是,通过代码或在配置文件中指定 |
Region | 是,通过代码或在配置文件中指定 | |
SignExpiredTime | 签名超时时间, 单位秒 | 否,默认值 3600 |
ConnectTimeoutInms | connect 超时时间, 单位毫秒 | 否,默认值 5000 |
ReceiveTimeoutInms | recv 超时时间, 单位毫秒 | 否,默认值 5000 |
UploadPartSize | 上传文件分块大小,取值范围 1M~5G | 否,默认值 10M |
UploadCopyPartSize | 上传复制文件分块大小,取值范围 5M~5G | 否,默认值 20M |
UploadThreadPoolSize | 单文件分块上传线程池大小,取值范围 1~100 | 否,默认值 5 |
DownloadSliceSize | 下载文件分块大小,取值范围 4K~20M | 否,默认值 4M |
DownloadThreadPoolSize | 单文件下载线程池大小,取值范围 1~10 | 否,默认值 10 |
AsynThreadPoolSize | 异步上传下载线程池大小,最小值为 1,不设上限 | 否,默认值 2 |
LogoutType | 日志输出类型,0:不输出,1:输出到屏幕,2:输出到 syslog | 否,默认值 1 |
LogLevel | 日志输出级别:1: ERR, 2: WARN, 3:INFO, 4:DBG | 否,默认值 4 |
IsDomainSameToHost | 是否使用专有的 Host | 否,默认值 false |
DestDomain | 特定 Host | 否,默认值为空 |
IsUseIntranet | 是否使用特定 IP 和端口号 | 否,默认值 false |
IntranetAddr | 特定 IP 和端口号,例如“127.0.0.1:80” | 否,默认值为空 |
MaxRetryTimes | 单个请求失败后最大重试次数,不需重试,设置为 0 即可 | 否,默认值 3 |
RetryIntervalMs | 两次重试间隔时间,单位毫秒 | 否,默认值 100ms |
将 SDK 内部日志打印到自定义日志文件(可选)
如果您需要将 SDK 内部日志打印到自定义日志文件(特别是 Windows 系统),则参考如下代码(建议将日志内容打印到指定文件,在遇到异常时方便定位):
#include "cos_api.h"#include "cos_sys_config.h"#include "cos_defines.h"void TestLogCallback(const std::string& log) {std::ofstream ofs;ofs.open("test.log", std::ios_base::app);ofs << log;ofs.close();}int main(int argc, char** argv) {qcloud_cos::CosConfig config("./config.json");config.SetLogCallback(&TestLogCallback);qcloud_cos::CosAPI cos(config);}
访问 COS 服务
#include "cos_api.h"#include "cos_sys_config.h"#include "cos_defines.h"int main(int argc, char *argv[]) {// 1. 指定配置文件路径,初始化 CosConfigqcloud_cos::CosConfig config("./config.json");qcloud_cos::CosAPI cos(config);// 2. 构造创建存储桶的请求std::string bucket_name = "examplebucket-1250000000"; // 替换为用户的存储桶名,由 bucketname-appid 组成,appid 必须填入,可以在 COS 控制台查看存储桶名称。 https://console.cloud.tencent.com/cos5/bucketqcloud_cos::PutBucketReq req(bucket_name);qcloud_cos::PutBucketResp resp;// 3. 调用创建存储桶接口qcloud_cos::CosResult result = cos.PutBucket(req, &resp);// 4. 处理调用结果if (result.IsSucc()) {// 创建成功} else {// 创建存储桶失败,可以调用 CosResult 的成员函数输出错误信息,例如 requestID 等std::cout << "HttpStatus=" << result.GetHttpStatus() << std::endl;std::cout << "ErrorCode=" << result.GetErrorCode() << std::endl;std::cout << "ErrorMsg=" << result.GetErrorMsg() << std::endl;std::cout << "ResourceAddr=" << result.GetResourceAddr() << std::endl;std::cout << "XCosRequestId=" << result.GetXCosRequestId() << std::endl;std::cout << "XCosTraceId=" << result.GetXCosTraceId() << std::endl;}}
#include "cos_api.h"#include "cos_sys_config.h"#include "cos_defines.h"int main(int argc, char *argv[]) {// 1. 指定配置文件路径,初始化 CosConfigqcloud_cos::CosConfig config("./config.json");qcloud_cos::CosAPI cos(config);// 2. 构造查询存储桶列表的请求qcloud_cos::GetServiceReq req;qcloud_cos::GetServiceResp resp;qcloud_cos::CosResult result = cos.GetService(req, &resp);// 3. 获取响应信息const qcloud_cos::Owner& owner = resp.GetOwner();const std::vector<qcloud_cos::Bucket>& buckets = resp.GetBuckets();std::cout << "owner.m_id=" << owner.m_id << ", owner.display_name=" << owner.m_display_name << std::endl;for (std::vector<qcloud_cos::Bucket>::const_iterator itr = buckets.begin(); itr != buckets.end(); ++itr) {const qcloud_cos::Bucket& bucket = *itr;std::cout << "Bucket name=" << bucket.m_name << ", location="<< bucket.m_location << ", create_date=" << bucket.m_create_date << std::endl;}// 4. 处理调用结果if (result.IsSucc()) {// 查询存储桶列表成功} else {// 查询存储桶列表失败,可以调用 CosResult 的成员函数输出错误信息,例如 requestID 等std::cout << "HttpStatus=" << result.GetHttpStatus() << std::endl;std::cout << "ErrorCode=" << result.GetErrorCode() << std::endl;std::cout << "ErrorMsg=" << result.GetErrorMsg() << std::endl;std::cout << "ResourceAddr=" << result.GetResourceAddr() << std::endl;std::cout << "XCosRequestId=" << result.GetXCosRequestId() << std::endl;std::cout << "XCosTraceId=" << result.GetXCosTraceId() << std::endl;}}
#include "cos_api.h"#include "cos_sys_config.h"#include "cos_defines.h"int main(int argc, char *argv[]) {// 1. 指定配置文件路径,初始化 CosConfigqcloud_cos::CosConfig config("./config.json");qcloud_cos::CosAPI cos(config);// 2. 构造上传文件的请求std::string bucket_name = "examplebucket-1250000000"; // 替换为用户的存储桶名,由 bucketname-appid 组成,appid 必须填入,可以在 COS 控制台查看存储桶名称。 https://console.cloud.tencent.com/cos5/bucketstd::string object_name = "exampleobject"; //exampleobject 即为对象键(Key),是对象在存储桶中的唯一标识。例如,在对象的访问域名 examplebucket-1250000000.cos.ap-guangzhou.myqcloud.com/doc/pic.jpg 中,对象键为 doc/pic.jpg,替换为用户指定的对象名。qcloud_cos::PutObjectByFileReq req(bucket_name, object_name, "/path/to/local/file"); // 替换为用户指定的文件路径//req.SetXCosStorageClass("STANDARD_IA"); // 默认为 STANDARD,可以调用 Set 方法设置存储类型qcloud_cos::PutObjectByFileResp resp;// 3. 调用上传文件接口qcloud_cos::CosResult result = cos.PutObject(req, &resp);// 4. 处理调用结果if (result.IsSucc()) {// 上传文件成功} else {// 上传文件失败,可以调用 CosResult 的成员函数输出错误信息,例如 requestID 等std::cout << "HttpStatus=" << result.GetHttpStatus() << std::endl;std::cout << "ErrorCode=" << result.GetErrorCode() << std::endl;std::cout << "ErrorMsg=" << result.GetErrorMsg() << std::endl;std::cout << "ResourceAddr=" << result.GetResourceAddr() << std::endl;std::cout << "XCosRequestId=" << result.GetXCosRequestId() << std::endl;std::cout << "XCosTraceId=" << result.GetXCosTraceId() << std::endl;}}
#include "cos_api.h"#include "cos_sys_config.h"#include "cos_defines.h"int main(int argc, char *argv[]) {// 1. 指定配置文件路径,初始化 CosConfigqcloud_cos::CosConfig config("./config.json");qcloud_cos::CosAPI cos(config);// 2. 构造查询对象列表的请求std::string bucket_name = "examplebucket-1250000000"; // 替换为用户的存储桶名,由 bucketname-appid 组成,appid 必须填入,可以在 COS 控制台查看存储桶名称。 https://console.cloud.tencent.com/cos5/bucketqcloud_cos::GetBucketReq req(bucket_name);qcloud_cos::GetBucketResp resp;qcloud_cos::CosResult result = cos.GetBucket(req, &resp);std::vector<qcloud_cos::Content> contents = resp.GetContents();for (std::vector<qcloud_cos::Content>::const_iterator itr = contents.begin(); itr != contents.end(); ++itr) {const qcloud_cos::Content& content = *itr;std::cout << "key name=" << content.m_key << ", lastmodified ="<< content.m_last_modified << ", size=" << content.m_size << std::endl;}// 3. 处理调用结果if (result.IsSucc()) {// 查询对象列表成功} else {// 查询对象列表失败,可以调用 CosResult 的成员函数输出错误信息,例如 requestID 等std::cout << "HttpStatus=" << result.GetHttpStatus() << std::endl;std::cout << "ErrorCode=" << result.GetErrorCode() << std::endl;std::cout << "ErrorMsg=" << result.GetErrorMsg() << std::endl;std::cout << "ResourceAddr=" << result.GetResourceAddr() << std::endl;std::cout << "XCosRequestId=" << result.GetXCosRequestId() << std::endl;std::cout << "XCosTraceId=" << result.GetXCosTraceId() << std::endl;}}
#include "cos_api.h"#include "cos_sys_config.h"#include "cos_defines.h"int main(int argc, char *argv[]) {// 1. 指定配置文件路径,初始化 CosConfigqcloud_cos::CosConfig config("./config.json");qcloud_cos::CosAPI cos(config);// 2. 构造下载对象的请求std::string bucket_name = "examplebucket-1250000000"; // 替换为用户的存储桶名,由 bucketname-appid 组成,appid 必须填入,可以在 COS 控制台查看存储桶名称。 https://console.cloud.tencent.com/cos5/bucketstd::string object_name = "exampleobject"; // exampleobject 即为对象键(Key),是对象在存储桶中的唯一标识。例如,在对象的访问域名 examplebucket-1250000000.cos.ap-guangzhou.myqcloud.com/doc/pic.jpg 中,对象键为 doc/pic.jpg,替换为用户指定的对象名。std::string local_path = "/tmp/exampleobject";// request 需要提供 appid、bucketname、object,以及本地的路径(包含文件名)qcloud_cos::GetObjectByFileReq req(bucket_name, object_name, local_path);qcloud_cos::GetObjectByFileResp resp;// 3. 调用下载对象接口qcloud_cos::CosResult result = cos.GetObject(req, &resp);// 4. 处理调用结果if (result.IsSucc()) {// 下载文件成功} else {// 下载文件失败,可以调用 CosResult 的成员函数输出错误信息,例如 requestID 等std::cout << "HttpStatus=" << result.GetHttpStatus() << std::endl;std::cout << "ErrorCode=" << result.GetErrorCode() << std::endl;std::cout << "ErrorMsg=" << result.GetErrorMsg() << std::endl;std::cout << "ResourceAddr=" << result.GetResourceAddr() << std::endl;std::cout << "XCosRequestId=" << result.GetXCosRequestId() << std::endl;std::cout << "XCosTraceId=" << result.GetXCosTraceId() << std::endl;}}
注意:
对象被删除后,其对应的数据将无法再被访问。
#include "cos_api.h"#include "cos_sys_config.h"#include "cos_defines.h"int main(int argc, char *argv[]) {// 1. 指定配置文件路径,初始化 CosConfigqcloud_cos::CosConfig config("./config.json");qcloud_cos::CosAPI cos(config);// 2. 构造删除对象的请求std::string bucket_name = "examplebucket-1250000000"; // 替换为用户的存储桶名,由 bucketname-appid 组成,appid 必须填入,可以在 COS 控制台查看存储桶名称。 https://console.cloud.tencent.com/cos5/bucketstd::string object_name = "exampleobject"; // exampleobject 即为对象键(Key),是对象在存储桶中的唯一标识。例如,在对象的访问域名 examplebucket-1250000000.cos.ap-guangzhou.myqcloud.com/doc/pic.jpg 中,对象键为 doc/pic.jpg,替换为用户指定的对象名。。// 3. 调用删除对象接口qcloud_cos::DeleteObjectReq req(bucket_name, object_name);qcloud_cos::DeleteObjectResp resp;qcloud_cos::CosResult result = cos.DeleteObject(req, &resp);// 4. 处理调用结果if (result.IsSucc()) {// 删除对象成功} else {// 删除对象失败,可以调用 CosResult 的成员函数输出错误信息,例如 requestID 等std::cout << "HttpStatus=" << result.GetHttpStatus() << std::endl;std::cout << "ErrorCode=" << result.GetErrorCode() << std::endl;std::cout << "ErrorMsg=" << result.GetErrorMsg() << std::endl;std::cout << "ResourceAddr=" << result.GetResourceAddr() << std::endl;std::cout << "XCosRequestId=" << result.GetXCosRequestId() << std::endl;std::cout << "XCosTraceId=" << result.GetXCosTraceId() << std::endl;}}
#include <iostream>#include <string>#include "cos_api.h"#include "cos_sys_config.h"using namespace qcloud_cos;int main() {// 初始化 cos 客户端const std::string region = "ap-guangzhou";const uint64_t appid = 12500000000;const std::string tmp_secret_id = "AKIDXXXXXXXX";const std::string tmp_secret_key = "1A2Z3YYYYYYYYYY";const std::string tmp_token = "token";CosSysConfig::SetLogLevel((LOG_LEVEL)COS_LOG_ERR);qcloud_cos::CosConfig config(appid, tmp_secret_id, tmp_secret_key, region);config.SetTmpToken(tmp_token); // 使用临时密钥初始化 CosAPI 对象qcloud_cos::CosAPI cos(config);// 构造生成预签名的请求const std::string bucket_name = "examplebucket-1250000000";const std::string object_name = "test.txt";qcloud_cos::GeneratePresignedUrlReq req(bucket_name, object_name, qcloud_cos::HTTP_GET); // 可设置请求方法// 下方代码块可选择是否设置。默认签名生效的开始时间是本地当前时间,默认有效期 60s{req.SetHttps(); // 是否为 httpsuint64_t start_time_in_s = time(NULL);req.SetStartTimeInSec(start_time_in_s); // 设置签名生效的开始时间req.SetExpiredTimeInSec(60); // 设置签名的有效期}// 生成预签名并打印std::string presigned_url = cos.GeneratePresignedUrl(req);std::cout << "Presigend Url=[" << presigned_url << "]" << std::endl;return 0;}成预签名


