操作场景
本文以在 VPC 网络环境下调用 C# SDK 为例介绍接入消息队列 CKafka 版并收发消息的操作过程,帮助您更好地理解消息收发的完整过程。
前提条件
安装.NET环境。以 CentOS 为例,使用如下命令安装 .NET 环境
sudo yum install -y dotnet-sdk-6.0
操作步骤
步骤1:准备配置
1. 登录 Linux 服务器
1.1 创建项目目录,生产者创建如下目录
mkdir KafkaProducercd KafkaProducerdotnet new console -n KafkaProducercd KafkaProducer
1.2 创建项目目录,消费者创建如下目录
mkdir KafkaConsumercd KafkaConsumerdotnet new console -n KafkaConsumercd KafkaConsumer
1.3 安装 Confluent.Kafka NuGet 包
dotnet add package Confluent.Kafka
参数 | 说明 |
BootstrapServers | 接入网络,在控制台的实例基本信息页面内接入方式模块的网络列复制。 |
步骤2:发送消息
1. 新建并编写生产消息文件 KafkaProducer.cs。
using Confluent.Kafka;using System;using System.Threading.Tasks;class KafkaProducer{static async Task Main(string[] args){var config = new ProducerConfig{BootstrapServers = "localhost:9092",//接入点使用控制台提供的接入点Acks = Acks.Leader, // acks 配置:可选值如下// Acks.All (等同于 acks=all):所有 ISR 副本确认(最强可靠性)// Acks.Leader (等同于 acks=1):仅 leader 确认(默认)// Acks.None (等同于 acks=0):不等待任何确认(最高吞吐,最低可靠性)EnableIdempotence = false, // 关闭幂等性MaxInFlight = 5 // 单个连接最大发送请求数,建议5};using var producer = new ProducerBuilder<Null, string>(config).Build();for (int i = 1; i <= 10; i++){var msg = $"this is ckafka msg value";try{var result = await producer.ProduceAsync("test-topic",new Message<Null, string> { Value = msg });Console.WriteLine($"Sent: {msg} | Offset: {result.Offset}");}catch (ProduceException<Null, string> e){Console.WriteLine($"Failed: {e.Error.Reason}");}}}}
2. 编译并运行KafkaProducer.cs 发送消息。
dotnet run
3. 运行结果。
Sent: this is ckafka msg value | Offset: 0Sent: this is ckafka msg value | Offset: 1Sent: this is ckafka msg value | Offset: 2Sent: this is ckafka msg value | Offset: 3Sent: this is ckafka msg value | Offset: 4Sent: this is ckafka msg value | Offset: 5Sent: this is ckafka msg value | Offset: 6Sent: this is ckafka msg value | Offset: 7Sent: this is ckafka msg value | Offset: 8Sent: this is ckafka msg value | Offset: 9
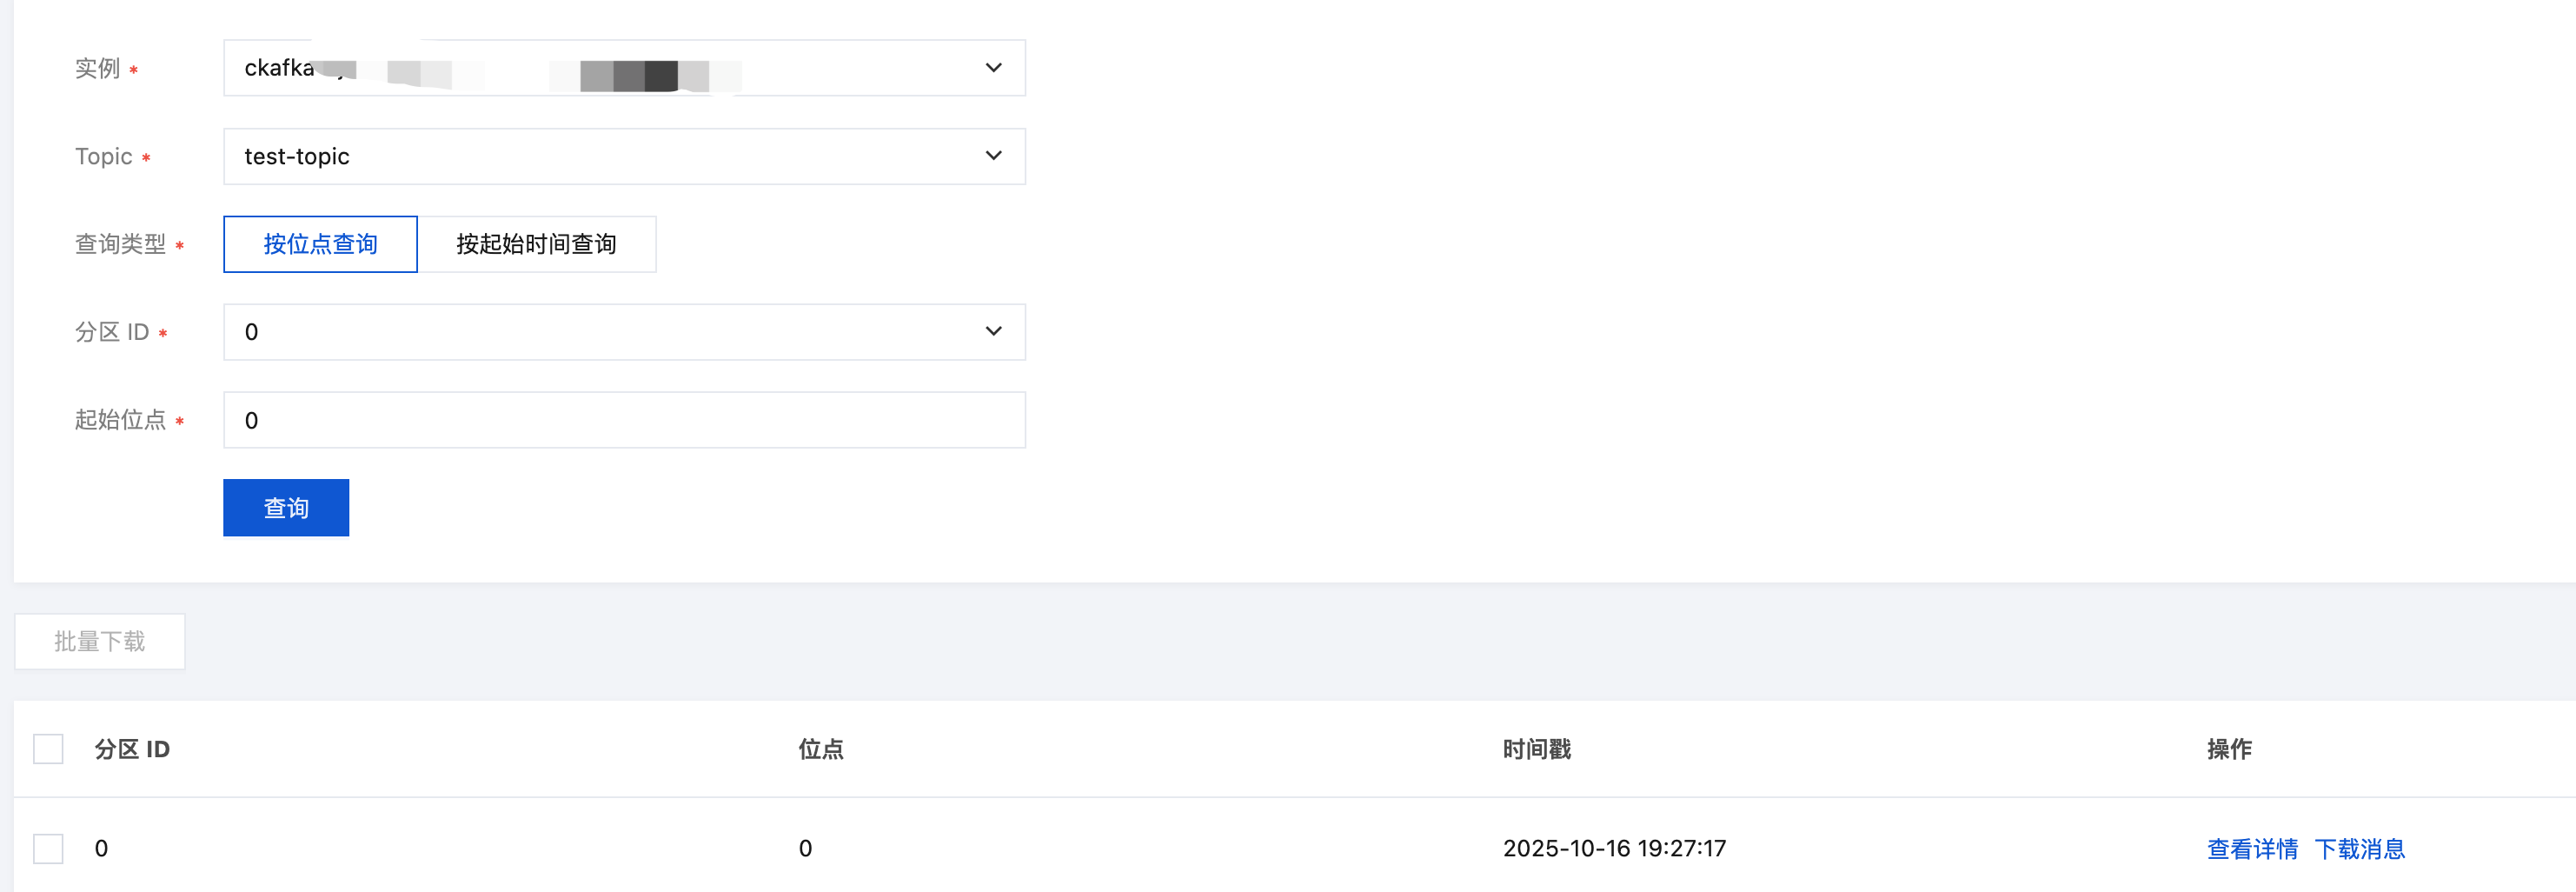
4. 在 CKafka 控制台 的 Topic 列表页面,选择对应的 Topic ,单击更多 > 消息查询,查看刚刚发送的消息。
步骤3:消费消息
1. 创建 Consumer 订阅消息程序 KafkaConsumer.cs。
mkdir KafkaConsumercd KafkaConsumerdotnet new console -n KafkaConsumercd KafkaConsumer
2. 编译并运行 KafkaConsumer.cs 消费消息。
using Confluent.Kafka;using System;class KafkaConsumer{static void Main(string[] args){var config = new ConsumerConfig{BootstrapServers = "localhost:9092", //接入点GroupId = "consumer-group", //消费组名字AutoOffsetReset = AutoOffsetReset.Earliest,// 如果没有初始化位点,从最早的消息开始消费EnableAutoCommit = true, //开启自动提交AutoCommitIntervalMs = 5000 //设置自动提交间隔:5000ms = 5秒};using var consumer = new ConsumerBuilder<Ignore, string>(config).Build();consumer.Subscribe("test-topic");Console.WriteLine("Consumer running...");var cts = new CancellationTokenSource();Console.CancelKeyPress += (_, e) => {e.Cancel = true;cts.Cancel();};try{while (true){var result = consumer.Consume(cts.Token);Console.WriteLine($"Received: {result.Message.Value} @ {result.TopicPartitionOffset}");}}catch (OperationCanceledException){Console.WriteLine("Consumer stopped.");}finally{consumer.Close();}}}
3. 运行结果。
Consumer running...Received: this is ckafka msg value @ test-topic [[0]] @0Received: this is ckafka msg value @ test-topic [[0]] @1Received: this is ckafka msg value @ test-topic [[0]] @2Received: this is ckafka msg value @ test-topic [[0]] @3Received: this is ckafka msg value @ test-topic [[0]] @4Received: this is ckafka msg value @ test-topic [[0]] @5Received: this is ckafka msg value @ test-topic [[0]] @6Received: this is ckafka msg value @ test-topic [[0]] @7Received: this is ckafka msg value @ test-topic [[0]] @8Received: this is ckafka msg value @ test-topic [[0]] @9
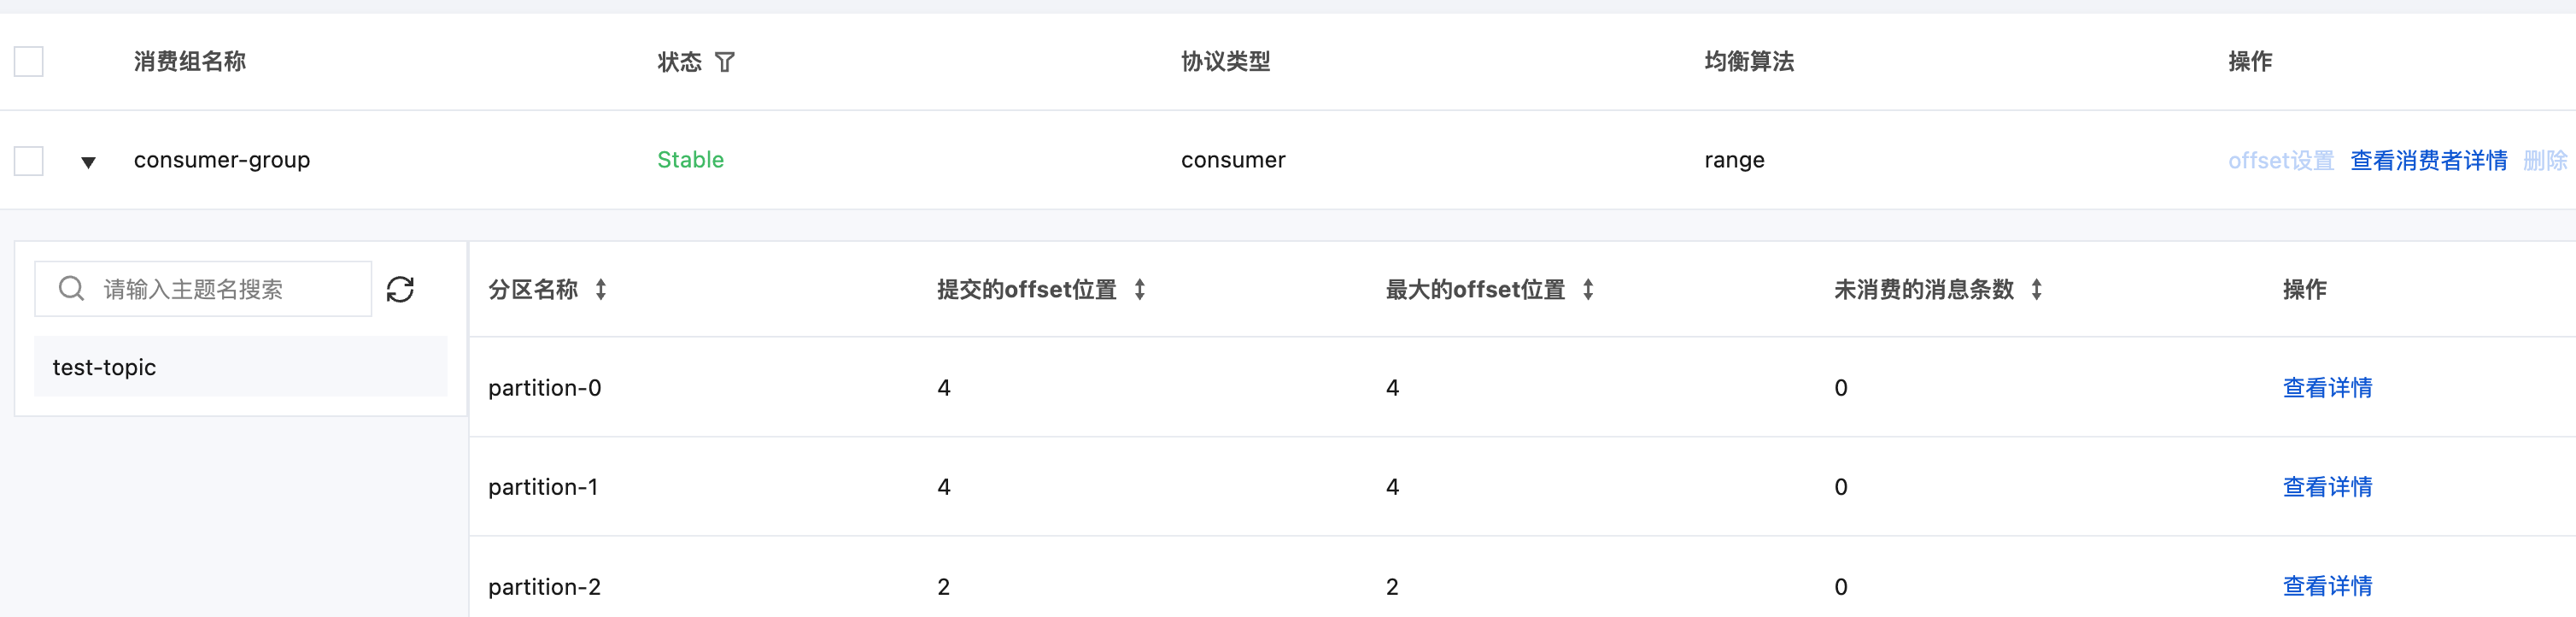
4. 在CKafka 控制台的 Consumer Group 页面,查看消费详情。