本文将介绍如果网络中增加了 CDN 网络层,用户将如何接入 WAF,提供更有效的安全防护。
内容分发网络(CDN)提供强大的网站静态内容的加速分发处理能力,显著提升网站资源加载速度,分布在不同区域的终端用户均可享受到快速流畅的网页体验。在用户高并发期间可缓解源站服务器压力,保证服务稳定和网页的流畅访问。
Web 应用防火墙提供实时防护能力,可有效拦截 Web 攻击,保障用户业务的数据和信息安全。

测试环境
CVM:存在一个 Web 服务。
备案域名。
Web 应用防火墙。
CDN 内容分发网络。
接入步骤
步骤1: 配置 Web 应用防火墙
1. 登录 Web 应用防火墙控制台,在左侧导航中,选择接入管理。
2. 在域名接入页面,单击添加域名。
3. 在添加域名页面,配置相关参数,单击确定。
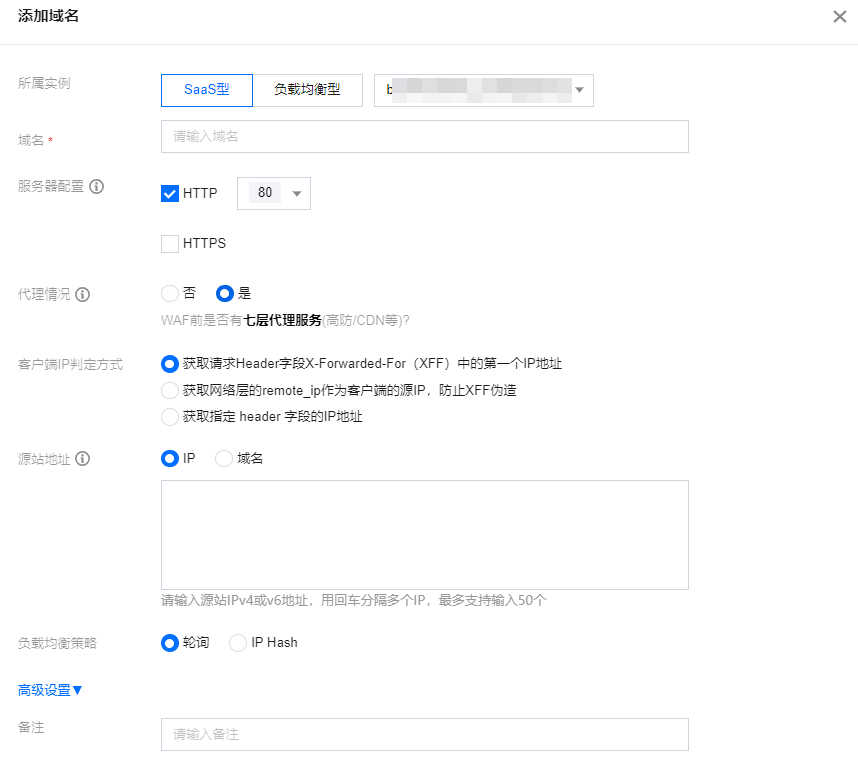
参数名称 | 说明 |
域名 | 在域名输入框中添加需要防护的域名 ,本示例中填写 youlin.life。 |
代理情况 | 根据实际情况选择是否已使用了高防、CDN、云加速等代理。 注意: 因为本文需要接入 CDN,因此选择是。 否:表示 WAF 收到的业务请求来自发起请求的客户端。WAF 直接获取与 WAF 建立连接的 IP 地址作为客户端 IP。 是:表示 WAF 收到的业务请求来自其他七层代理服务转发,而非直接来自发起请求的客户端。为了保证 WAF 可以获取真实的客户端 IP,进行安全分析和防护,您需要进一步设置客户端 IP 判断方法。 取请求 Header 字段 X-Forwarded-For(XFF)中的第一个 IP 地址作为客户端 IP。 获取网络层的 remote_ip 作为客户端的源 IP,防止 XFF 伪造。 获取指定 header 字段的 IP 地址。 |
源站地址 | 根据实际需求选择 IP 或域名。 |
其他参数 |
4. 完成配置后,可以在当前页面看到接入的域名。当前接入的 CNAME 为
09a10b6316608b648da8eec6fffeb59b.qcloudwzgj.com。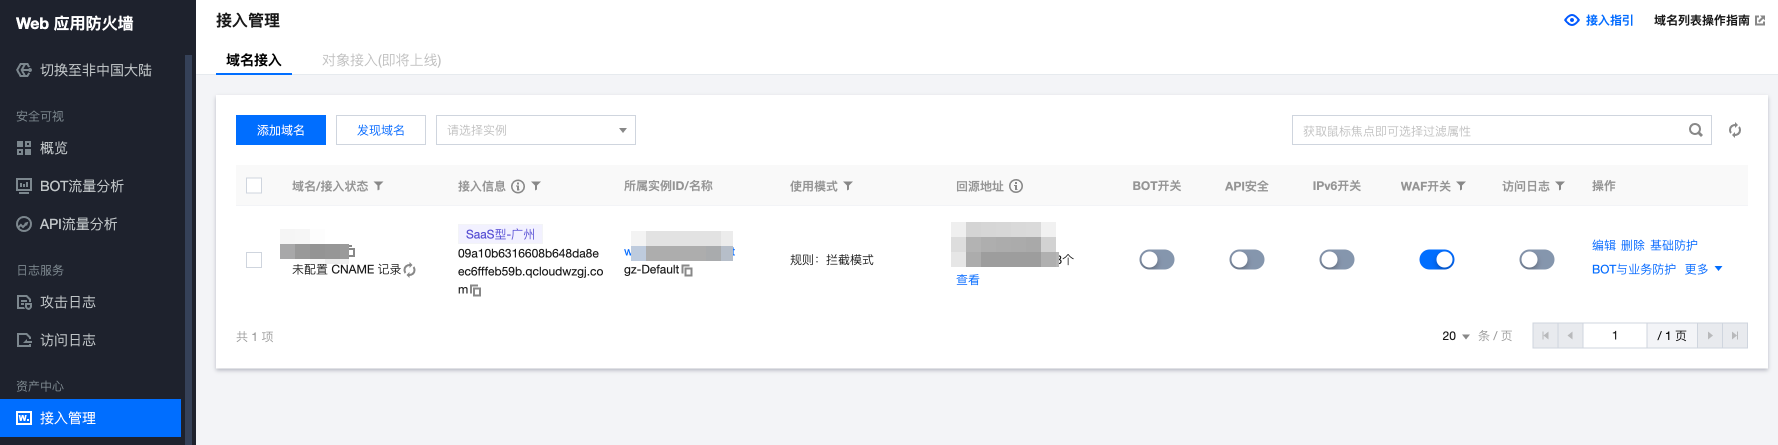
步骤2:配置 CDN
1. 登录 CDN 控制台,在左侧导航中,选择域名管理。
2. 在域名管理页面,单击添加域名,输入加速域名和回源地址,配置相关参数,单击确认添加。
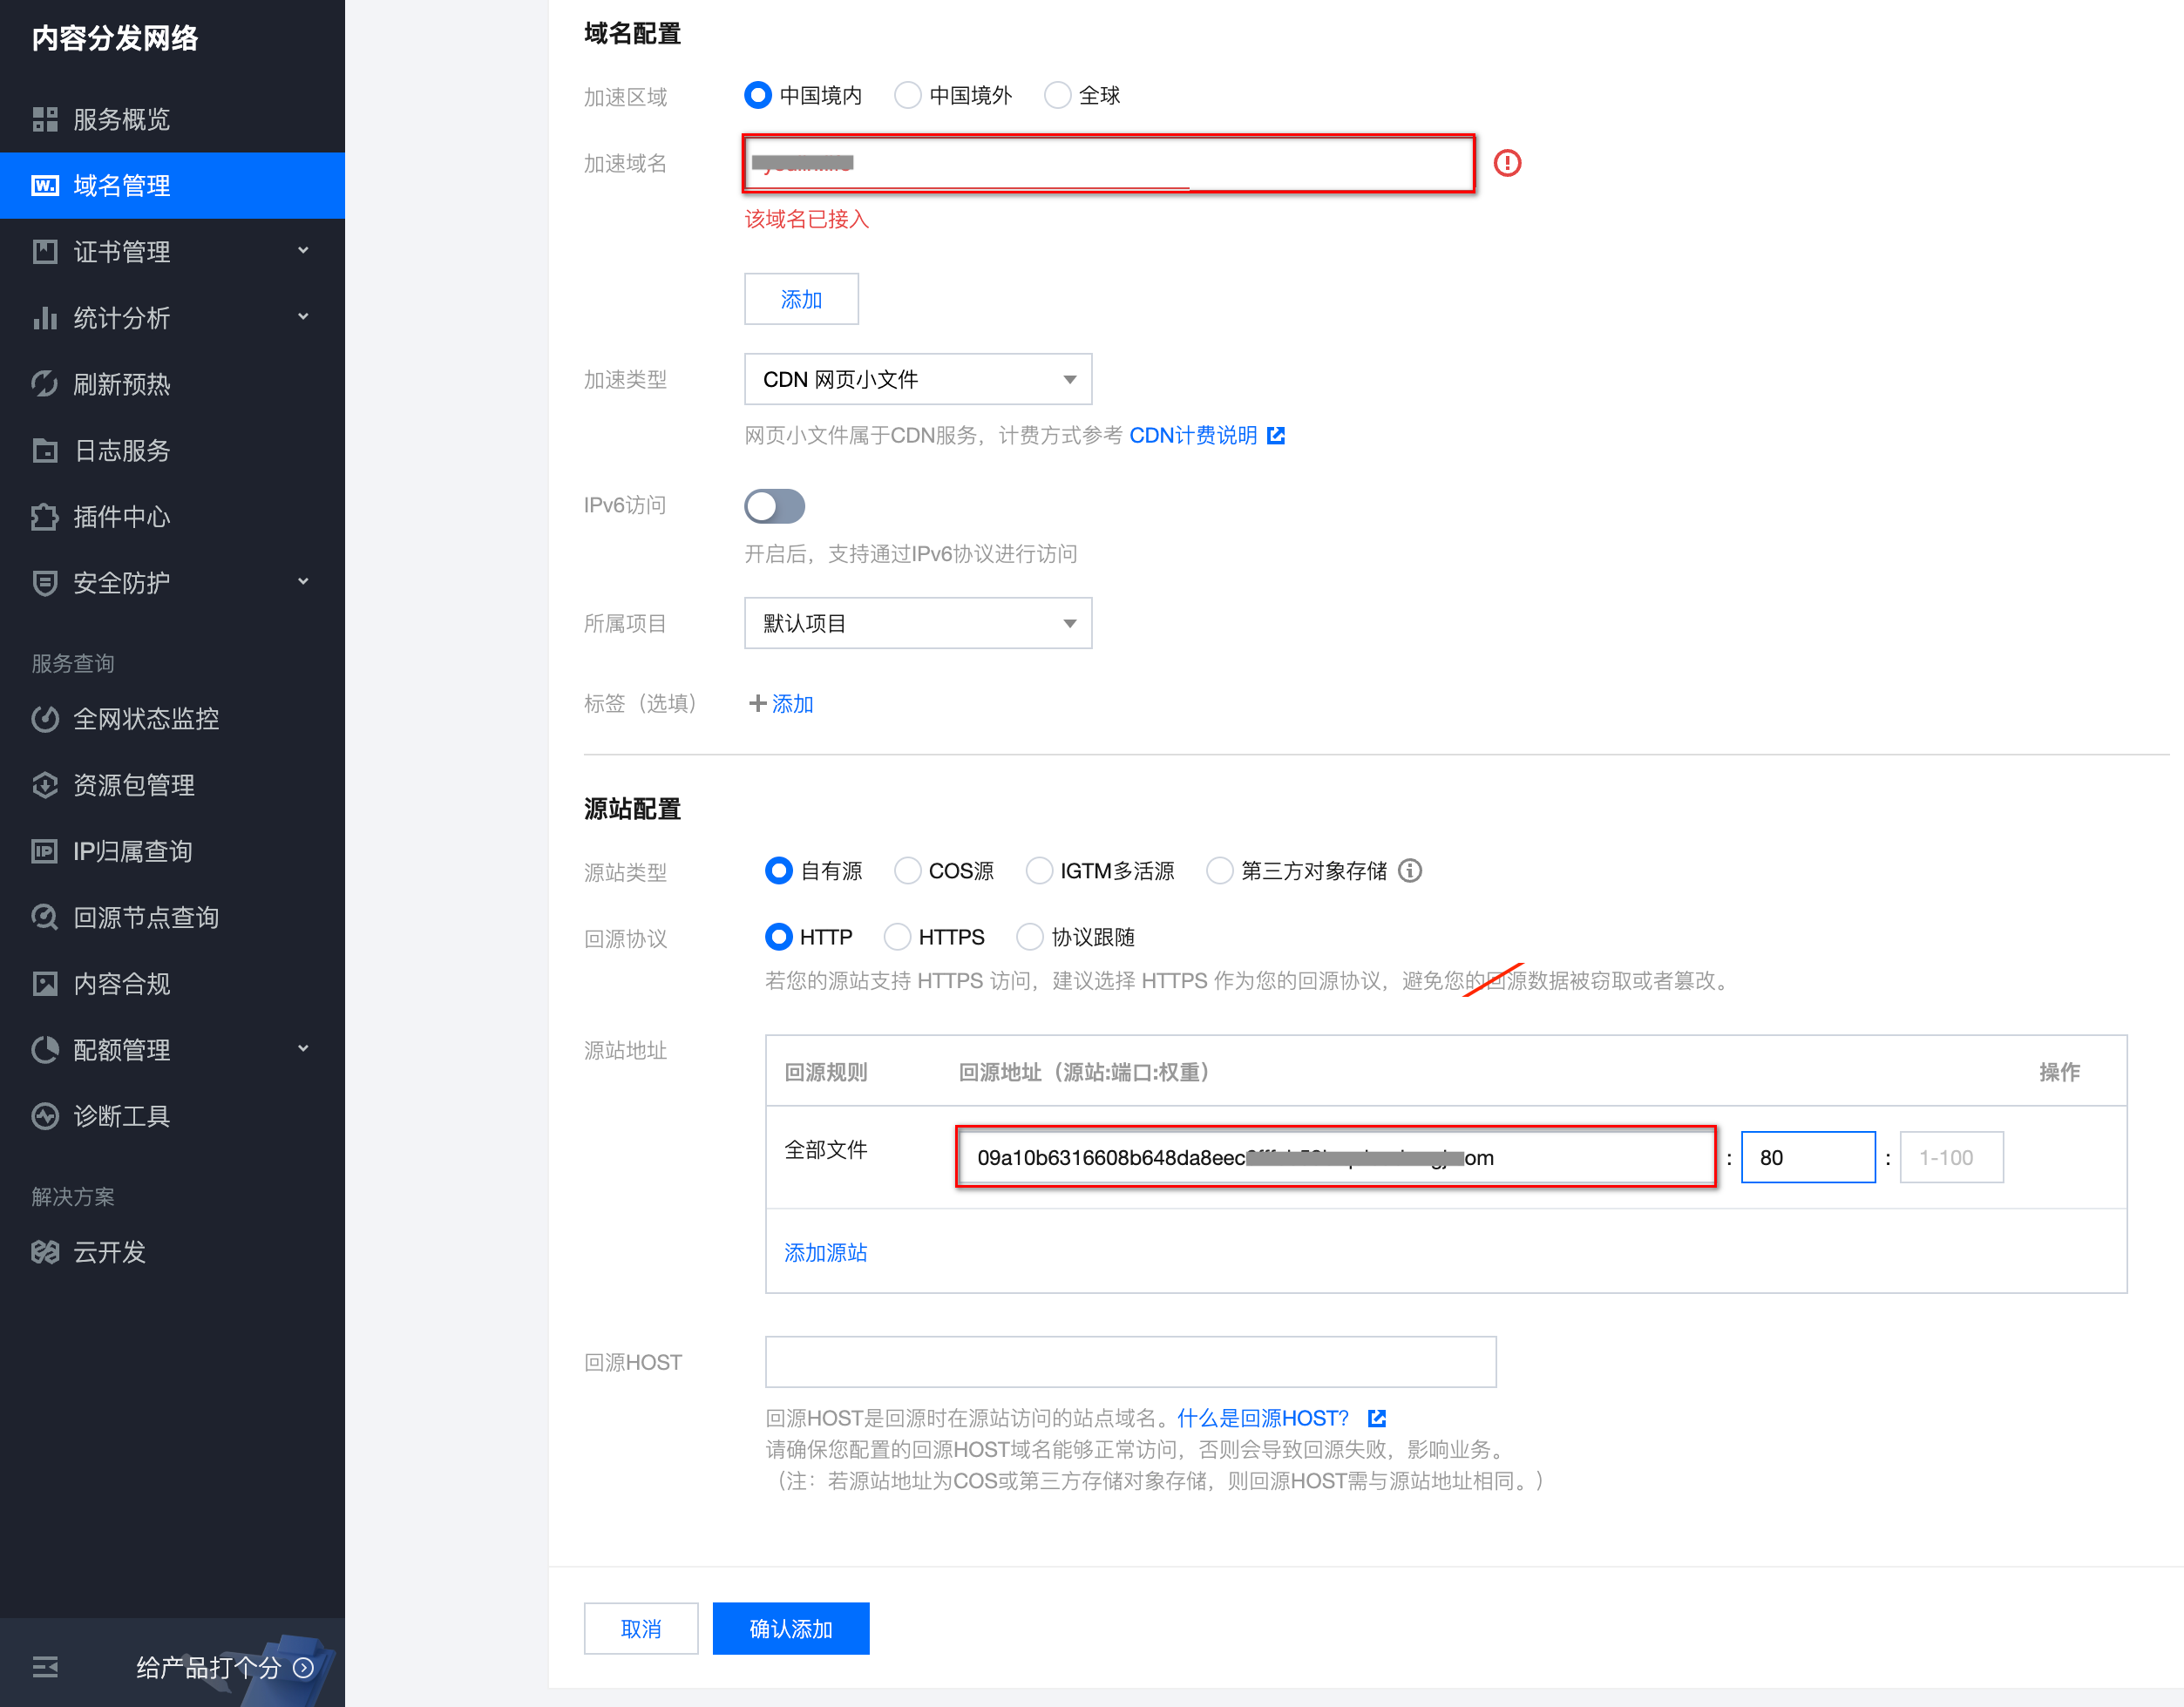
3. 配置完成后,可以在当前页面看到添加的域名,以及生成的 CDN CNAME 地址。

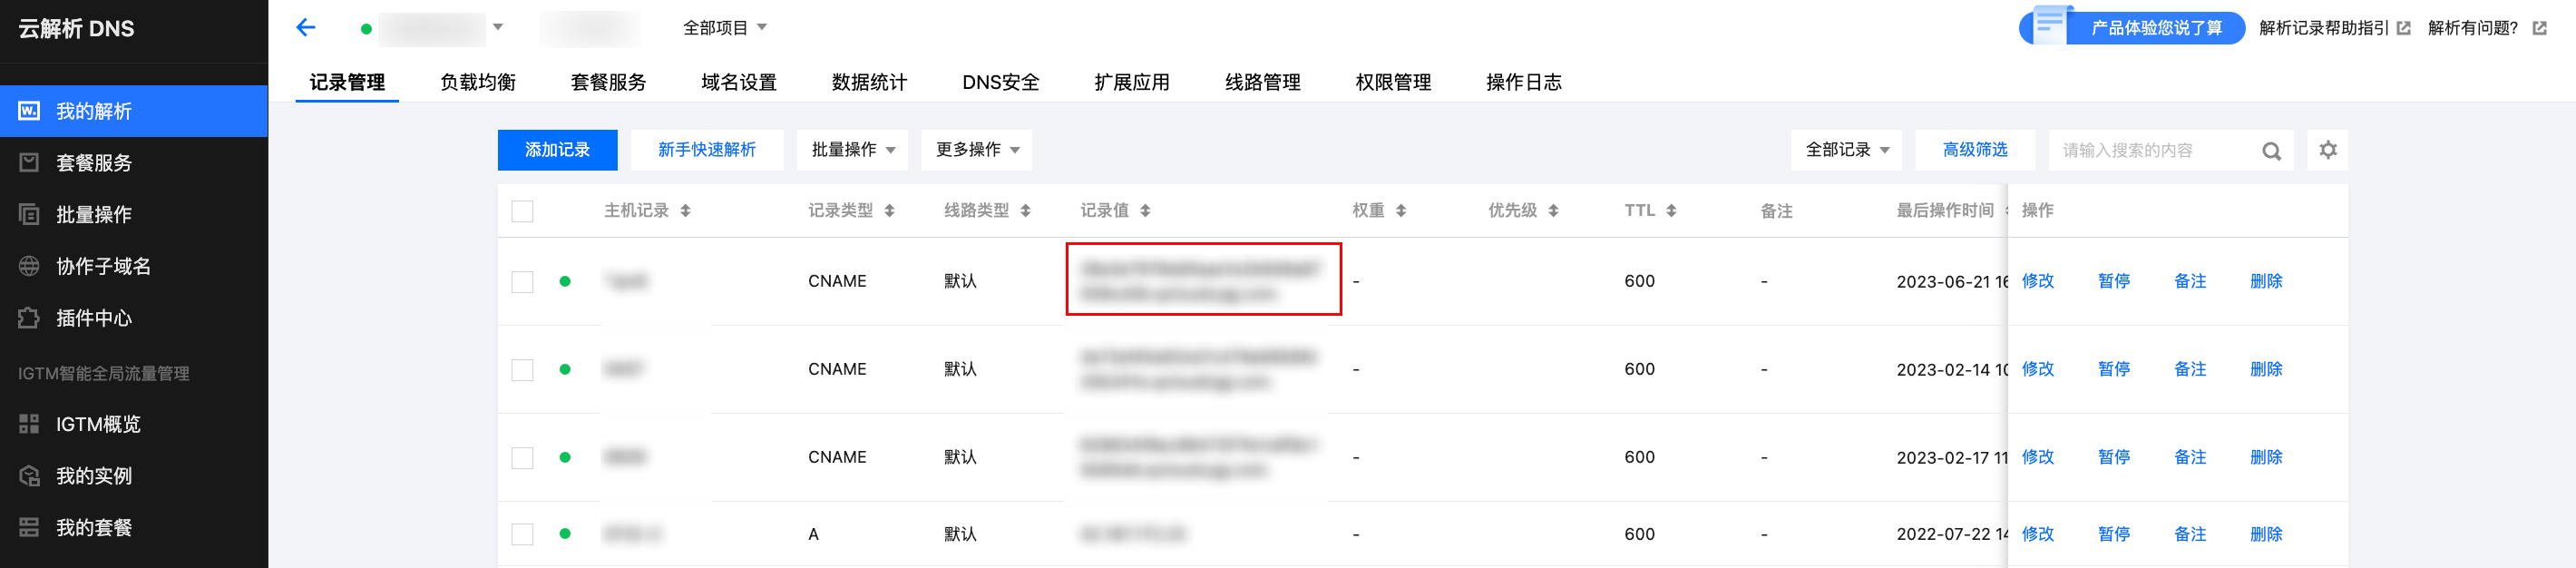
步骤3:配置 DNS
1. 登录 云解析 DNS 控制台,在左侧导航中,选择我的解析。
2. 在我的解析页面,选择要操作的域名,单击解析。
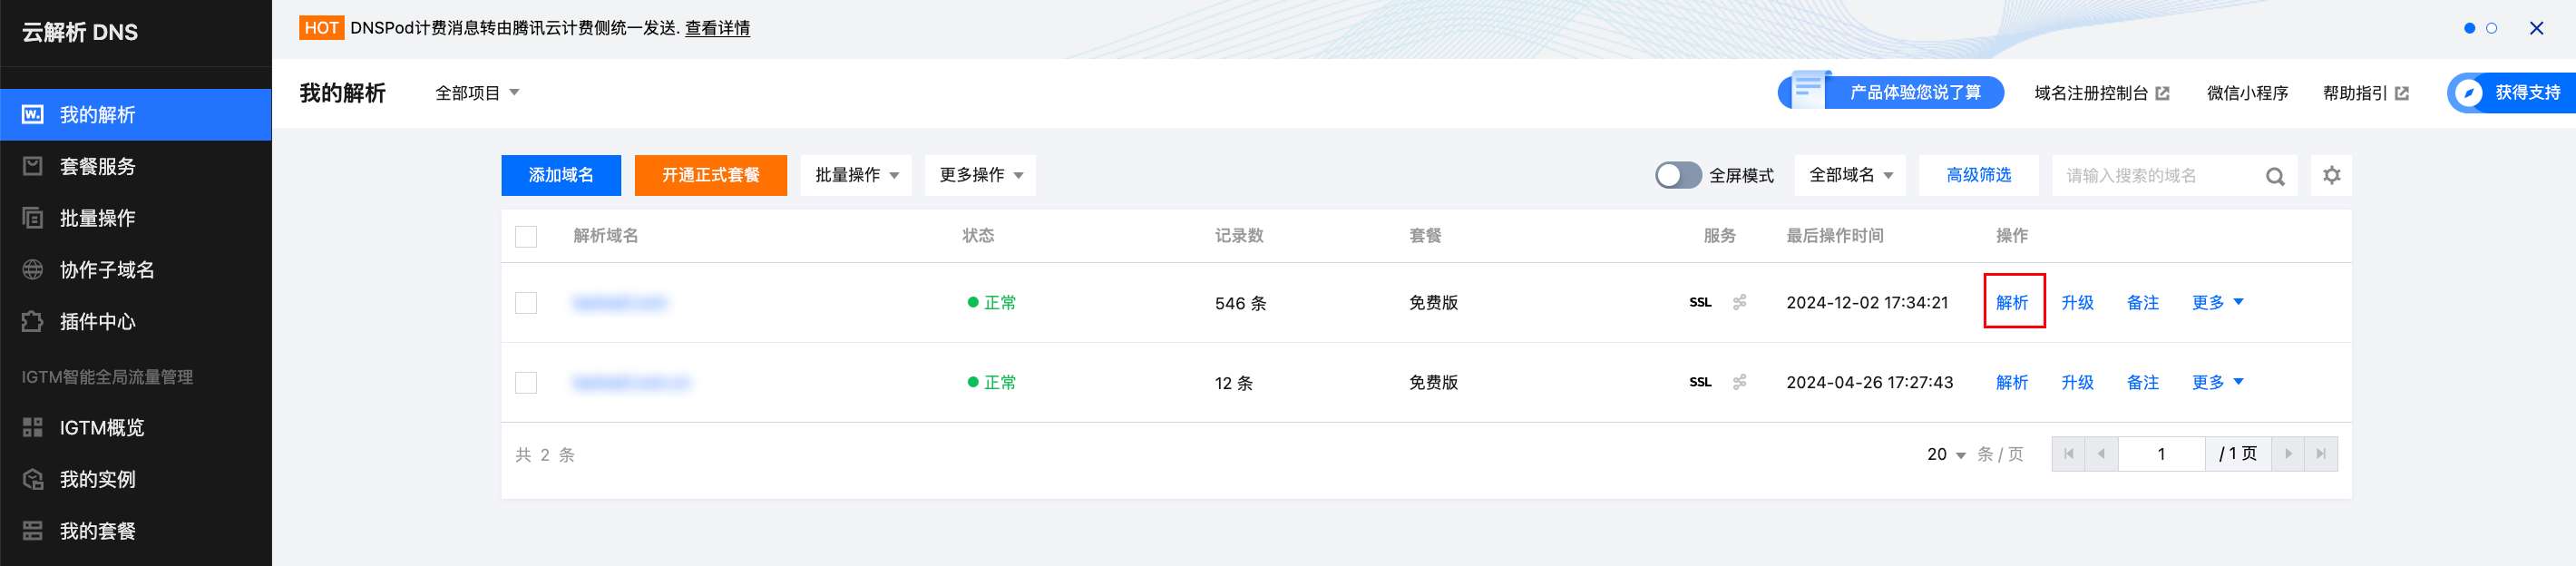
3. 添加 CNAME 地址,其中记录值为 CDN 的 CNAME 地址。
测试验证
验证1 : 域名是否能正常访问
浏览器访问目标域名
http://xx.com,检测是否正常。验证2 : WAF 是否接入成功
浏览器访问
http://xx.com/?test=alert(123),检测是否能被 WAF 拦截。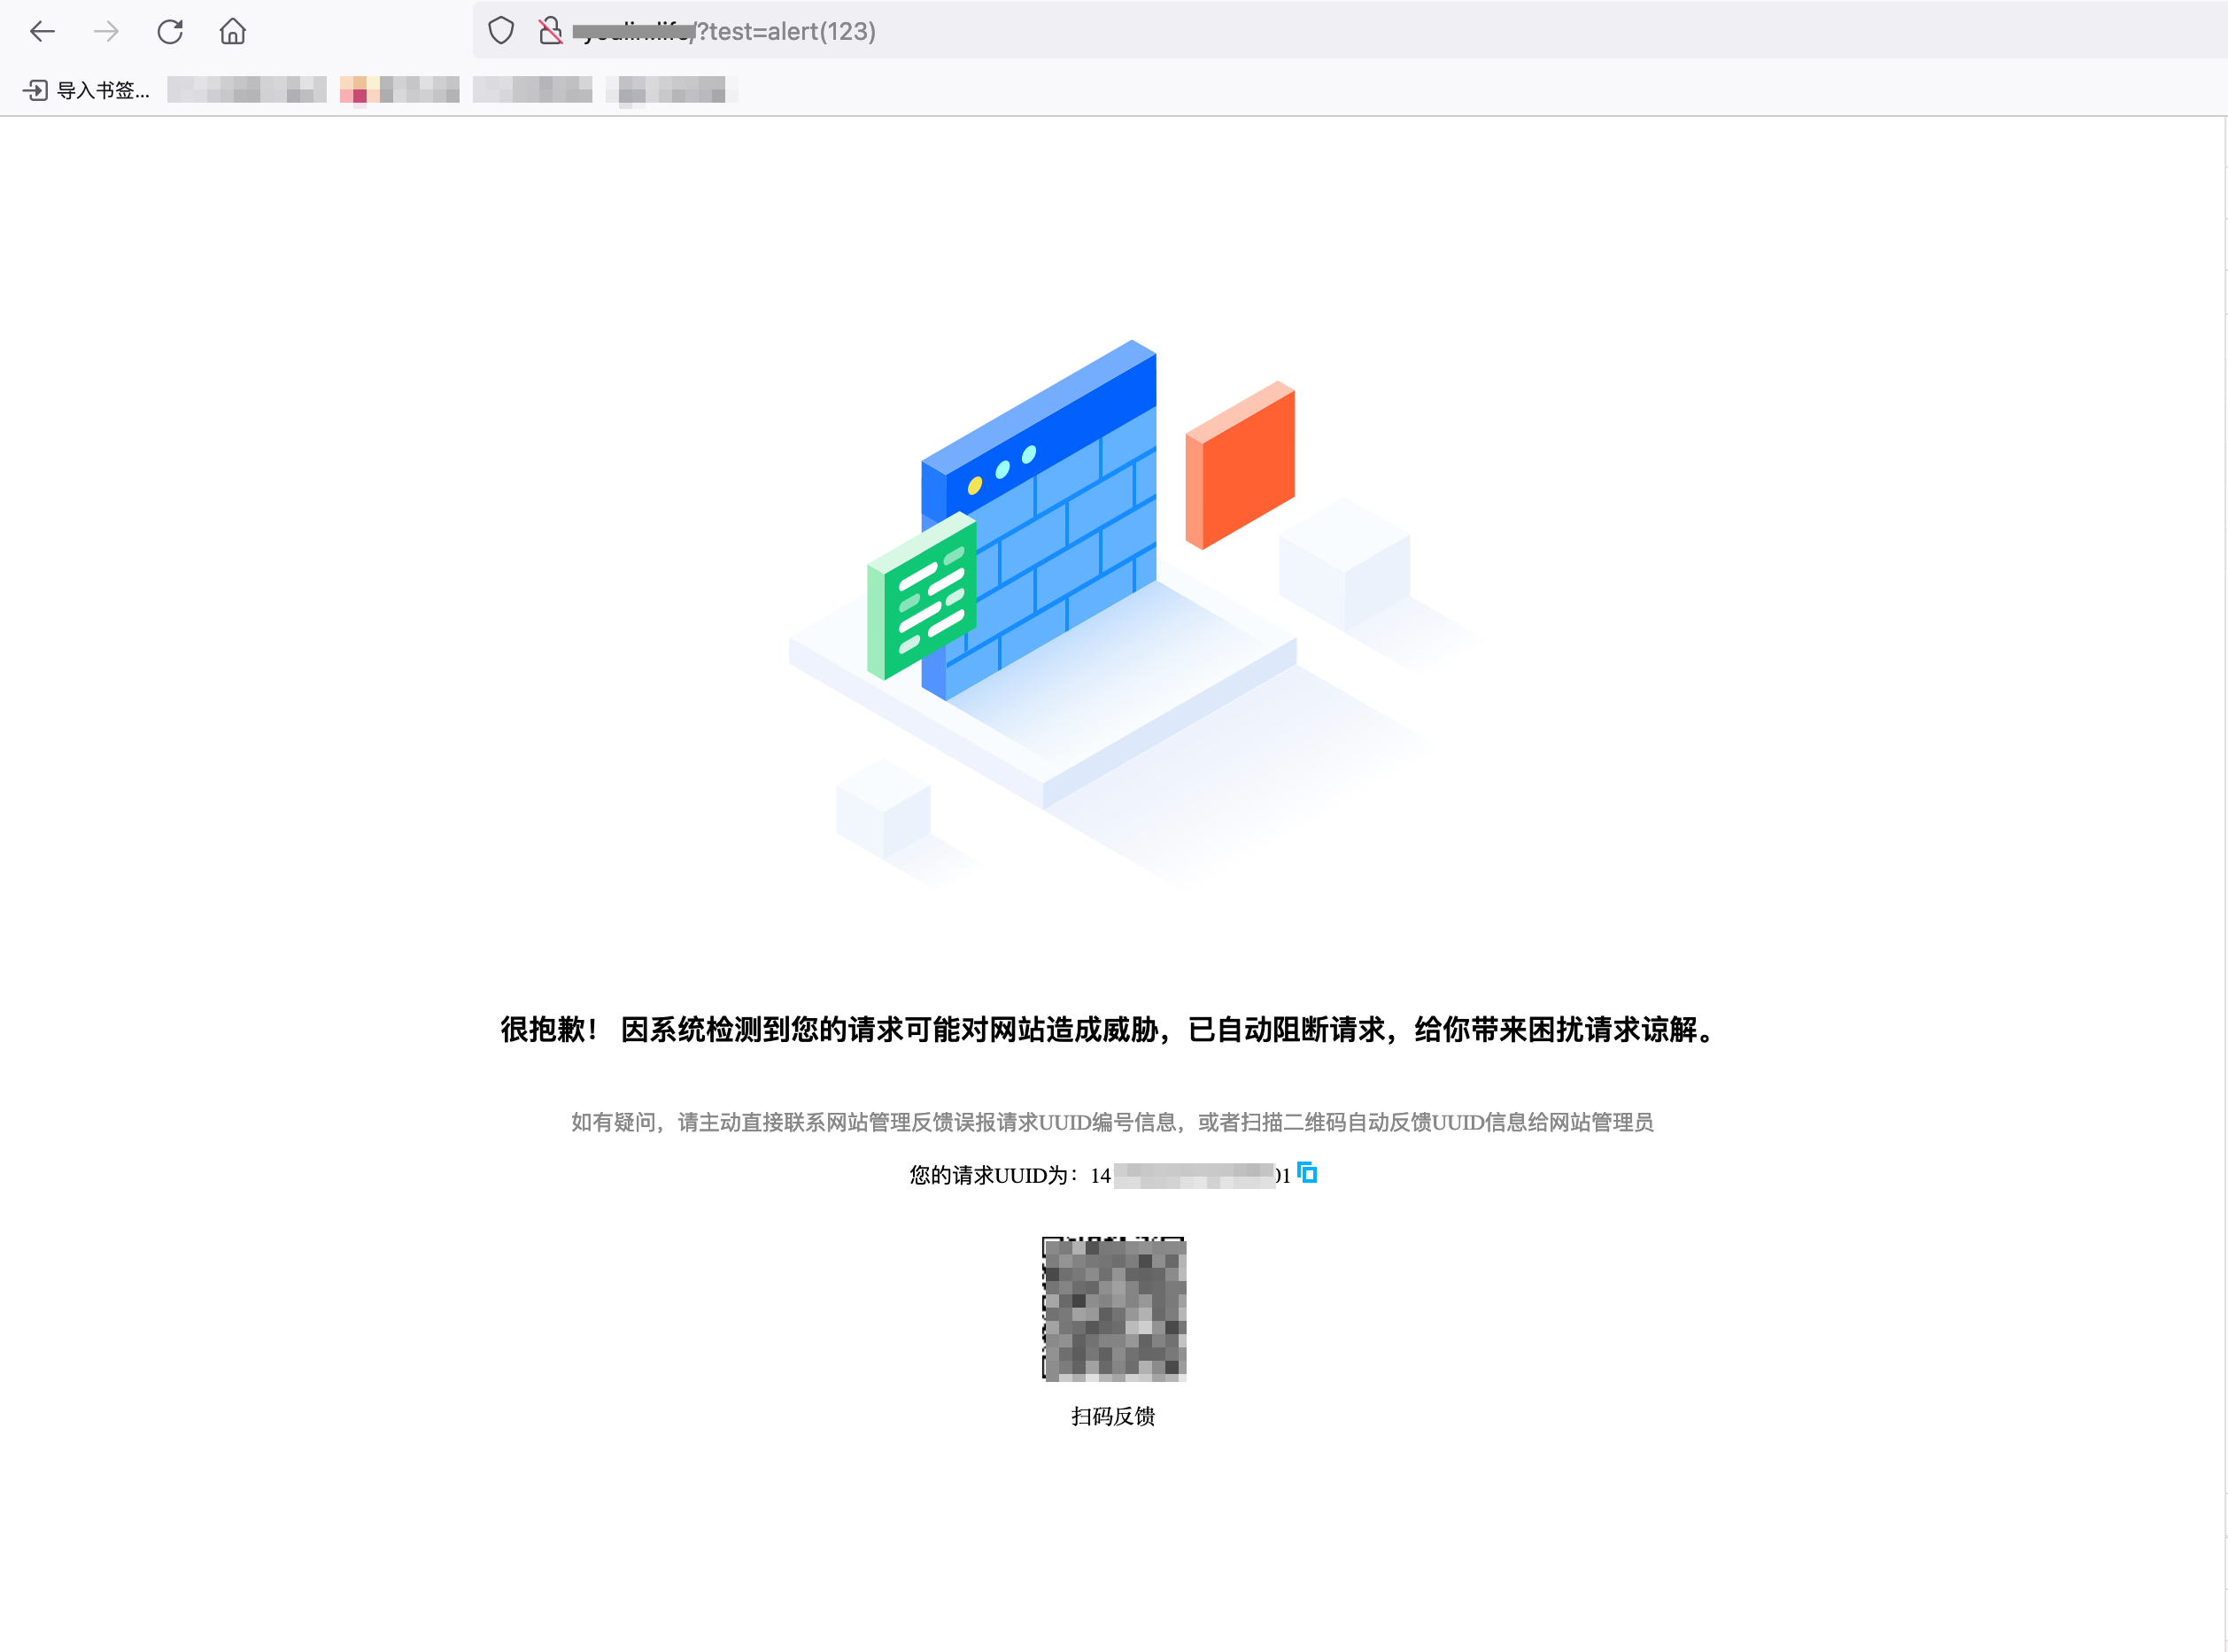
验证3:CDN 是否接入成功
打开浏览器的开发者模式,访问加速域名。
验证方法①:确认 Remote Address 的 IP是否属于 CDN 节点 IP。操作详情请参见 IP 归属查询。
验证方法②:
判断是否缓存命中的方法:有返回以下任意一个,即代表缓存命中,否则代表缓存未命中。
X-Cache-Lookup: Hit From MemCache
X-Cache-Lookup: Hit From Disktank
X-Cache-Lookup: Cache Hit

验证4 : WAF 是否能正确识别客户端 IP
1. 在 攻击日志页面,最近一次记录的 attack_ip。
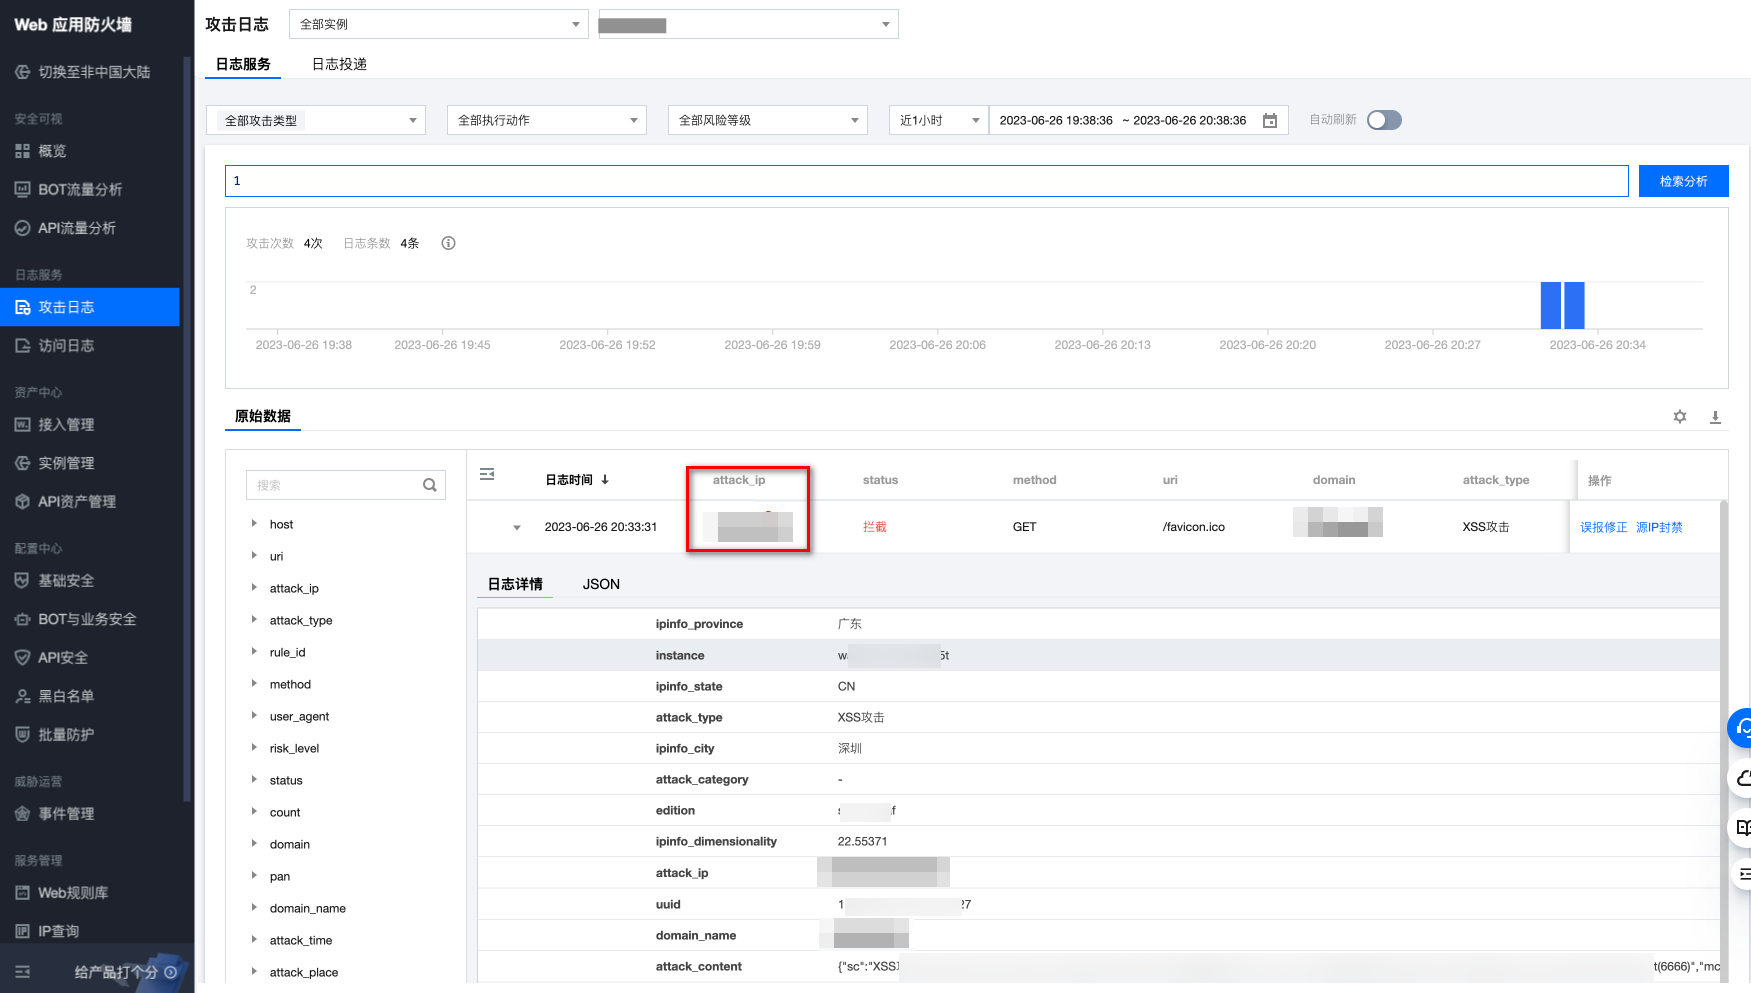
2. 验证 attack_ip 是否为客户端真实 IP,而非 CDN 的 IP。
可以与本地 IP 对比,是否为测试机器的 IP。
可以通过 CDN 的 IP 归属查询 功能进行验证。


