AtomicXCore 提供了 CoGuestStore 模块,专门用于管理观众连麦的完整业务流程。您无需关心复杂的状态同步和信令交互,只需调用几个简单的方法,即可为您的直播添加强大的观众与主播音视频互动功能。
核心场景
CoGuestStore 支持以下两种最主流的连麦场景:观众申请上麦:观众主动发起连麦请求,主播在收到请求后进行同意或拒绝。
主播邀请上麦:主播可以主动向直播间内的任意一位观众发起连麦邀请。
实现步骤
步骤1:组件集成
步骤2:实现观众申请上麦
观众端实现
作为观众,您的核心任务是发起申请、接收结果和主动下麦。
1. 发起连麦申请
当用户点击界面上的“申请连麦”按钮时,调用
applyForSeat 方法。import AtomicXCorelet liveId = "房间ID"let guestStore = CoGuestStore.create(liveID: liveId)// 用户点击“申请连麦”func requestToConnect() {// timeout: 请求超时时间,例如 30 秒guestStore.applyForSeat(timeout: 30.0, extraInfo: nil) { result inswitch result {case .success():print("连麦申请已发送,等待主播处理...")case .failure(let error):print("申请发送失败: \\(error.message)")}}}
2. 监听主播的响应
通过订阅
guestEventPublisher,您可以接收到主播的处理结果。// 在您的视图控制器初始化时订阅事件func subscribeGuestEvents() {guestStore.guestEventPublisher.sink { [weak self] event inif case let .onGuestApplicationResponded(isAccept, hostUser) = event {if isAccept {print("主播 \\(hostUser.userName) 同意了您的申请,准备上麦")// 1. 打开摄像头、麦克风DeviceStore.shared.openLocalCamera(isFront: true, completion: nil)DeviceStore.shared.openLocalMicrophone(completion: nil)// 2. 在此更新 UI,例如关闭申请按钮,显示连麦中的状态} else {print("主播 \\(hostUser.userName) 拒绝了您的申请")// 弹窗提示用户申请被拒绝}}}.store(in: &cancellables) // 管理订阅生命周期}
3. 主动下麦
当连麦观众想结束互动时,调用
disConnect 方法即可返回普通观众状态。// 用户点击“下麦”按钮func leaveSeat() {guestStore.disConnect { result inswitch result {case .success():print("已成功下麦")case .failure(let error):print("下麦失败: \\(error.message)")}}}
4. (可选) 取消申请
如果观众在主播处理前想撤回申请,可以调用
cancelApplication。// 用户在等待时,点击“取消申请”func cancelRequest() {guestStore.cancelApplication { result inswitch result {case .success():print("申请已取消")case .failure(let error):print("申请取消失败: \\(error.message)")}}}
主播端实现
作为主播,您的核心任务是接收申请、展示申请列表和处理申请。
1. 监听新的连麦申请
通过订阅
hostEventPublisher,您可以在有新观众申请时立即收到通知,并给出提示。import AtomicXCorelet liveId = "房间ID"let guestStore = CoGuestStore.create(liveID: liveId)// 订阅主播事件guestStore.hostEventPublisher.sink { [weak self] event inif case let .onGuestApplicationReceived(guestUser) = event {print("收到观众 \\(guestUser.userName) 的连麦申请")// 在此更新 UI,例如在“申请列表”按钮上显示红点}}.store(in: &cancellables)
2. 展示申请列表
CoGuestStore 的 state 会实时维护当前的申请者列表,您可以订阅它来刷新您的 UI。// 订阅状态变更guestStore.state.subscribe(StatePublisherSelector(keyPath: \\CoGuestState.applicants)) // 只关心申请者列表的变化.removeDuplicates().sink { applicants inprint("当前申请人数: \\(applicants.count)")// 在此刷新您的“申请者列表”UI// self.applicantListView.update(with: applicants)}.store(in: &cancellables)
3. 处理连麦申请
当您在列表中选择一位观众并点击“同意”或“拒绝”时,调用相应的方法。
// 主播点击“同意”按钮,传入申请者的 userIDfunc accept(userId: String) {guestStore.acceptApplication(userID: userId) { result inif case .success = result {print("已同意 \\(userId) 的申请,对方正在上麦")}}}// 主播点击“拒绝”按钮func reject(userId: String) {guestStore.rejectApplication(userID: userId) { result inif case .success = result {print("已拒绝 \\(userId) 的申请")}}}
步骤3:实现主播邀请上麦
主播端实现
1. 向观众发起邀请
当主播在观众列表中选择某人并点击“邀请连麦”时,调用
inviteToSeat 方法。// 主播选择观众并发起邀请func invite(userId: String) {// timeout: 邀请超时时间guestStore.inviteToSeat(userID: userId, timeout: 30.0, extraInfo: nil) { result inif case .success = result {print("已向 \\(userId) 发出邀请,等待对方回应...")}}}
2. 监听观众的回应
通过
hostEventPublisher 监听 onHostInvitationResponded 事件。// 在 hostEventPublisher 的订阅中添加if case let .onHostInvitationResponded(isAccept, guestUser) = event {if isAccept {print("观众 \\(guestUser.userName) 接受了您的邀请")} else {print("观众 \\(guestUser.userName) 拒绝了您的邀请")}}
观众端实现
1. 接收主播的邀请
通过
guestEventPublisher 监听 onHostInvitationReceived 事件。// 在 guestEventPublisher 的订阅中添加if case let .onHostInvitationReceived(hostUser) = event {print("收到主播 \\(hostUser.userName) 的连麦邀请")// 在此弹出一个对话框,让用户选择“接受”或“拒绝”// self.showInvitationDialog(from: hostUser)}
2. 响应邀请
当用户在弹出的对话框中做出选择后,调用相应的方法。
let inviterId = "发起邀请的主播ID" // 从 onHostInvitationReceived 事件中获取// 用户点击“接受”func accept() {guestStore.acceptInvitation(inviterID: inviterId) { result inif case .success = result {// 2. 打开摄像头、麦克风DeviceStore.shared.openLocalCamera(isFront: true, completion: nil)DeviceStore.shared.openLocalMicrophone(completion: nil)}}}// 用户点击“拒绝”func reject() {guestStore.rejectInvitation(inviterID: inviterId) { result in// ...}}
运行效果
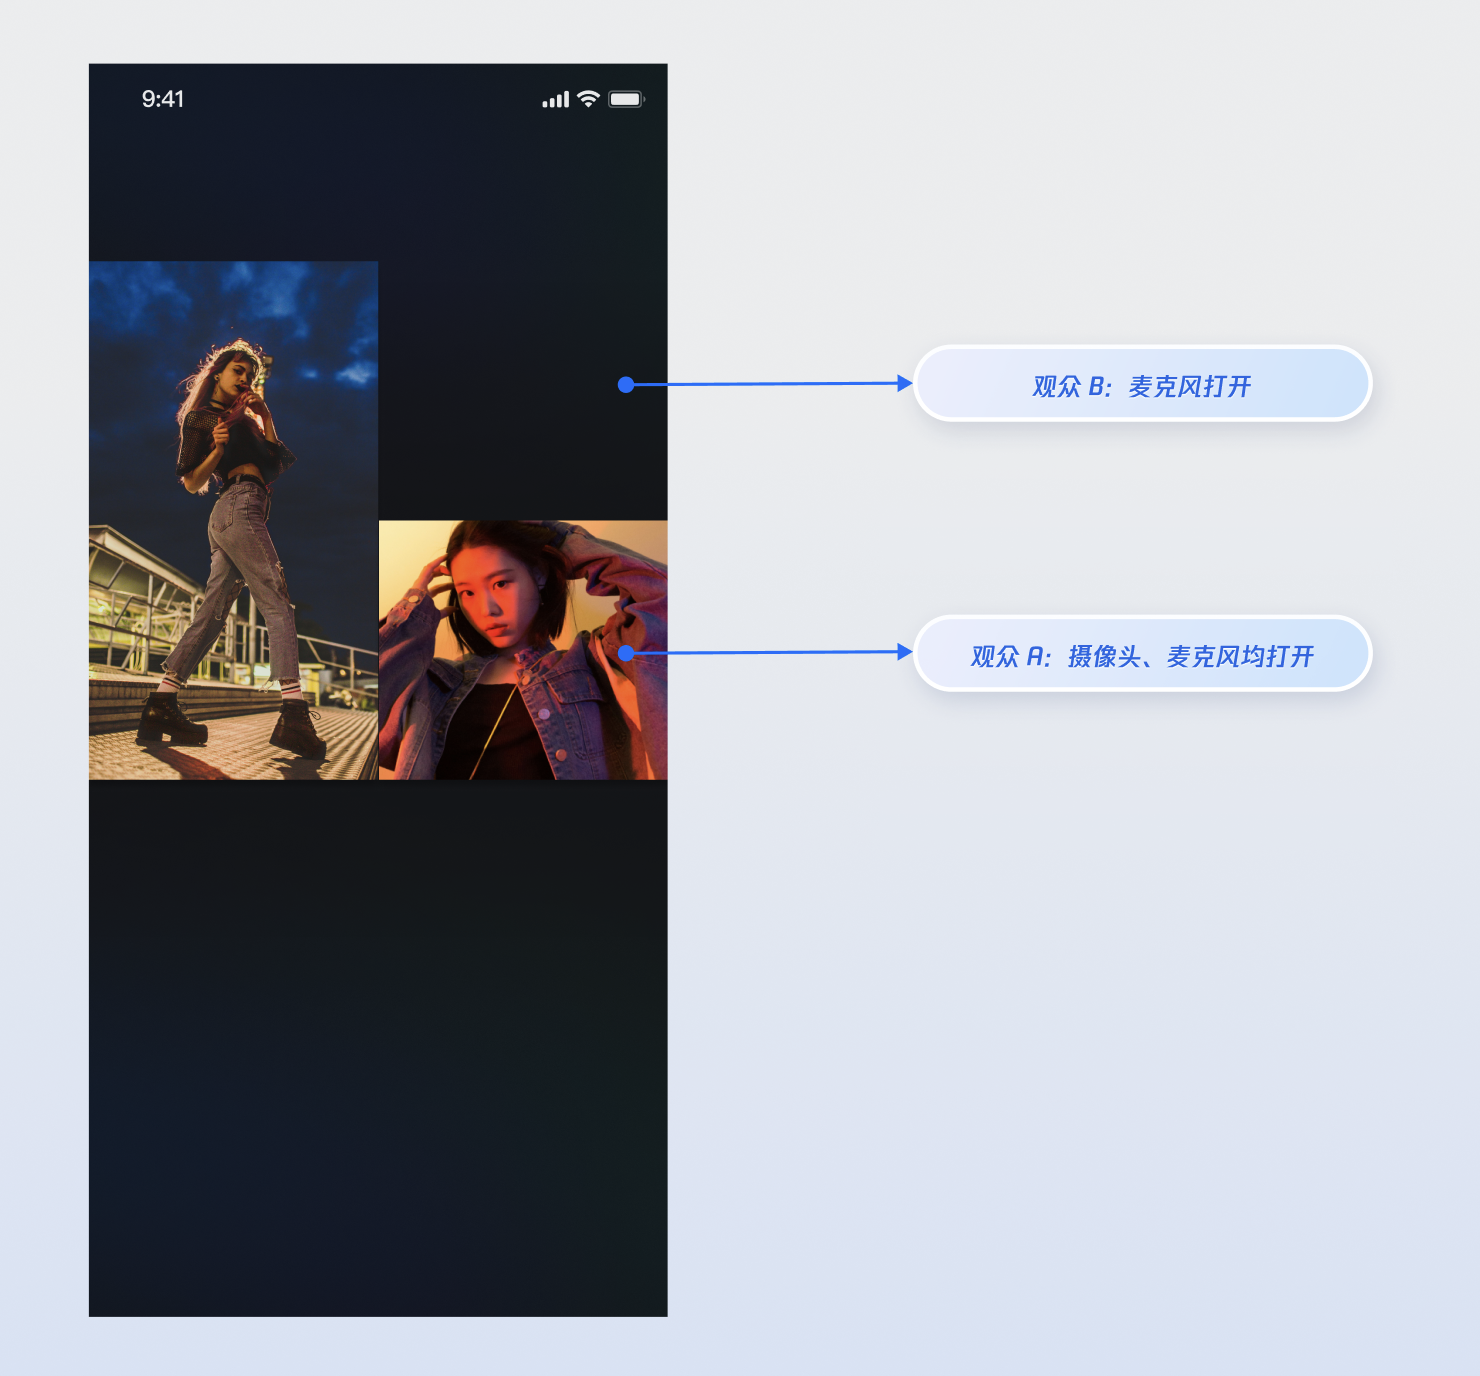
当您集成以上功能实现后,请分别使用两个观众与主播进行连麦操作,观众 A 同时打开摄像头和麦克风,观众 B 只打开麦克风,运行效果如下,您可以参考下一章节 完善 UI 细节 来定制您想要的 UI 逻辑。
完善 UI 细节
您可以通过
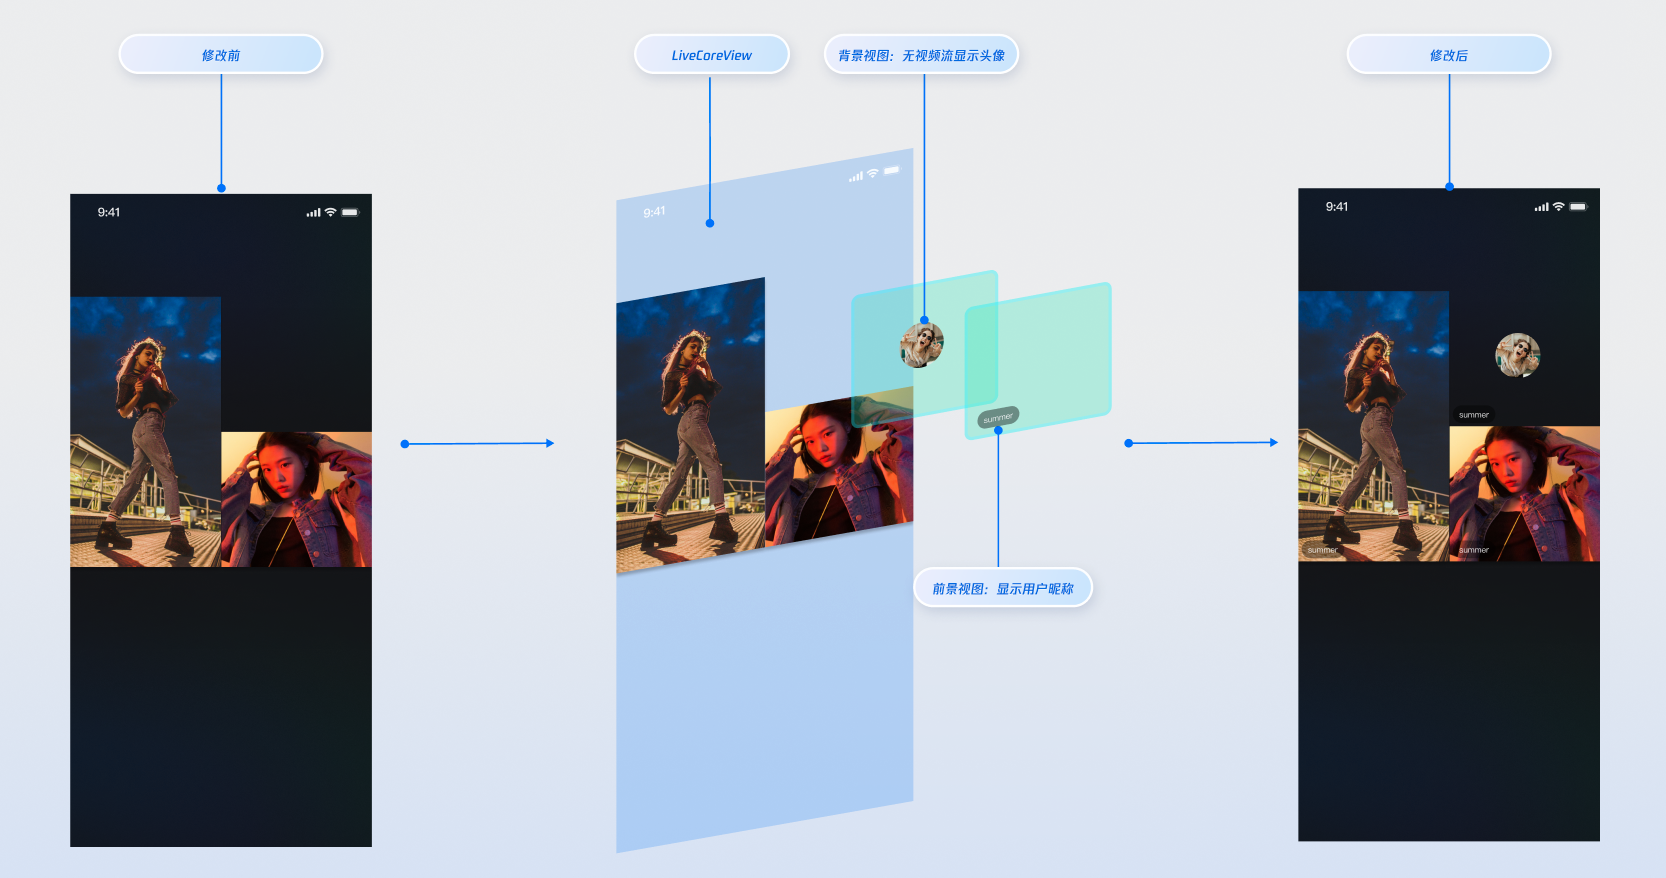
LiveCoreView.VideoViewDelegate 协议提供的“插槽”能力,在观众连麦的视频流画面上添加自定义视图,用于显示昵称、头像等信息,或在他们关闭摄像头时提供占位图,以优化视觉体验。实现视频流画面的昵称显示
实现效果
实现方式
提示:
步骤 1:创建前景视图 (CustomSeatView),该视图用于在视频流上方显示用户信息。
import UIKit// 自定义的用户信息悬浮视图(前景)class CustomSeatView: UIView {lazy var nameLabel: UILabel = {let label = UILabel()label.textColor = .whitelabel.font = .systemFont(ofSize: 14)return label}()override init(frame: CGRect) {super.init(frame: frame)backgroundColor = UIColor.black.withAlphaComponent(0.5)addSubview(nameLabel)nameLabel.snp.makeConstraints { make inmake.bottom.equalToSuperview().offset(-5)make.leading.equalToSuperview().offset(5)}}}
步骤 2:创建背景视图 (CustomAvatarView),该视图用于在用户无视频流时作为占位图显示。
import UIKit// 自定义的头像占位视图(背景)class CustomAvatarView: UIView {lazy var avatarImageView: UIImageView = {let imageView = UIImageView()imageView.tintColor = .grayreturn imageView}()override init(frame: CGRect) {super.init(frame: frame)backgroundColor = .clearlayer.cornerRadius = 30addSubview(avatarImageView)avatarImageView.snp.makeConstraints { make inmake.center.equalToSuperview()make.width.height.equalTo(60)}}}
步骤 3:实现
VideoViewDelegate.createCoGuestView 协议,根据 viewLayer 的值返回对应的视图。import AtomicXCore// 1. 在您的视图控制器中,遵守 VideoViewDelegate 协议class YourViewController: UIViewController, VideoViewDelegate {// ... 其他代码 ...// 2. 完整实现协议方法,处理两种 viewLayerfunc createCoGuestView(seatInfo: TUISeatFullInfo, viewLayer: ViewLayer) -> UIView? {guard let userId = seatInfo.userID,!userId.isEmpty else {return nil}if viewLayer == .foreground {// 用户摄像头开启时,显示前景视图let seatView = CustomSeatView()seatView.nameLabel.text = seatInfo.userNamereturn seatView} else { // viewLayer == .background// 用户摄像头关闭时,显示背景视图let avatarView = CustomAvatarView()// 您可以在这里通过 seatInfo.userAvatar 加载用户真实头像return avatarView}}}
参数说明:
参数 | 类型 | 说明 |
seatInfo | TUISeatFullInfo | 麦位信息对象,包含麦上用户的详细信息。 |
seatInfo.userID | String? | 麦上用户的 ID。 |
seatInfo.userName | String? | 麦上用户的昵称。 |
seatInfo.userAvatar | String? | 麦上用户的头像 URL。 |
seatInfo.userMicrophoneStatus | TUIDeviceStatus | 麦上用户的麦克风状态。 |
seatInfo.userCameraStatus | TUIDeviceStatus | 麦上用户的摄像头状态。 |
viewLayer | ViewLayer | 视图层级枚举。 .foreground 表示前景挂件视图,始终显示在视频画面的最上层。.background 表示背景挂件视图,位于前景视图下层,仅在对应用户没有视频流(例如未开摄像头)的情况下显示,通常用于展示用户的默认头像或占位图。 |
API 文档
常见问题
如何管理通过 VideoViewDelegate 添加的自定义视图的生命周期和事件?
LiveCoreView 会自动管理您通过代理方法返回的视图的添加和移除,您无需手动处理。如果需要在自定义视图中处理用户交互(例如点击事件),请在创建视图时为其添加相应的事件即可。
VideoViewDelegate 中的 viewLayer 参数有什么作用?
viewLayer 用于区分前景和背景挂件:.foreground:前景层,始终显示在视频画面的最上层。.background:背景层,仅在对应用户没有视频流(例如未开摄像头)的情况下显示,通常用于展示用户的默认头像或占位图。我的自定义视图为什么没有显示?
检查代理设置:请确认已调用
coreView.videoViewDelegate = self 并成功设置了代理。检查实现方法:请检查是否正确实现了对应的代理方法(例如
createCoGuestView)。检查返回值:确保您的代理方法在正确的时机返回了一个有效的
UIView 实例,而不是 nil。您可以在代理方法中添加断点或日志进行调试。


