功能预览
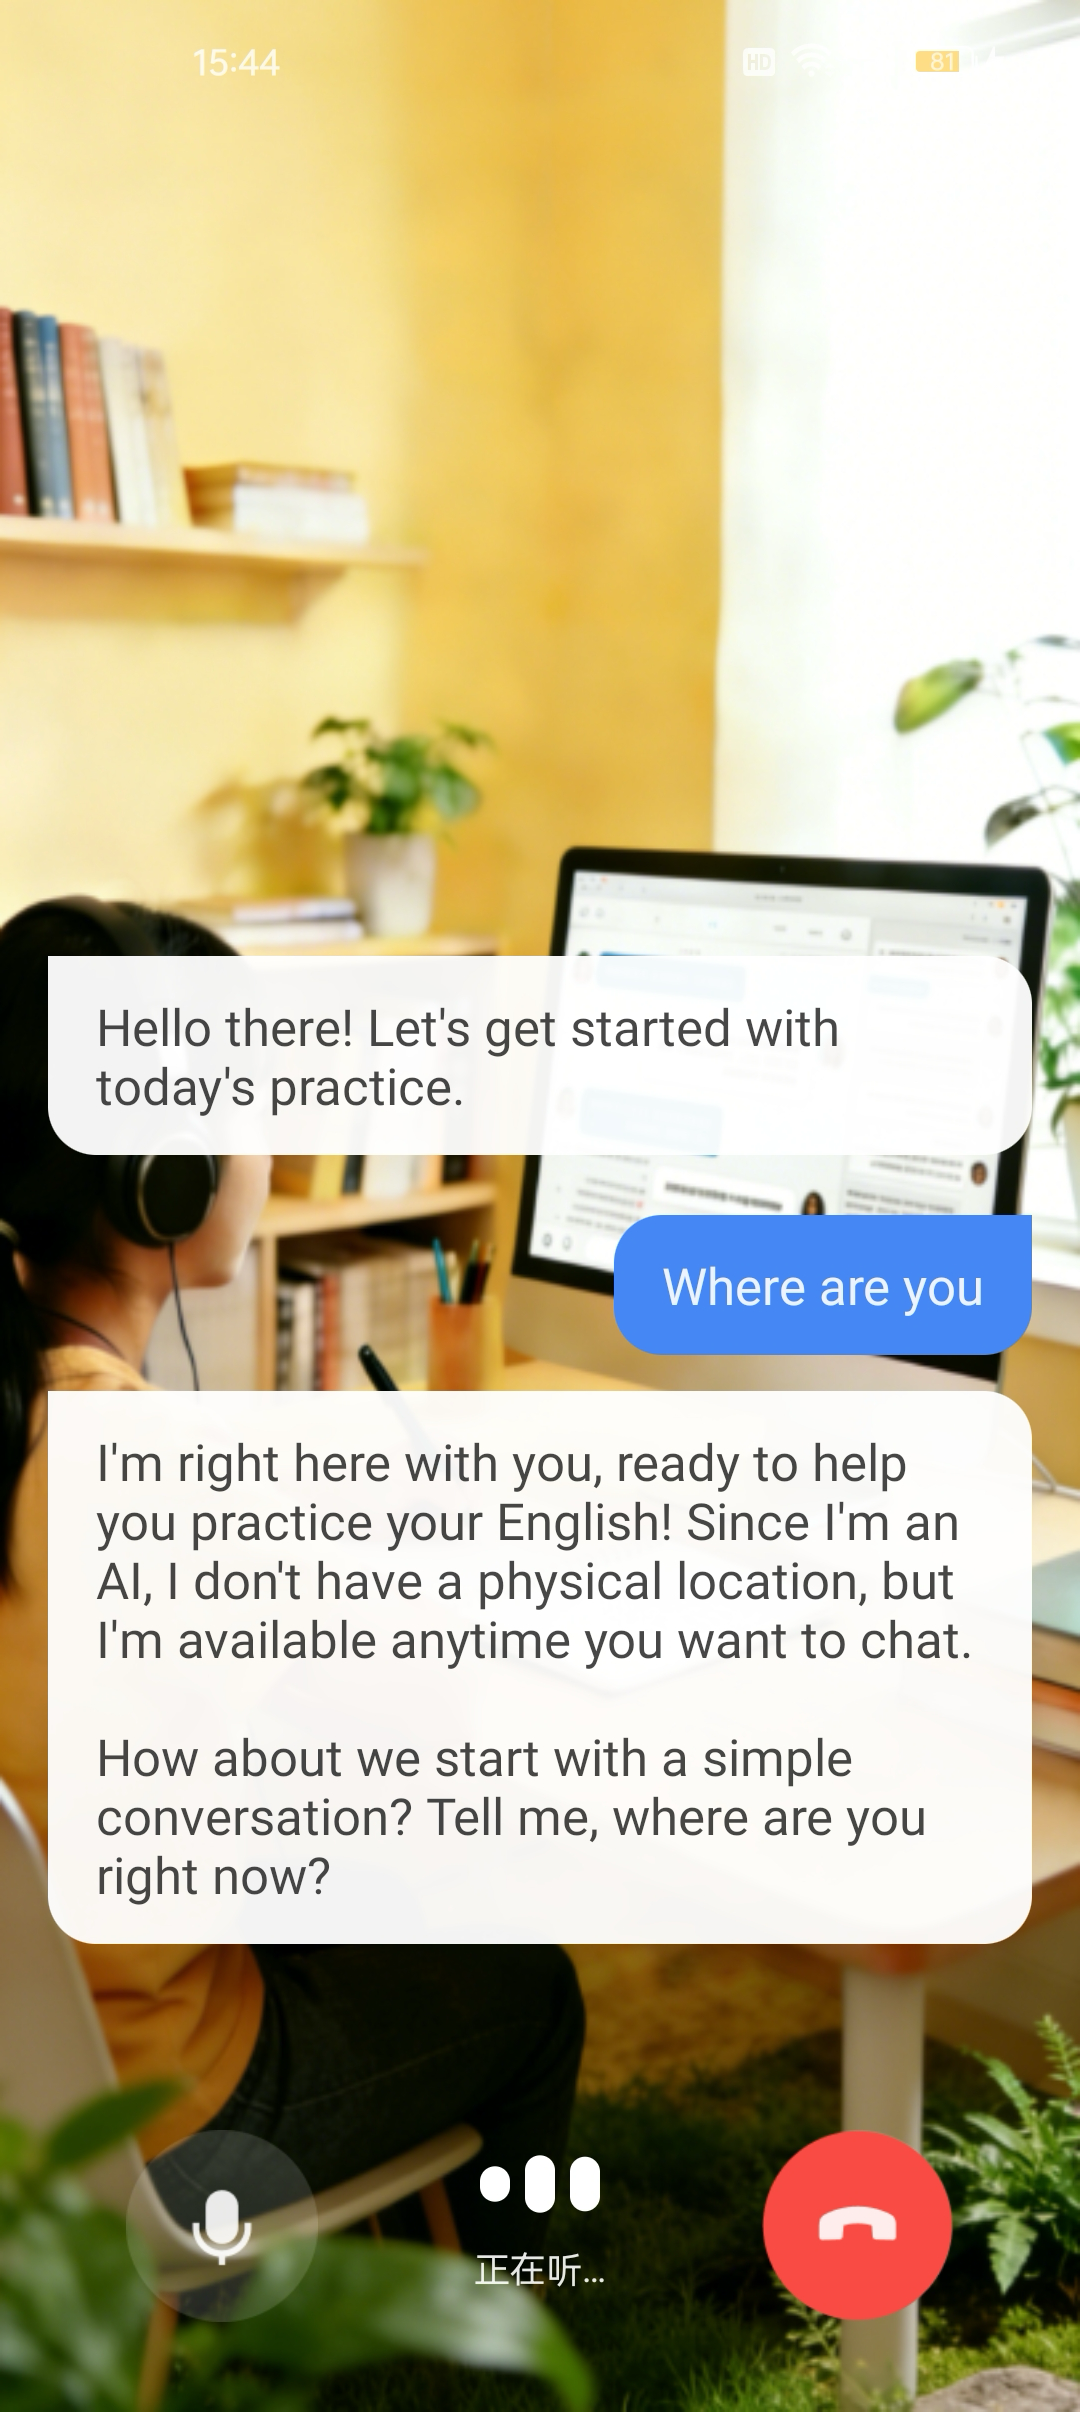
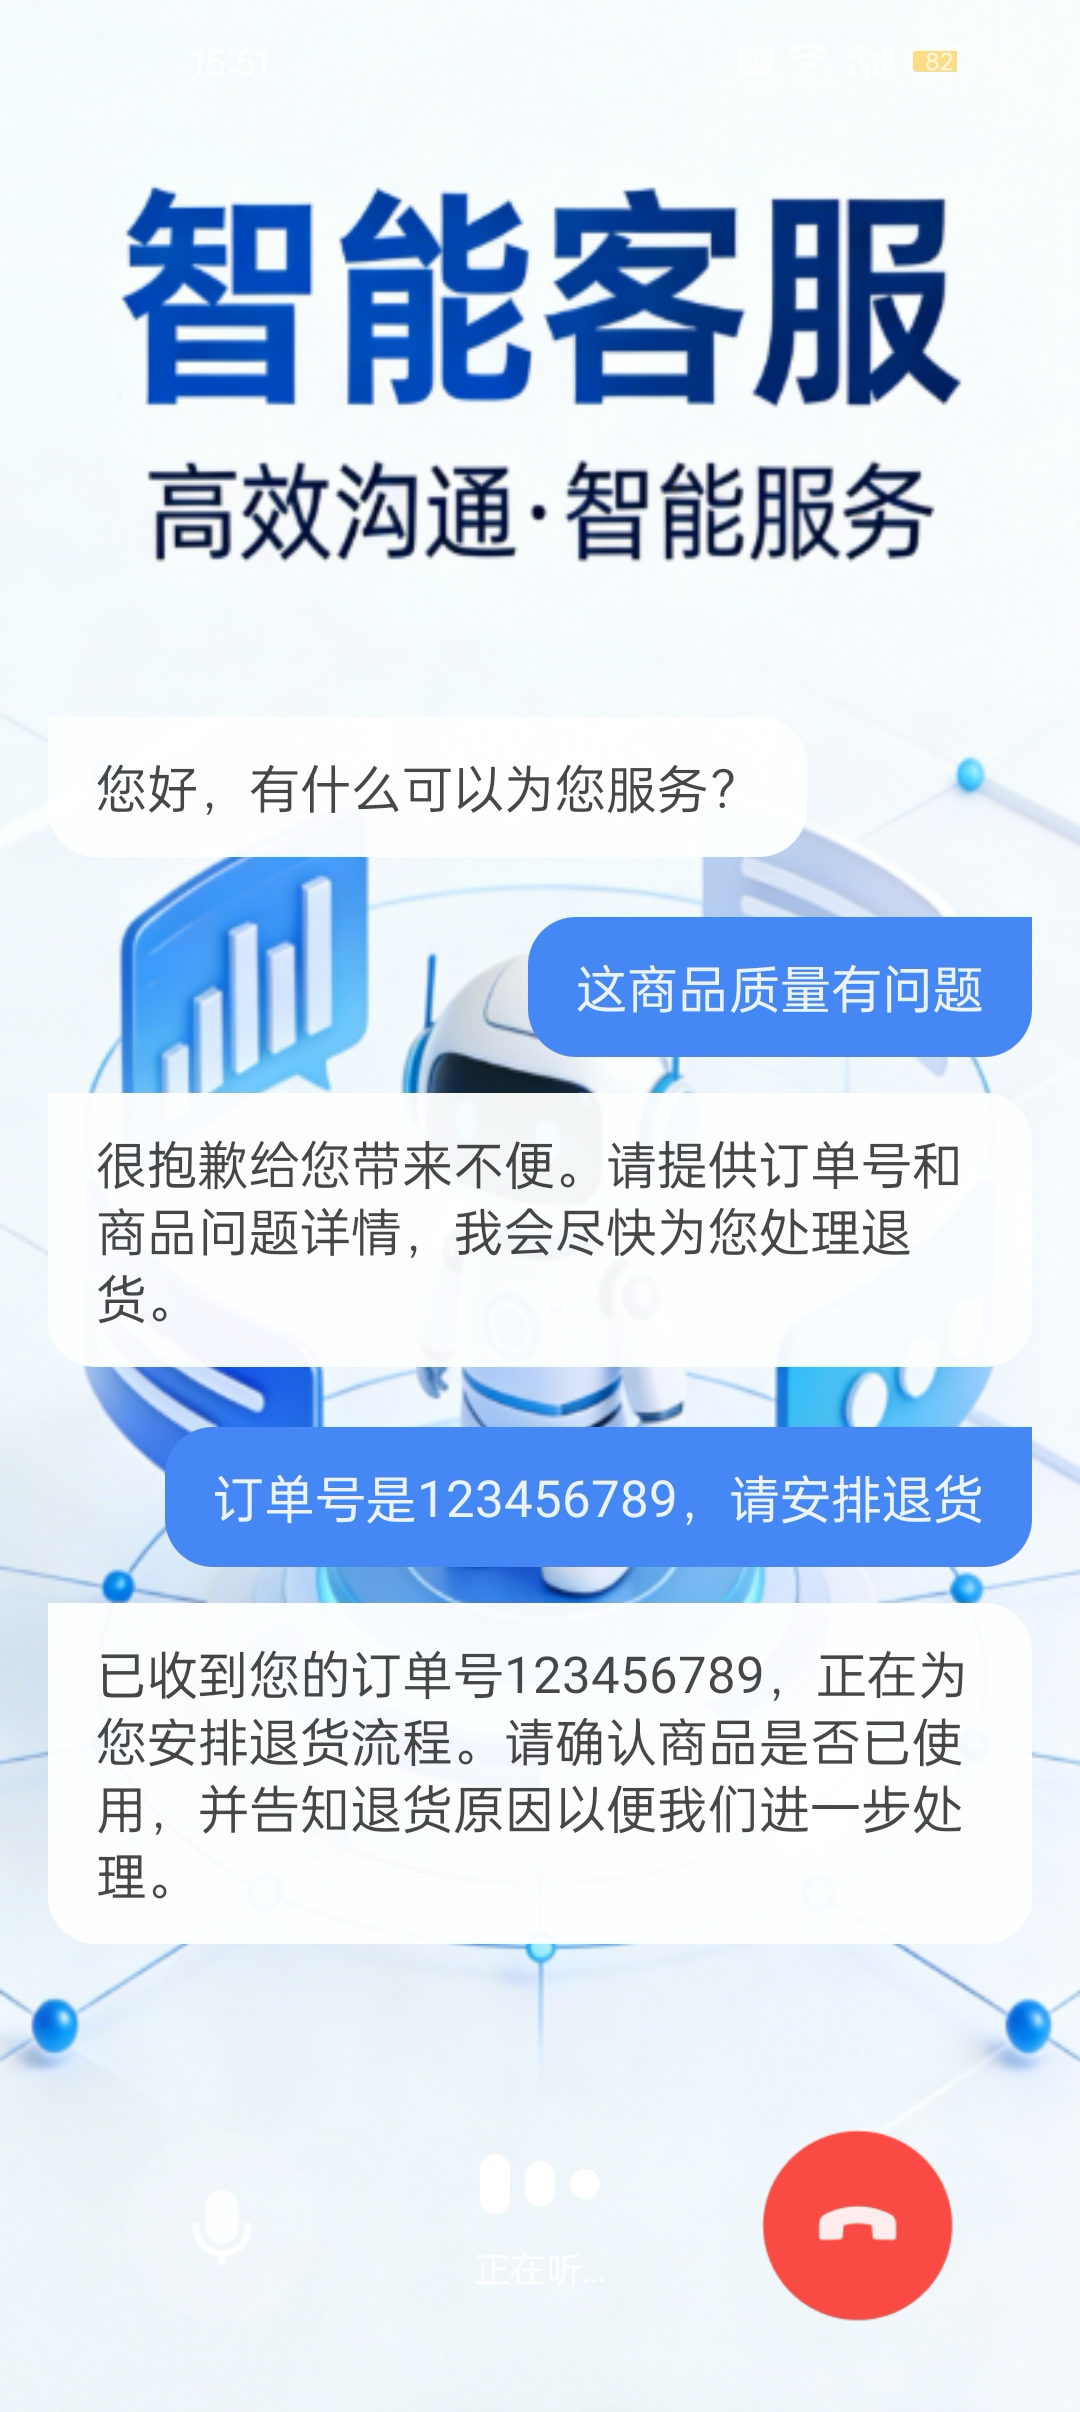
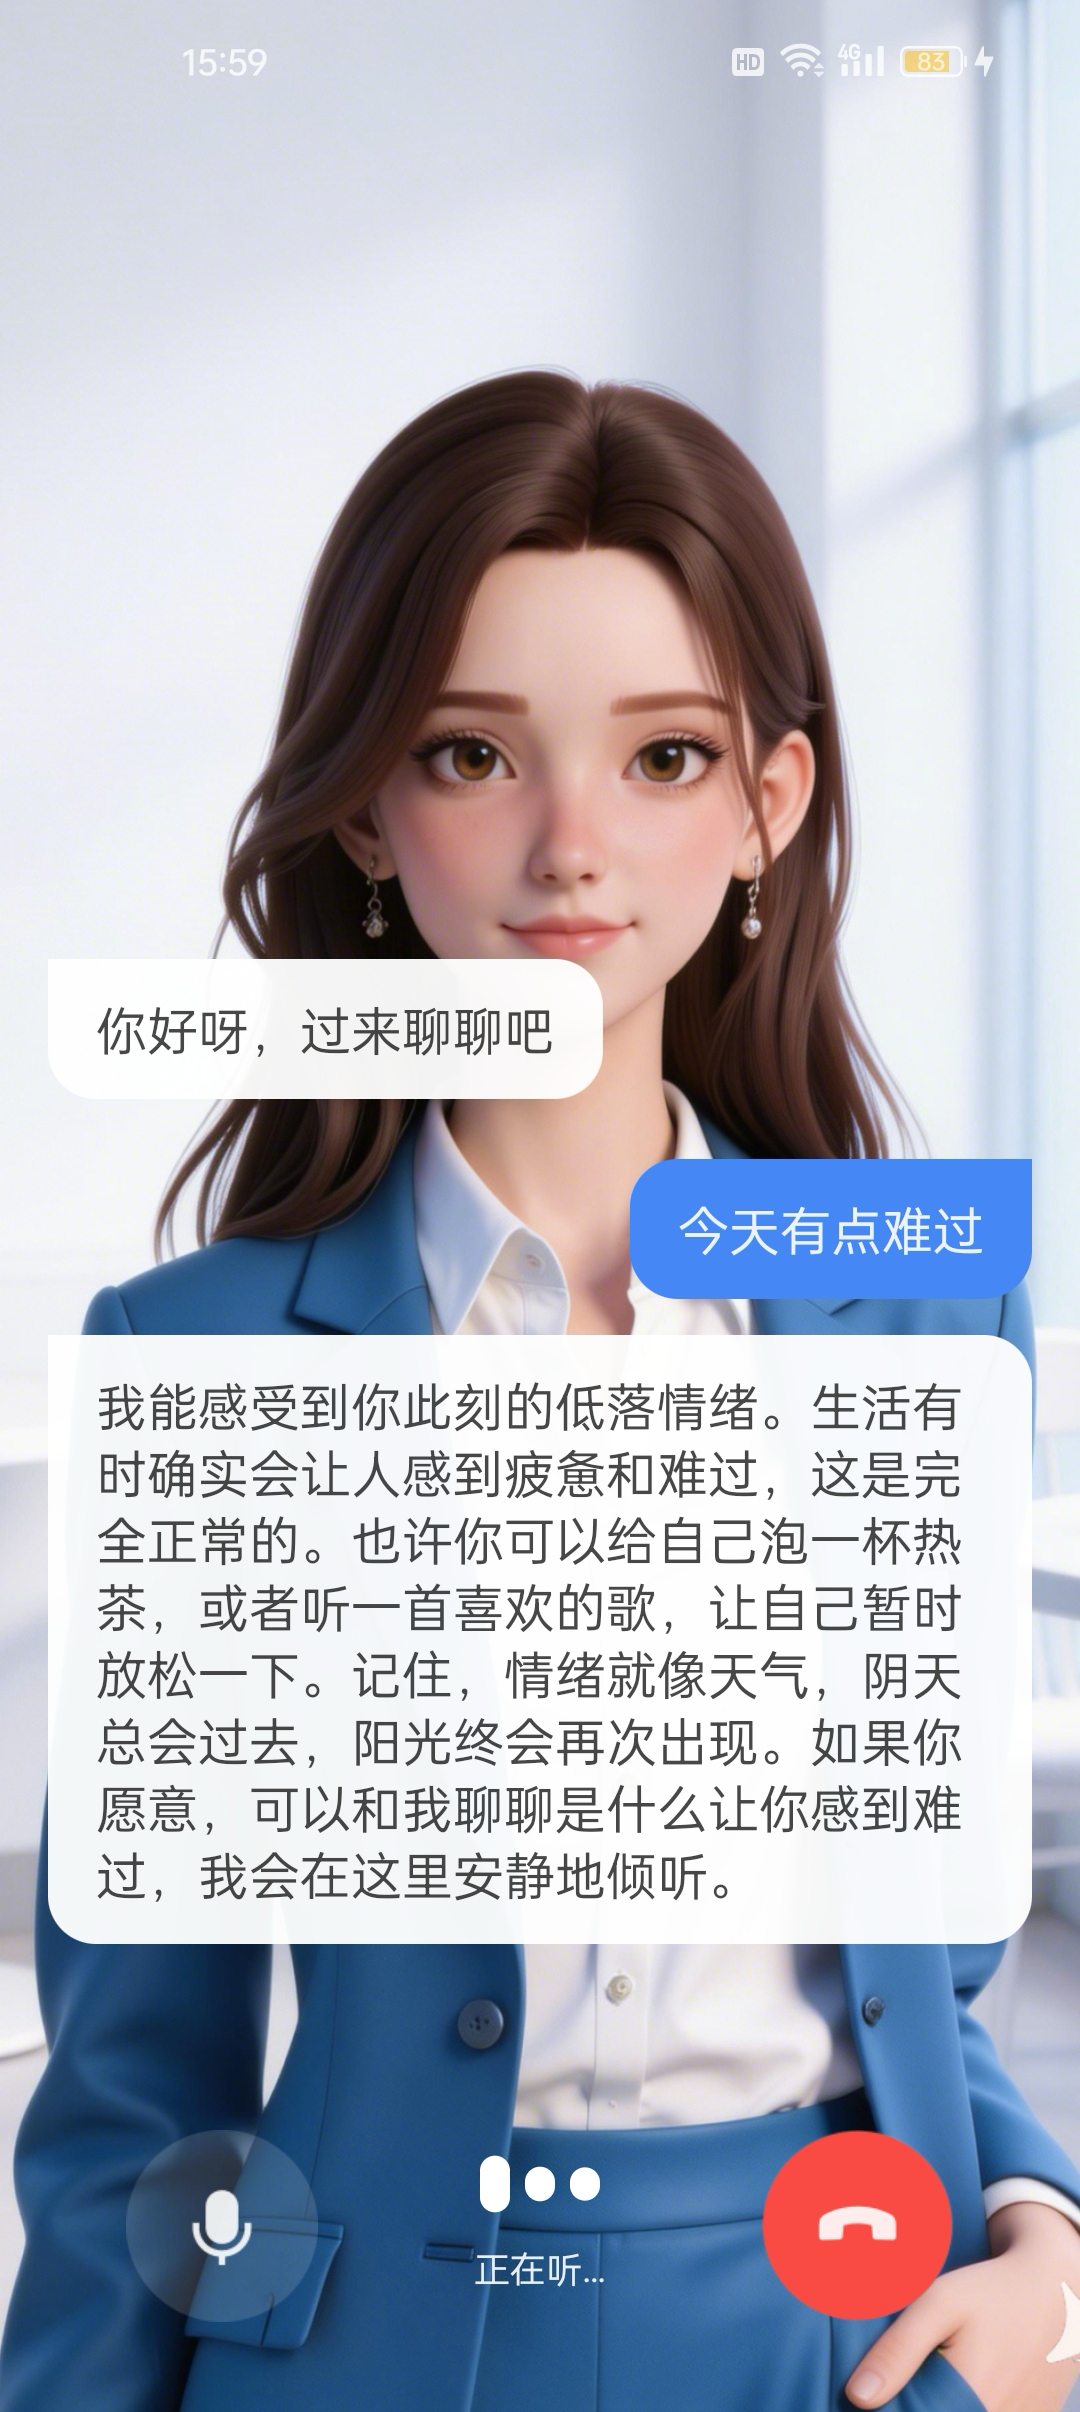
本篇文档旨在指导 iOS 开发者如何使用核心组件
AIConversationCoreView,快速构建具备 AI 对话功能的 app。在线教育 | 智能客服 | 情感陪伴 |
 |  |  |
核心功能
AIConversationCoreView 是一个专为 AI 对话设计的轻量级 View 组件,是您构建 AI 对话的核心,它封装了所有复杂的底层技术(例如开启 AI 对话、结束 AI 对话)。您可以将 AIConversationCoreView 作为 AI 对话画面的"画布",专注于上层 UI 与交互的开发。准备工作
步骤 1:开通服务
步骤 2:代码集成
集成 AIConversationKit 组件
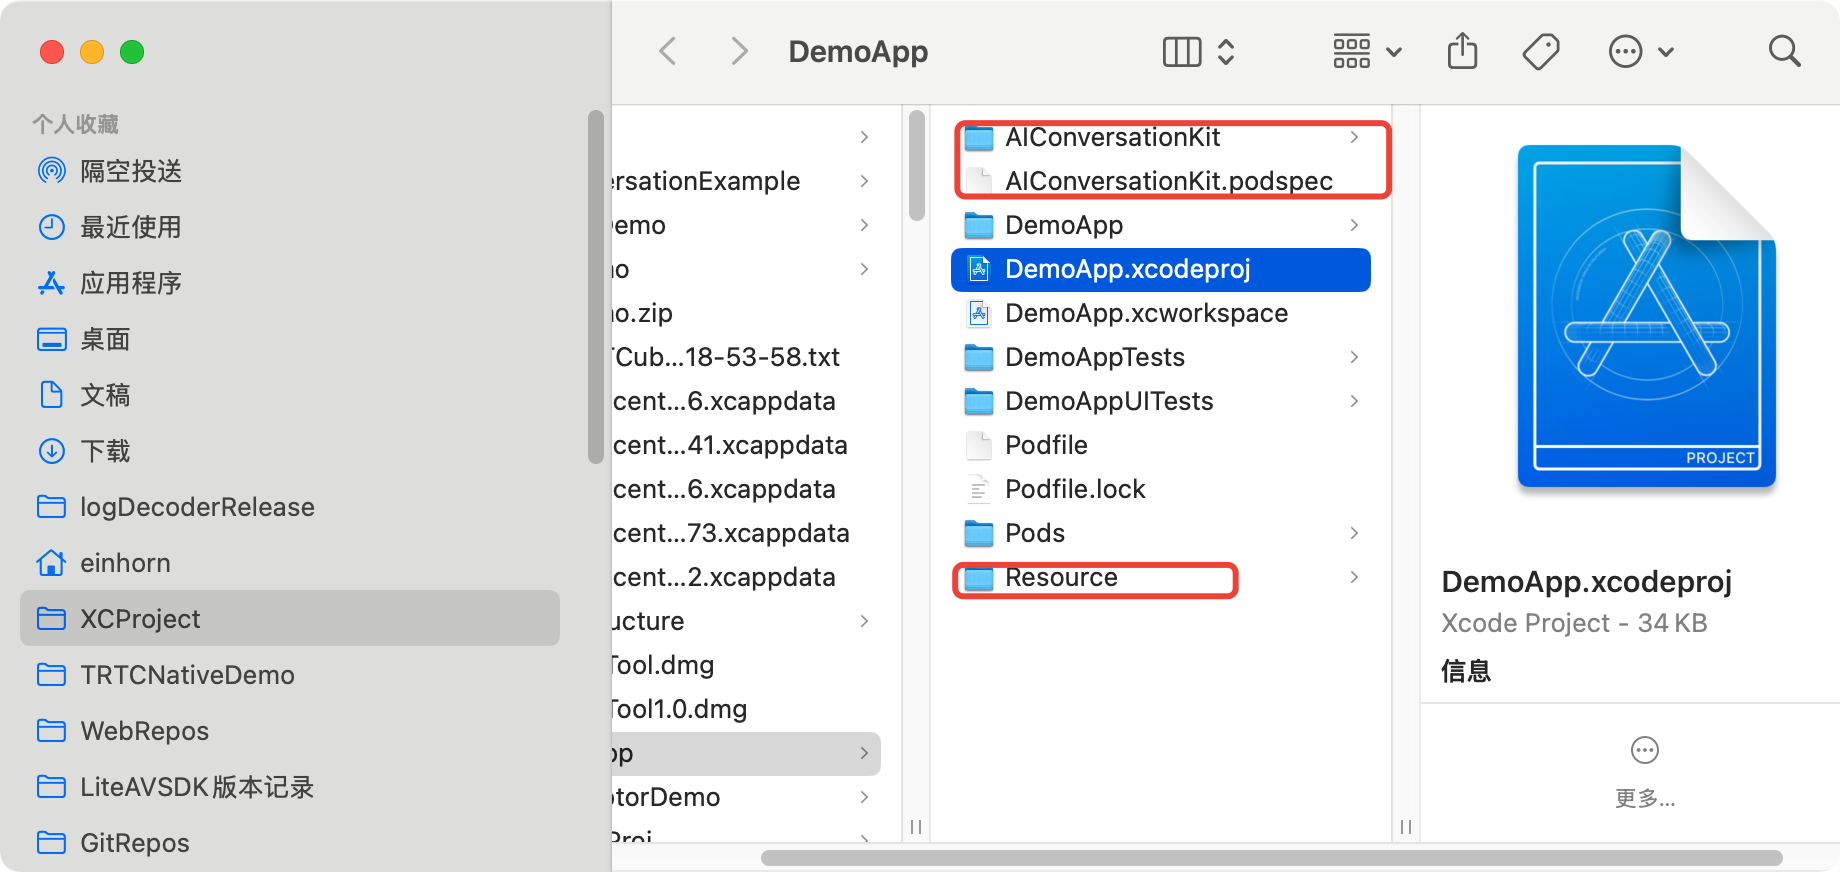
1. 从 GitHub 下载 zip 文件,解压后,您会看到 AIConversationKit 目录、AIConversationKit.podspec 文件和 Resource 目录。
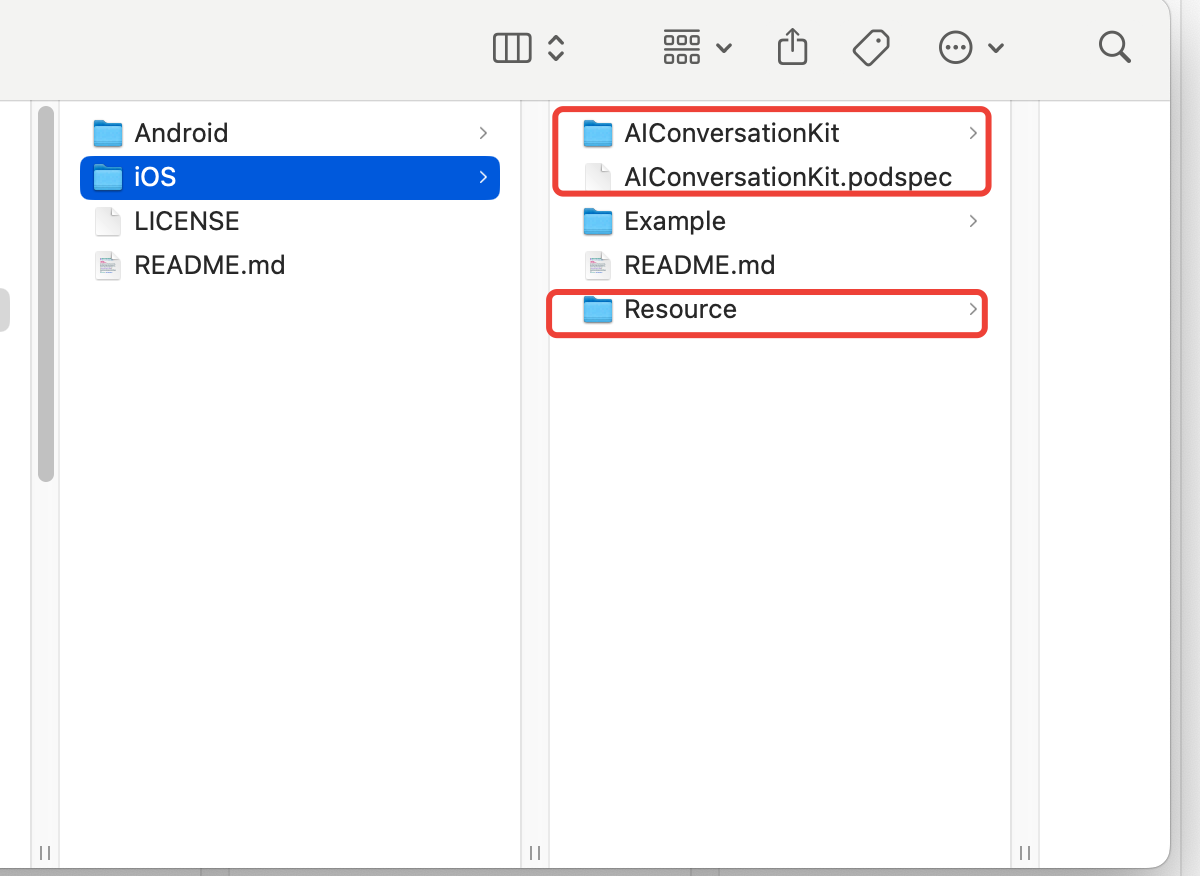
2. 复制上一步中解压得到的目录里的 AIConversationKit、podspec 和 Resource 到您的工程中。
3. 然后在
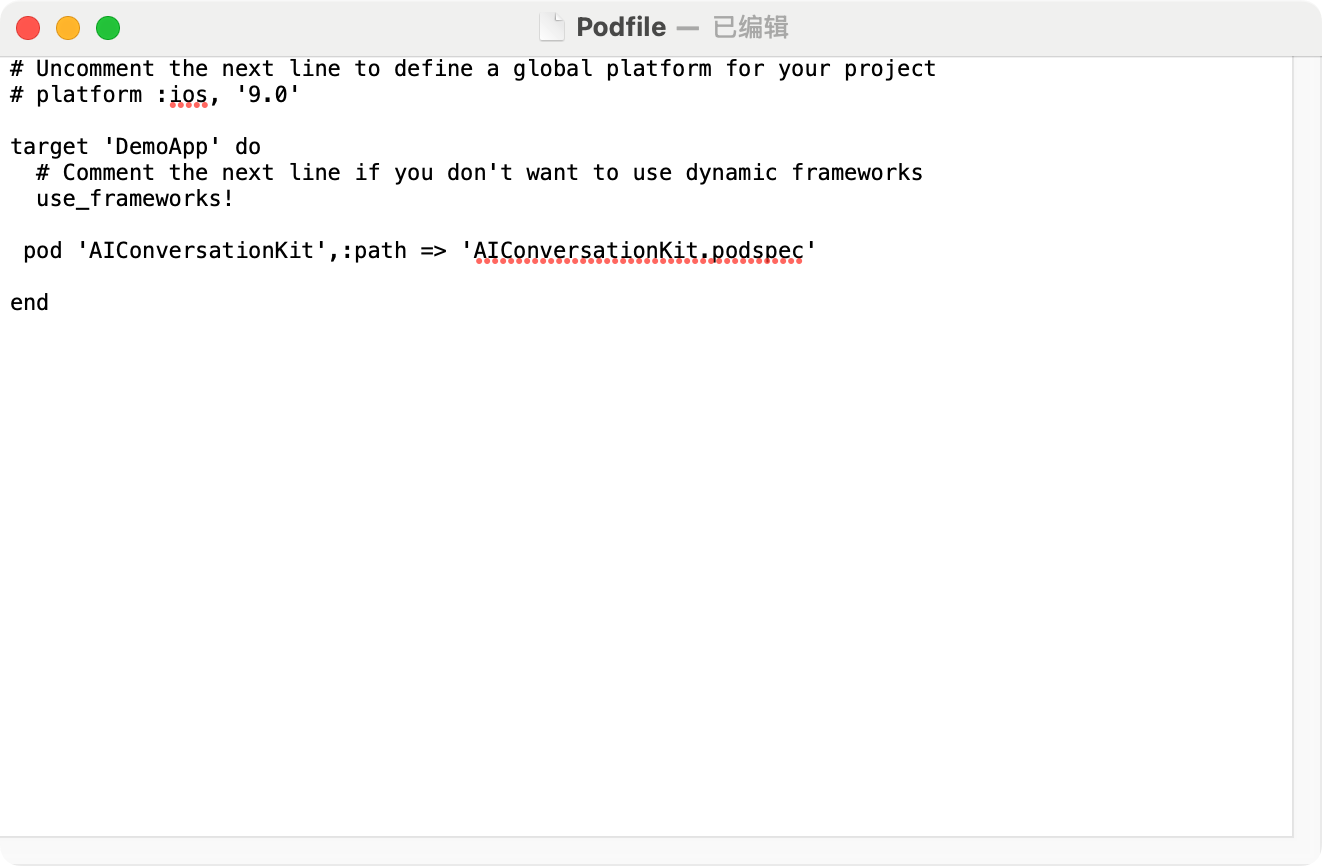
.xcodeproj 中打开控制台,执行 pod init。4. 在生成的 Podfile 里这样写:
pod 'AIConversationKit', :path => 'AIConversationKit.podspec'
5. 执行
pod install。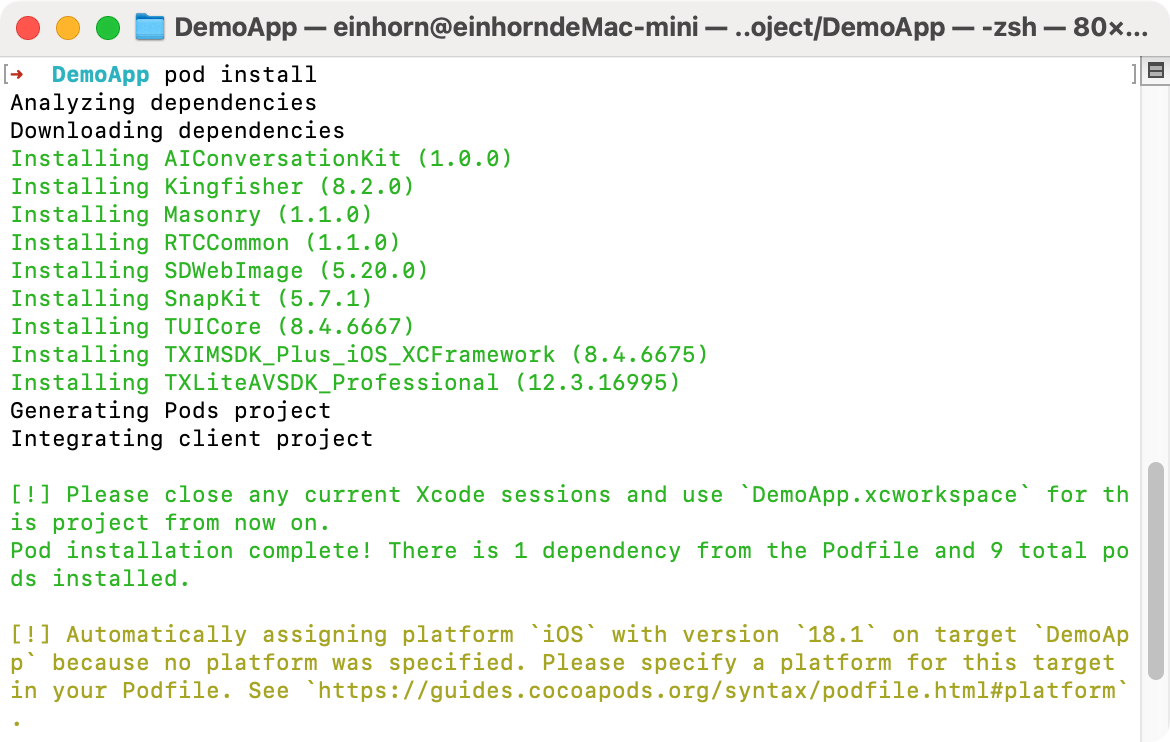
6. 打开
.xcworkspace: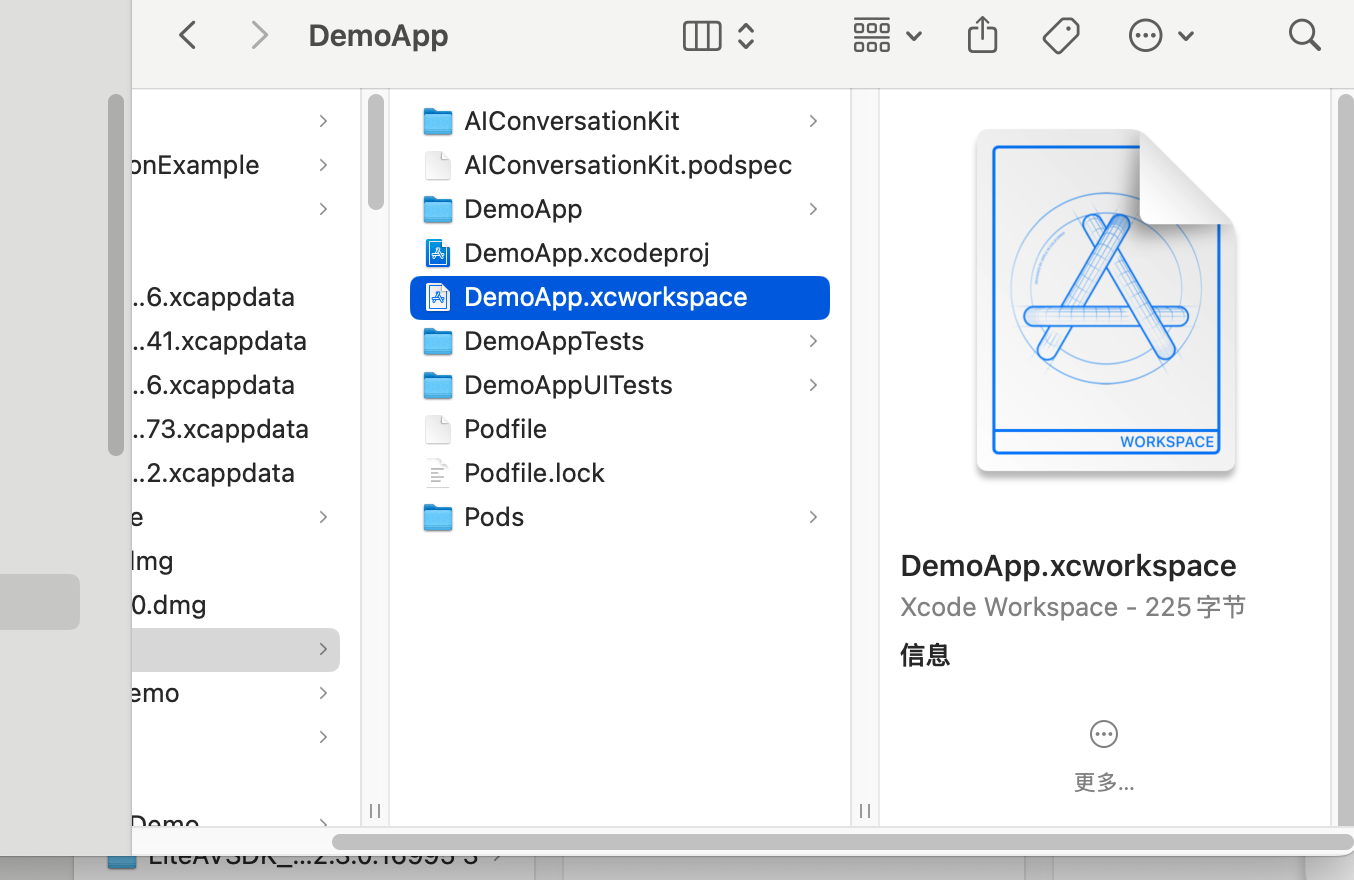
7. 配置证书信息:
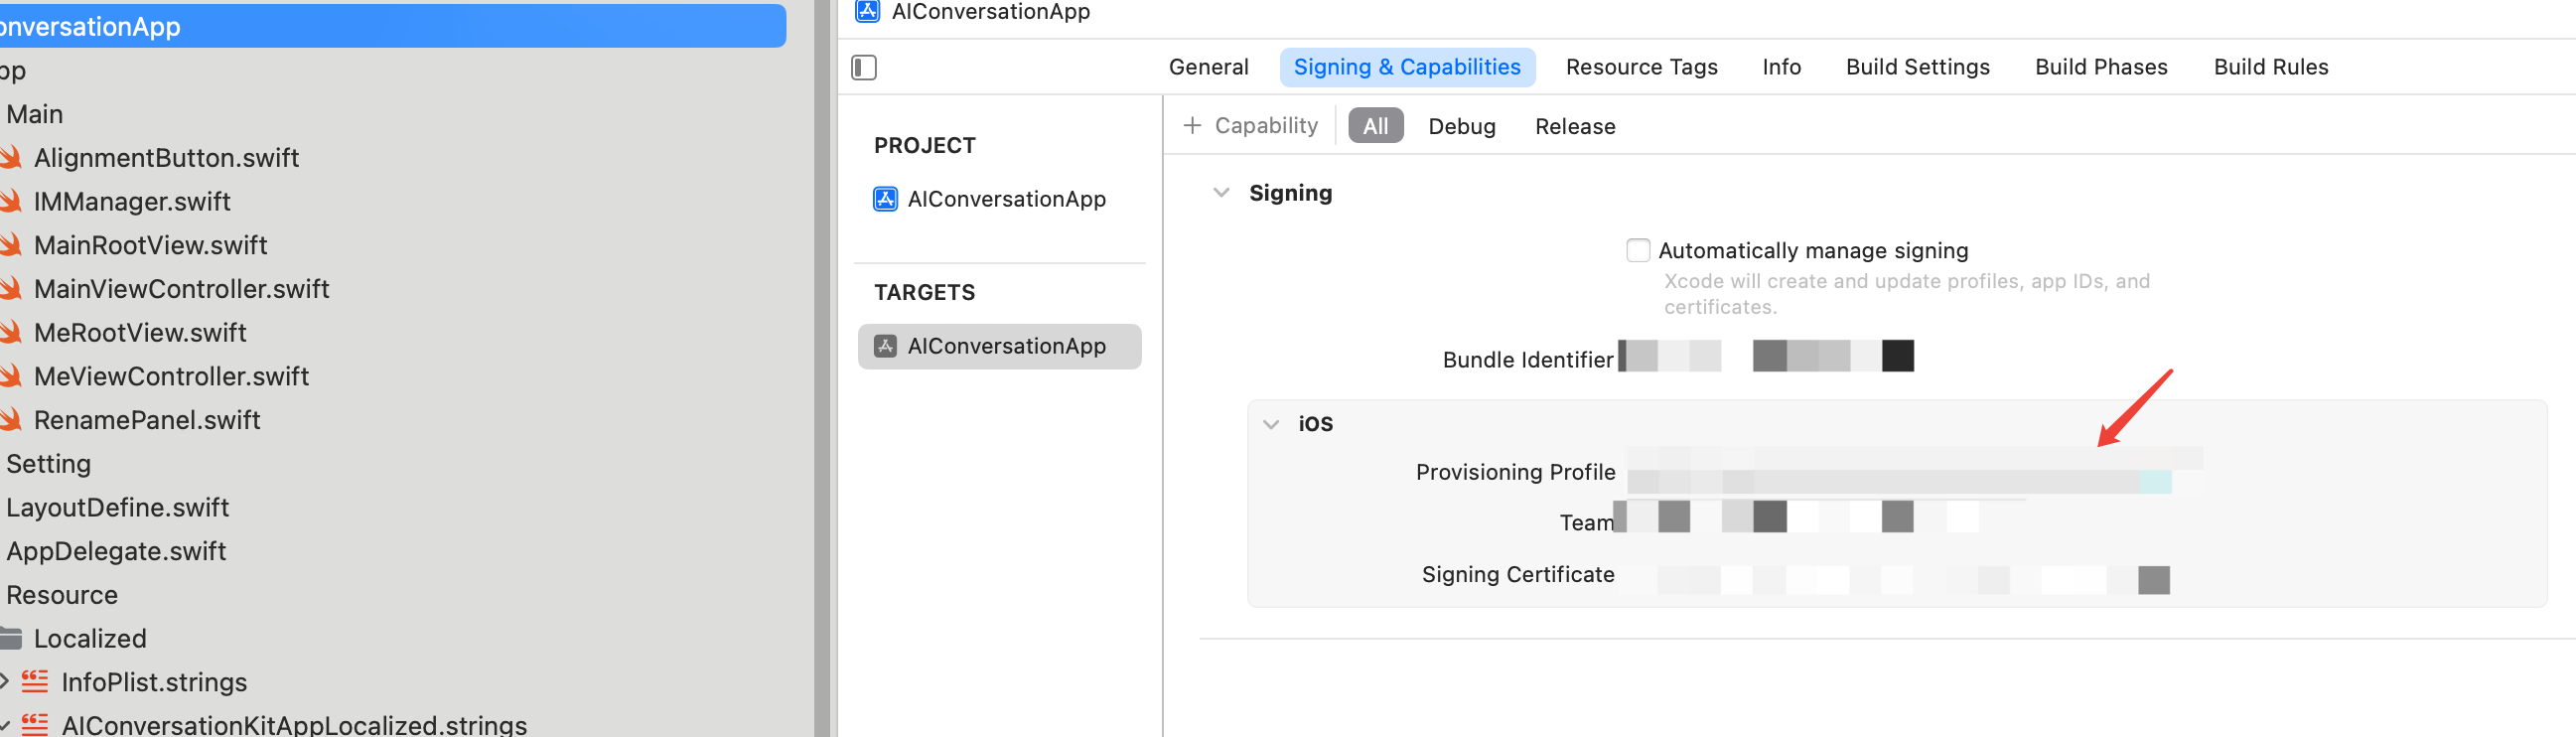
工程配置
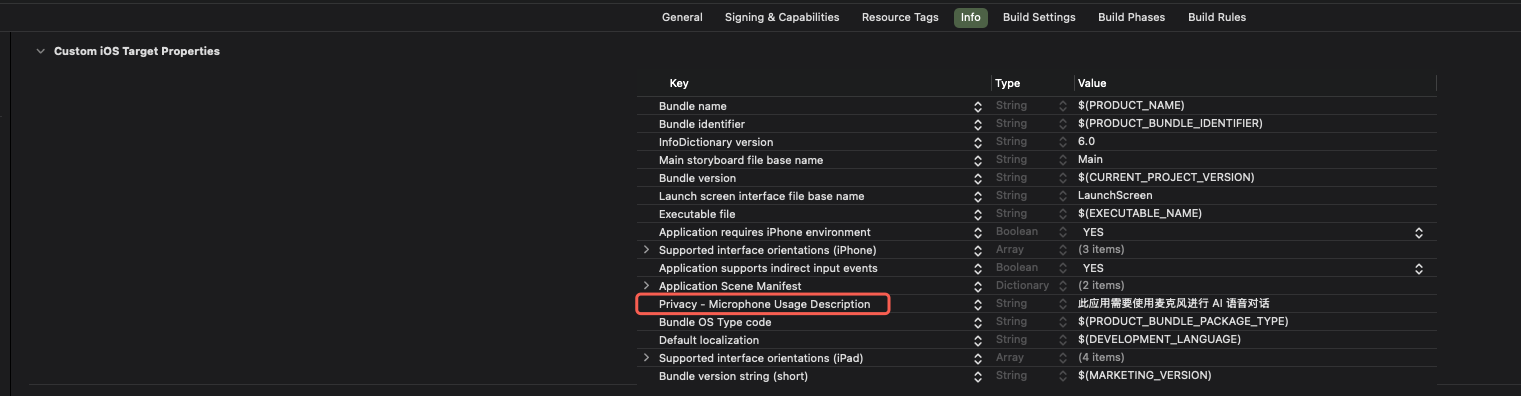
使用 AI 对话,需要授权麦克风使用权限。在 App 的 Info.plist 中添加以下麦克风声明,对应麦克风系统弹出授权对话框时的提示信息。
<key>NSMicrophoneUsageDescription</key><string>此应用需要使用麦克风进行 AI 语音对话</string>
步骤 3:实现登录逻辑
在您的项目中添加登录代码,这是使用
AIConversationCoreView 各项功能的关键前提:重要:
推荐在您 App 自身的用户账户登录成功后,再调用 TUILogin.login,以确保登录业务逻辑的清晰和一致。
import TUICoreimport AIConversationKit// 示例代码在 didFinishLaunchingWithOptions 完成登录,推荐您在自己登录业务完成后再调用登录服务func application(_ application: UIApplication, didFinishLaunchingWithOptions launchOptions: [UIApplication.LaunchOptionsKey: Any]?) -> Bool {let userId = "denny" // 请替换为您的 UserIDlet sdkAppId = 1600000001 // 请替换为开通服务控制台的 SDKAppIDlet sdkSecretKey = "xxx" // 请替换为开通服务控制台的 SDKSecretKeylet userSig = GenerateTestUserSig.genTestUserSig(sdkAppId: sdkAppId, userId: userId, secretkey: sdkSecretKey)TUILogin.login(Int32(sdkAppId), userID: userId, userSig:userSig){print("login success")} fail: { code, message inprint("login failed, code: \\(code), error: \\(message ?? "nil")")}return true}
登录接口参数说明
参数 | 类型 | 说明 |
SDKAppID | Int | |
UserID | String | 当前用户的唯一 ID,仅包含英文字母、数字、连字符和下划线。 |
userSig | String | 用于腾讯云鉴权的票据。请注意: |
搭建基础 AI 对话
步骤 1:添加 AIConversationCoreView
只需要将
AIConversationCoreView 添加到您的 ViewController 中即可。import UIKitimport AIConversationKitclass YourAIViewController: UIViewController {private let conversationCoreView = AIConversationCoreView()override func viewDidLoad() {super.viewDidLoad()view.addSubview(conversationCoreView)conversationCoreView.frame = view.boundsconversationCoreView.autoresizingMask = [.flexibleWidth, .flexibleHeight]}}
步骤 2:开启 AI 对话
通过调用
startAIConversation 接口开始 AI 对话,完整示例代码如下:import UIKitimport AIConversationKitimport TUICoreclass YourAIViewController: UIViewController {private let conversationCoreView = AIConversationCoreView()override func viewDidLoad() {super.viewDidLoad()view.addSubview(conversationCoreView)conversationCoreView.frame = view.boundsconversationCoreView.autoresizingMask = [.flexibleWidth, .flexibleHeight]startAIConversation()}private func startAIConversation() {var config = AIConversationConfig()let sdkAppId = 1600000001 // 1、替换 sdkAppIdlet sdkSecretKey = "xxx" // 2、替换 sdkSecretKeylet aiRobotId = "robot_\\(TUILogin.getUserID() ?? "")"let aiRobotSig = GenerateTestUserSig.genTestUserSig(sdkAppId: sdkAppId, userId: aiRobotId, secretkey: sdkSecretKey)config.agentConfig?.aiRobotId = aiRobotIdconfig.agentConfig?.aiRobotSig = aiRobotSigconfig.secretId = "xxx" // 3、替换 secretIdconfig.secretKey = "xxx" // 4、替换 secretKey// 5、替换 llmConfigconfig.llmConfig = "{\\"LLMType\\":\\"openai\\",\\"Model\\":\\"hunyuan-turbo-latest\\",\\"SystemPrompt\\":\\"您是一个个人助手\\",\\"APIUrl\\":\\"https://hunyuan.cloud.tencent.com/openai/v1/chat/completions\\",\\"APIKey\\":\\"xxxx\\",\\"History\\":5,\\"Streaming\\":true}"// 6、替换 ttsConfigconfig.ttsConfig = "{\\"TTSType\\":\\"tencent\\",\\"AppId\\":\\"xxx\\",\\"SecretId\\":\\"xxx\\",\\"SecretKey\\":\\"xxx\\",\\"VoiceType\\":\\"502001\\",\\"Speed\\":1.25,\\"Volume\\":5,\\"PrimaryLanguage\\":1,\\"FastVoiceType\\":\\"\\"}"conversationCoreView.startAIConversation(config: config) { code, message inprint("startAIConversation code: \\(code), message: \\(message)")}}}
1. sdkAppId 和 sdkSecretKey 使用 完成登录 后获取的数据即可。
2. 请到 准备工作 配置 AI 对话后台参数,包括基础配置、STT、LLM、TTS;然后点击右下角的快速跑通,切换到 iOS,获取 SecretId、SecretKey 和 Config 参数。
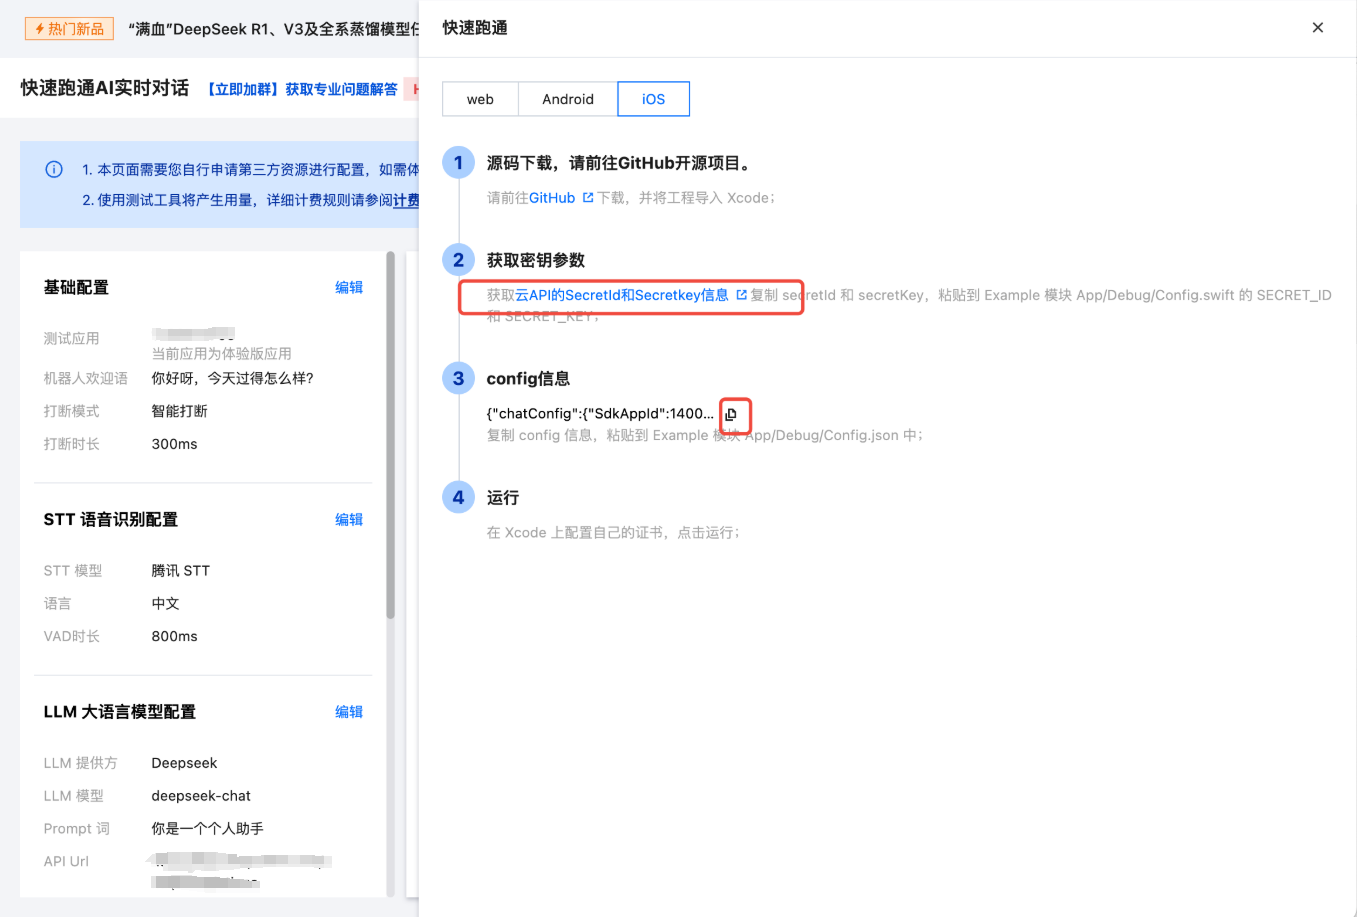
3. 将云 API 的 SecretId 和 SecretKey 复制到
config.secretId和config.secretKey中,SecretId 和 SecretKey 请妥善保存,避免泄露。4. 将 Config 信息复制到 JSON 解析工具中,例如 JSONUtil,将 LLMConfig 对应的字符串值复制到
config.llmConfig,将 TTSConfig 对应的字符串值复制到config.ttsConfig中。说明:
开发环境:如果您正在本地开发调试阶段,可以采用上述方式快速集成 AI 对话。该方法中账号信息很容易被反编译逆向破解,一旦您的密钥泄露,攻击者就可以盗用您的腾讯云流量。
生产环境:如果您的项目要发布上线,请将上述账号信息保存到服务端中,避免流量被盗用;相关对话配置,也可以保存到服务端中,方便动态调整 AI 对话效果。
步骤 3:结束 AI 对话
通过调用
stopAIConversation 接口结束 AI 对话,示例代码如下:import UIKitimport AIConversationKitimport TUICoreclass YourAIViewController: UIViewController {// ... 其他代码 ...private func stopAIConversation() {conversationCoreView.stopAIConversation() { code, message inprint("stopAIConversation code: \\(code), message: \\(message)")}}}
步骤 4:显示 AI 对话字幕 (可选)
只需要将
AIConversationSubtitleView 添加到您的 ViewController 中,即可完成 AI 对话字幕的显示。import UIKitimport AIConversationKitclass YourAIViewController: UIViewController {private let conversationCoreView = AIConversationCoreView()private let subtitleView = AIConversationSubtitleView()override func viewDidLoad() {super.viewDidLoad()view.addSubview(conversationCoreView)conversationCoreView.frame = view.boundsconversationCoreView.autoresizingMask = [.flexibleWidth, .flexibleHeight]// 添加字幕视图view.addSubview(subtitleView)subtitleView.translatesAutoresizingMaskIntoConstraints = falseNSLayoutConstraint.activate([subtitleView.leadingAnchor.constraint(equalTo: view.leadingAnchor),subtitleView.trailingAnchor.constraint(equalTo: view.trailingAnchor),subtitleView.topAnchor.constraint(equalTo: view.topAnchor, constant: 120),subtitleView.bottomAnchor.constraint(equalTo: view.bottomAnchor, constant: -120)])}}
步骤 5:控制麦克风开关 (可选)
只需要将
MicView 添加到您的 ViewController 中,即可点击开关本地麦克风。import UIKitimport AIConversationKitclass YourAIViewController: UIViewController {private let conversationCoreView = AIConversationCoreView()private let micView = MicView()override func viewDidLoad() {super.viewDidLoad()view.addSubview(conversationCoreView)conversationCoreView.frame = view.boundsconversationCoreView.autoresizingMask = [.flexibleWidth, .flexibleHeight]// 添加 MicViewview.addSubview(micView)micView.translatesAutoresizingMaskIntoConstraints = falseNSLayoutConstraint.activate([micView.widthAnchor.constraint(equalToConstant: 120),micView.heightAnchor.constraint(equalToConstant: 120),micView.leadingAnchor.constraint(equalTo: view.leadingAnchor, constant: 48),micView.bottomAnchor.constraint(equalTo: view.safeAreaLayoutGuide.bottomAnchor, constant: -32)])}}
步骤 6:显示 AI 状态 (可选)
只需要将
AIStatusView 添加到您的 ViewController 中,即可显示当前 AI 状态。import UIKitimport AIConversationKitclass YourAIViewController: UIViewController {private let conversationCoreView = AIConversationCoreView()private let aiStatusView = AIStatusView()override func viewDidLoad() {super.viewDidLoad()view.addSubview(conversationCoreView)conversationCoreView.frame = view.boundsconversationCoreView.autoresizingMask = [.flexibleWidth, .flexibleHeight]// 添加 AIStatusViewview.addSubview(aiStatusView)aiStatusView.translatesAutoresizingMaskIntoConstraints = falseNSLayoutConstraint.activate([aiStatusView.widthAnchor.constraint(equalToConstant: 180),aiStatusView.heightAnchor.constraint(equalToConstant: 130),aiStatusView.centerXAnchor.constraint(equalTo: view.centerXAnchor),aiStatusView.bottomAnchor.constraint(equalTo: view.safeAreaLayoutGuide.bottomAnchor, constant: -48)])}}
调节对话效果
为了在 AI 对话中获得最佳体验,清晰的声音采集至关重要。我们提供多种参数设置,帮助您在不同环境下都能获得清晰的语音交互效果。
vadLevel 远场人声抑制
在多人交谈的环境中,其他人声可能会干扰 AI 对您声音的识别。通过调整人声抑制级别,我们可以有效过滤环境中的其他人声干扰,让 AI 更准确地专注于您的语音;您可以通过设置 config 中的 sttConfig.vadLevel 参数来达到期望的效果。
级别 | 效果描述 | 使用场景 |
0 | 关闭远场人声抑制功能 | 在嘈杂环境下AI容易被噪声打断,可能导致无法正常对话。 |
1 | 开启轻度抑制模式 | 适合相对安静的环境使用,例如家庭、图书馆。 |
2 | 推荐默认设置 | 适用于大多数日常场景(默认值)。 |
3 | 开启强力抑制模式 | 适合嘈杂环境使用,例如菜市场、车站。 |
代码配置示例
var config = AIConversationConfig()config.sttConfig?.vadLevel = 3conversationCoreView.startAIConversation(config: config, completion: nil)
interruptMode 打断模式
根据您的使用习惯,可以设置不同的打断方式,在 AI 说话时进行打断,使对话交互更加自然流畅;您可以通过设置 config 中的 agentConfig.interruptMode 参数来达到期望的效果。
模式 | 功能描述 | 适用场景 |
0 | 智能模式 | AI 正在说话时,可通过点击屏幕或用户说话打断;(默认值) |
1 | 手动打断 | AI 正在说话时,只能通过点击屏幕打断; |
代码配置示例
var config = AIConversationConfig()config.agentConfig?.interruptMode = 1conversationCoreView.startAIConversation(config: config, completion: nil)
language 语言识别
根据说话者使用的语言进行设置,AI 才能准确地将语音转换成对应的文字内容;您可以通过设置 config 中的 sttConfig.language 参数来达到期望的效果。
语言代码 | 语言名称 | 说明 |
"zh" | 中文 | 支持普通话识别 (默认值) |
"en" | 英语 | 支持英语识别 |
代码配置示例
var config = AIConversationConfig()config.sttConfig?.language = "en"conversationCoreView.startAIConversation(config: config, completion: nil)
常见问题
pod install 执行后本地安装找不到 AIConversationKit 最新版本?
如果无法安装 TUILiveKit 最新版本,请按以下步骤操作:
1. 在 Podfile 所在目录下删除
Podfile.lock 和 Pods,您可以选择手动删除或终端执行以下命令// cd 到 Podfile 所在目录下rm -rf Pods/rmPodfile.lock
2. 在 Podfile 所在目录下执行
pod install --repo-update// cd 到 Podfile 所在目录下pod install --repo-update
每次进房都需要调用登录吗?
不需要。通常您只需要完成一次
TUILogin.login 调用即可,我们建议您将 TUILogin.login 和 TUILogin.logout 与自己的登录业务关联。Podfile 文件有没有示例配置可以参考?
部署目标版本过低警告 ?
如果您遇到如下错误:
clang: error: SDK does not contain 'libarclite' at the path '/Applications/Xcode.app/Contents/Developer/Toolchains/XcodeDefault.xctoolchain/usr/lib/arc/libarclite_iphonesimulator.a'; try increasing the minimum deployment target部署目标版本过低警告:TXLiteAVSDK_Professional: iOS 8.0 → 需要 12.0+TXIMSDK_Plus_iOS_XCFramework: iOS 8.0 → 需要 12.0+TUICore: iOS 9.0 → 需要 12.0+
post_install do |installer|installer.pods_project.targets.each do |target|target.build_configurations.each do |config|config.build_settings['CODE_SIGNING_ALLOWED'] = 'NO'config.build_settings['ENABLE_BITCODE'] = 'NO'config.build_settings['IPHONEOS_DEPLOYMENT_TARGET'] = 13.0endendend


