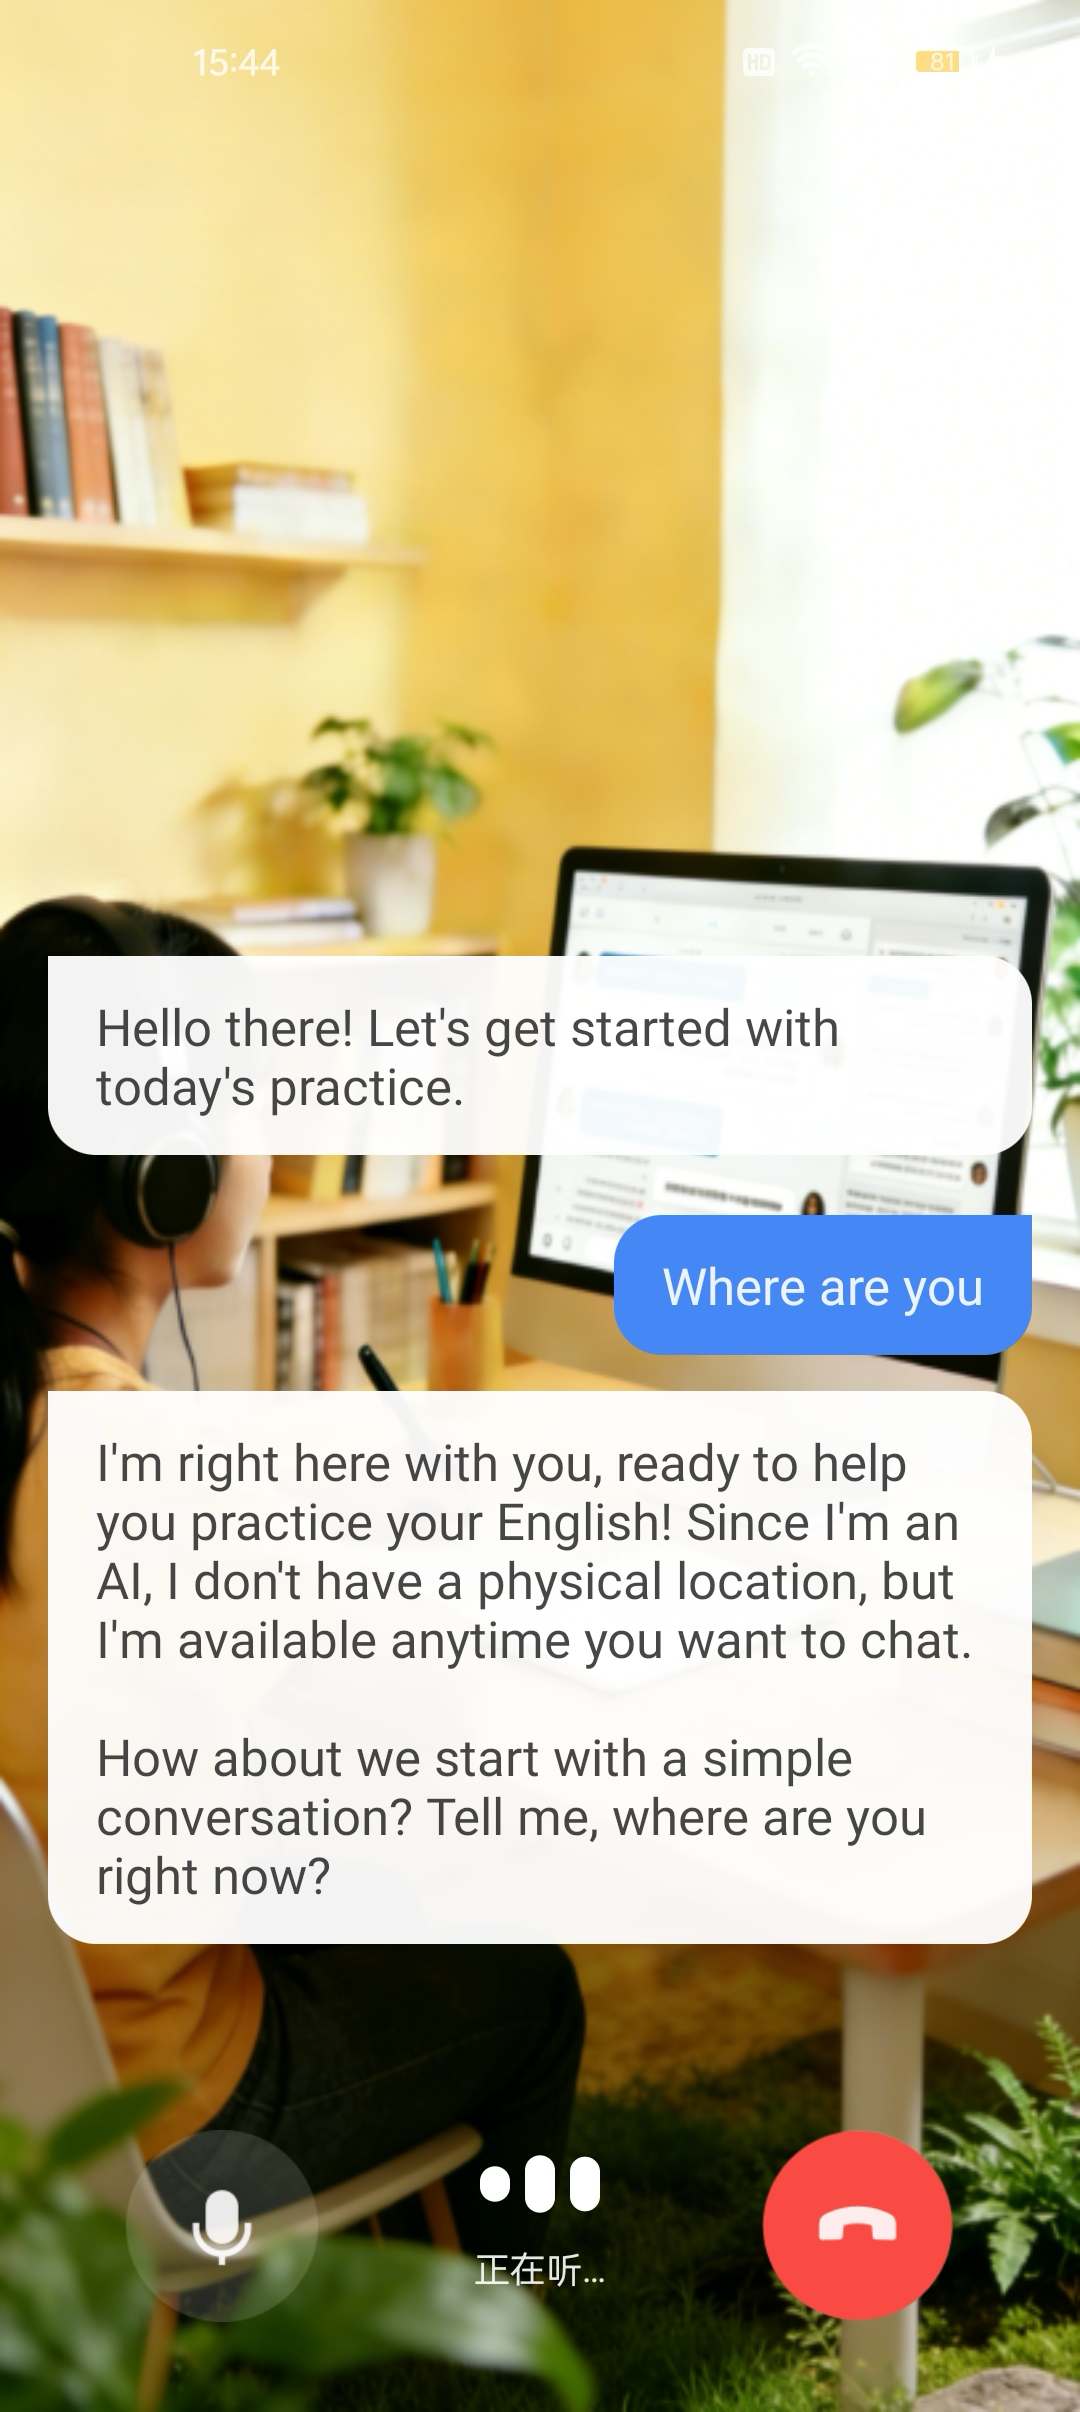
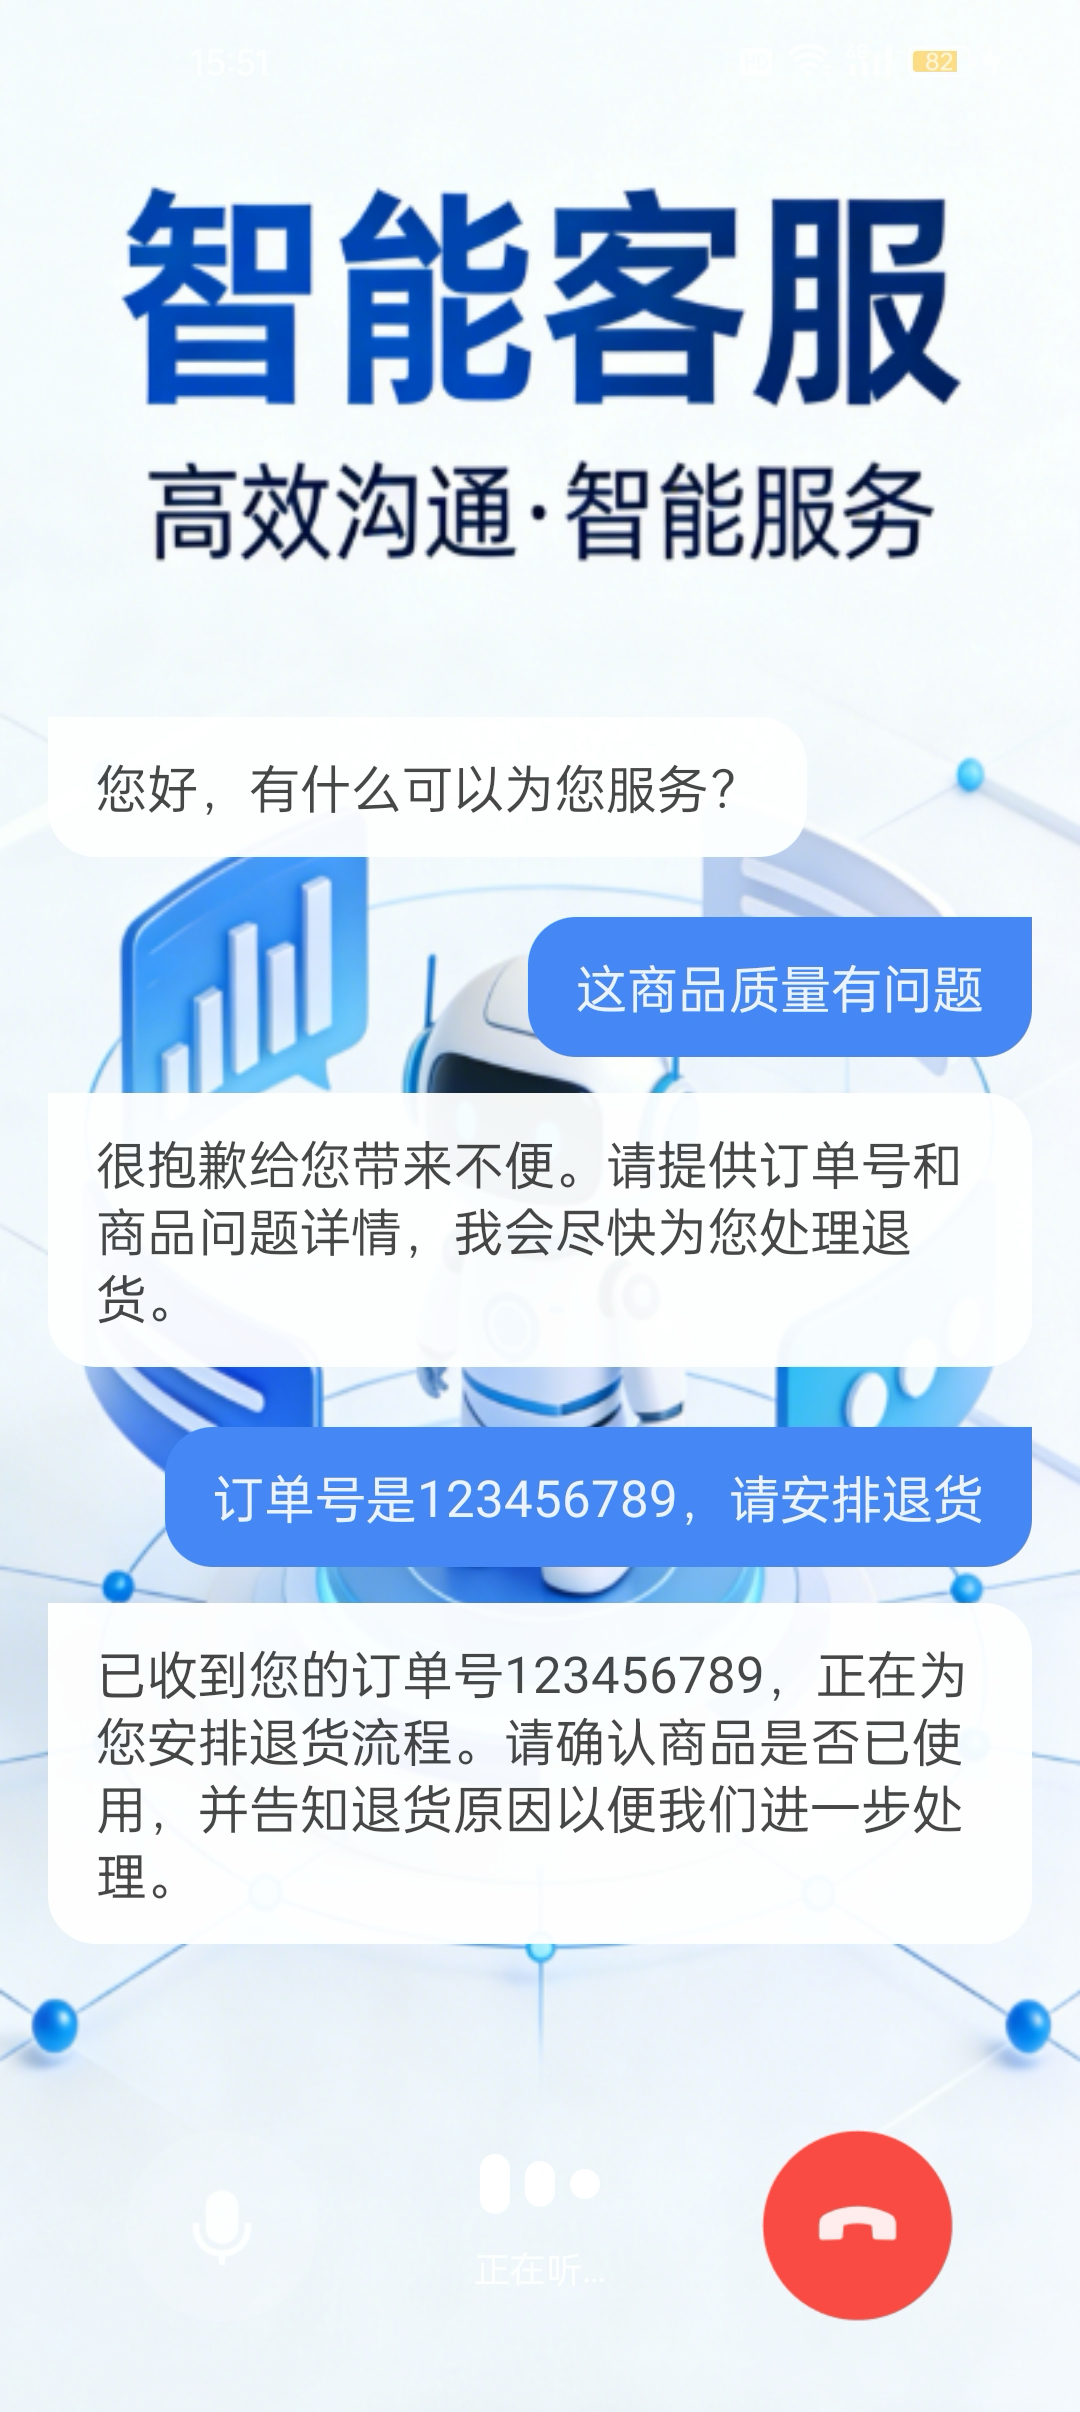
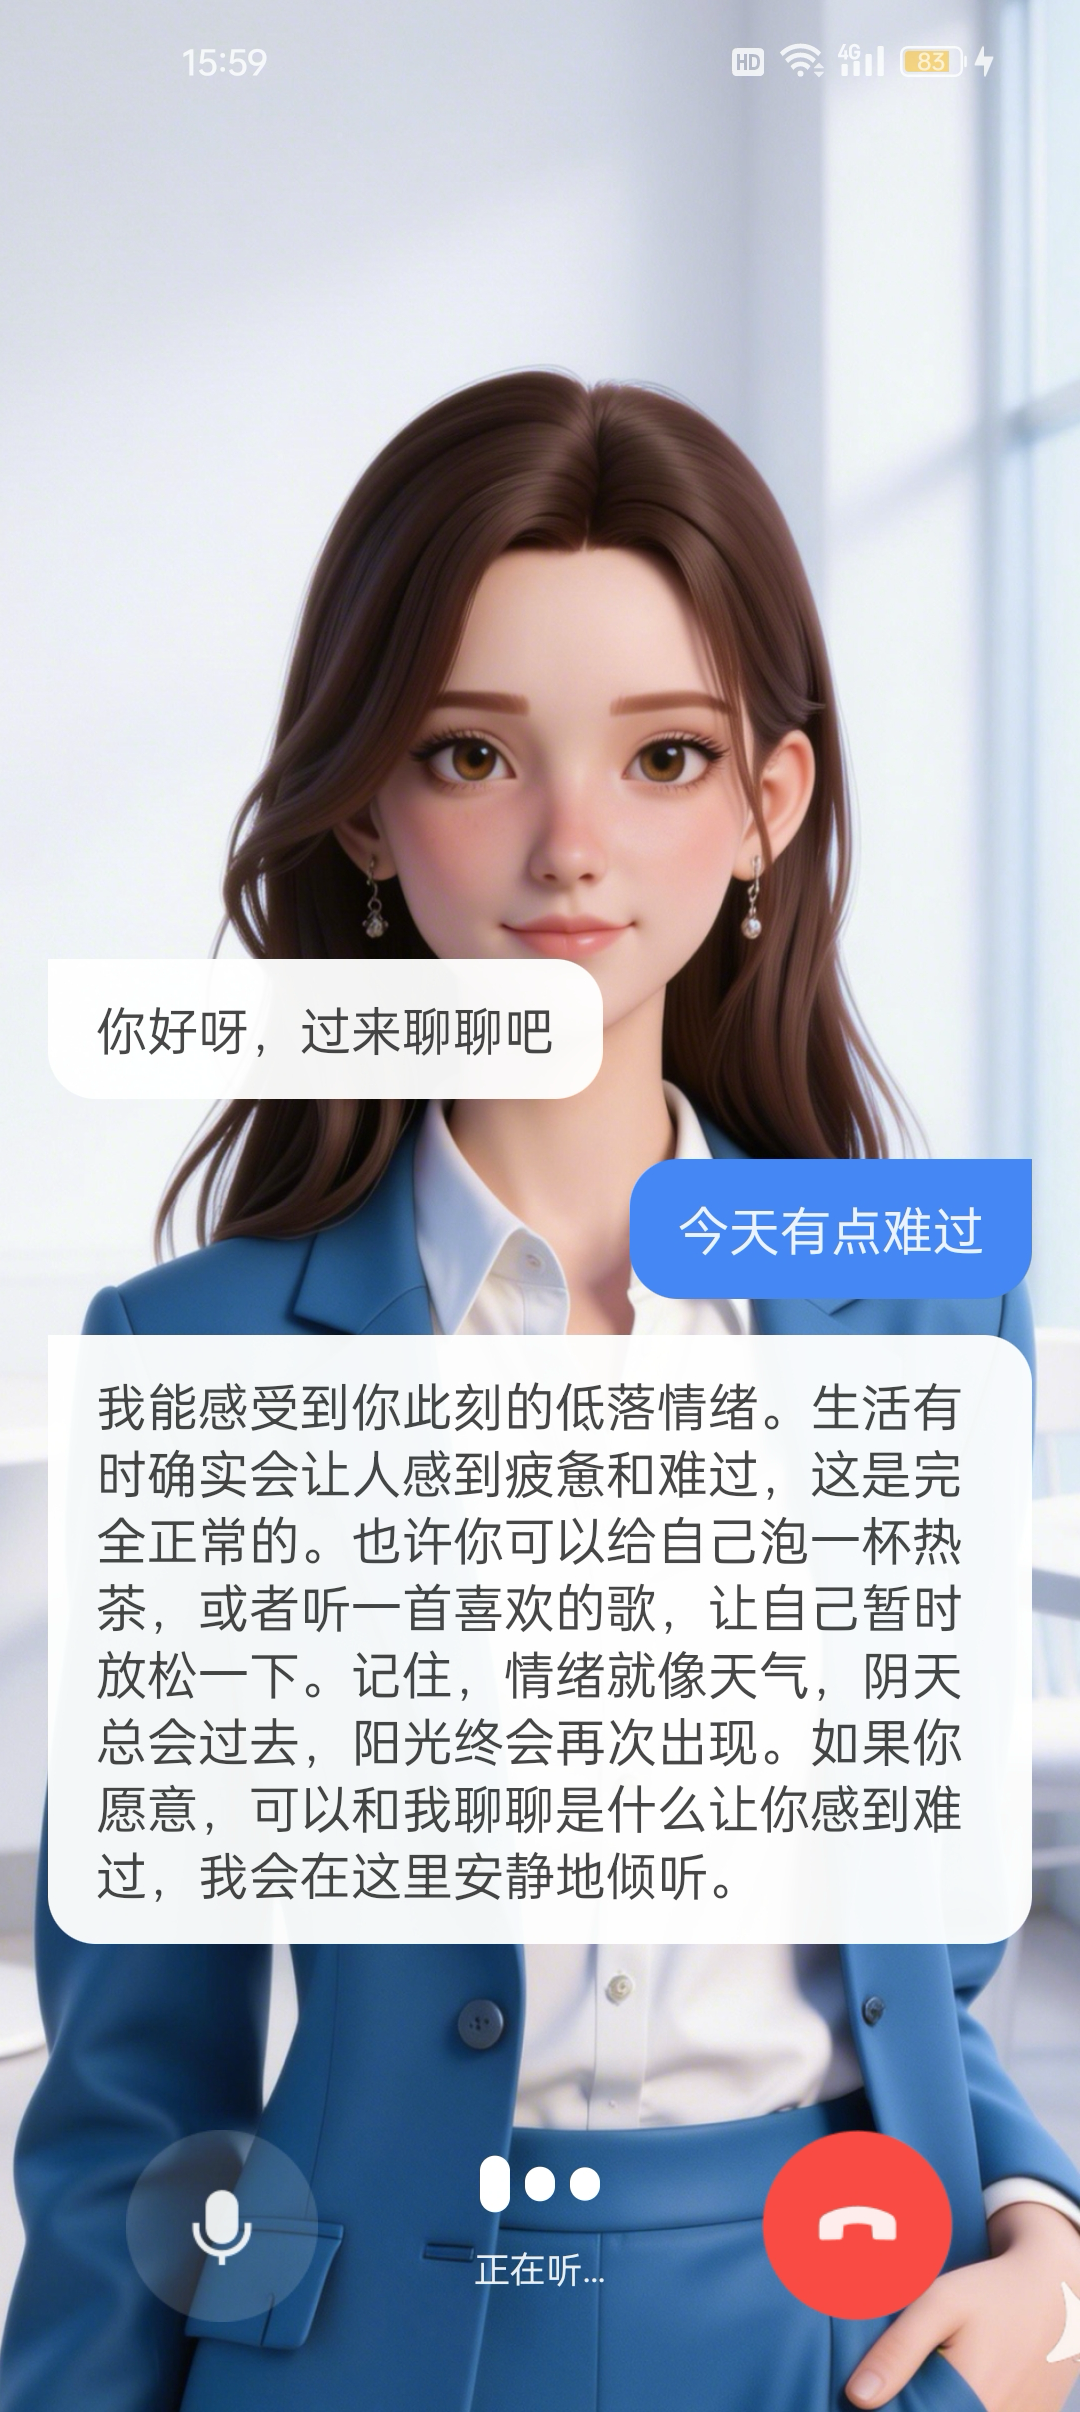
本篇文档旨在指导 Android 开发者如何使用核心组件
AIConversationCoreView,快速构建具备 AI 对话功能的 App。在线教育 | 智能客服 | 情感陪伴 |
 |  |  |
核心功能
AIConversationCoreView 是一个专为 AI 对话设计的轻量级 View 组件,是您构建 AI 对话的核心,它封装了所有复杂的底层技术(例如开启 AI 对话、结束 AI 对话)。您可以将 AIConversationCoreView 作为 AI 对话画面的"画布",专注于上层 UI 与交互的开发。准备工作
步骤 1:开通服务
步骤 2:代码集成
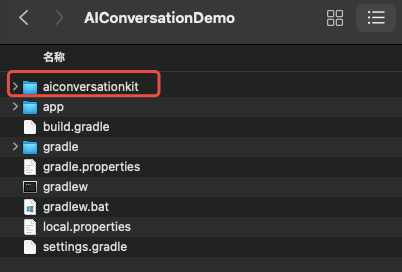
获取 AIConversationKit 组件
工程配置
1. 在工程根目录的
settings.gradle(或 settings.gradle.kts) 文件中添加以下代码,它的作用是将 aiconversationkit 组件导入到您当前的项目中。include ':aiconversationkit'
include (":aiconversationkit")
2. 在 app 目录的
build.gradle(或 build.gradle.kts)文件中添加以下代码,它的作用是声明当前app对新加入的aiconversationkit组件的依赖。api project(':aiconversationkit')
api(project(":aiconversationkit"))
3. 在 proguard-rules.pro 文件中添加以下代码,因为我们在 SDK 内部使用了Java 的反射特性,需要将 SDK 的部分类加入不混淆名单。
-keep class com.tencent.** { *; }
4. 为了防止编译时,
AndroidManifest合并过程中产生属性冲突,您需要在 app/src/main/AndroidManifest.xml 文件的 <application> 节点中,添加 tools:replace="android:allowBackup" 和 android:allowBackup="false",用以覆盖组件内的设置。<!-- app/src/main/AndroidManifest.xml --><applicationandroid:name=".DemoApplication"android:allowBackup="false"android:icon="@drawable/app_ic_launcher"android:label="@string/app_name"android:largeHeap="true"android:theme="@style/AppTheme"tools:replace="android:allowBackup">
5.
配置 Kotlin 支持(可选)
如果您的项目已是 Kotlin 工程:可跳过此步。
如果您的项目尚未配置 Kotlin:请添加对应版本的 Kotlin Gradle 插件:
注意:
若需添加 Kotlin Gradle 插件,$kotlin_version 请填入具体版本号,并确保其与您项目的 Android Gradle 插件版本兼容(例如 $kotlin_version 设置为 1.9.0 ,对应的 Android Gradle 插件版本是 8.6.0)。可以参见 Kotlin-Gradle 插件兼容性。
// project root build.gradlebuildscript {dependencies {classpath "org.jetbrains.kotlin:kotlin-gradle-plugin:$kotlin_version"}}
步骤 3:实现登录逻辑
在您的项目中添加登录代码,这是使用
AIConversationCoreView 各项功能的关键前提:重要:
推荐在您 App 自身的用户账户登录成功后,再调用 TUILogin.login,以确保登录业务逻辑的清晰和一致。
val userId = "denny" // 请替换为您的 UserIDval sdkAppId = 1400000001 // 请替换为开通服务控制台的 SDKAppIDval sdkSecretKey = "xxxx" // 请替换为开通服务控制台的 SDKSecretKeyval userSig = GenerateTestUserSig.genTestUserSig(sdkAppId, userId, sdkSecretKey)TUILogin.login(this, sdkAppId, userId, userSig, object : TUICallback() {override fun onSuccess() {}override fun onError(errorCode: Int, errorMessage: String) {}})
登录接口参数说明
参数 | 类型 | 说明 |
SDKAppID | Int | |
UserID | String | 当前用户的用户ID,仅包含英文字母、数字、连字符和下划线。 |
userSig | String | 用于腾讯云鉴权的票据。请注意: |
搭建基础 AI 对话
步骤 1:布局 AIConversationCoreView
添加
AIConversationCoreView 到您的布局文件中。<?xml version="1.0" encoding="utf-8"?><androidx.constraintlayout.widget.ConstraintLayout xmlns:android="http://schemas.android.com/apk/res/android"xmlns:tools="http://schemas.android.com/tools"android:layout_width="match_parent"android:layout_height="match_parent"tools:context=".YourAIActivity"><com.trtc.uikit.aiconversationkit.view.AIConversationCoreViewandroid:id="@+id/ai_conversation_core_view"android:layout_width="match_parent"android:layout_height="match_parent"/></androidx.constraintlayout.widget.ConstraintLayout>
步骤 2:开启 AI 对话
通过调用
startAIConversation 接口开始 AI 对话,完整示例代码如下:import android.os.Bundleimport android.util.Logimport androidx.appcompat.app.AppCompatActivityimport com.tencent.qcloud.tuicore.TUILoginimport com.trtc.uikit.aiconversationkit.debug.GenerateTestUserSigimport com.trtc.uikit.aiconversationkit.store.AIConversationConfigimport com.trtc.uikit.aiconversationkit.view.AIConversationCoreViewimport io.trtc.tuikit.atomicxcore.api.CompletionHandler// YourAIActivity 代表您的 AI 对话 Activityclass YourAIActivity : AppCompatActivity() {// 1. 将 AIConversationCoreView 作为您 Activity 的一个属性private lateinit var coreView: AIConversationCoreViewoverride fun onCreate(savedInstanceState: Bundle?) {super.onCreate(savedInstanceState)setContentView(R.layout.your_ai_activity_layout)coreView = findViewById<AIConversationCoreView>(R.id.ai_conversation_core_view)startAIConversation()}private fun startAIConversation() {val config = AIConversationConfig()val sdkAppId = 1400000001 // 1、替换 sdkAppIdval sdkSecretKey = "xxx" // 2、替换 sdkSecretKeyval aiRobotId = "robot_" + TUILogin.getUserId()val aiRobotSig = GenerateTestUserSig.genTestUserSig(sdkAppId, aiRobotId, sdkSecretKey)config.agentConfig.aiRobotId = aiRobotIdconfig.agentConfig.aiRobotSig = aiRobotSigconfig.secretId = "xxx" // 3、替换 secretIdconfig.secretKey = "xxx" // 4、替换 secretKey// 5、替换 llmConfigconfig.llmConfig = "{\\"LLMType\\":\\"openai\\",\\"Model\\":\\"hunyuan-turbo-latest\\",\\"SystemPrompt\\":\\"您是一个私人助手\\",\\"APIUrl\\":\\"https:xxx\\",\\"APIKey\\":\\"xxx\\",\\"History\\":5,\\"Streaming\\":true}"// 6、替换 ttsConfigconfig.ttsConfig = "{\\"TTSType\\":\\"tencent\\",\\"AppId\\":\\"xxx\\",\\"SecretId\\":\\"xxx\\",\\"SecretKey\\":\\"xxx\\",\\"VoiceType\\":\\"502001\\",\\"Speed\\":1.25,\\"Volume\\":5,\\"PrimaryLanguage\\":1,\\"FastVoiceType\\":\\"\\"}"coreView.startAIConversation(config, object : CompletionHandler {override fun onFailure(code: Int, desc: String) {Log.e("AIConversation", "startAIConversation failed code: $code desc: $desc")}override fun onSuccess() {Log.d("AIConversation", "startAIConversation success")}})}}
1. SDKAppId 和 SDKSecretKey 使用 完成登录 获取的数据即可。
2. 请到 准备工作 配置 AI 对话后台参数,包括基础配置、STT、LLM、TTS;然后点击右下角的快速跑通,切换到 Android,获取 SecretId、SecretKey 和 Config 参数。
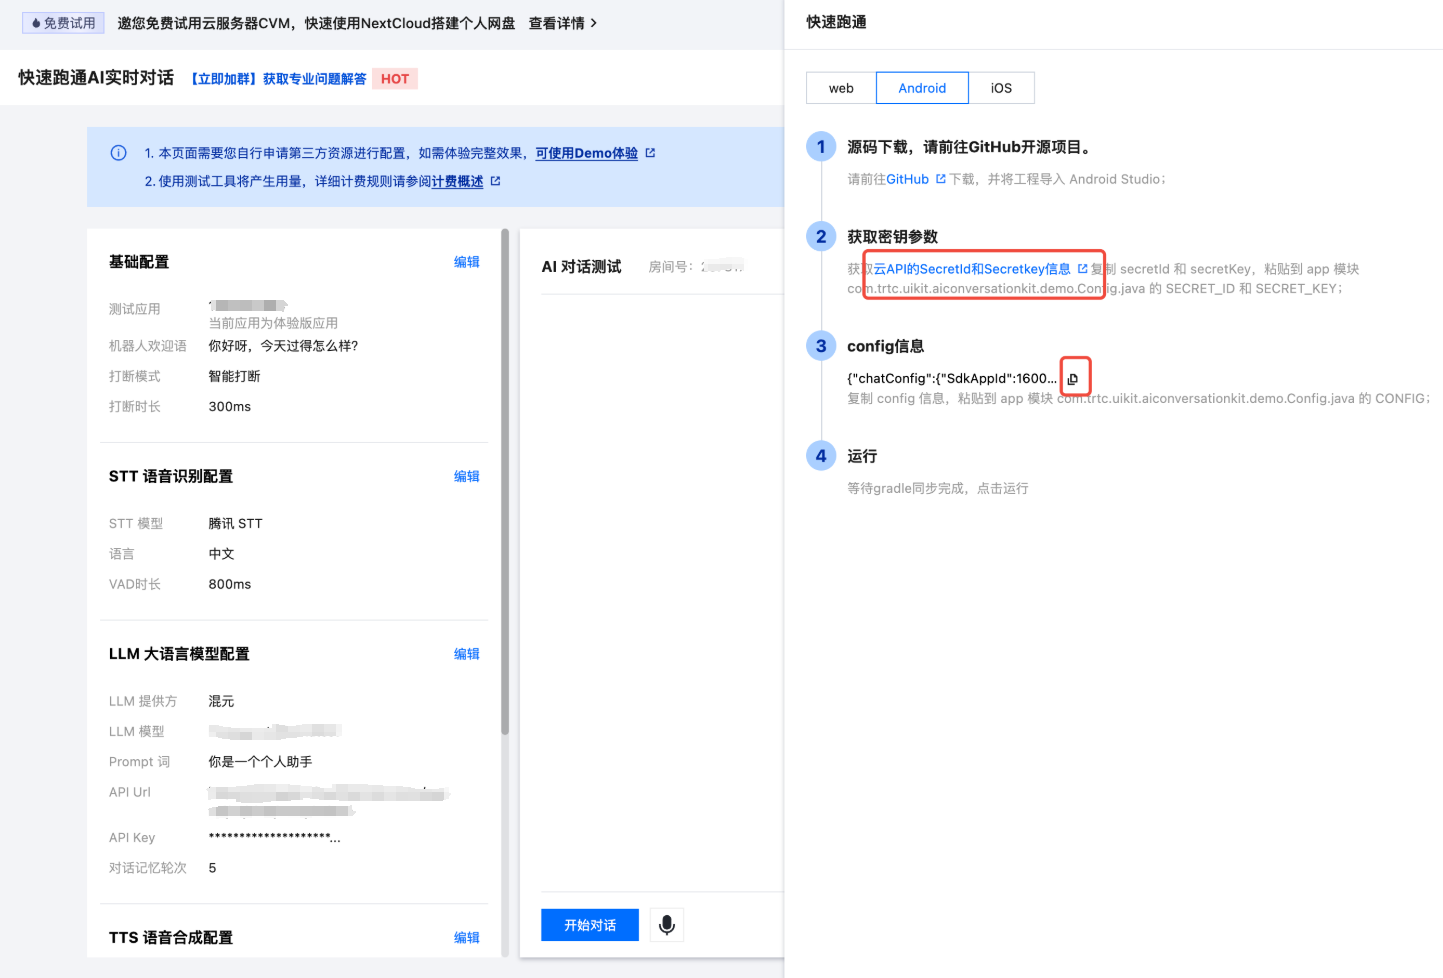
3. 将云 API 的 SecretId 和 SecretKey 复制到
config.secretId 和 config.secretKey 中,SecretId 和 SecretKey 请妥善保存,避免泄露。4. 将 Config 信息复制到 JSON 解析工具中,例如 JsonUtil,将 LLMConfig 对应的字符串值复制到
config.llmConfig,将 TTSConfig 对应的字符串值复制到 config.ttsConfig 中。说明:
开发环境:如果您正在本地开发调试阶段,可以采用上述方式快速集成 AI 对话。该方法中账号信息很容易被反编译逆向破解,一旦您的密钥泄露,攻击者就可以盗用您的腾讯云流量。
生产环境:如果您的项目要发布上线,请将上述账号信息保存到服务端中,避免流量被盗用;相关对话配置,也可以保存到服务端中,方便动态调整 AI 对话效果。
步骤 3:结束 AI 对话
通过调用
stopAIConversation 接口结束 AI 对话,完整示例代码如下:import android.util.Logimport androidx.appcompat.app.AppCompatActivityimport com.trtc.uikit.aiconversationkit.view.AIConversationCoreViewimport io.trtc.tuikit.atomicxcore.api.CompletionHandlerclass YourAIActivity : AppCompatActivity() {// ... 其他代码 ...private fun stopAIConversation() {coreView.stopAIConversation(object : CompletionHandler {override fun onFailure(code: Int, desc: String) {Log.e("AIConversation", "stopAIConversation failed code: $code desc: $desc")}override fun onSuccess() {Log.d("AIConversation", "stopAIConversation success")}})}// 确保在 Activity 销毁时也调用退出 AI 对话override fun onDestroy() {super.onDestroy()stopAIConversation()Log.d("AIConversation", "YourAIActivity onDestroy")}}
步骤 4:显示 AI 对话字幕 (可选)
只需要将
AIConversationSubtitleView 添加到布局文件中,即可完成 AI 对话字幕的显示。<?xml version="1.0" encoding="utf-8"?><androidx.constraintlayout.widget.ConstraintLayout xmlns:android="http://schemas.android.com/apk/res/android"xmlns:tools="http://schemas.android.com/tools"android:layout_width="match_parent"android:layout_height="match_parent"xmlns:app="http://schemas.android.com/apk/res-auto"tools:context=".YourAIActivity"><com.trtc.uikit.aiconversationkit.view.AIConversationCoreViewandroid:id="@+id/ai_conversation_core_view"android:layout_width="match_parent"android:layout_height="match_parent"/><com.trtc.uikit.aiconversationkit.view.AIConversationSubtitleViewandroid:layout_width="match_parent"android:layout_height="0dp"android:layout_marginTop="150dp"android:layout_marginBottom="150dp"app:layout_constraintTop_toTopOf="parent"app:layout_constraintBottom_toBottomOf="parent" /></androidx.constraintlayout.widget.ConstraintLayout>
步骤 5:控制麦克风的开关 (可选)
只需要将
MicView 添加到布局文件中,即可点击开关本地麦克风。<?xml version="1.0" encoding="utf-8"?><androidx.constraintlayout.widget.ConstraintLayout xmlns:android="http://schemas.android.com/apk/res/android"xmlns:tools="http://schemas.android.com/tools"android:layout_width="match_parent"android:layout_height="match_parent"xmlns:app="http://schemas.android.com/apk/res-auto"tools:context=".YourAIActivity"><com.trtc.uikit.aiconversationkit.view.AIConversationCoreViewandroid:id="@+id/ai_conversation_core_view"android:layout_width="match_parent"android:layout_height="match_parent"/><!-- 其它代码 --><com.trtc.uikit.aiconversationkit.view.feature.MicViewandroid:layout_width="100dp"android:layout_height="100dp"android:layout_marginStart="32dp"android:layout_marginBottom="24dp"app:layout_constraintStart_toStartOf="parent"app:layout_constraintBottom_toBottomOf="parent" /></androidx.constraintlayout.widget.ConstraintLayout>
步骤 6:显示 AI 交互按钮 (可选)
只需要将
AIInteractionView 添加到布局文件中,即可显示当前 AI 状态,并点击打断 AI 的说话。<?xml version="1.0" encoding="utf-8"?><androidx.constraintlayout.widget.ConstraintLayout xmlns:android="http://schemas.android.com/apk/res/android"xmlns:tools="http://schemas.android.com/tools"android:layout_width="match_parent"android:layout_height="match_parent"xmlns:app="http://schemas.android.com/apk/res-auto"tools:context=".YourAIActivity"><com.trtc.uikit.aiconversationkit.view.AIConversationCoreViewandroid:id="@+id/ai_conversation_core_view"android:layout_width="match_parent"android:layout_height="match_parent"/><!-- 其它代码 --><com.trtc.uikit.aiconversationkit.view.feature.AIInteractionViewandroid:layout_width="100dp"android:layout_height="100dp"android:layout_marginBottom="24dp"app:layout_constraintStart_toStartOf="parent"app:layout_constraintEnd_toEndOf="parent"app:layout_constraintBottom_toBottomOf="parent" /></androidx.constraintlayout.widget.ConstraintLayout>
调节对话效果
为了在 AI 对话中获得最佳体验,清晰的声音采集至关重要。我们提供多种参数设置,帮助您在不同环境下都能获得清晰的语音交互效果。
vadLevel 远场人声抑制
在多人交谈的环境中,其他人声可能会干扰 AI 对您声音的识别。通过调整人声抑制级别,我们可以有效过滤环境中的其他人声,让 AI 更准确地专注于您的语音;您可以通过设置
config 中的 sttConfig.vadLevel 参数来达到期望的效果。级别 | 效果描述 | 使用场景 |
0 | 关闭远场人声抑制功能 | 在嘈杂环境下 AI 容易被噪声打断,可能导致无法正常对话。 |
1 | 开启轻度抑制模式 | 适合相对安静的环境使用,例如家庭、图书馆。 |
2 | 推荐默认设置 | 适用于大多数日常场景(默认值)。 |
3 | 开启强力抑制模式 | 适合嘈杂环境使用,例如菜市场、车站。 |
代码配置示例
val config = AIConversationConfig()config.sttConfig.vadLevel = 3coreView.startAIConversation(config, null)
interruptMode 打断模式
根据您的使用习惯,可以设置不同的打断方式,在 AI 说话时进行打断,使对话交互更加自然流畅;您可以通过设置
config 中的 agentConfig.interruptMode 参数来达到期望的效果。模式 | 功能描述 | 适用场景 |
0 | 智能模式 | AI 正在说话时,可通过点击屏幕或说话打断。(默认值) |
1 | 手动打断 | AI 正在说话时,只能通过点击屏幕打断。 |
代码配置示例
val config = AIConversationConfig()config.agentConfig.interruptMode = 1coreView.startAIConversation(config, null)
language 语言识别
根据说话者使用的语言进行设置,AI 才能准确地将语音转换成对应的文字内容;您可以通过设置
config 中的 sttConfig.language 参数来达到期望的效果。语言代码 | 语言名称 | 说明 |
"zh" | 中文 | 支持中文识别 (默认值) |
"en" | 英语 | 支持英语识别 |
代码配置示例
val config = AIConversationConfig()config.sttConfig.language = "en"coreView.startAIConversation(config, null)
常见问题
每次进房都需要调用登录吗?
不需要。通常您只需要完成一次
TUILogin.login 调用即可,建议将 TUILogin.login 和 TUILogin.logout 与自己的登录业务关联。集成代码后产生如下图所示编译报错 allowBackup 异常,如何处理?

问题原因:多个模块的
AndroidManifest.xml 中都配置了 allowBackup 属性 ,造成冲突。解决方法:
1. 在工程的
AndroidManifest.xml 文件中删除 allowBackup 属性或将该属性改为 false,表示关闭备份和恢复功能;2. 在
AndroidManifest.xml文件的 application 节点中添加 tools:replace="android:allowBackup",表示覆盖其他模块的设置,使用您自己的设置;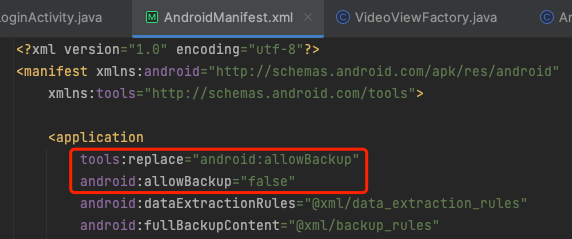
集成代码后还需要添加麦克风等权限的声明吗?
不需要,AIConversationKit 中已经内置了麦克风等权限的声明,在接入过程中您无需再关心这些权限的声明。


