操作步骤
1. 进入 index.js 页面,在 onload 的生命周期里,调用 login_yun 云函数实现登录的操作。
wx.cloud.callFunction({name: 'login_yun'}).then(res => {console.log(res)if(res.result.status === 200){app.globalData.openId = res.result.user_data.data[0].openId}else{app.globalData.openId = res.result.openId}})
2. 在 index.js 页面,添加 data 存放所需要的数据。
data: {// 遮罩层标志putBodyMask: false,putGirlMask: false,xuzhiMask: true,// 抽出的遮罩层outBodyMask: false,outGirlMask: false,// 交友宣言textareaBody: '',textareaGirl: '',// qq微信号numberBody: '',numberGirl: '',// 上传图片预览的srcsrcListBody: [],srcListGirl: [],// 放入的学校arrayBody4: ["河南理工大学", "焦作大学", "焦作师范"],indexBody4: 0,// 纸条的生命arrayBody2: ["被抽中一次销毁", "被抽中两次销毁", "被抽中三次销毁"],indexBody2: 0,arrayBody3: ["河南理工大学", "焦作大学", "焦作师范"],indexBody3: 0,// 放入的学校arrayGirl4: ["河南理工大学", "焦作大学", "焦作师范"],indexGirl4: 0// 纸条的生命arrayGirl2: ["被抽中一次销毁", "被抽中两次销毁", "被抽中三次销毁"],indexGirl2: 0,arrayGirl3: ["河南理工大学", "焦作大学", "焦作师范"],indexGirl3: 0,// 添加图片的加号addMask: true},
3. 学校选择的逻辑。
3.1 picker 中 bindchange="bindSchoolChangePut",通过 bindSchoolChangePut 来触发学校改变的事件,选择对应的学校。
3.2 e.detail.value 来获取在 data 中绑定的学校的列表索引。
// 放入时,学校的选择bindSchoolChangePut: function(e){this.setData({indexBody4: parseInt(e.detail.value)})}
4. 单击确认放入,触发对应的 surePutBodyBtns 事件,再进行判断,进而实现限制交友宣言长度。
if(that.data.textareaBody.length < 20){return wx.showToast({title: '交友宣言太短',icon: 'error',duration: 2000})}
5. 上传微信号的正则匹配。
if(!(/^(((13[0-9]{1})|(15[0-9]{1})|(18[0-9]{1})|(17[0-9]{1}))+\\d{8})$/).test(that.data.numberBody) && !(/^[a-zA-Z]([-_a-zA-Z0-9]{6,20})$/).test(that.data.numberBody)){return wx.showToast({title: '微信号格式错误',icon: 'error',duration: 2000})}
微信官方定义的微信号规则:
可使用6-20个字母、数字、下划线和减号。
必须以字母开头(字母不区分大小写)。
不支持设置中文。
6. 实现本地图片的选择,一次上传限制一张,并且进行图片大小的限制,cloudPath 随机配置存储在云存储里的路径。
// 选择本地图片chooseImgGirl: function(){const that = thiswx.chooseImage({count: 5,sizeType: ['original', 'compressed'],sourceType: ['album', 'camera'],success (res) {// tempFilePath可以作为img标签的src属性显示图片if(res.tempFiles[0].size > 1200000){return wx.showToast({title: '图片过大',icon: 'error',duration: 2000})}const filePath = res.tempFilePaths[0]let timeStamp = Date.parse(new Date());const cloudPath = "image/" + timeStamp + filePath.match(/\\.[^.]+?$/)[0]that.pageData.filePath = filePaththat.pageData.cloudPath = cloudPaththat.setData({srcListGirl: res.tempFilePaths})}})
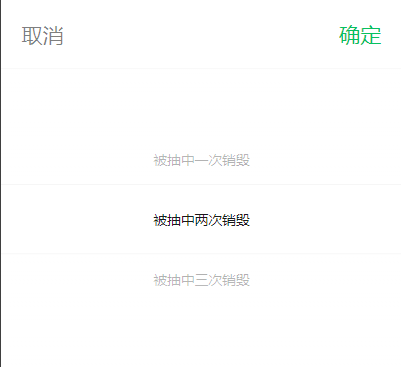
7. 单击纸条的生命,相应值的选择对应数据库 life 字段。
8. 单击确认放入之后,相应逻辑是先上传图片,再上传 location,weChatId 等信息到 body_girl_yun 表,上传成功要跳转到 history 页面。
// 上传图片的api,先上传图片到云存储wx.cloud.uploadFile({cloudPath,filePath,success: function(res){wx.hideLoading()wx.showLoading({title: '信息上传中',mask: true})// 上传图片完成后上传数据db.collection("body_girl_yun").add({data: {location: that.data.indexGirl4,weChatId: that.data.numberGirl,picture: res.fileID,life: parseInt(that.data.indexGirl2) + 1,des: that.data.textareaGirl,sex: 2,openId: app.globalData.openId,time: new Date().getTime()}}).then(result => {wx.hideLoading()that.pageData = {filePath: '',cloudPath: ''}that.setData({putGirlMask: false,srcListGirl: [],textareaGirl: '',numberGirl: ''})// 上传完成后跳转到history页wx.switchTab({url: '/pages/history/history',success: res=>{wx.showToast({title: '放入纸条成功',icon: 'success'})},fail: err => {wx.showToast({title: err,icon: 'error'})}})}})
9. 页面底部两个点击事件:联系客服与 uu 须知。联系客服主要是在 index.wxml 里通过小程序的 open-type=“concat” 来实现。
<!-- 底部的通知 --><view class="bottom_view"><button bindtap="xuzhi">UU须知</button><!-- <text class="heng">|</text> --><button bindcontact="contact" open-type="contact">遇到问题?联系客服</button></view>
// 点击UU须知xuzhi: function(){this.setData({xuzhiMask: true})},// 联系客服contact: function(){console.log()}


