linux系列之ubuntu新装后高效环境配置处理

更换Ubuntu下载源
将Ubuntu的软件下像源换为国内的载镜源。
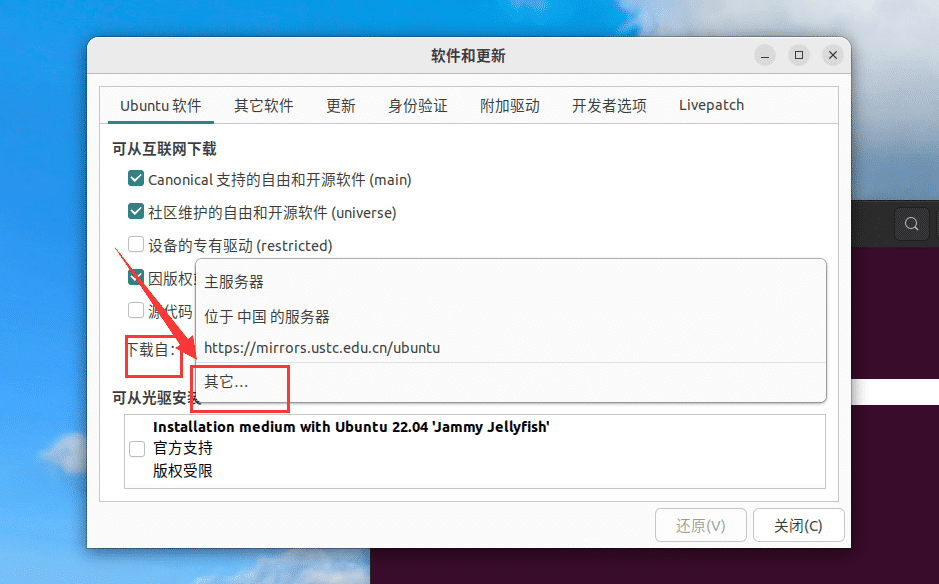
桌面版直接在【软件和更新】里 ubuntu软件,下载自 改为其他国内镜像站,默认的中国下载区有时也很慢。
安装终端Terminator
安装 sudo apt-get install terminator
首选项设置一下,透明度,选中复制,中键粘贴。
设置为默认终端,ctrl+alt+T可唤起,以下是一种配置方式。
1 2 | gsettings set org.gnome.desktop.default-applications.terminal exec /usr/bin/terminator gsettings set org.gnome.desktop.default-applications.terminal exec-arg "-x" |
|---|
换回原默认设置
1 2 | gsettings reset org.gnome.desktop.default-applications.terminal exec gsettings reset org.gnome.desktop.default-applications.terminal exec-arg |
|---|
安装zsh
zsh是一款功能强大的shell。
查看是否已安装: cat /etc/shells
下载安装zsh: sudo apt install zsh
切换默认shell为zsh,切换后记得重启终端:
1 | chsh -s /bin/zsh |
|---|
查看shell是否为zsh:
1 2 3 4 | # 查看当前shell echo $SHELL # 输出为:/usr/bin/zsh |
|---|
配置oh my zsh
安装ohmyzsh
- 从github仓库里进行安装:
1 | sh -c "$(curl -fsSL https://raw.github.com/ohmyzsh/ohmyzsh/master/tools/install.sh)" |
|---|
- 从清华大学镜像站安装:
github国内太慢或无法访问的话,可以使用镜像站-清华大学开源软件镜像站: ohmyzsh Git 镜像使用帮助
- 安装 在本地克隆后获取安装脚本。
1 2 3 | git clone https://mirrors.tuna.tsinghua.edu.cn/git/ohmyzsh.git cd ohmyzsh/tools REMOTE=https://mirrors.tuna.tsinghua.edu.cn/git/ohmyzsh.git sh install.sh |
|---|
- 切换已有 ohmyzsh 至镜像源
1 2 | git -C $ZSH remote set-url origin https://mirrors.tuna.tsinghua.edu.cn/git/ohmyzsh.git git -C $ZSH pull |
|---|
配置主题和插件
Oh-My-Zsh默认安装了很多主题,位于目录.oh-my-zsh/themes下。 通过zsh配置文件~/.zshrc中的主题设置为自己喜欢的主题名字即可:
1 2 3 4 | #修改选择主题的名称,如果要随机则填random,每次打开都随机应用一个主题。 ZSH_THEME="robbyrussell" #ZSH_THEME="random" 随机 |
|---|
推荐插件:
- zsh-autosuggestions
命令自动补全插件,当你输入命令的几个字母,它会自动根据历史输入进行自动补全,然后按→
1 | git clone https://github.com/zsh-users/zsh-autosuggestions $ZSH_CUSTOM/plugins/zsh-autosuggestions |
|---|
- incr
一款自动提示插件,功能非常强大
1 2 3 4 5 | wget http://mimosa-pudica.net/src/incr-0.2.zsh mkdir ~/.oh-my-zsh/plugins/incr mv incr-0.2.zsh ~/.oh-my-zsh/plugins/incr echo 'source ~/.oh-my-zsh/plugins/incr/incr*.zsh' >> ~/.zshrc source ~/.zshrc |
|---|
注意:因为新版本的问题,需要进到目录.oh-my-zsh/plugins/incr/把incr-0.2.zsh 更名为 incr.plugin.zsh 不然会提示plugin 'incr' not found
- zsh-syntax-highlighting
自动命名高亮显示。
1 | git clone https://github.com/zsh-users/zsh-syntax-highlighting.git ${ZSH_CUSTOM:-~/.oh-my-zsh/custom}/plugins/zsh-syntax-highlighting vim ~/.zshrc |
|---|
- autojump
自动统计我们经常cd的目录,不同目录会有不同的权重。在我们想要进入某个目录时,使用j <dir-name>即可以帮助我们快速跳转到目标目录。
1 | sudo apt-get install autojump |
|---|
- extract
对于不同类型的压缩格式:.tar、.tar.gz、.tar.bz2、.tar.xz、.rar、.zip,解压时一律使用x <archived file>。默认ohmyzsh里已经安装,启用即可。
- 选择启用插件
在这配置文件~/.zshrc修改,添加要使用的插件:
1 2 3 4 5 6 7 8 | plugins=( zsh-syntax-highlighting zsh-autosuggestions incr git autojump extract ) |
|---|
安装curl
无法识别的curl命令的话是没安装curl
安装命令:
1 | sudo apt install curl |
|---|
开启ssh
ssh默认端口22
1 2 | sudo apt update sudo apt install openssh-server |
|---|
防火墙放开
1 | sudo ufw allow ssh |
|---|
安装v2rayA
开源的代理工具,可以实现全局透明代理,这里用docker安装
1 2 3 4 5 6 7 8 9 10 11 | # run v2raya docker run -d \ --restart=always \ --privileged \ --network=host \ --name v2raya \ -e V2RAYA_LOG_FILE=/tmp/v2raya.log \ -v /lib/modules:/lib/modules:ro \ -v /etc/resolv.conf:/etc/resolv.conf \ -v /etc/v2raya:/etc/v2raya \ mzz2017/v2raya |
|---|
详细介绍:https://v2raya.org/docs/prologue/installation/docker/#%E8%BF%90%E8%A1%8C
安装docker和修改docker下载源
一键安装docker
2017年后 docker 分为了 docker-CE(社区版)和docker-EE(商业版) ,这里都是以CE版演示。
懒人一键安装版,直接执行官方的一键安装脚本,脚本会自动区分操作系统,安装的是体验版而不是稳定版,最好不要用于生产环境。脚本官方github地址。
1 2 3 4 5 6 7 8 9 | sudo wget -qO- https://get.docker.com/ | bash # 如果上面的不行,执行下面两句 curl -fsSL https://get.docker.com -o get-docker.sh sudo sh get-docker.sh # 安装成功执行下面语句,如果有类似回显,说明安装成功 docker --version Docker version 18.06.1-ce, build e68fc7a |
|---|
Ubuntu安装dokcer
CE支持x86_64, armhf, s390x (IBM Z), and ppc64le (IBM Power)架构的Ubuntu
- 卸载旧版本
旧版本叫docker或docker-engine,如有安装,先卸载它及其依赖,新版本叫docker-ce
/var/lib/docker/目录下的镜像文件,容器,卷和网络将会被保留,不会被删除。
1 | sudo apt-get remove docker docker-engine docker.io containerd runc |
|---|
- 添加源进行安装
首先安装docker的仓库,你可以从这个仓库中安装或者升级docker。
- 设置仓库
升级apt包索引
1 | $ sudo apt-get update |
|---|
安装能够让apt使用HTTPS的包
1 2 3 4 5 | $ sudo apt-get install \ apt-transport-https \ ca-certificates \ curl \ software-properties-common |
|---|
添加官方的GPG key
1 | $ curl -fsSL https://download.docker.com/linux/ubuntu/gpg | sudo apt-key add - |
|---|
查看现在是否拥有了指纹9DC8 5822 9FC7 DD38 854A E2D8 8D81 803C 0EBF CD88的密匙,执行下面搜索命令,如果有类似回显说明拥有此密匙。
1 2 3 4 5 | $ sudo apt-key fingerprint 0EBFCD88 pub 4096R/0EBFCD88 2017-02-22 Key fingerprint = 9DC8 5822 9FC7 DD38 854A E2D8 8D81 803C 0EBF CD88 uid Docker Release (CE deb) <[email protected]> sub 4096R/F273FCD8 2017-02-22 |
|---|
设置稳定版源 必须安装稳定版源,即使安装体验版或者测试版也需要稳定版源,不同架构的机器需要不同安装命令,lsb_release -cs命令会返回是哪种Debian发行版,比如xenial,如果想安装体验版(edge)或者测试版(test),将命令中的stable换成相应的字符串即可。
1 2 3 4 5 6 7 8 9 10 11 12 13 14 15 16 17 18 19 20 21 22 23 24 25 26 27 28 29 30 31 32 33 | $ # x86_64 / amd64架构 $ sudo add-apt-repository \ "deb [arch=amd64] https://download.docker.com/linux/ubuntu \ $(lsb_release -cs) \ stable" $ # armhf架构 $ sudo add-apt-repository \ "deb [arch=armhf] https://download.docker.com/linux/ubuntu \ $(lsb_release -cs) \ stable" $ # arm64架构 $ sudo add-apt-repository \ "deb [arch=arm64] https://download.docker.com/linux/ubuntu \ $(lsb_release -cs) \ stable" $ # IBM Power (ppc64le) $ sudo add-apt-repository \ "deb [arch=ppc64el] https://download.docker.com/linux/ubuntu \ $(lsb_release -cs) \ stable" $ # IBM Z (s390x) $ sudo add-apt-repository \ "deb [arch=s390x] https://download.docker.com/linux/ubuntu \ $(lsb_release -cs) \ stable" |
|---|
注意:从docker17.06开始,稳定版也同样会被推送到体验版和测试版的仓库里
- 安装docker CE
升级apt包索引
1 | $ sudo apt-get update |
|---|
安装最新版本的docker CE
1 | $ sudo apt-get install docker-ce |
|---|
注意:如果安装了多个docker仓库,使用apt-get install或者apt-get update命令时后面不跟版本信息的话,将始终安装最高版本的docker!
安装指定版本的docker CE 列出版本,版本号从高到低
1 2 | $ apt-cache madison docker-ce docker-ce | 18.09.0~ce-0~ubuntu | https://download.docker.com/linux/ubuntu xenial/stable amd64 Packages |
|---|
安装指定版本的docker CE,需要指定完整的包名称,例如安装仓库中的这个版本 18.09.0~ce-0~ubuntu ,其命令为
1 | $ sudo apt-get install docker-ce=18.03.0~ce-0~ubuntu |
|---|
其他版本同理 docker deamon,即docker守护进程/docker引擎,在安装完成后会自动启动 如果需要升级的话,首先执行sudo apt-get update,再重复上面的过程即可。
引用:https://zhuanlan.zhihu.com/p/54147784
修改docker下载源
打开daemon.json文件,若不存在则新增:
1 | sudo vi /etc/docker/daemon.json |
|---|
添加以下下载源:
1 2 3 4 5 6 7 8 9 | { "registry-mirrors": [ "http://hub-mirror.c.163.com", "https://docker.mirrors.ustc.edu.cn", "https://mirror.baidubce.com", "https://ljqvceaj.mirror.aliyuncs.com" ] } |
|---|
添加用户docker权限
将docker权限添加到当前用户,免去每次都输sudo命令。
- 创建docker组:
sudo groupadd docker - 将用户添加到docker组:
sudo gpasswd -a ${USER} docker - 重启docker服务:
sudo systemctl restart docker
安装docker compose
1 | sudo apt install docker-compose |
|---|
查看安装是否成功
1 | docker-compose -v |
|---|
输出版本信息说明安装成功。
解决无法访问github
github直接无法访问,我这里ping直接显示github.com 为127.0.0.1
在github地址前直接添加这个代理地址,比如:
1 | git clone https://ghproxy.com/https://github.com/zsh-users/zsh-autosuggestions $ZSH_CUSTOM/plugins/zsh-autosuggestions |
|---|
- 修改本地hosts方式
hosts文件位于etc路径下,超级管理员修改。
1 2 3 4 5 | vi etc/hosts # 添加下面一行 20.205.243.166 github.com |
|---|
你可以用站长工具,查询你所在位置github.com的dns解析,以上就是我所查询的地址。
共享宿主机文件夹
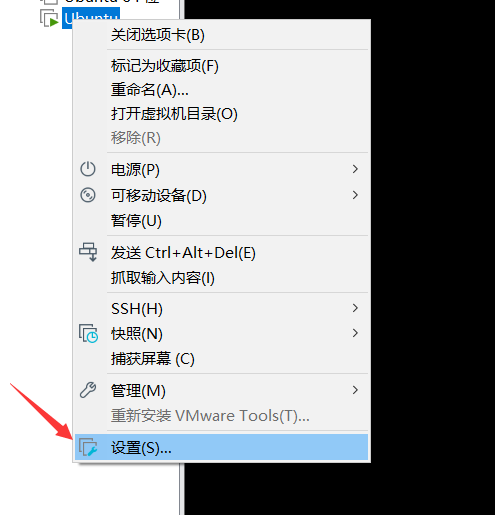
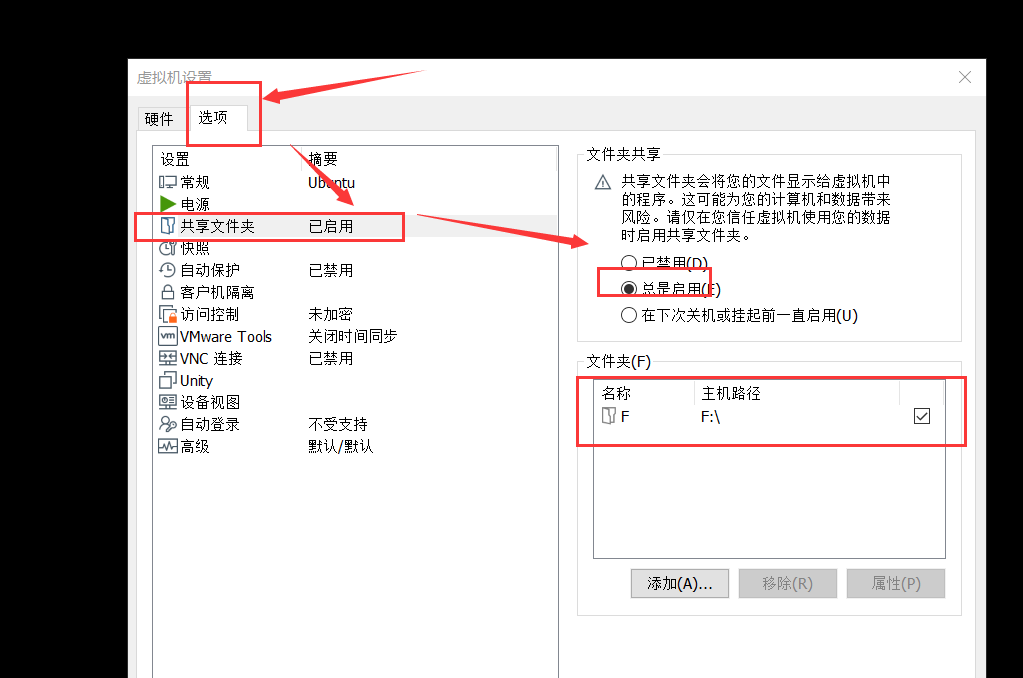
如果是在vmware虚拟机里安装的ubuntu,开启共享宿主机文件夹。
右键虚拟机,设置,硬件|选项(点击选项),共享文件夹,总是启用,添加共享的文件夹。
腾讯云开发者
