实战 | OpenCV4.8一维码检测与解码使用演示(步骤 + 源码)
实战 | OpenCV4.8一维码检测与解码使用演示(步骤 + 源码)

视觉/图像重磅干货,第一时间送达!
导 读
本文主要介绍OpenCV4.8中一维码检测与解码使用演示(步骤 + 源码)。
背景介绍
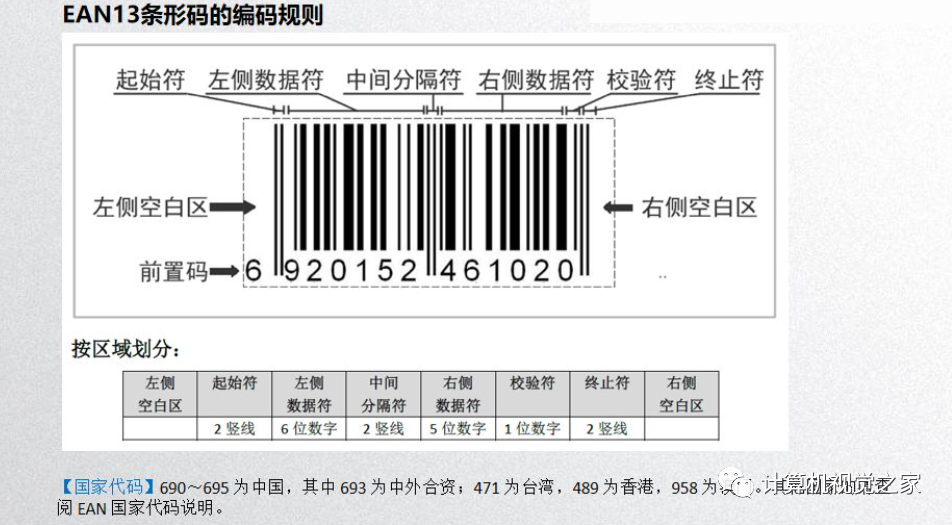
条形码(1D-Barcode)是现实生活中识别商品的主要技术。常见的条形码是由反射率相差很大的黑条和白条排列的平行线图案组成。条码识别是对条码进行水平方向扫描,得到一串由不同宽度、不同颜色的条组成的二进制码,即条码的代码信息。通过匹配各种条码编码方式,可以对条码的内容进行解码。目前,OpenCV4.8支持 EAN-8、EAN-13、UPC-A 和 UPC-E几种条码类型。
参考链接:
https://docs.opencv.org/4.8.0/d6/d25/tutorial_barcode_detect_and_decode.html使用步骤
本文内容均以OpenCV4.8.0做演示,具体步骤如下:
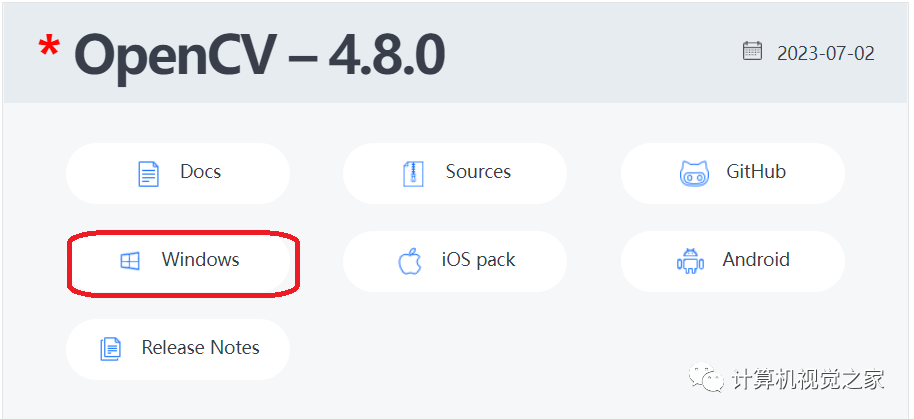
【1】下载并安装OpenCV4.8.0 Release版本
地址:https://opencv.org/releases/

【2】下载超分辨率条码检测器模型
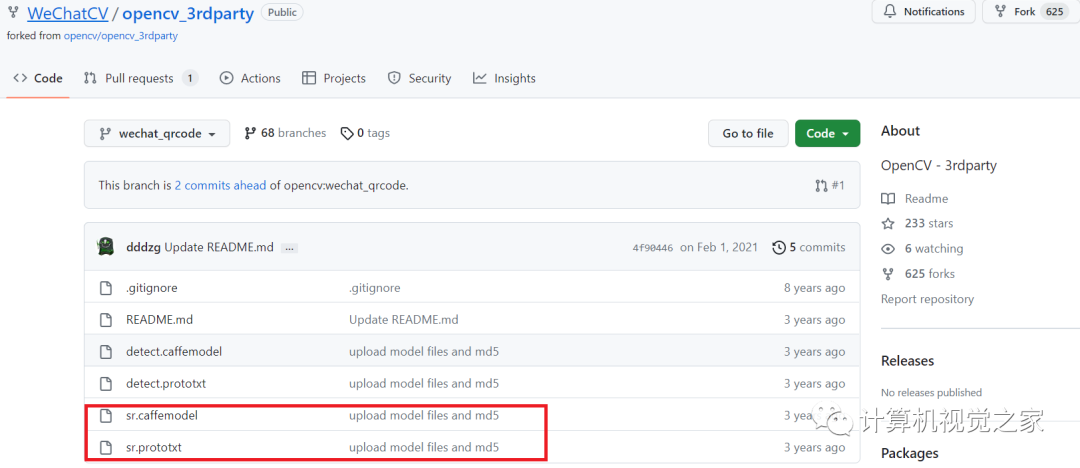
下载地址:
https://github.com/WeChatCV/opencv_3rdparty/tree/wechat_qrcode解压后将下面两个文件放到指定目录:

【3】测试代码:
// Barcode_1D_Decoder.cpp : 此文件包含 "main" 函数。程序执行将在此处开始并结束。

#include "pch.h"
#include <iostream>
#include <opencv2/opencv.hpp>

#define Mode 1  // 0-img_test, 1-cam_test

using namespace std;
using namespace cv;

static const Scalar greenColor(0, 255, 0);
static const Scalar redColor(0, 0, 255);
static const Scalar yellowColor(0, 255, 255);
static Scalar randColor()
{
  RNG &rng = theRNG();
  return Scalar(rng.uniform(0, 255), rng.uniform(0, 255), rng.uniform(0, 255));
}

struct TheApp
{
  Ptr<barcode::BarcodeDetector> bardet;
  //! [output]
  vector<Point> corners;
  vector<string> decode_info;
  vector<string> decode_type;
  //! [output]
  bool detectOnly;

  void cleanup()
{
    corners.clear();
    decode_info.clear();
    decode_type.clear();
  }

  inline string modeString() const
{
    return detectOnly ? "<detect>" : "<detectAndDecode>";
  }

  void drawResults(Mat &frame) const
{
    //! [visualize]
    for (size_t i = 0; i < corners.size(); i += 4)
    {
      const size_t idx = i / 4;
      const bool isDecodable = idx < decode_info.size()
        && idx < decode_type.size()
        && !decode_type[idx].empty();
      const Scalar lineColor = isDecodable ? greenColor : redColor;
      // draw barcode rectangle
      vector<Point> contour(corners.begin() + i, corners.begin() + i + 4);
      const vector< vector<Point> > contours{ contour };
      drawContours(frame, contours, 0, lineColor, 1);
      // draw vertices
      for (size_t j = 0; j < 4; j++)
        circle(frame, contour[j], 2, randColor(), -1);
      // write decoded text
      if (isDecodable)
      {
        ostringstream buf;
        buf << "[" << decode_type[idx] << "] " << decode_info[idx];
        putText(frame, buf.str(), contour[1], FONT_HERSHEY_COMPLEX, 0.8, yellowColor, 1);
      }
    }
    //! [visualize]
  }

  void drawFPS(Mat &frame, double fps) const
{
    ostringstream buf;
    buf << modeString()
      << " (" << corners.size() / 4 << "/" << decode_type.size() << "/" << decode_info.size() << ") "
      << cv::format("%.2f", fps) << " FPS ";
    putText(frame, buf.str(), Point(25, 25), FONT_HERSHEY_COMPLEX, 0.8, redColor, 2);
  }

  inline void call_decode(Mat &frame)
{
    cleanup();
    if (detectOnly)
    {
      //! [detect]
      bardet->detectMulti(frame, corners);
      //! [detect]
    }
    else
    {
      //! [detectAndDecode]
      bardet->detectAndDecodeWithType(frame, decode_info, decode_type, corners);
      //! [detectAndDecode]
    }
  }

  int liveBarCodeDetect()
{
    VideoCapture cap(0);
    if (!cap.isOpened())
    {
      cout << "Cannot open a camera" << endl;
      return 2;
    }
    Mat frame;
    Mat result;
    cap >> frame;
    cout << "Image size: " << frame.size() << endl;
    cout << "Press 'd' to switch between <detect> and <detectAndDecode> modes" << endl;
    cout << "Press 'ESC' to exit" << endl;
    for (;;)
    {
      cap >> frame;
      if (frame.empty())
      {
        cout << "End of video stream" << endl;
        break;
      }
      if (frame.channels() == 1)
        cvtColor(frame, frame, COLOR_GRAY2BGR);
      TickMeter timer;
      timer.start();
      call_decode(frame);
      timer.stop();
      drawResults(frame);
      drawFPS(frame, timer.getFPS());
      imshow("barcode", frame);
      const char c = (char)waitKey(1);
      if (c == 'd')
      {
        detectOnly = !detectOnly;
        cout << "Mode switched to " << modeString() << endl;
      }
      else if (c == 27)
      {
        cout << "'ESC' is pressed. Exiting..." << endl;
        break;
      }
    }
    return 0;
  }

  int imageBarCodeDetect(const string &in_file, const string &out_file)
{
    Mat frame = imread(in_file, IMREAD_COLOR);
    cout << "Image size: " << frame.size() << endl;
    cout << "Mode is " << modeString() << endl;
    const int count_experiments = 100;
    TickMeter timer;
    for (size_t i = 0; i < count_experiments; i++)
    {
      timer.start();
      call_decode(frame);
      timer.stop();
    }
    cout << "FPS: " << timer.getFPS() << endl;
    drawResults(frame);
    if (!out_file.empty())
    {
      cout << "Saving result: " << out_file << endl;
      imwrite(out_file, frame);
    }
    imshow("barcode", frame);
    cout << "Press any key to exit ..." << endl;
    waitKey(0);
    return 0;
  }
};


int main()
{
  string sr_prototxt = "./model/sr.prototxt";
  string sr_model = "./model/sr.caffemodel";

  TheApp app;
  app.detectOnly = false;
  //! [initialize]
  try
  {
    app.bardet = makePtr<barcode::BarcodeDetector>(sr_prototxt, sr_model);
  }
  catch (const std::exception& e)
  {
    cout <<"read sr_model failed!" << endl;
    cout << e.what() << endl;
    return -1;
  }
  //! [initialize]

  if(Mode)
    app.liveBarCodeDetect();
  else
  {
    string inPath = "./imgs/t6.jpg";
    string outPath = "./res.jpg";
    Mat img = imread(inPath);
    app.call_decode(img);
    app.drawResults(img);

    imshow("barcode", img);
    waitKey();
  }
  return 0;
}
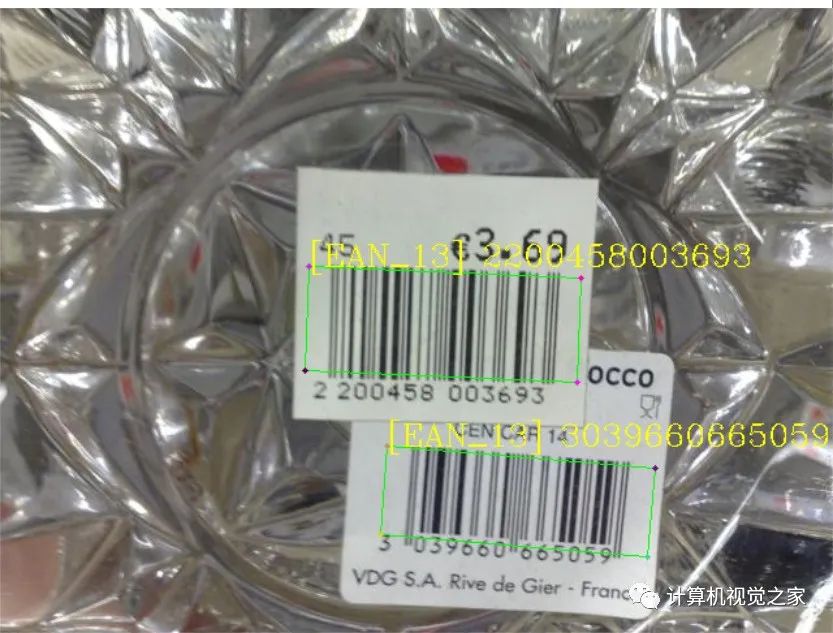
【4】图片测试:
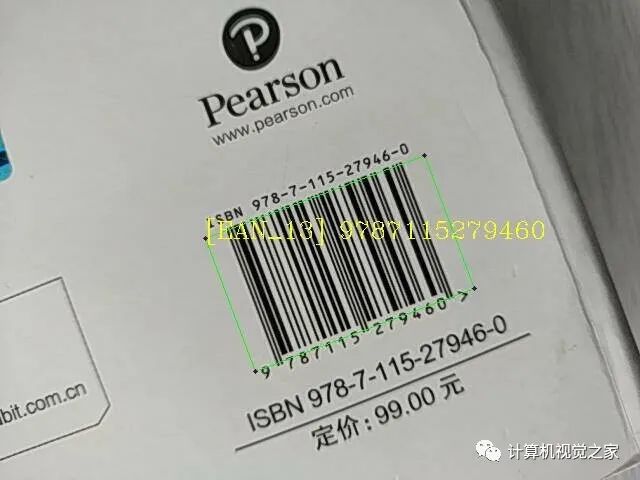
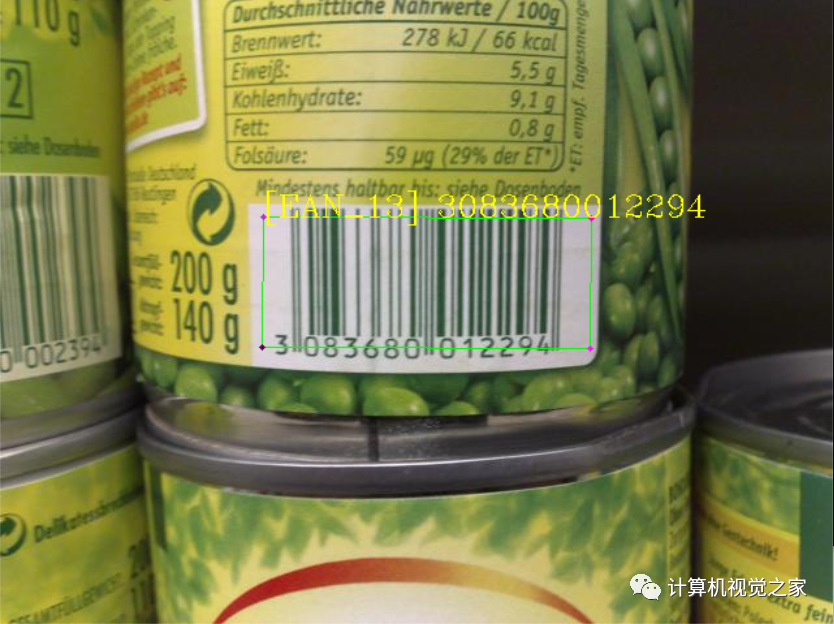
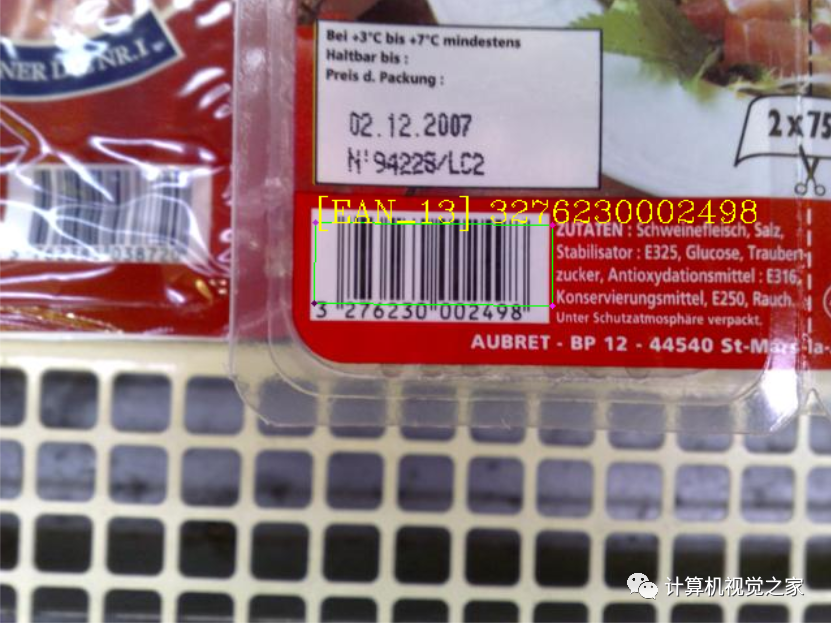
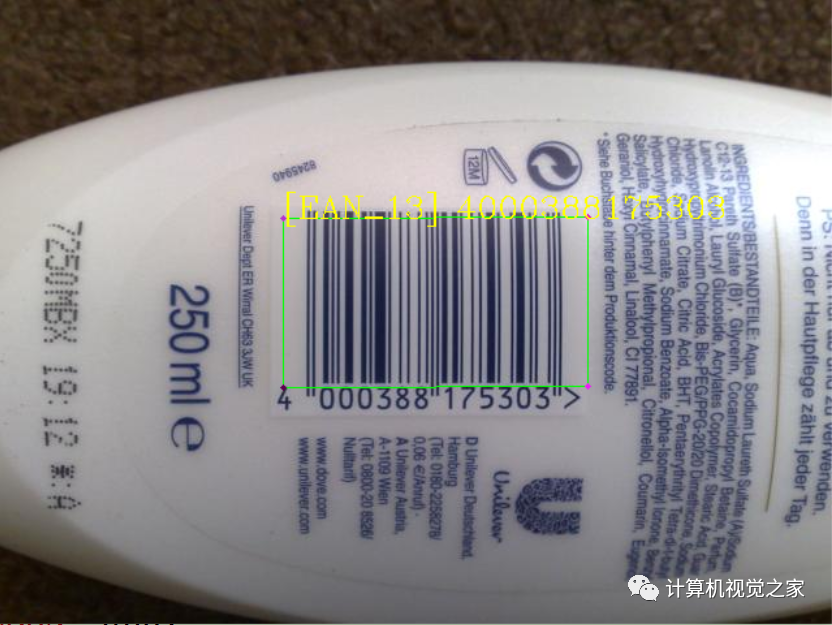
【5】视频测试:
简要说明
模块引入了多种条形码识别算法。
在编码时,我们首先需要创建一个cv::barcode::BarcodeDetector对象。它主要有三个成员函数,下面分别介绍。
【1】初始化
try
 {
 app.bardet = makePtr<barcode::BarcodeDetector>(sr_prototxt, sr_model);
 }
 catch (const std::exception& e)
 {
 cout <<
 "\n---------------------------------------------------------------\n"
 "Failed to initialize super resolution.\n"
 "Please, download 'sr.*' from\n"
 "https://github.com/WeChatCV/opencv_3rdparty/tree/wechat_qrcode\n"
 "and put them into the current directory.\n"
 "Or you can leave sr_prototxt and sr_model unspecified.\n"
 "---------------------------------------------------------------\n";
 cout << e.what() << endl;
 return -1;
 }
我们需要创建变量来存储输出。
 vector<Point> corners;
 vector<string> decode_info;
 vector<string> decode_type;
【2】条码检测
cv::barcode::BarcodeDetector::detect方法使用基于方向相干性的算法。首先,我们计算每个像素的平均平方梯度。然后,我们将图像划分为方形块,并计算每个块的梯度方向一致性和平均梯度方向。然后,我们连接所有具有高梯度方向一致性和相似梯度方向的补丁。在这个阶段,我们使用多尺度补丁来捕获多尺寸条形码的梯度分布,并应用非极大值抑制来过滤重复的提案。最后,我们使用cv::minAreaRect来限制 ROI,并输出矩形的角点。
检测输入图像中的代码,并输出检测到的矩形的角点:
bardet->detectMulti(frame, corners);【3】解码
cv::barcode::BarcodeDetector::decode方法首先对图像进行超缩放(可选)(如果图像小于阈值),锐化图像,然后通过 OTSU 或局部二值化对其进行二值化。然后它通过匹配指定条形码图案的相似度来读取条形码的内容。
cv::barcode::BarcodeDetector::detectAndDecodedetect将和组合decode在一次调用中。下面一个简单的例子展示了如何使用这个函数:
bardet->detectAndDecodeWithType(frame,decode_info,decode_type,corners);可视化结果:
for (size_t i = 0; i < corners.size(); i += 4)
 {
 const size_t idx = i / 4;
 const bool isDecodable = idx < decode_info.size()
 && idx < decode_type.size()
 && !decode_type[idx].empty();
 const Scalar lineColor = isDecodable ? greenColor : redColor;
 // draw barcode rectangle
 vector<Point> contour(corners.begin() + i, corners.begin() + i + 4);
 const vector< vector<Point> > contours {contour};
 drawContours(frame, contours, 0, lineColor, 1);
 // draw vertices
 for (size_t j = 0; j < 4; j++)
 circle(frame, contour[j], 2, randColor(), -1);
 // write decoded text
 if (isDecodable)
 {
 ostringstream buf;
 buf << "[" << decode_type[idx] << "] " << decode_info[idx];
 putText(frame, buf.str(), contour[1], FONT_HERSHEY_COMPLEX, 0.8, yellowColor, 1);
 }
 }
温馨提示:
条码检测成功,解码失败:条码框为红色;
条码检测成功,解码成功:条码框为绿色,解码内容为黄色。
使用总结
【1】一维码检测效果较好,大部分条码均可检测到;
【2】一维码解码效果针对商品类条码效果较好,比较适用手机端扫码。
【3】支持条码类似有待增加;
【4】视频检测和解码速度较快,640*480分辨率FPS在40~200之间。
本文分享自 OpenCV与AI深度学习 微信公众号,前往查看
如有侵权,请联系 cloudcommunity@tencent.com 删除。
本文参与 腾讯云自媒体同步曝光计划 ,欢迎热爱写作的你一起参与!
