Flutter 全平台 | 从 shared_preferences 聊聊六端插件

Flutter 全平台 | 从 shared_preferences 聊聊六端插件

张风捷特烈
发布于 2024-06-06 09:04:53
发布于 2024-06-06 09:04:53
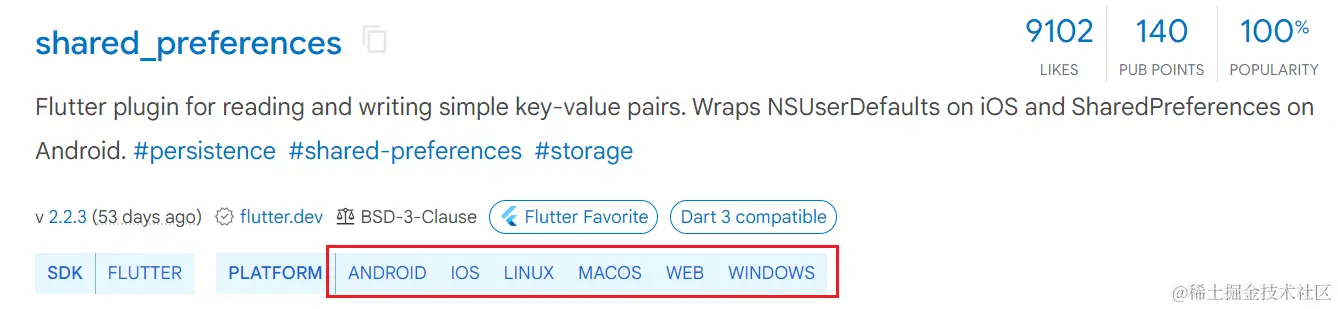
用过 Flutter 的小伙伴应该对 shared_preferences 并不陌生,它支持 六大平台,用于存储键值对,并以 xml 文件的形式将数据进行持久化。这种功能的实现会依赖各个平台的能力,而且功能点并不复杂。所以它是一个非常好的六端插件 研究对象。
1. 项目结构
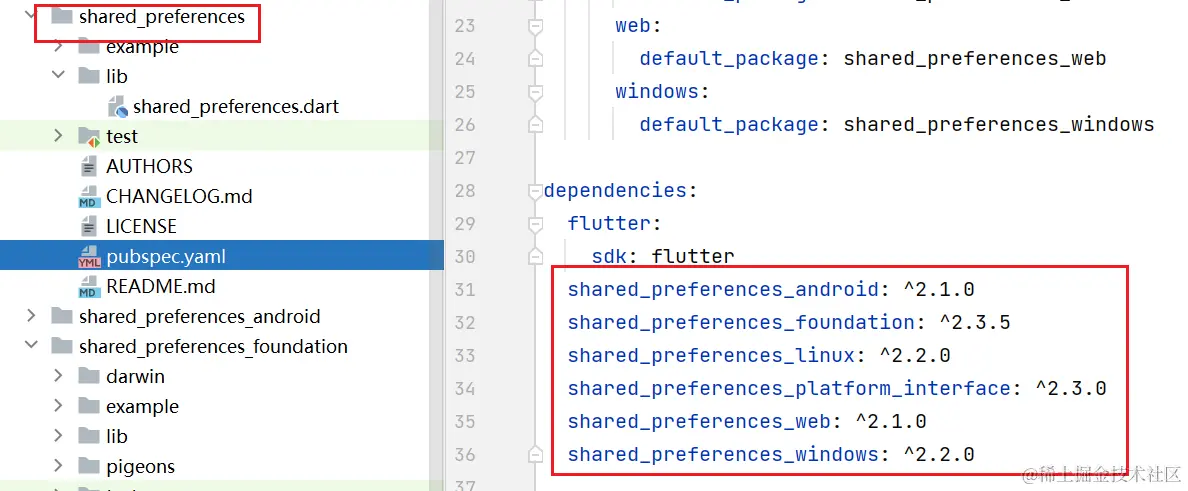
进入 shared_preferences 插件源码中,可以看到它并非是一个简单的插件项目。而是:
- 统一接口
shared_preferences_platform_interface; - 每个平台给出自己的实现包,比如安卓端通过
shared_preferences_android实现; - 通过
shared_preferences库整合各个平台包的功能。

这样对于开发者,既可以独立维护和发展每个平台的类库。对于使用者,又可以基于 shared_preferences 一个库来访问所有子系统的功能。是一种非常好的项目结构。
2. 依赖关系
通过各个类库的 pubspec.yaml,可以查看他们之间的依赖关系。如下所示,shared_preferences 库依赖了其他的五个分库:
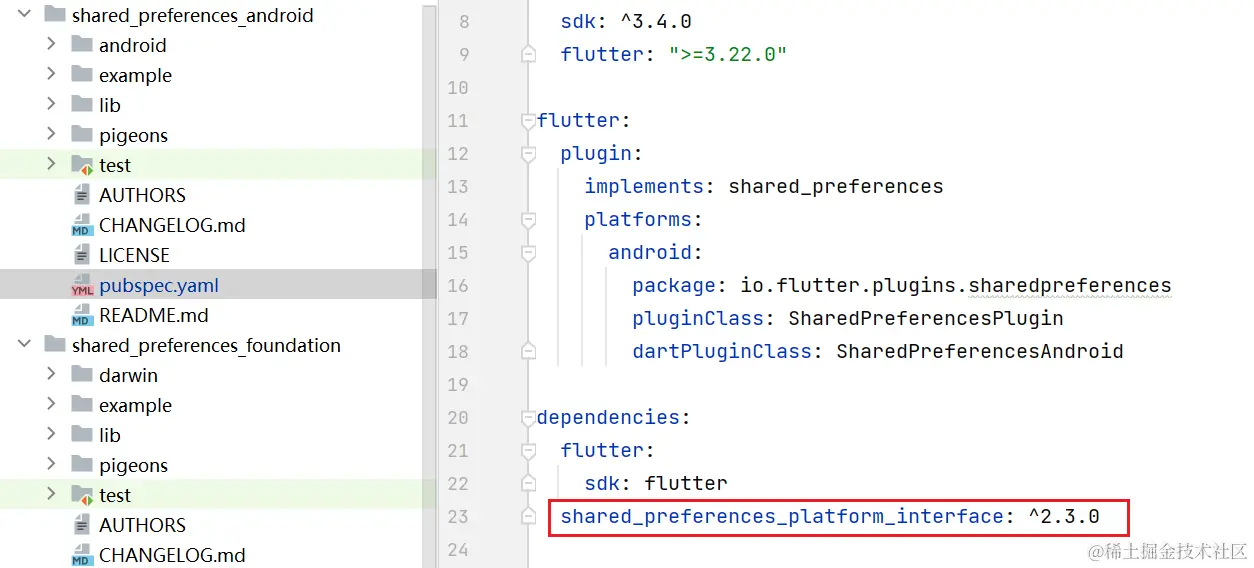
在分库中,会依赖 shared_preferences_platform_interface 接口,对接口中定义的抽象功能进行具体实现。
通过下面的简图,可以更好的理解这六个类库之间的关系:

3. 接口包 shared_preferences_platform_interface
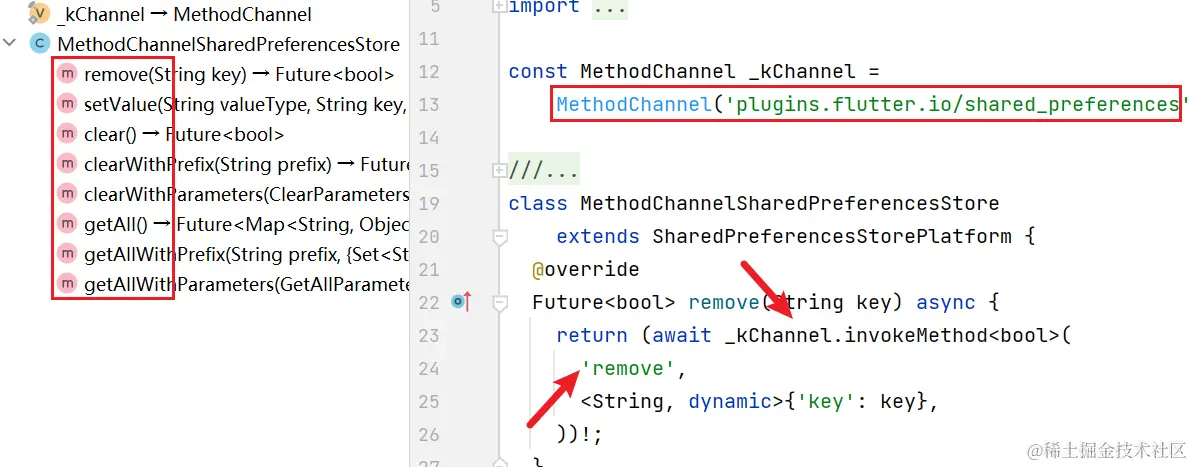
shared_preferences_platform_interface 包中定义了 SharedPreferencesStorePlatform 接口,其中声明了一些抽象方法:
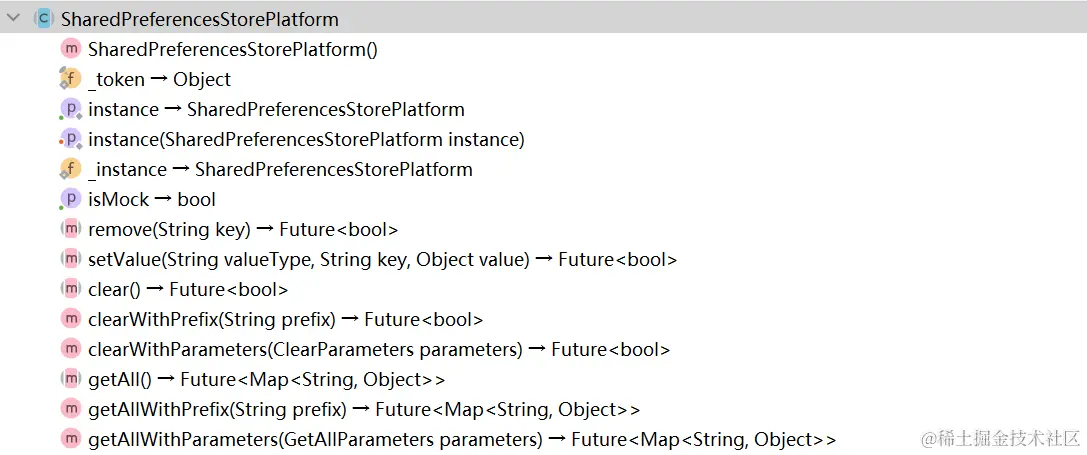
并且通过静态变量 instance 得到 SharedPreferencesStorePlatform 实例对象,注意这里并非单例模式,首先它没有私有化构造;其次它可以通过 set 方法设置其他实例。可以看出,默认的实例是 MethodChannelSharedPreferencesStore 对象。
abstract class SharedPreferencesStorePlatform extends PlatformInterface {
  SharedPreferencesStorePlatform() : super(token: _token);

  static final Object _token = Object();

  static SharedPreferencesStorePlatform get instance => _instance;

  static set instance(SharedPreferencesStorePlatform instance) {
    if (!instance.isMock) {
      PlatformInterface.verify(instance, _token);
    }
    _instance = instance;
  }

  static SharedPreferencesStorePlatform _instance =
      MethodChannelSharedPreferencesStore();
其中 MethodChannelSharedPreferencesStore 必然是 SharedPreferencesStorePlatform 的实现类。可以看出定义了 MethodChannel 全局常量作为平台共同的渠道方法,在具体实现中通过 MethodChannel#invokeMethod 来触发平台方法:
3. windows 和 linux 平台的功能实现
windows 和 linux 平台本身并没有 xml 配置文件的写入和读取工具。所以对于这两个平台,会通过 shared_preferences.json 来存储数据,实现 SharedPreferencesStorePlatform 中定义的存取等接口功能:
windows | linux |
|---|---|
下面是 windows 和 linux 对于 SharedPreferencesStorePlatform 的实现。可以看出在 registerWith 方法中,会将 SharedPreferencesStorePlatform 接口中的静态实例设为当前类对象:
---->[windows]----
class SharedPreferencesWindows extends SharedPreferencesStorePlatform {
  static void registerWith() {
    SharedPreferencesStorePlatform.instance = SharedPreferencesWindows();
  }
  static const String _defaultPrefix = 'flutter.';
}

---->[linux]----
class SharedPreferencesLinux extends SharedPreferencesStorePlatform {
  static const String _defaultPrefix = 'flutter.';
  static void registerWith() {
    SharedPreferencesStorePlatform.instance = SharedPreferencesLinux();
  }
下面代码可以看出 windows 和 linux 会将配置文件放在 getApplicationSupportPath 之下,名称为 shared_preferences.json :
---->[windows]----
Future<File?> _getLocalDataFile() async {
  if (_localDataFilePath != null) {
    return _localDataFilePath!;
  }
  final String? directory = await pathProvider.getApplicationSupportPath();
  if (directory == null) {
    return null;
  }
  return _localDataFilePath =
      fs.file(path.join(directory, 'shared_preferences.json'));
}

---->[linux]----
Future<File?> _getLocalDataFile() async {
  final String? directory = await pathProvider.getApplicationSupportPath();
  if (directory == null) {
    return null;
  }
  return fs.file(path.join(directory, 'shared_preferences.json'));
}
拿设置值来说,会先通过 _readPreferences 得到 map 对象,然后添加键值对。通过 _writePreferences 将新的 map 对象写入到文件中:
@override
Future<bool> setValue(String valueType, String key, Object value) async {
final Map<String, Object> preferences = await _readPreferences();
preferences[key] = value;
return _writePreferences(preferences);
}
Future<bool> _writePreferences(Map<String, Object> preferences) async {
try {
final File? localDataFile = await _getLocalDataFile();
if (localDataFile == null) {
debugPrint('Unable to determine where to write preferences.');
return false;
}
if (!localDataFile.existsSync()) {
localDataFile.createSync(recursive: true);
}
final String stringMap = json.encode(preferences);
localDataFile.writeAsStringSync(stringMap);
} catch (e) {
debugPrint('Error saving preferences to disk: $e');
return false;
}
return true;
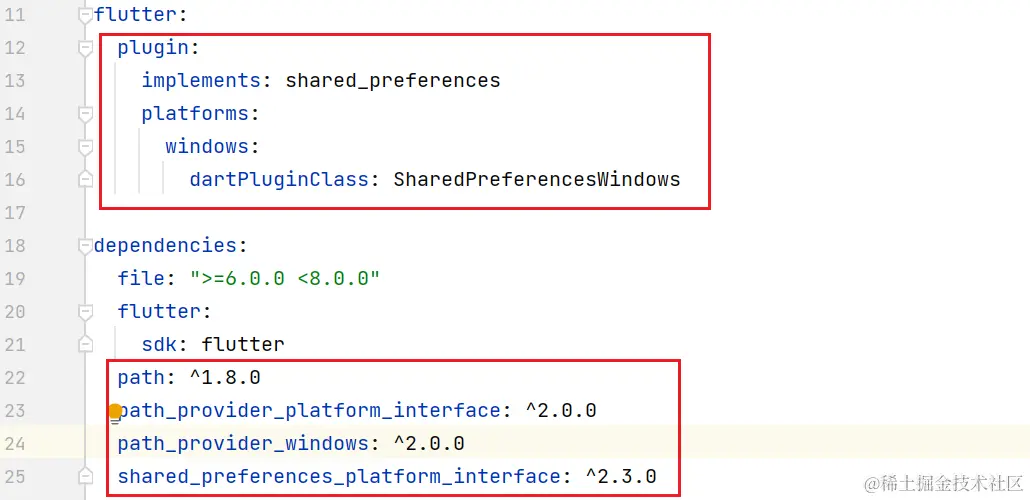
}最后看一下 windows 中 pubspec.yaml 的声明。它在 futter 节点下增加了 plugin 节点,来描述当前插件包。另外 shared_preferences_windows 是一个独立的包,他可以依赖其他的类库。比如这里的 path_provider_windows, 用于获取路径。 Linux 也是类似的:
4. shared_preferences 库
shared_preferences 是面向开发者的类库,其中提供了我们日常开发中所用到的所有方法。他通过 SharedPreferences._ 私有化构造,通过 getInstance 获取 SharedPreferences 实例。
class SharedPreferences {
  SharedPreferences._(this._preferenceCache);

  static Future<SharedPreferences> getInstance() async {
  if (_completer == null) {
    final Completer<SharedPreferences> completer =
        Completer<SharedPreferences>();
    _completer = completer;
    try {
      final Map<String, Object> preferencesMap =
          await _getSharedPreferencesMap();
      completer.complete(SharedPreferences._(preferencesMap));
    } catch (e) {
      completer.completeError(e);
      final Future<SharedPreferences> sharedPrefsFuture = completer.future;
      _completer = null;
      return sharedPrefsFuture;
    }
  }
  return _completer!.future;
}
该实例的核心是 _preferenceCache 映射数据,在构造时会作为入参。比如 getString 方法会从 _preferenceCache 中检索对应的值; setString 会更新 _preferenceCache 映射关系,并通过 _store 存储值。而这个 _store 正是各个平台提供的数据访问接口 SharedPreferencesStorePlatform:

final Map<String, Object> _preferenceCache;
String? getString(String key) => _preferenceCache[key] as String?;
Future<bool> setString(String key, String value) =>
_setValue('String', key, value);
Future<bool> _setValue(String valueType, String key, Object value) {
ArgumentError.checkNotNull(value, 'value');
final String prefixedKey = '$_prefix$key';
if (value is List<String>) {
_preferenceCache[key] = value.toList();
} else {
_preferenceCache[key] = value;
}
return _store.setValue(valueType, prefixedKey, value);
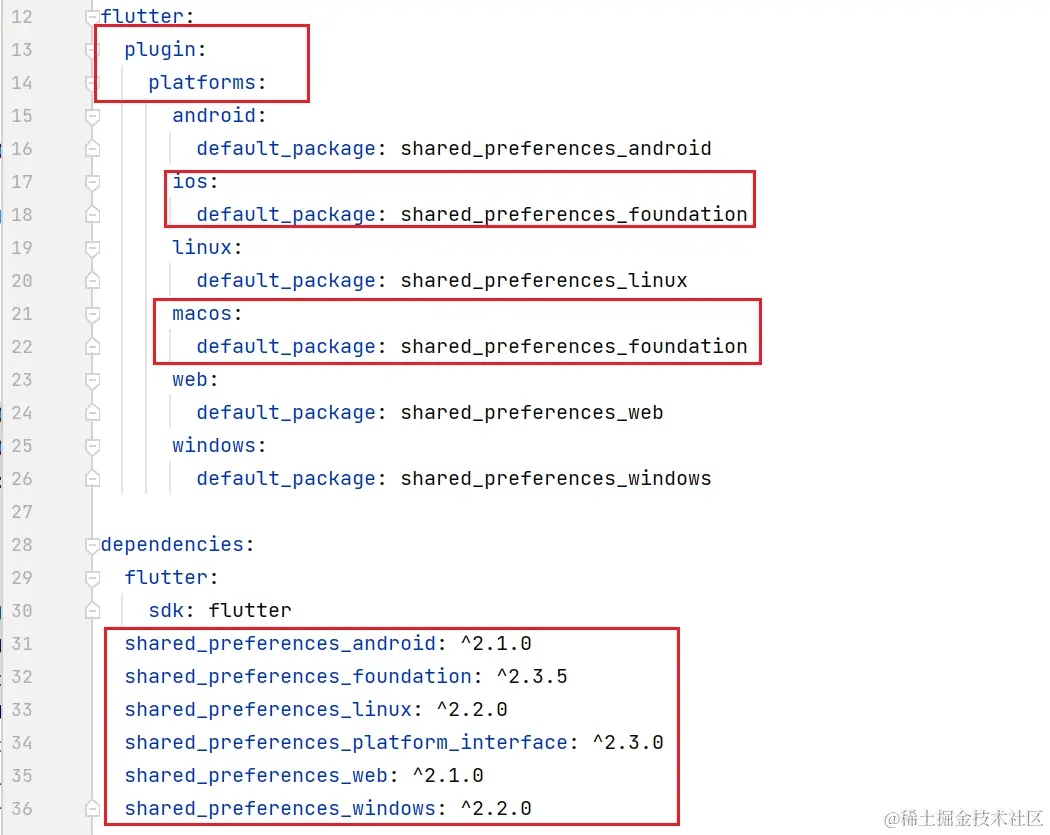
}最后看一下 shared_preferences 中的 pubspec.yaml 文件。在 flutter 节点下对各个平台的类库实现进行描述。可以看出 iOS 和 Macos 都是通过 shared_preferences_foundation 首先的:
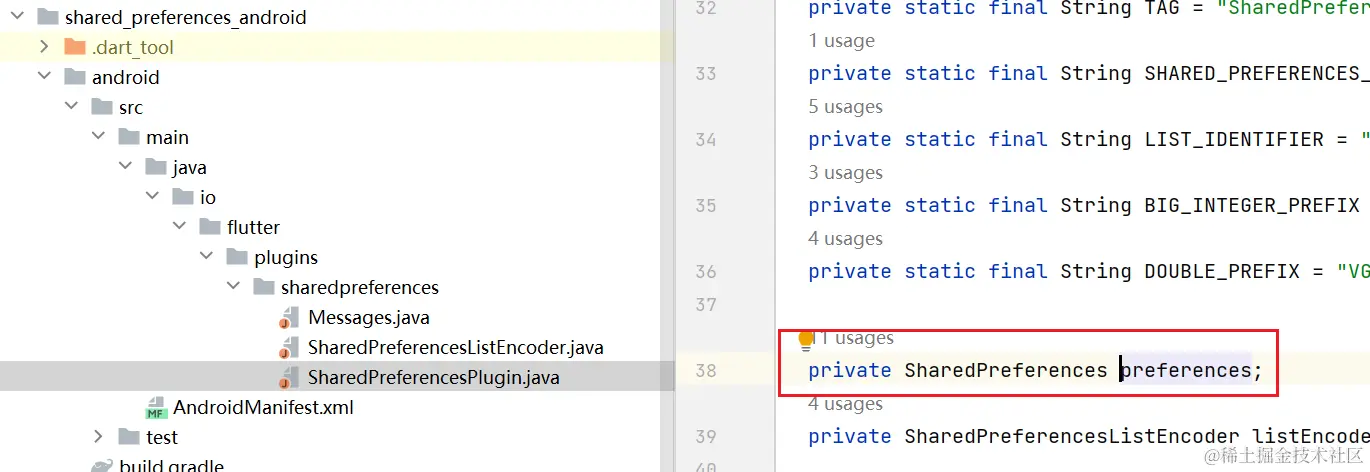
5. Android、iOS、MacOS 平台
Android、iOS、MacOS 平台有相关的 xml 配置数据的存取功能。比如 Android 中使用 SharedPreferences 对象,这也是该库名称的由来:
iOS、MacOS 平台的提供的功能是一样的,代码在 shared_preferences_foundation 中。可以看到是通过 UserDefaults 进行数据持久化的。
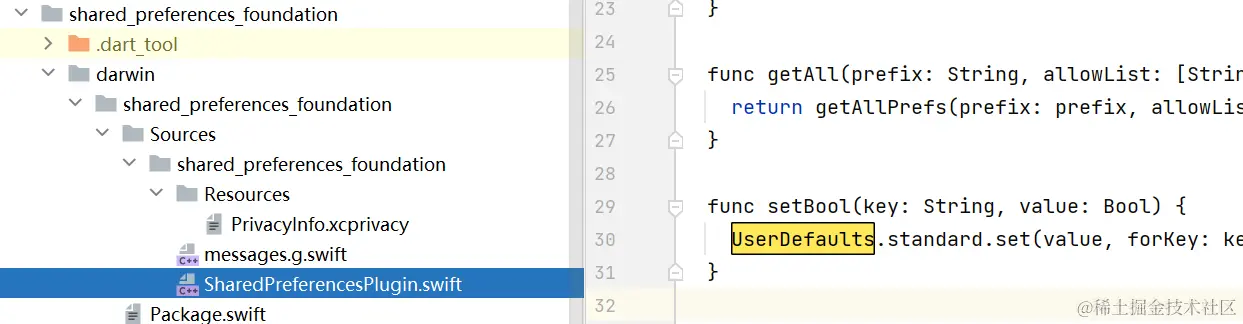
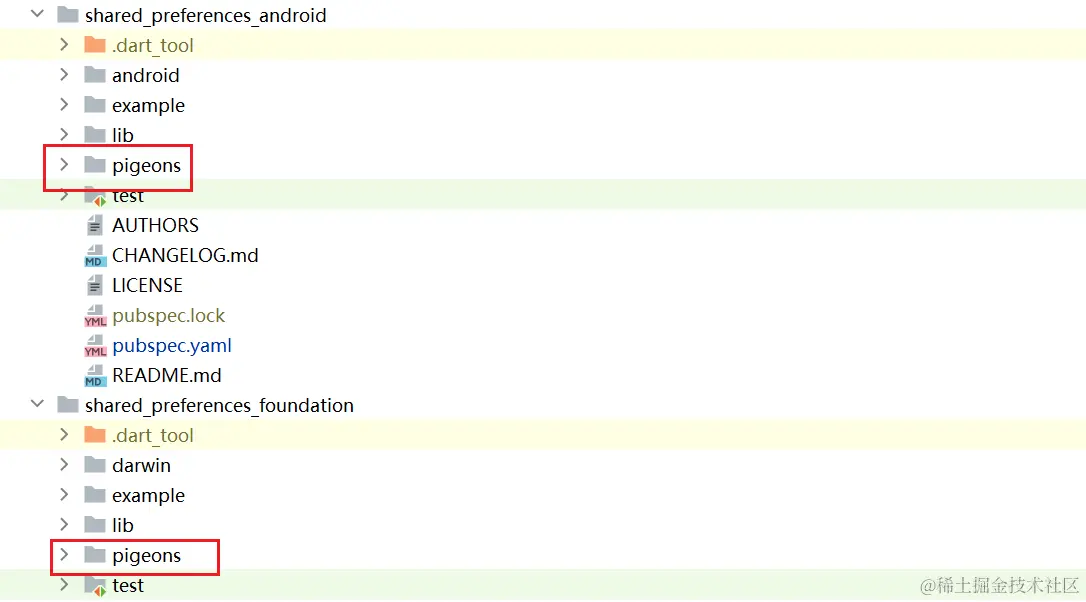
最后说一下,这三个平台涉及到渠道方法来沟通原生平台,这里使用了 pigeons 工具自动生成相关代码,这一点以后有机会再开一篇细讲一下:
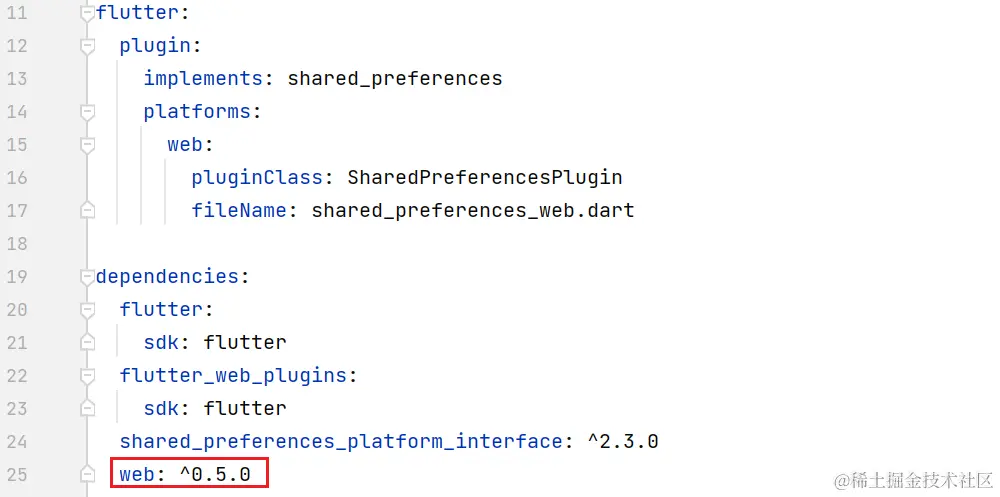
6. Web 平台
最后看一下 Web 平台的实现,其中依赖了 web 类库:
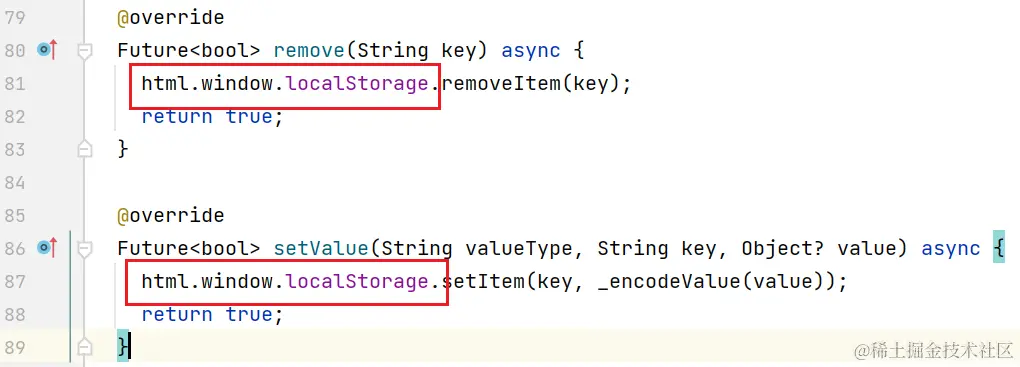
作为存储的实现层,web 平台肯定也需要实现 SharedPreferencesStorePlatform 的接口功能。

从设置和存储值可以看出 web 平台是基于 localStorage 实现的:
到这里,shared_preferences 六端的插件的结构就已经分析完毕了。以后自己需要编写多平台插件也可以按照这种结构。每个类库职责分离,通过一个类库集成各个分库的功能。那本文就到这里,谢谢观看 ~
本文参与 腾讯云自媒体同步曝光计划,分享自作者个人站点/博客。
原始发表:2024-06-06,如有侵权请联系 cloudcommunity@tencent.com 删除
评论
登录后参与评论
推荐阅读
目录
腾讯云开发者

Copyright © 2013 - 2026 Tencent Cloud. All Rights Reserved. 腾讯云 版权所有
深圳市腾讯计算机系统有限公司 ICP备案/许可证号:粤B2-20090059 ![]() 粤公网安备44030502008569号
粤公网安备44030502008569号
腾讯云计算(北京)有限责任公司 京ICP证150476号 | 京ICP备11018762号