CSS 入门指南(二):盒模型 & 浮动弹性布局 & CSS 特性
CSS 入门指南(二):盒模型 & 浮动弹性布局 & CSS 特性

一、盒模型
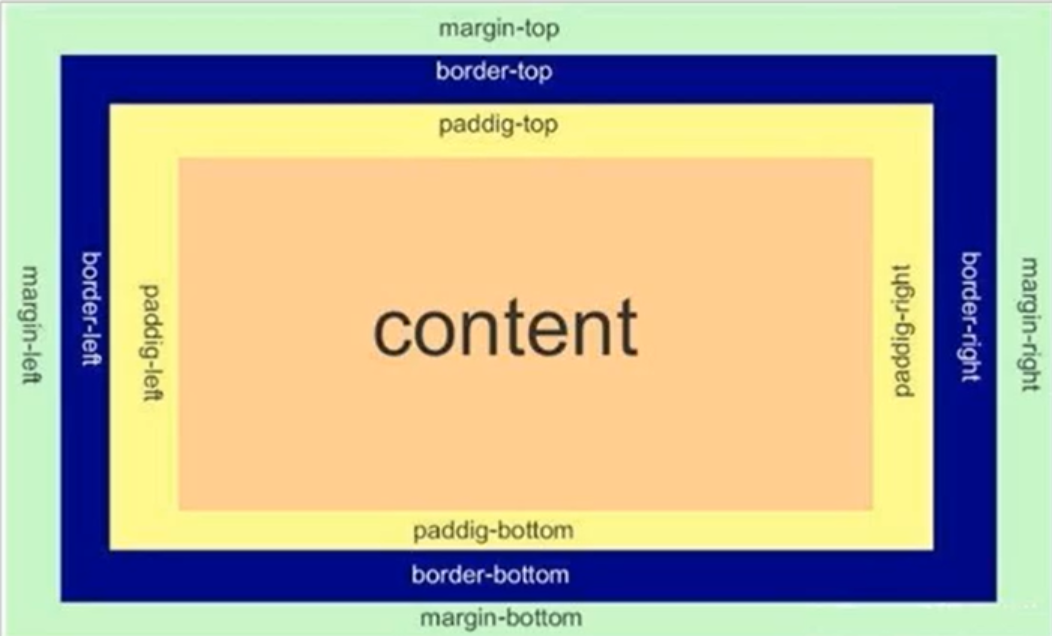
每一个 HTML 元素就相当于是一个矩形的 “盒子”
这个盒子由这几个部分构成 : 边框 border、 内容 content、 内边距 padding、 外边距 margin
1. 边框
CSS 的 border 属性是一个用于设置各种单独的边界属性的简写属性。border 可以用于设置一个或多个以下属性的值:border-width、border-style、border-color
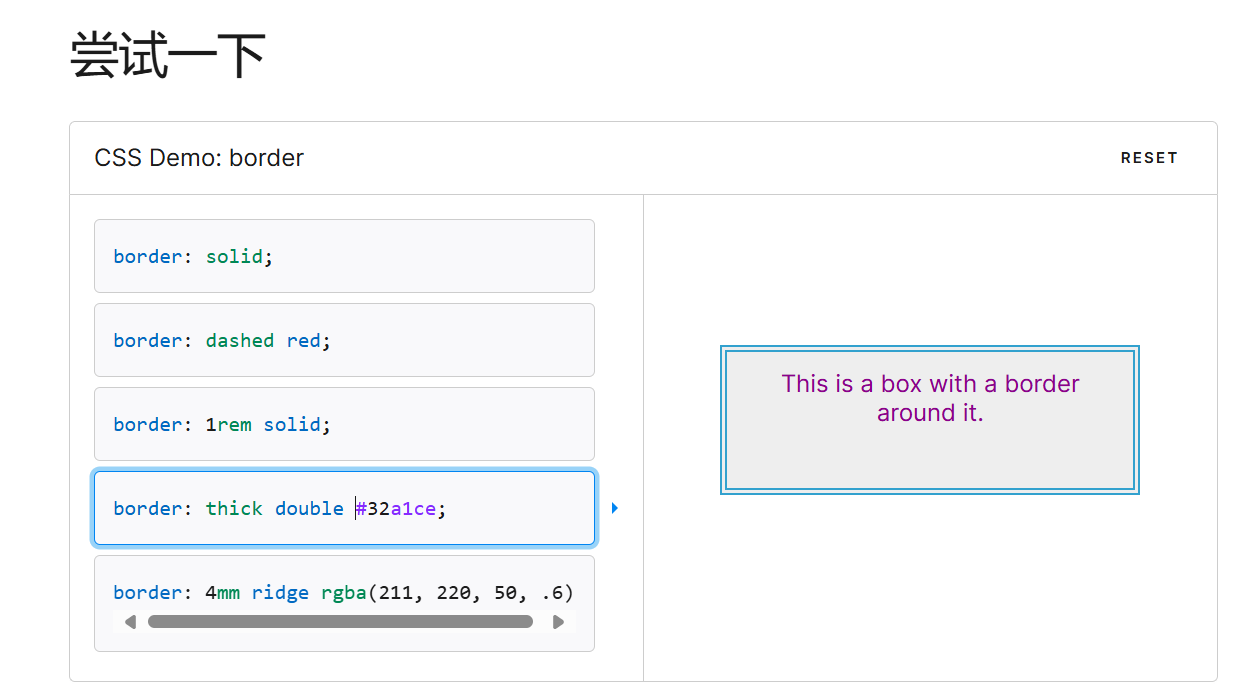
- 和所有的简写属性一样,如果有缺省值会被设置成对应属性的初始值。
- 同时需要注意设置 border 对
border-image属性的影响,虽然 border 属性不能设置这个属性,但会把该属性重置为初始值 none。 - 这使得我们可以用 border 属性去重置整个样式表中的 border 设置。因为 W3C 计划在未来的标准中保留该属性,因此建议使用该属性重置边框设定。
备注: 虽然border-width、border-style和 border-color 简写属性接受最多 4 个参数来为不同的边设置宽度、风格和颜色,但 border 属性只接受三个参数,分别是宽度、风格和颜色,所以这样会使得四条边的边框相同。
【案例】
<style>
    div {
        width: 500px;
        height: 250px;
        border-width: 10px;
        border-style: solid;
        border-color: green;
    }
	/*当然也可以进行简写*/
    border: 10px solid green; /*无顺序要求*/
</style>

<div>test</div>
可以改四个方向的任意边框.
border-top/bottom/left/right以下的代码只给上边框设为红色,其余为蓝色利用到的层叠性,就近原则的生效.
border: 1px solid blue;
border-top:red;
边框会撑大盒子
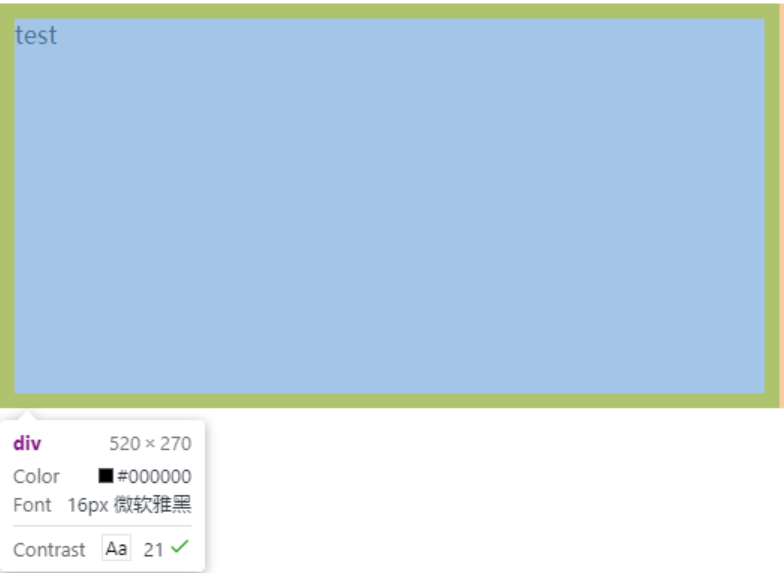
- 在下面运行结果中:可以看到 width、 height 是 500*250,而最终整个盒子大小是 520 * 270。边框10个像素相当于扩大了大小.
举个例子:
买房子时:
- 建筑面积 = 套内面试 + 公摊面试(电梯间)
- 套内面积 = 使用面积 + 墙占据的空间
蓝色区域就是 “使用面积”, 绿色区域就是 “套内面积”
通过 box-sizing 属性可以修改浏览器的行为, 使边框不再撑大盒子
*为通配符选择器
*{box-sizing: border-box;}2. 内边距
padding 设置内容和边框之间的距离
基础写法
默认内容是顶着边框来放置的,用 padding 来控制这个距离
可以给四个方向都加上边距
- padding-top
- padding-bottom
- padding-left
- padding-right
【案例】
<style>
    div {height: 200px; width: 300px;}
</style>

<div>test</div>
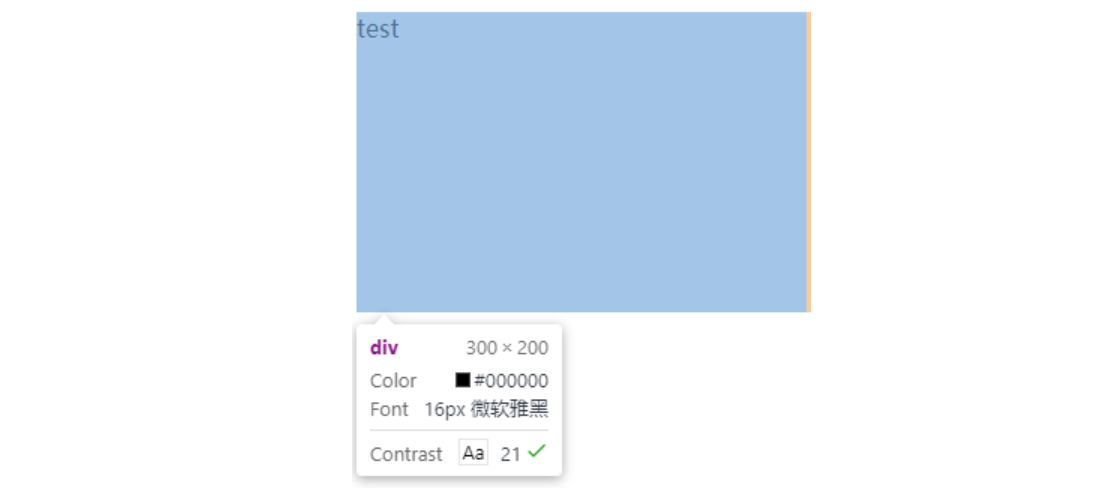
效果如下:
加上 padding 之后,如下:
div {
    height: 200px;
    width: 300px;
    padding-top: 5px;
    padding-left: 10px;
}
此时结果如下:
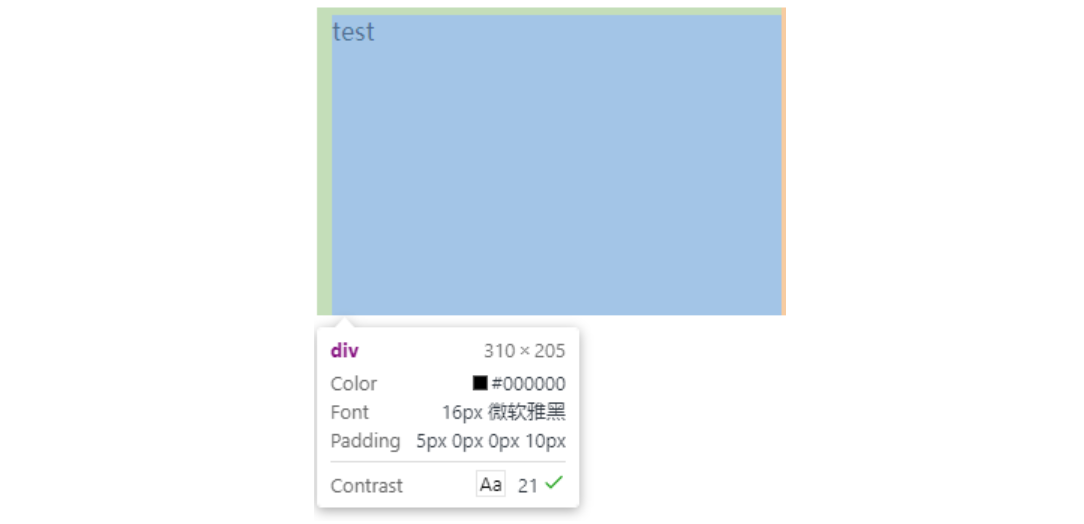
此时可以看到带有了一个绿色的内边距.
注意:
- 整个盒子的大小从原来的 300 * 200 => 310 * 205,说明内边距也会影响到盒子大小(撑大盒子).
- 使用
box-sizing: border-box属性也可以使内边距不再撑大盒子 (和上面 border 类似)
复合写法
可以把多个方向的 padding 合并到一起. [四种情况都要记住, 都很常见]
padding: 5px; 表示四个方向都是 5px
padding: 5px 10px; 表示上下内边距 5px, 左右内边距为 10px
padding: 5px 10px 20px; 表示上边距 5px, 左右内边距为 10px, 下内边距为 20px
padding: 5px 10px 20px 30px; 表示 上5px, 右10px, 下20px, 左30px (顺时针)
控制台中选中元素, 查看右下角, 是很清楚的

3. 外边距
基础写法
控制盒子和盒子之间的距离
可以给四个方向都加上边距:margin-top、margin-bottom、margin-left、margin-right
<style>
    div{
        background-color: red;
        width: 200px;
        height: 200px;
    }
    .one{margin-bottom: 20px;}
</style>

<div class="one">11111</div>
<div>呵呵</div>
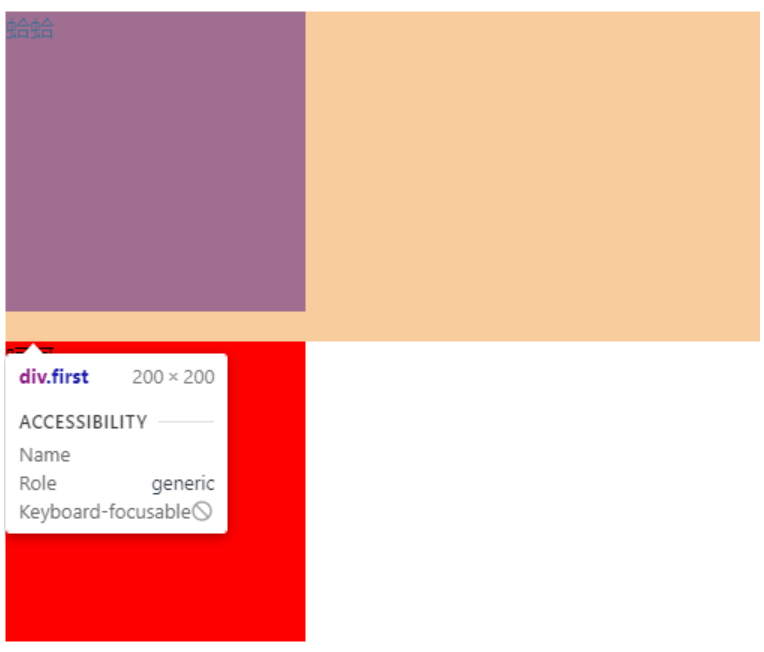
检查如下:
复合写法
- 规则同 padding 一样
margin: 10px; // 四个方向都设置
margin: 10px 20px; // 上下为 10, 左右 20
margin: 10px 20px 30px; // 上 10, 左右 20, 下 30
margin: 10px 20px 30px 40px; // 上 10, 右 20, 下 30, 左 40
合并问题
场景:垂直排列的兄弟元素,上下 margin 会合并
现象:取两个 margin 中的较大值生效
<style>
    .one{
        width: 100px;
        height: 100px;
        background-color: pink;
        margin-bottom: 20px;
    }
    .two{
        width: 100px;
        height: 100px;
        background-color: pink;
        margin-top: 50px;
    }
</style>

<div class="one">one</div>
<div class="two">two</div>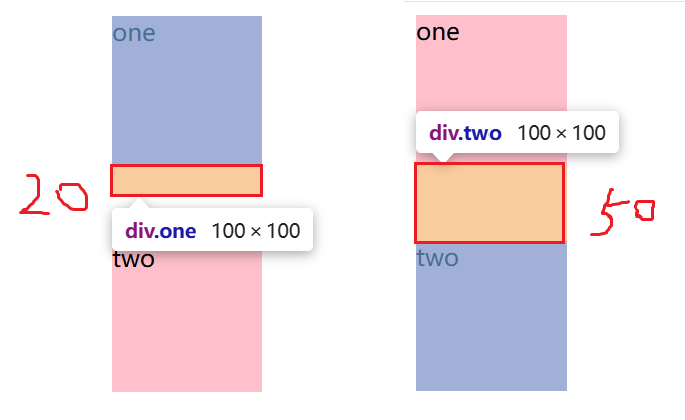
塌陷问题
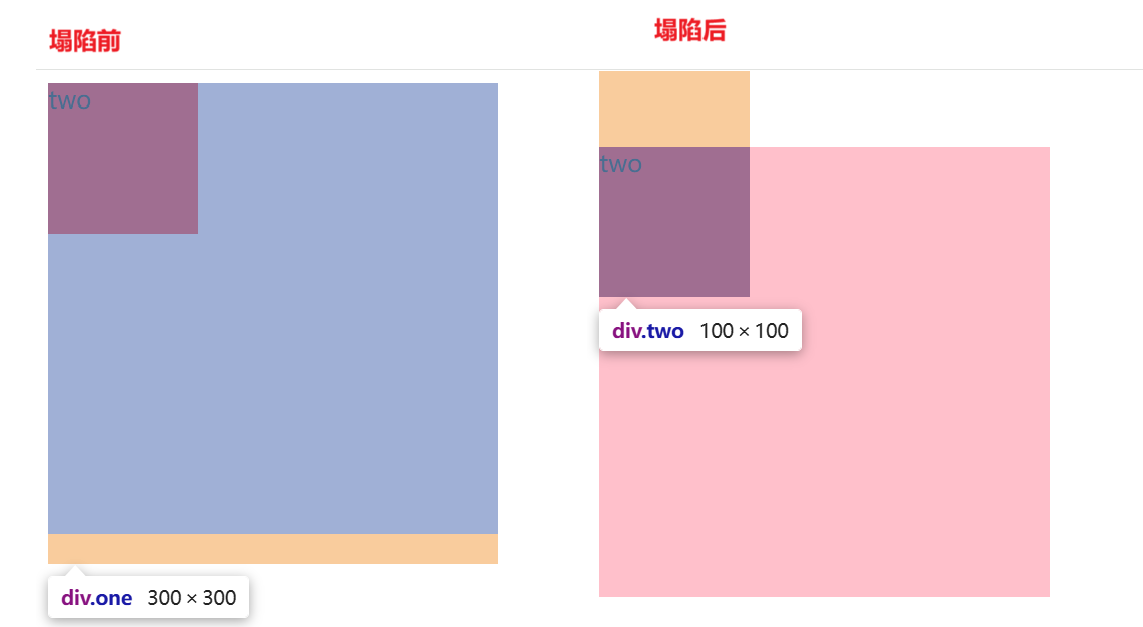
场景:父子级的标签,子级的添加 上外边距 会产生 塌陷 问题
现象:导致父级一起向下移动
【案例】
<style>
    .one{
        width: 300px;
        height: 300px;
        background-color: pink;
    }
    .two{
        width: 100px;
        height: 100px;
        background-color: red;
        margin-top: 50px;
    }
    </style>

<div class="one">
    <div class="two">two</div>
</div>
效果如下:
解决办法:
- 取消子级 margin,父级设置 padding
- 父级设置 overflow: hidden
- 父级设置 border-top
4. 块级元素水平居中
前提:
- 指定宽度(如果不指定宽度, 默认和父元素一致)
- 把水平
margin设为auto
下面三种写法均可以
margin-left: auto; margin-right: auto;
margin: auto;
margin: 0 auto;
【案例】
<style>
    div{
        width: 500px;
        height: 200px;
        background-color: red;
        margin: 0 auto;
    }
</style>

<div>123</div>
注意:
这个水平居中的方式和
text-align不一样.margin: auto是给块级元素用得到.text-align: center是让行内元素或者行内块元素居中的.
另外:对于垂直居中,不能使用 "上下 margin 为 auto " 的方式.
5. 去除浏览器默认样式
浏览器会给元素加上一些默认的样式,尤其是内外边距. 不同浏览器的默认样式存在差别.
为了保证代码在不同的浏览器上都能按照统一的样式显示,往往我们会去除浏览器默认样式.
使用 通配符选择器 即可完成这件事情.
* {margin: 0; padding: 0;}【案例】

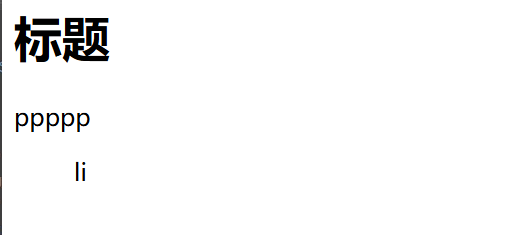
注意:无序标签前面的那个小圆点,其实没有消失,而是挪到了浏览器的外面看不到
那么我们如果想要去掉这个小圆点,如下:
li{list-style: none;}效果如下:
6. 内容溢出
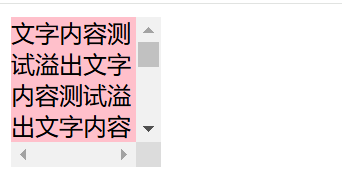
控制 溢出 元素的内容的显示方式
属性名: overflow
属性值 | 效果 |
|---|---|
hidden | 溢出隐藏 |
scroll | 溢出滚动(无论是否溢出,都显示出滚动条位置) |
auto | 溢出滚动(溢出才显示滚动条位置) |
【案例】
<style>
    div{
        width: 100px;
        height: 100px;
        background-color: pink;
        overflow: scroll;
    }
</style>

<div>
    文字内容测试溢出文字内容测试溢出文字内容测试溢出文字内容测试溢出文字内容测试溢出文字内容测试溢出
    文字内容测试溢出文字内容测试溢出文字内容测试溢出文字内容测试溢出文字内容测试溢出
    文字内容测试溢出文字内容测试溢出文字内容测试溢出
    文字内容测试溢出文字内容测试溢出
    文字内容测试溢出文字内容测试溢出
</div>
效果如下:
7. 盒子模型 - 阴影(拓展)
box-shadow

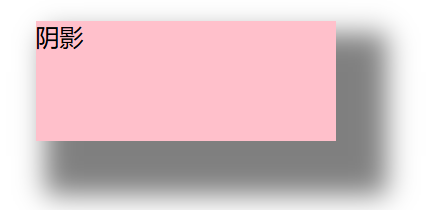
属性值:x 轴偏移量 Y 轴偏移量 模糊半径 扩散半径 颜色 内外阴影- 给元素设置 阴影 效果
注意:
- X 轴偏移量 和 Y 轴偏移量必须书写
- 默认是 外阴影,内阴影需要添加
inset
【案例】
<style>
    div{
        margin: 50px auto;
        width: 200px;
        height: 80px;
        background-color: pink;

        box-shadow: 20px 22px 18px 14px rgba(0, 0, 0, 50%);
    }
</style>

<div>阴影</div>
如下:
二、浮动 & 弹性布局
1. 标准流
标准流也叫文档流,指的是标签在页面中默认的布局规则,例如:块元素独占一行,行内元素可以一行显示多个

- 实际布局中可能会让 div 在同一行出现,但是实际其默认的排列规则是需要独占一行显示的,此时这种默认的标准规则就叫标准流
- 而工作中标准流无法完成布局效果,这时就有两种排列方法:浮动(了解)、Flex 布局
2. 浮动布局 – float
2.1 基本概念
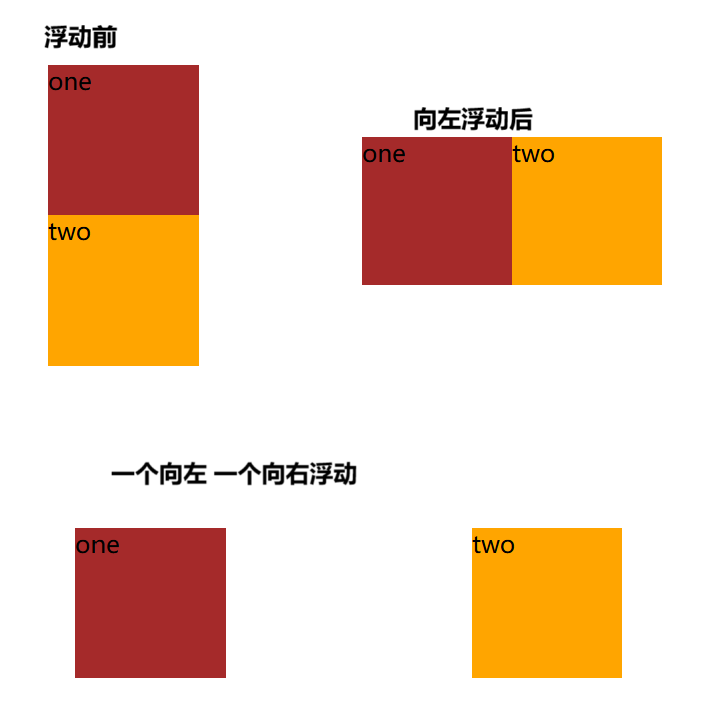
作用:让块元素水平排列
属性名:float
- left:左对齐
- right: 右对齐
特点:
- 浮动后的盒子顶对齐
- 具备行内块特点
- 当父级宽度不够时,浮动的子级会换行
- 浮动后的盒子脱标,
- 子级浮动,父级没有高度,子级无法撑开父级高度,影响布局
【案例】
<style>
    .one{
        width: 100px;
        height: 100px;
        background-color: brown;
        float: left;
    }
    .two{
        width: 100px;
        height: 100px;
        background-color: orange;
        float: right;
    }
</style>

<div class="one">one</div>
<div class="two">two</div>
如下:
如果两个一个大一个小,并且小的向左浮动,大的不浮动,会咋样呢,来看看吧如下:
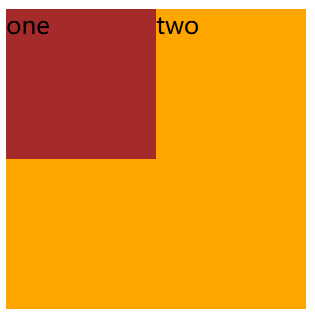
- 原因:就是因为只给 one 加了浮动,浮动之后的盒子会脱离标准流的控制,不再占用标准流位置,因此在其看来 one 根本不存在,此时 two 就是第一个盒子,因此 two 就会出现在左上角,这个现象就是 浮动盒子的脱标现象,因此实际中如果要浮动,其他最好一起跟着浮动。
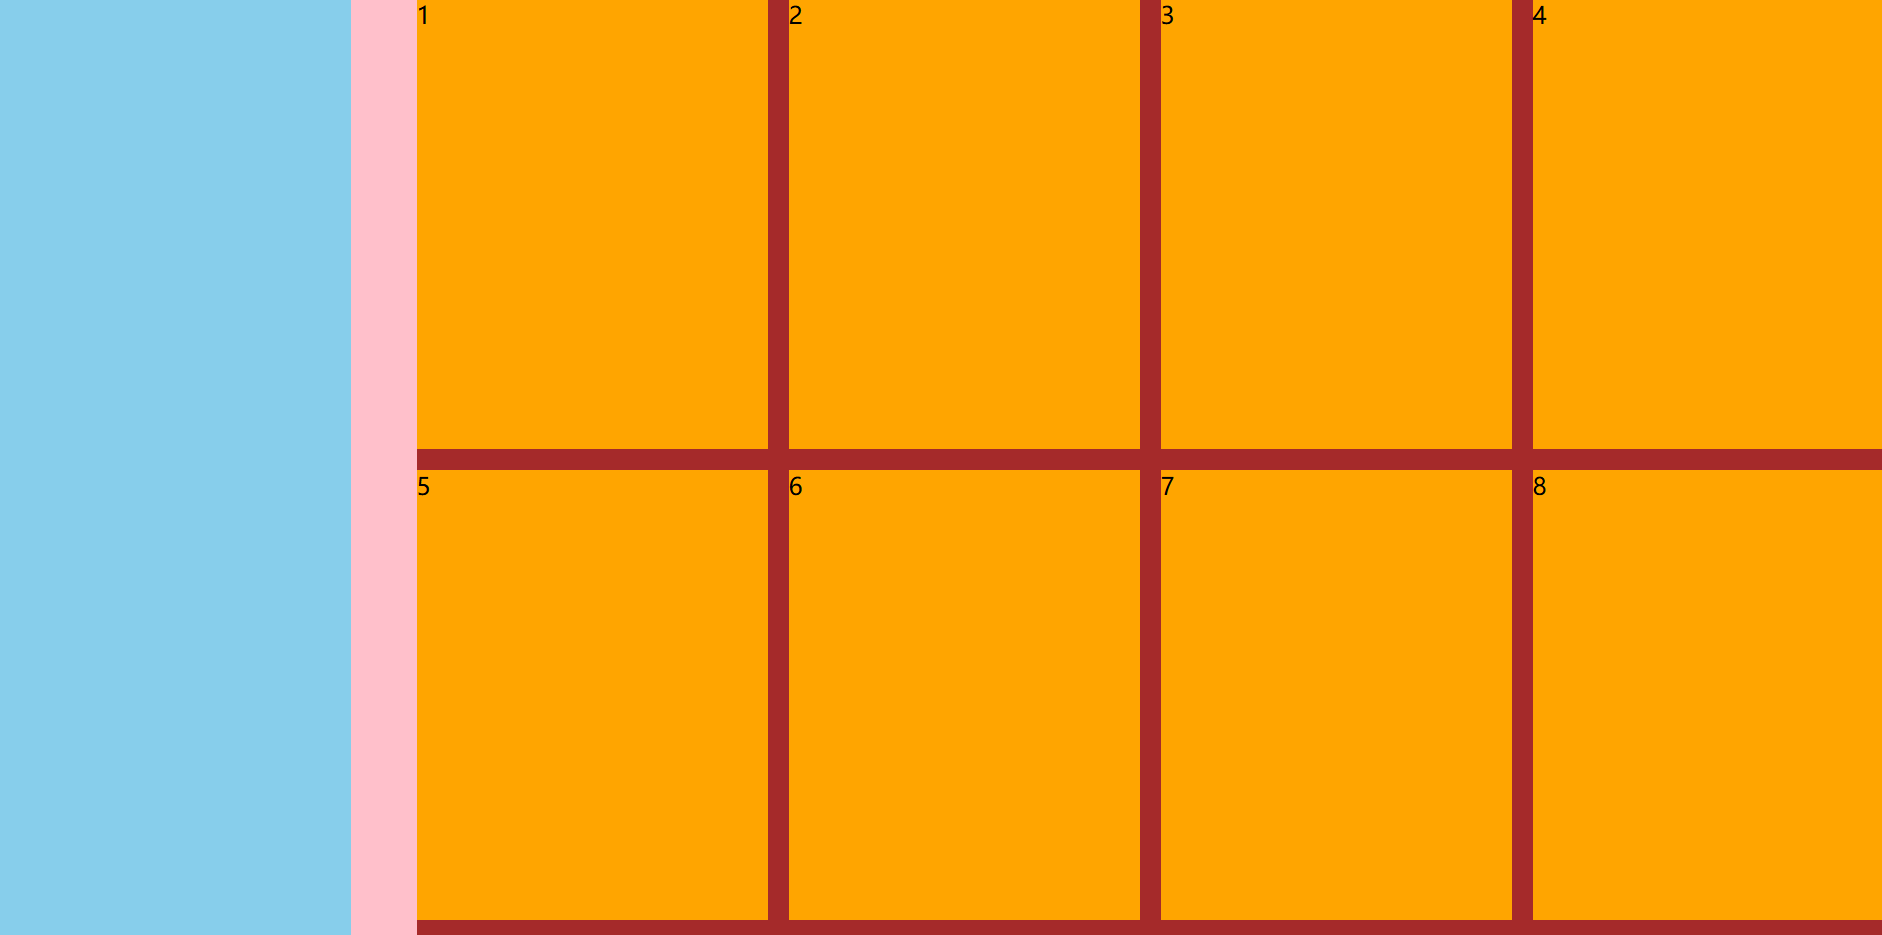
【案例】
<style>
    *{margin: 0; padding: 0;}
    li{list-style: none;}
    .product{margin: 50px auto; width: 1226px;height: 628px;background-color: pink;}
    .left{float: left;width: 234px;height: 628px;background-color: skyblue;}
    .right{float: right;width: 978px;height: 628px;background-color: brown;}

    .right li{
        float: left;
        margin-right: 14px; margin-bottom: 14px;
        width: 234px; height: 300px; background-color: orange;
    }
    .right li:nth-child(4n){margin-right: 0;}
</style>

<div class="product">
    <div class="left"></div>
    <div class="right">
        <ui>
            <li>1</li><li>2</li>
            <li>3</li><li>4</li>
            <li>5</li><li>6</li>
            <li>7</li><li>8</li>
        </ui>
    </div>
</div>
效果如下:
2.2 清除浮动
场景:浮动元素容易 脱标,如果父级没有高度,子级无法撑开父级高度(可能导致页面布局错乱)
解决方法:清除浮动
<style>
    .top{
        margin: 10px auto;
        width: 1200px;
        /* height: 300px; */
        background-color: pink;
    }

    .left{width: 200px;height: 300px;background-color: skyblue;float: left;}
    .right{width: 950px;height: 300px;background-color: orange;float: right;}

    .bottom{
        height: 100px;
        background-color: brown;
    }
</style>

<div class="top">
    <div class="left"></div>
    <div class="right"></div>
</div>
<div class="bottom"></div>
效果如下:

清除浮动方法如下
方法一:额外标签法
- 在父元素内容的最后添加一个块级元素,设置 CSS 属性
clear:both
<style>
    .top{
        margin: 10px auto;
        width: 1200px;
        /* height: 300px; */
        background-color: pink;
    }

    .left{width: 200px;height: 300px;background-color: skyblue;float: left;}
    .right{width: 950px;height: 300px;background-color: orange;float: right;}

    .bottom{
        height: 100px;
        background-color: brown;
    }
    /*一般给清除浮动的标签取名为 .clearfix*/
    .clearfix{clear: both;}
</style>

<div class="top">
    <div class="left"></div>
    <div class="right"></div>
    <div class="clearfix"></div>
</div>
<div class="bottom"></div>
此时效果如下:

方法二:单伪元素法
.clearfix::after{
    content: "";
    display: block;
    clear: both;
}

<!--在 div 使用如下: 给父标签使用就行-->
<div class="top clearfix">
    <div class="left"></div>
    <div class="right"></div>
</div>
<div class="bottom"></div>
方法三:双伪元素法(推荐)
/*before 是用于解决外边距塌陷问题的*/
.clearfix::before, .clear::after{
    content: "";
    display: table;
}
.clearfix::after{
    clear: both;
}
方法四:overflow
- 父元素添加 CSS 属性
overflow:hidden
3. 弹性布局 – Flex
3.1 基本概念
flex 是 flexible box 的缩写。意思为"弹性盒子"任何一个 html 元素,都可以指定为 display:flex 完成弹性布局。
- 是浏览器提倡的布局模型,非常适合结构化布局,提供了强大的空间分布和对齐能力
- Flex 模型不会产生浮动布局中的脱标现象,布局网页更简单灵活
- flex 布局的本质是给父盒子添加
display:flex属性,来控制子盒子的位置和排列方式
基础概念:
- 被设置为
display:flex属性的元素,称为flex container,子元素可以 自动挤压或拉伸 - 它的所有子元素立刻称为了该容器的成员,称为
flex item flex item可以纵向排列;也可以横向排列,称为 flex direction(主轴)
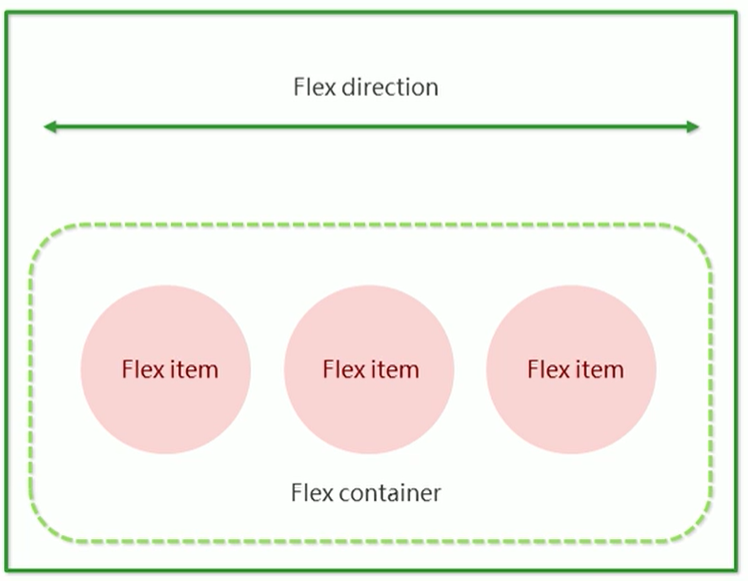
注意:当父元素设置为 display: flex 之后, 子元素的 float, clear, vertical-align 都会失效
3.2 常用属性
属性 | 描述 |
|---|---|
display: flex | 创建 flex 容器 |
justify-content | 主轴对齐方式 |
align-items | 侧轴对齐方式 |
align-self | 某个弹性盒子侧轴对齐方式 |
flex-direction | 修改主轴方向 |
flex | 弹性压缩比 |
flex-wrap | 弹性盒子换行 |
align-content | 行对齐方式 |
① 主轴对齐方式
justify-content 设置主轴上的子元素排列方式.
- 使用之前一定要确定好主轴是哪个方向
属性取值 | 描述 |
|---|---|
flex-start | 默认值,弹性盒子从起点开始依次排列 |
flex-end | 弹性盒子从终点开始依次排列 |
center | 弹性盒子沿 主轴 居中 开始依次排列 |
space-between | 弹性盒子从 主轴均匀 开始依次排列,空白间距均分在弹性盒子之间 |
space-around | 弹性盒子从 主轴均匀 开始依次排列,空白间距均分在弹性盒子两侧 |
space-evenly | 弹性盒子从 主轴均匀 开始依次排列,弹性盒子与容器之间间距相等 |
【案例】
<style>
    div{width: 100%; height: 150px; background-color: red; display: flex}
    div>span{width: 100px; height:100px; background-color: green; }
</style>

<div>
    <span>1</span>
    <span>2</span>
    <span>3</span>
    <span>4</span>
    <span>5</span>
</div>
① 未指定 justify-content 时, 默认按照从左到右的方向布局

② 设置 justify-content: flex-end , 此时元素都排列到右侧了.

③ 设置 justify-content: center , 此时元素居中排列

④ 设置 justify-content: space-around; 平分了剩余空间.

⑤ 设置 justify-content: space-between; 先两边元素贴近边缘,再平分剩余空间.

⑥ 设置 justify-content: space-evenly; 与容器之间距离相等

② 侧轴对齐方式
- align-items:当前弹性容器内 所有 弹性盒子的侧轴对齐方式(给弹性容器设置)
- align-self:单独控制 某个 弹性盒子的侧轴对齐方式(给弹性盒子设置)
设置侧轴上的子元素排列方式.
- 在上面的代码中, 我们是让元素按照主轴的方向排列, 同理我们也可以指定元素按照侧轴方向排列.
属性取值 | 描述 |
|---|---|
stretch | 默认值,行拉伸以占剩余空间 |
flex-start | 弹性盒子从起点开始依次排列 |
flex-end | 弹性盒子从终点开始依次排列 |
center | 弹性盒子沿侧轴开始依次排列 |
space-between | 行均匀分布在弹性容器中 |
space-around | 行均匀分布在弹性容器中,两端各占一半 |
取值和 justify-content 差不多.
理解 stretch(拉伸):
- 这个是
align-content的默认值. 意思是如果子元素没有被显式指定高度,那么就会填充满父元素的 高度.
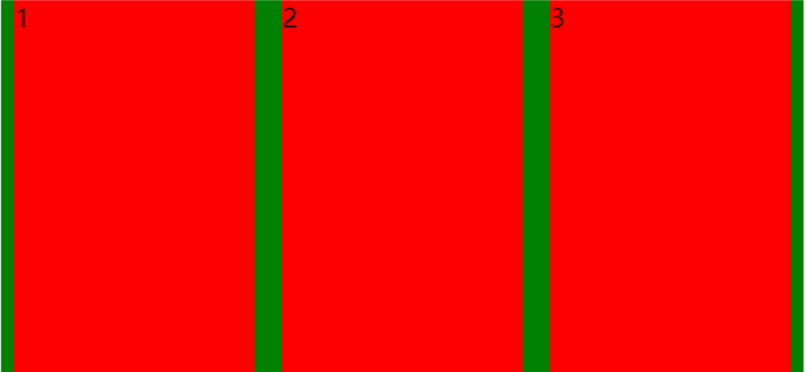
【案例】
<style>
    div{width: 500px; height: 500px; background-color: green; display: flex; justify-content: space-around;}
    div>span{background-color: red; width: 150px;}
</style>

<div>
    <span>1</span>
    <span>2</span>
    <span>3</span>
</div>
效果如下:
可以使用 align-items 实现垂直居中
<style>
    div{width: 500px; height: 500px; background-color: green; display: flex; justify-content: space-around; align-items: center;}
    div>span{background-color: red; width: 150px; height:100px}
</style>

<div>
    <span>1</span>
    <span>2</span>
    <span>3</span>
</div>
效果如下:

注意:align-items 只能针对单行元素来实现. 如果有多行元素, 就需要使用 item-contents
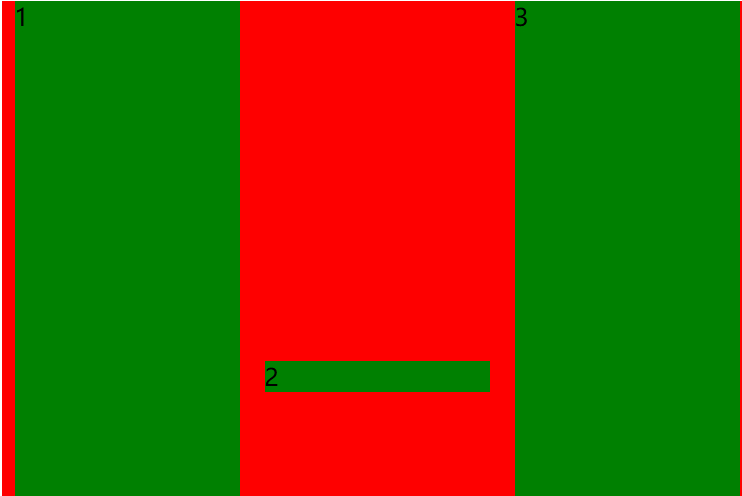
使用 align-self 对 2 进行操作,如下:
div>span:nth-child(2){align-self: center;}效果如下:
③ 修改主轴方向
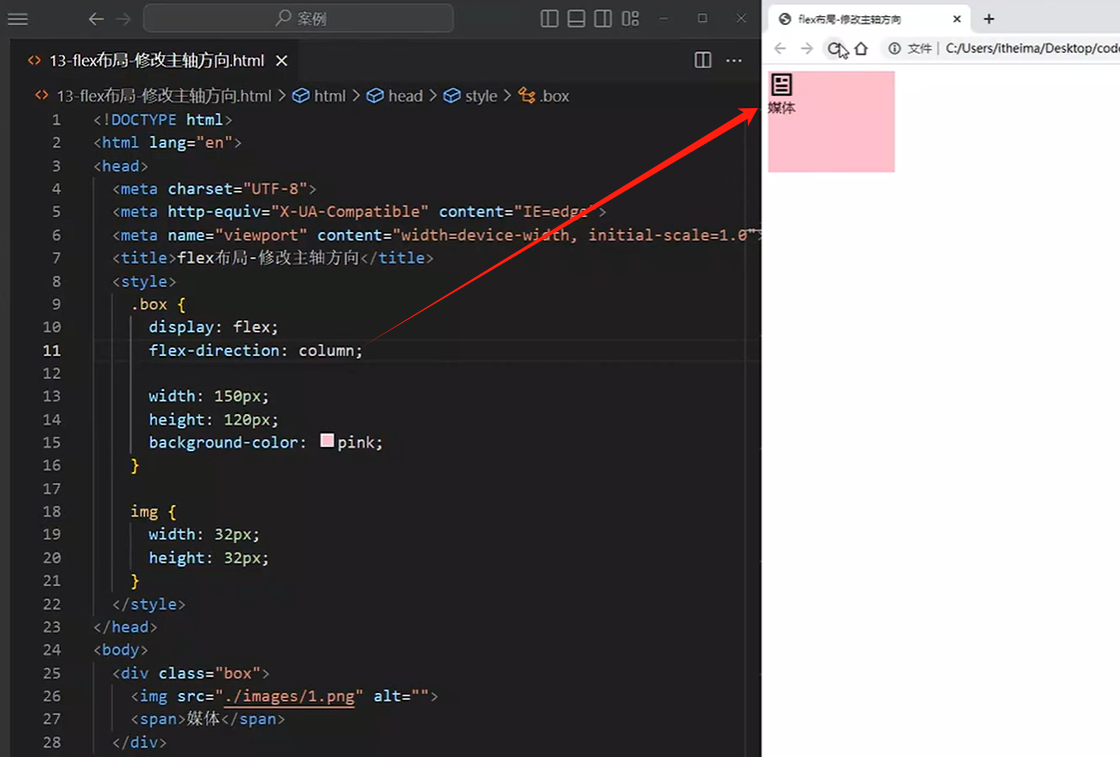
主轴默认在 水平方向,侧轴默认在 垂直方向
属性名:flex-direction
属性值 | 效果 |
|---|---|
row | 水平方向,从左向右(默认) |
column | 垂直方向,从上向下 |
row-reverse | 水平方向,从右向左 |
column-reverse | 垂直方向,从下向上 |
④ 弹性伸缩比
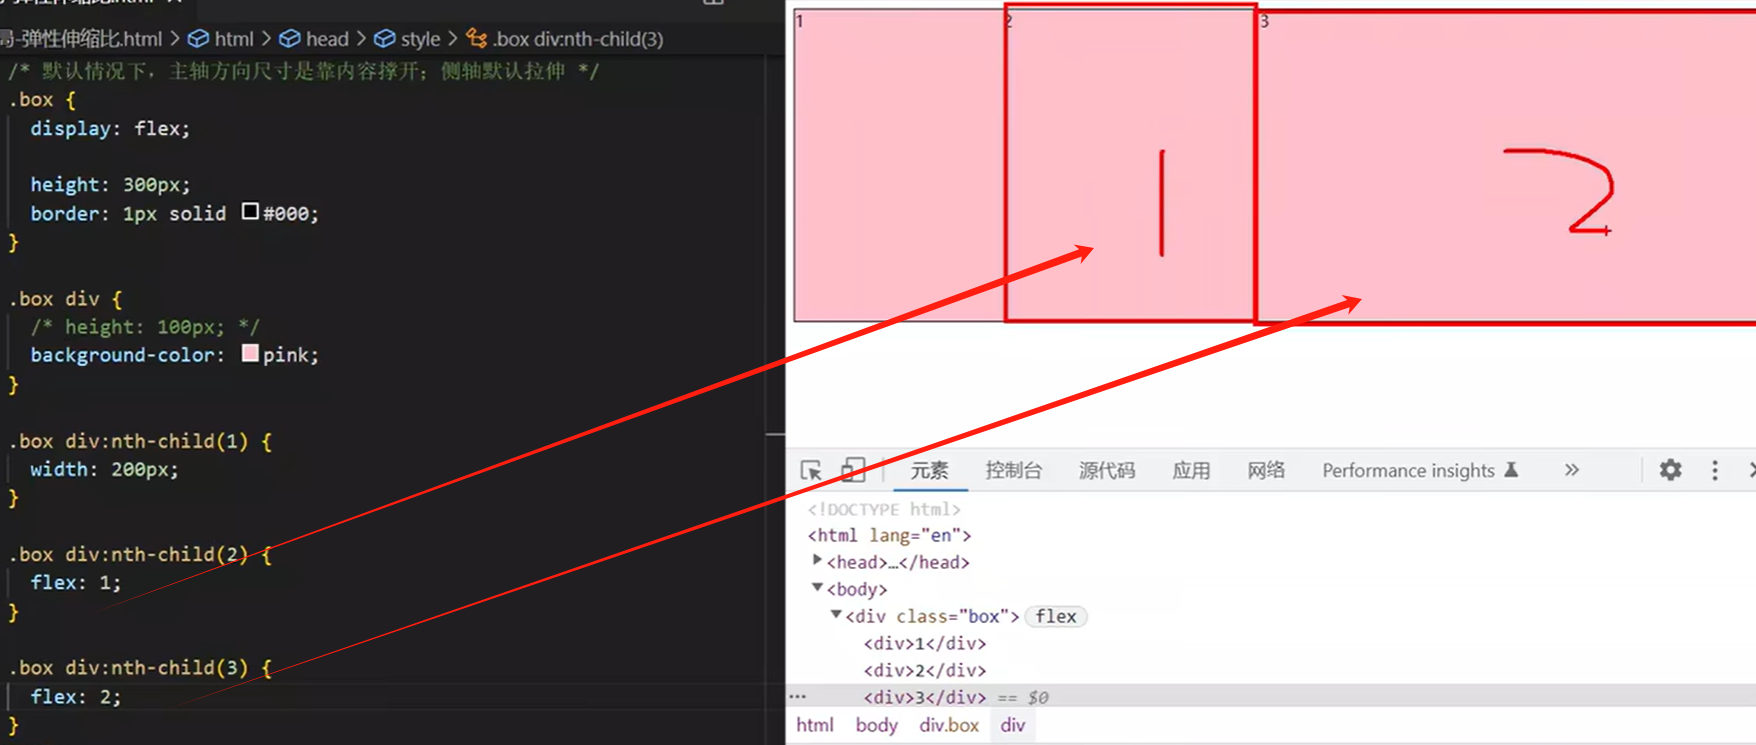
控制弹性盒子的主轴方向的尺寸
属性值:整数数字,表示占用父级剩余尺寸的份数
⑤ 弹性换行和行对齐方式
弹性盒子都可以 自动挤压或拉伸,默认情况下,所有弹性盒子都在一行显示
属性值:
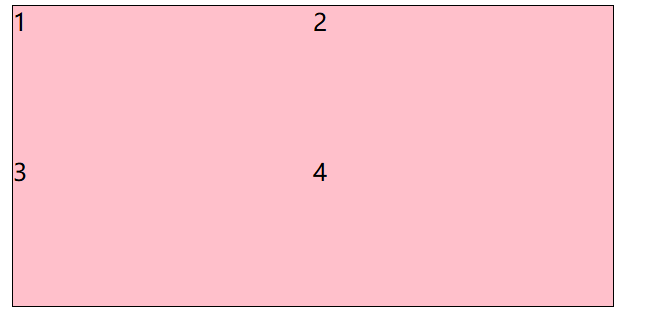
wrap:换行nowrap:不换行(默认)
【案例】
<style>
    .box{
        display: flex;
        flex-wrap: wrap;
        height: 200px; width: 400px;border: 1px solid #000;
    }
    .box div{width: 200px;height: 100px;background-color: pink;}
</style>

<div class="box">
    <div>1</div> <div>2</div>
    <div>3</div> <div>4</div>
</div>
效果如下:
行对齐方式就是 : align-content,这里暂时就不继续测了
三、CSS 特性
1, 继承性
继承性:子级默认继承 父级的文字控制属性
注意:如果标签自己有样式则生效自己的样式,不继承
<head>
    <title>Document</title>
    <style>
        body{
            color: red;
            font-size: 30px;
        }
    </style>
</head>
<body>
    <p>这是div里面的单词</p>
    <span>div里面的span</span>
    <!-- a标签的color 继承失效 -->
    <a href="#">继承失效 </a>
    <!-- h系列标签 font-size 继承失效 -->
    <h1>继承失效</h1>
</body>
2, 层叠性
特点:
- 相同的属性会覆盖:后面的 CSS 属性覆盖前面的 CSS 属性
- 不同的属性会叠加:不同的 CSS 属性都生效
<head>
    <title>层叠性</title>
    <style>
        /* 当选择器优先级相同时,设置相同的样式,最终写在最后的样式生效 */
        div{color:red;color: green;}
        /* 不同的样式 会层层叠加 */
        .box{font-size: 30px;}
    </style>
</head>
<body>
    <div class="box">文章</div>
</body>
3, 优先级
优先级:也叫权重,当一个标签使用了 多种选择器时,基于不同种类的选择器的匹配规则
<style>
    div{color: red;}
    .box{color: green;}
</style>
<div class ="box"> div 标签 </div>规则:选择器优先级高的样式生效
公式:
- 通配符选择器< 标签选择器 < 类选择器 < id 选择器 < 行内样式 < !important
- 选中标签的范围越大,优先级越低

