GitHub项目FLUX.2开源了,支持 10 张图片同时参考的开源模型

GitHub项目FLUX.2开源了,支持 10 张图片同时参考的开源模型

搜罗万相
发布于 2026-03-26 19:01:32
发布于 2026-03-26 19:01:32
AI 图像生成的实用化转折
2024年11月25日,德国AI图像模型独角兽黑森林实验室(Black Forest Labs)发布了最新一代图像生成模型家族FLUX.2,这标志着AI图像生成技术正式从"演示工具"向"生产力工具"转型。作为此前在Hugging Face上仅次于DeepSeek-R1的第二受欢迎开源模型FLUX.1的继任者,FLUX.2不仅在技术上实现了多项突破,更将目标锁定在解决真实生产环境中的需求上。
与几个月前横空出世、拳打Midjourney、脚踢Stable Diffusion的FLUX.1相比,FLUX.2不仅升级了模型性能,更是直接改变了AI图像生成的游戏规则。
核心特性:从单图生成到多模态协同
多图参考能力:前所未有的一致性控制
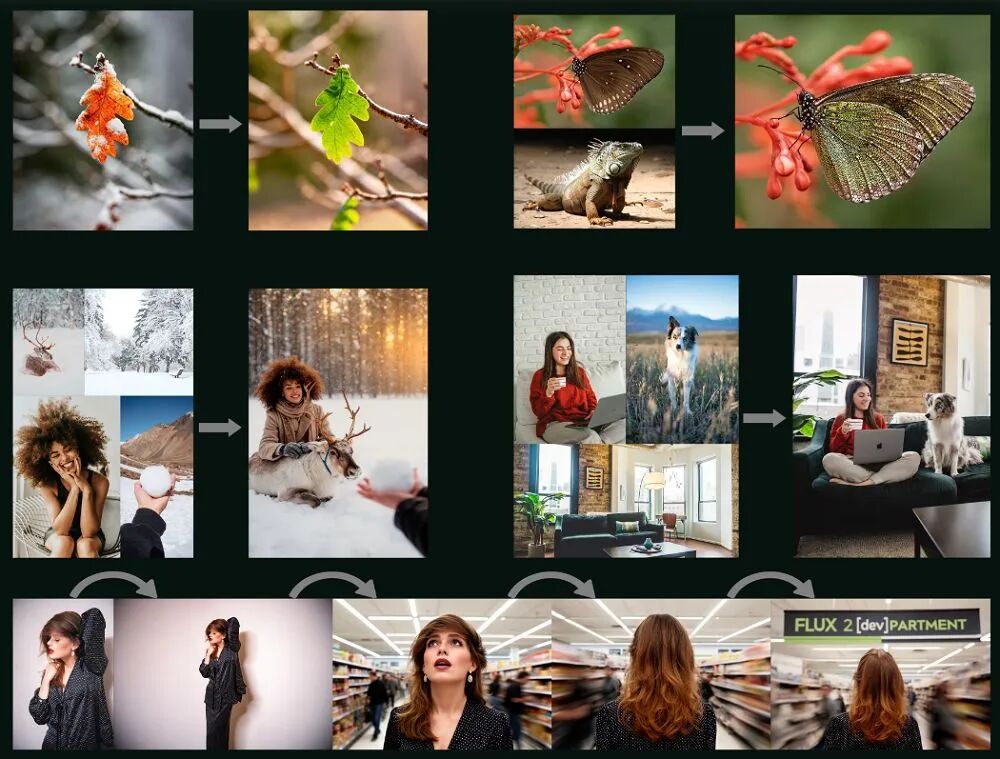
FLUX.2最令人瞩目的创新在于其同时参考多达10张图片的能力,并能在生成过程中保持字符、产品和风格的高度一致性。这一功能彻底改变了传统文生图模型"一次只能处理一个参考"的限制。
通过这项技术,用户可以将不同图片中的服装、姿势、场景、光照等元素组合在一起,生成一张新的、逻辑连贯的图像。例如,一张看似真实的模特照片,实际上可能融合了10张不同图片的元素——来自图A的服装、图B的姿势、图C的场景背景、图D的光照效果等等。

FLUX.2多图参考示例:由10张不同图片元素组合生成的逼真模特图
这种能力对于产品拍摄、广告制作、电商视觉设计等商业场景具有革命性意义,大幅降低了多次拍摄和后期合成的成本。
逼近专业摄影水平
FLUX.2在图像细节和真实感方面实现了显著提升,能够生成更丰富的细节、更清晰的纹理和更稳定的光照效果。这使其特别适用于:
- 产品拍摄:生成高质量的产品展示图,包括精确的材质表现和光影效果
- 可视化设计:创建建筑、工业设计等领域的真实渲染图
- 模拟摄影:还原特定相机、镜头的成像特点,如CCD相机的闪光灯效果和画质特征
FLUX.2生成的高细节产品展示图,展现出色的材质表现和光影效果
文本渲染:从乱码到完美排版
长期以来,AI图像生成模型在文字渲染方面一直存在明显短板。FLUX.2在这方面取得了重大突破,现在能够可靠地生成:
- 复杂排版:多层次的文字布局和版式设计
- 信息图表:包含准确文字和数据的图表
- 表情包:带有清晰、准确文字的网络表情包
- UI Demo:具有清晰文本的用户界面原型
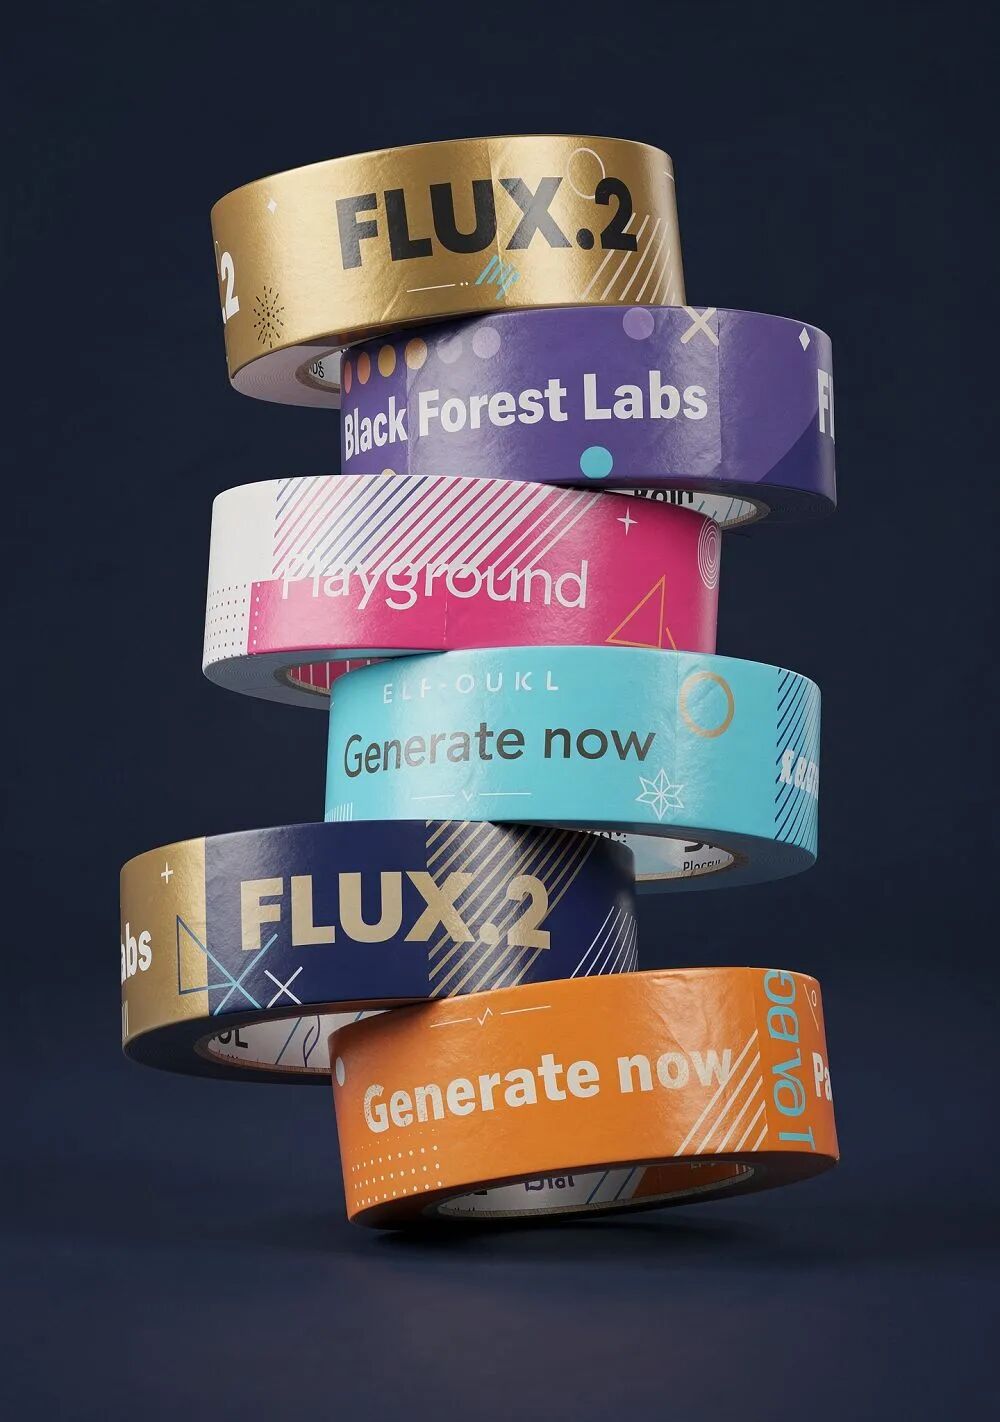
FLUX.2的文本渲染能力展示:复杂排版、信息图表和清晰的文字表现
在实测中,FLUX.2能够准确渲染英文和其他拉丁字母语言,生成的科普插图中所有文字都准确无误。不过目前在中文渲染方面仍存在一定局限,输出结果可能出现乱码现象。
使用教程:快速上手 FLUX.2
本章节将详细介绍如何在不同硬件环境下部署和使用 FLUX.2 [dev] 模型,从高端数据中心 GPU 到消费级显卡,我们都提供了相应的解决方案。
环境准备
推荐配置(完整性能):
- GB200:最佳性能,完整模型运行
- H100:优秀性能,支持 CPU offloading
消费级配置(量化版本):
- RTX 4090:通过量化和远程文本编码器方案可流畅运行
- 其他 NVIDIA GPU:参考 diffusers 量化指南选择合适的量化版本
软件要求
不同硬件平台的测试环境:
GB200 平台:
- CUDA 12.9
- Python 3.12
H100 平台:
- CUDA 12.6
- Python 3.10
消费级显卡(RTX 4090 等):
- CUDA 11.8+ 或 12.x
- Python 3.10+
依赖安装
首先创建 Python 虚拟环境并安装必要的依赖:
# 创建虚拟环境 python -m venv flux2_env source flux2_env/bin/activate # Linux/Mac # 或 flux2_env\Scripts\activate # Windows # 安装核心依赖 pip install torch torchvision --index-url https://download.pytorch.org/whl/cu121 pip install diffusers transformers accelerate huggingface_hub # 安装可选依赖(用于水印等功能) pip install invisible-watermark 模型下载与配置
从 Hugging Face 下载权重
你可以选择手动下载或自动下载模型权重。
方法一:手动下载并设置环境变量
访问 FLUX.2-dev 模型页面 手动下载权重文件,然后设置环境变量:
export FLUX2_DEV_PATH="/path/to/your/downloaded/weights" export FLUX2_AE_PATH="/path/to/autoencoder/ae.safetensors" 方法二:自动下载
如果不设置环境变量,运行时会自动从 Hugging Face 下载模型权重。确保你已登录 Hugging Face:
huggingface-cli login 输入你的 Hugging Face access token 完成登录。
基础使用方法
启动交互式会话
Clone 官方仓库并启动交互式会话:
git clone https://github.com/black-forest-labs/flux2.git cd flux2 # 高端 GPU(GB200) python -m flux2 --interactive # H100 需要 CPU offloading python -m flux2 --interactive --cpu_offloading True 启动后,你可以在交互式界面中进行文生图和图像编辑操作。
文生图(Text-to-Image)
在交互式会话中,直接输入提示词即可生成图像:
> A serene lakeside cabin at sunset, with warm orange sky reflecting on calm water 你也可以通过 Python 脚本调用:
from flux2 import generate_image prompt = "A serene lakeside cabin at sunset, with warm orange sky reflecting on calm water" image = generate_image( prompt=prompt, num_inference_steps=50, guidance_scale=4.0, seed=42 ) image.save("output.png") 图像编辑(Image Editing)
FLUX.2 支持基于参考图像的编辑:
from flux2 import edit_image from PIL import Image input_image = Image.open("input.jpg") prompt = "Transform this into a watercolor painting style" edited_image = edit_image( prompt=prompt, image=input_image, num_inference_steps=50, guidance_scale=4.0 ) edited_image.save("edited_output.png") 多图输入使用
FLUX.2 的核心优势之一是支持同时参考多达 10 张图片:
from flux2 import generate_from_multiple_images reference_images = [ Image.open("style_ref.jpg"), Image.open("pose_ref.jpg"), Image.open("lighting_ref.jpg") ] prompt = "Professional product photography combining these reference elements" result = generate_from_multiple_images( prompt=prompt, reference_images=reference_images, num_inference_steps=50 ) result.save("multi_ref_output.png") 消费级硬件运行方案(RTX 4090)
对于没有数据中心级 GPU 的用户,FLUX.2 团队与 Hugging Face 合作提供了量化版本,可以在 RTX 4090 等消费级显卡上流畅运行。
完整代码示例
以下示例展示了如何在 RTX 4090 上运行 FLUX.2 [dev] 的 4-bit 量化版本:
import torch from diffusers import Flux2Pipeline from diffusers.utils import load_image from huggingface_hub import get_token import requests import io  # 配置 repo_id = "diffusers/FLUX.2-dev-bnb-4bit" device = "cuda:0" torch_dtype = torch.bfloat16  # 远程文本编码器函数 def remote_text_encoder(prompts):     response = requests.post(         "https://remote-text-encoder-flux-2.huggingface.co/predict",         json={"prompt": prompts},         headers={             "Authorization": f"Bearer {get_token()}",             "Content-Type": "application/json"         }     )     prompt_embeds = torch.load(io.BytesIO(response.content))     return prompt_embeds.to(device)  # 加载量化模型(不包含文本编码器) pipe = Flux2Pipeline.from_pretrained(     repo_id,     text_encoder=None,     torch_dtype=torch_dtype ).to(device)  # 准备提示词 prompt = """Realistic macro photograph of a hermit crab using a soda can
as its shell, partially emerging from the can, captured with sharp detail
and natural colors, on a sunlit beach with soft shadows and a shallow
depth of field, with blurred ocean waves in the background. The can has
the text `BFL Diffusers` on it and it has a color gradient that starts
with #FF5733 at the top and transitions to #33FF57 at the bottom."""  # 生成图像 image = pipe(     prompt_embeds=remote_text_encoder(prompt),     # 可选:添加参考图像     # image=load_image("https://example.com/reference.png"),     generator=torch.Generator(device=device).manual_seed(42),     num_inference_steps=50,  # 28 步是速度与质量的良好折衷     guidance_scale=4.0, ).images[0]  # 保存结果 image.save("flux2_output.png")
量化方案说明
BNB 4-bit 量化:
- 模型大小:约 8GB VRAM
- 推理速度:略慢于完整版本
- 质量损失:最小化
其他量化选项:
- 更多量化大小和组合可参考 diffusers 量化指南
远程文本编码器:
- 将计算密集的文本编码部分转移到远程服务器
- 大幅降低本地 VRAM 需求
- 需要稳定的网络连接
提示词优化(Prompt Upsampling)
FLUX.2 [dev] 从提示词优化中获益显著。系统可以将简短的提示词扩展为更详细、更具表现力的描述,从而提升生成质量。
本地 Upsampling
使用与文本编码相同的 Mistral-Small-3.2-24B-Instruct-2506 模型进行本地提示词优化:
from flux2 import generate_image_with_upsampling simple_prompt = "a cat on a beach" # 系统会自动将提示词扩展为更详细的描述 image = generate_image_with_upsampling( prompt=simple_prompt, use_local_upsampling=True, num_inference_steps=50 ) image.save("upsampled_output.png") 使用 OpenRouter API
对于更强大的提示词优化,可以通过 OpenRouter 调用其他大语言模型:
import os os.environ["OPENROUTER_API_KEY"] = "your_api_key_here" image = generate_image_with_upsampling( prompt=simple_prompt, use_openrouter=True, openrouter_model="anthropic/claude-3.5-sonnet", # 或其他模型 num_inference_steps=50 ) 何时使用 Upsampling
推荐使用场景:
- 简短或模糊的提示词
- 需要高度细节的专业图像
- 艺术风格或特定美学要求
可以跳过的场景:
- 已经非常详细的提示词
- 简单的概念性图像
- 快速原型和测试
详细指导请参考 提示词优化指南。
高级功能
隐形水印嵌入
FLUX.2 支持通过 invisible-watermark 库在生成的图像中嵌入不可见的水印:
from flux2 import generate_image from invisible_watermark import WatermarkEncoder # 生成图像 image = generate_image(prompt="your prompt here") # 嵌入水印 encoder = WatermarkEncoder() encoder.set_watermark('bytes', 'your_watermark_data'.encode('utf-8')) watermarked_image = encoder.encode(image, 'dwtDct') watermarked_image.save("watermarked_output.png") C2PA 元数据标记
建议使用 C2PA 标准为输出图像添加元数据,记录生成信息和来源:
# 需要安装 c2pa-python # pip install c2pa-python from c2pa import Builder builder = Builder() builder.add_ingredient("flux2_generated") builder.add_assertion("stds.schema-org.CreativeWork", { "author": "FLUX.2 [dev]", "datePublished": "2024-11-25" }) # 为图像添加 C2PA 清单 builder.sign_file("output.png", "output_with_c2pa.png") CPU Offloading(H100 及内存受限环境)
在 H100 或 VRAM 有限的情况下,可以启用 CPU offloading 将部分计算转移到 CPU 内存:
from flux2 import generate_image image = generate_image( prompt="your prompt", cpu_offloading=True, # 启用 CPU offloading num_inference_steps=50 ) 或在命令行中:
python -m flux2 --interactive --cpu_offloading True 实用技巧与参数调优
推理步数优化
50 步(默认):
- 最高质量输出
- 较慢的生成速度
- 适合最终作品
28 步(快速模式):
- 质量与速度的良好平衡
- 适合快速迭代和测试
- 质量损失可接受
# 高质量模式 image_hq = generate_image(prompt, num_inference_steps=50) # 快速模式 image_fast = generate_image(prompt, num_inference_steps=28) Guidance Scale 调节
Guidance scale 控制模型对提示词的遵循程度:
# 较低的 guidance (2.0-3.0) # - 更有创意和多样性 # - 可能偏离提示词 # 中等的 guidance (3.5-4.5) # - 平衡的表现(推荐) # - 既遵循提示又有创意 # 较高的 guidance (5.0-7.0) # - 严格遵循提示词 # - 可能过于死板 image = generate_image( prompt="your prompt", guidance_scale=4.0 # 推荐值 ) 随机种子控制
使用固定种子可以确保结果的可重复性:
import torch # 设置固定种子 generator = torch.Generator(device="cuda").manual_seed(42) # 生成可重复的结果 image1 = generate_image(prompt, generator=generator) image2 = generate_image(prompt, generator=generator) # 相同的结果 批量生成
通过调整 batch size 可以同时生成多张图片:
# 一次生成 4 张不同的图片 images = pipe( prompt_embeds=remote_text_encoder(prompt), num_images_per_prompt=4, num_inference_steps=28, guidance_scale=4.0 ).images for i, img in enumerate(images): img.save(f"output_{i}.png") 故障排查
常见问题及解决方案:
- CUDA Out of Memory
- 使用量化版本(4-bit 或 8-bit)
- 启用 CPU offloading
- 降低 batch size
- 减少图像分辨率
- 生成速度慢
- 减少推理步数(50 → 28)
- 使用更快的硬件
- 考虑使用 API 版本
- 图像质量不理想
- 尝试提示词优化(upsampling)
- 调整 guidance scale
- 增加推理步数
- 使用更详细的提示词
- 文本编码器连接失败
- 检查网络连接
- 验证 Hugging Face token
- 考虑使用本地文本编码器
更多详细信息和故障排查,请参考:
- 官方文档
- GitHub Issues
- Diffusers 量化指南
相关链接:
- FLUX.2 体验地址:http://bfl.ai/play
- FLUX.2 [dev] 开源地址:https://huggingface.co/black-forest-labs/FLUX.2-dev
- GitHub 仓库:https://github.com/black-forest-labs/flux2
本文参与 腾讯云自媒体同步曝光计划,分享自微信公众号。
原始发表:2025-12-07,如有侵权请联系 cloudcommunity@tencent.com 删除
评论
登录后参与评论
推荐阅读
目录
腾讯云开发者

Copyright © 2013 - 2026 Tencent Cloud. All Rights Reserved. 腾讯云 版权所有
深圳市腾讯计算机系统有限公司 ICP备案/许可证号:粤B2-20090059 ![]() 粤公网安备44030502008569号
粤公网安备44030502008569号
腾讯云计算(北京)有限责任公司 京ICP证150476号 | 京ICP备11018762号