功能介绍
本地录制为所有用户提供方便快捷的记录会议的方式,它能将您在会议中的视频及共享内容保存在您的本地文件夹中,方便您随时查阅。
前提条件
登录用户:免费版、专业版、商业版、企业版、教育版、教育加强版用户。
登录系统:Windows/macOS。
版本要求:客户端2.3.0及以上版本。
注意事项
录制过程中的注意事项
录制期间无法更改录制文件存储路径。
录制过程中会议结束或是被移出会议,将自动结束录制并转码。
云录制与本地录制对主持人和联席主持人互斥,共用一套开始、暂停、恢复和结束操作。
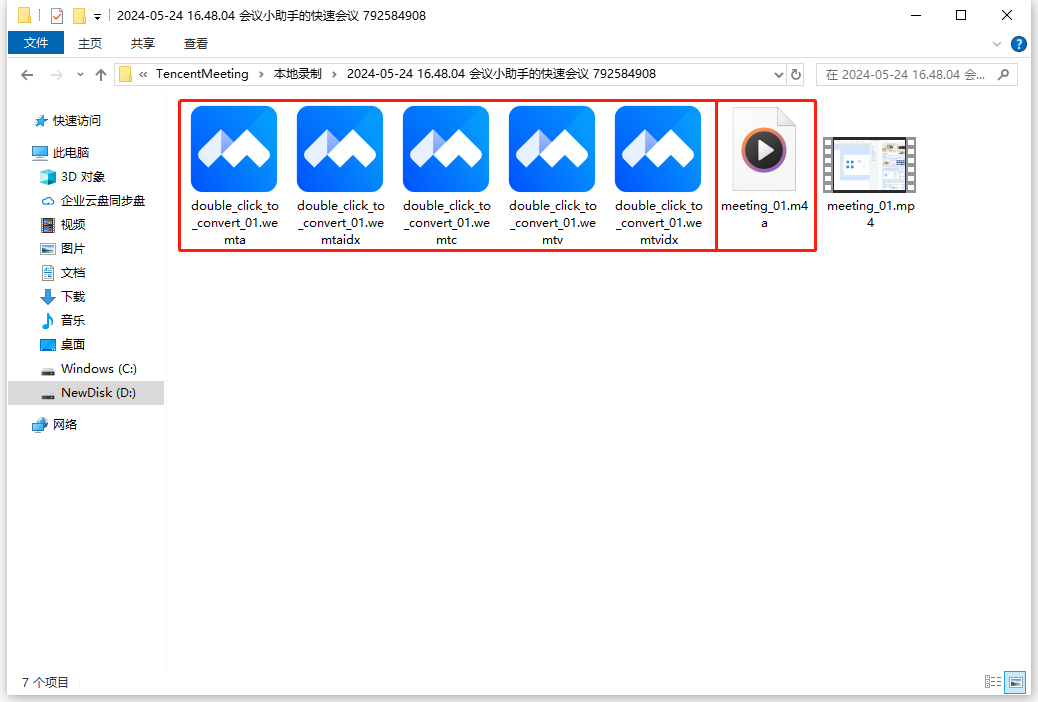
本地录制格式
录制视频文件:MP4。
录制音频文件:m4a。
录制原始文件:wemta、wemta.idx、wemtv、wemtv.idx。
录制文件的注意事项
如果一场会议中有多段录制,则会按照时间顺序生成多个录制文件;从暂停状态恢复后,会跟暂停之前的录制内容合在一个录制文件中。
因意外情况导致录制转码中断时,可以通过两种方式进行手动转码。
可以在历史会议中找到该场会议的录制文件,单击文件进行转码。
还可以通过打开录制文件,找到录制的原始文件(格式:wemta、wemta.idx、wemtv、wemtv.idx),进行双击操作,即可开始转码。转码完成后,系统将提示您录制视频(MP4文件)的所在位置,即可打开播放。
若在历史会议中对本地录制记录进行删除,则保存在本地的录制原文件一并被删除。
使用本地录制
开启本地录制
会中选择底部工具栏录制 > 本地录制,单击开启,即可开启本地录制,并告知会中所有参会成员。
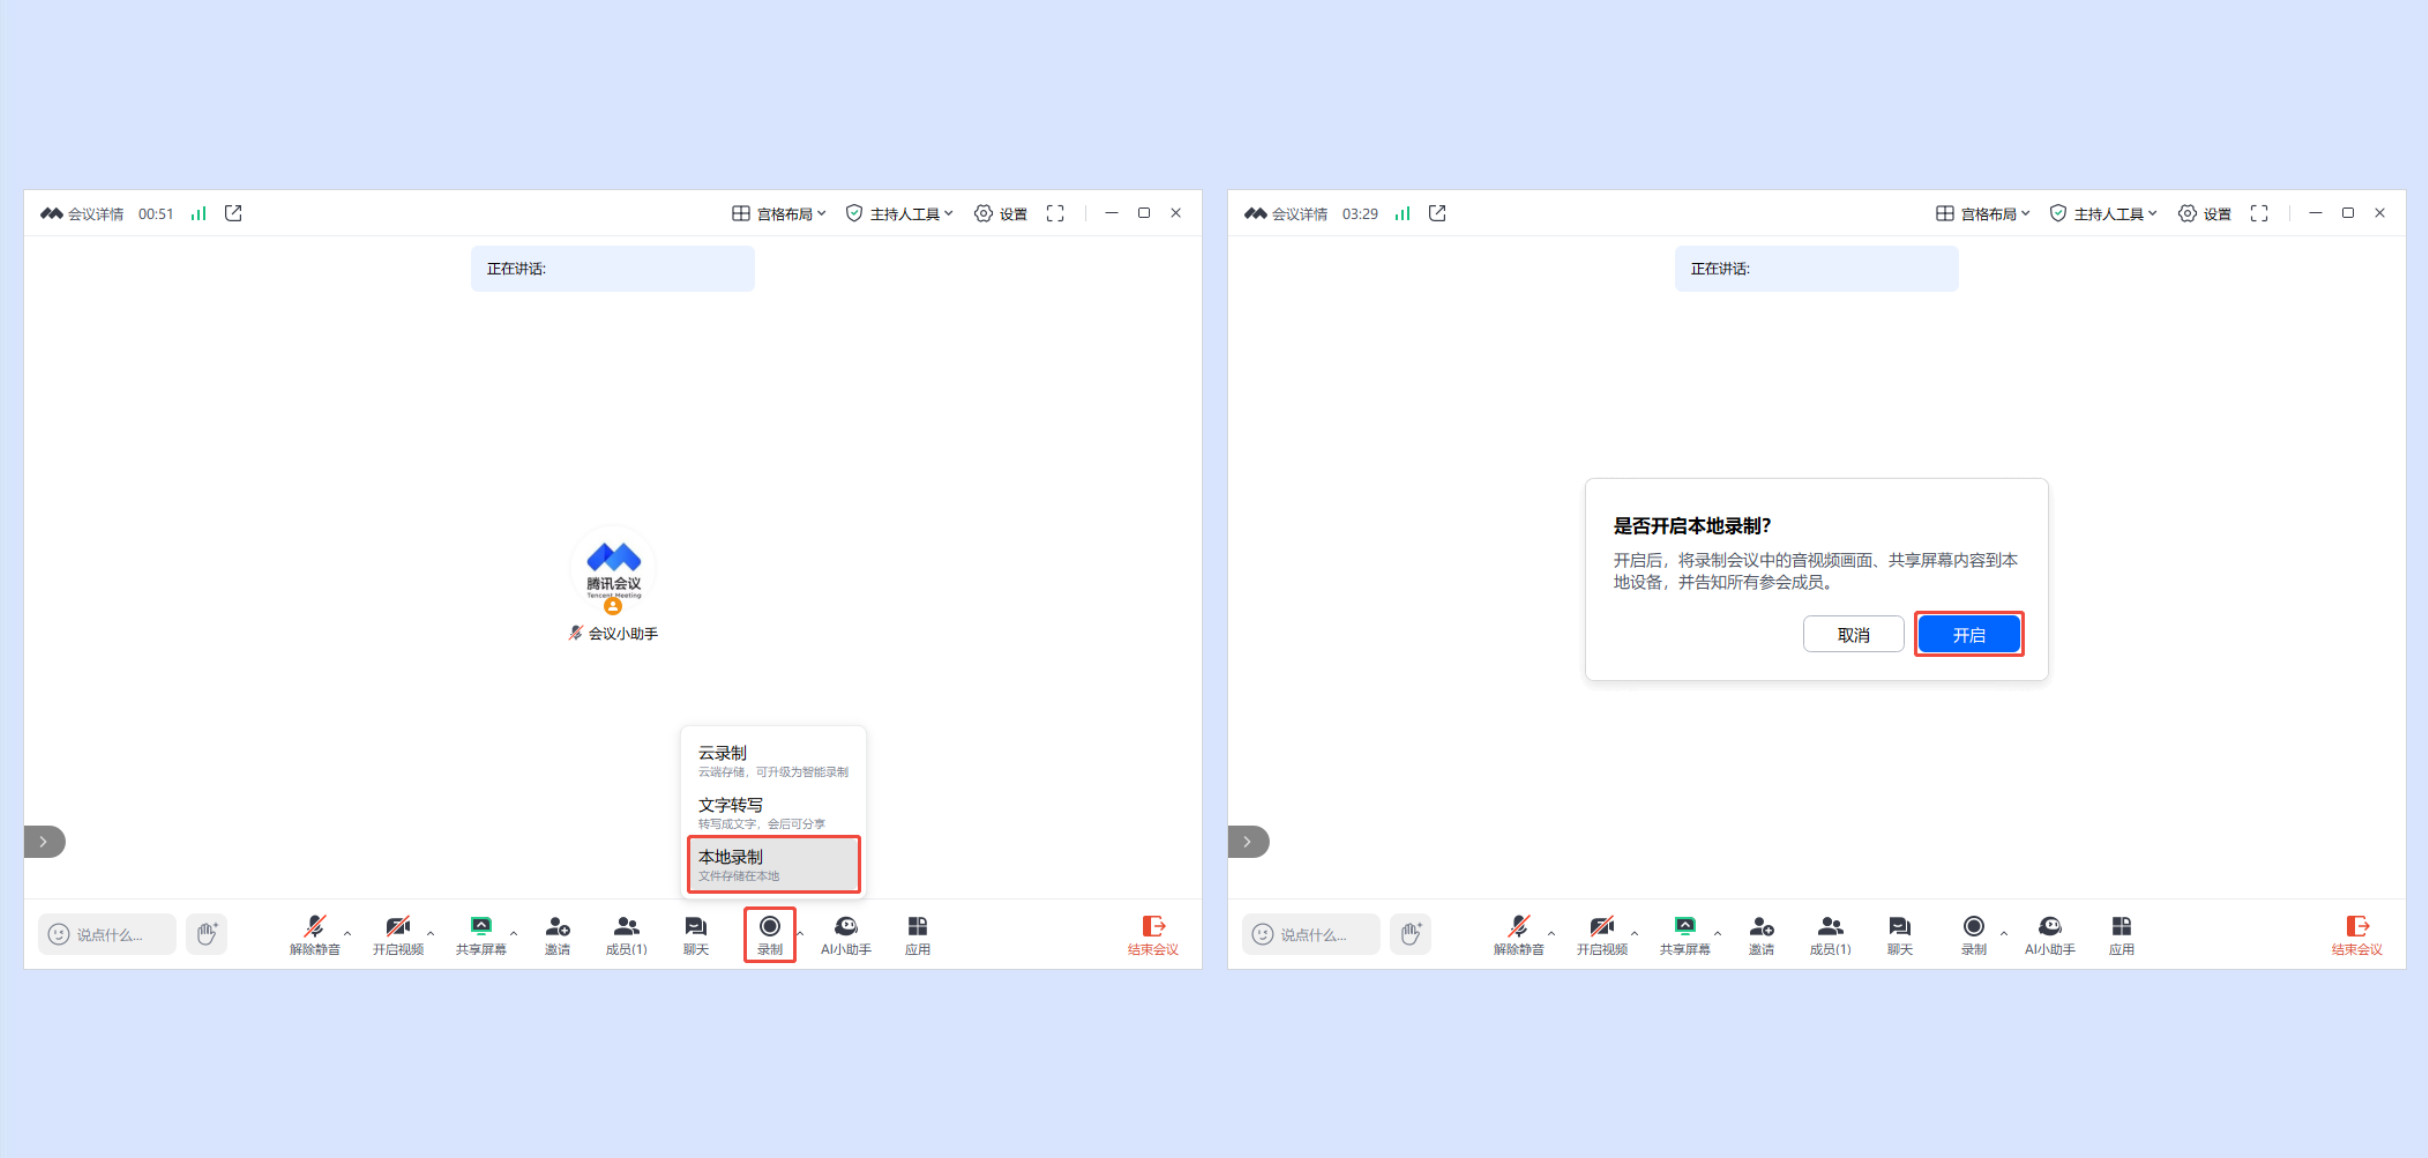
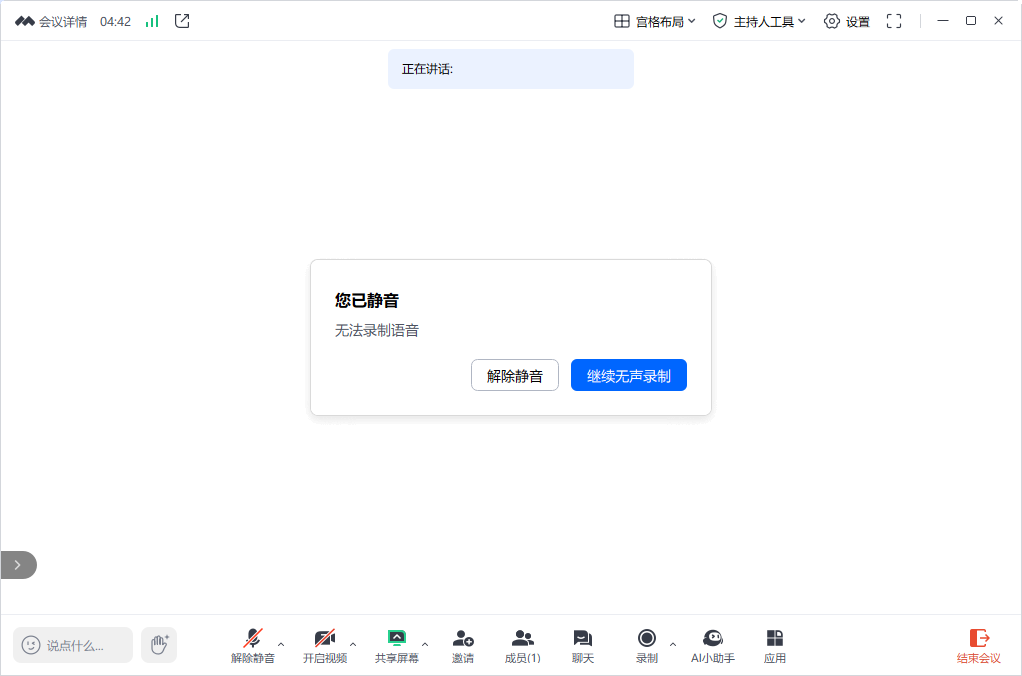
若用户当前处于静音状态,则提醒用户解除静音或保持无声录制,选择完成后开启录制。
若用户当前处于开麦状态,则正常开启录制。
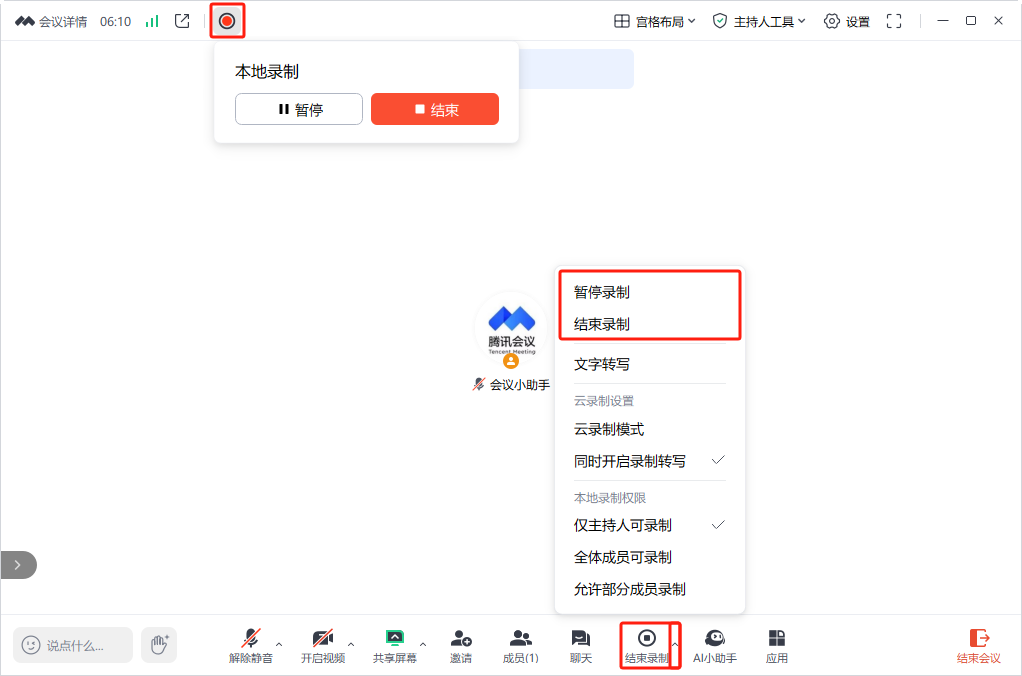
暂停或结束本地录制
进入开启录制后,底部工具栏录制变为结束录制。
顶部状态栏显示录制图标,指向该图标即可选择暂停、结束录制。
单击底部工具栏结束录制右侧的展开箭头,在展开的菜单栏中增加暂停录制和结束录制。
录制暂停状态下,暂停变为恢复录制。
暂停录制:单击即可暂停当前录制。
恢复录制:恢复录制状态。
结束录制:结束并退出录制状态,并提示“会议结束时,录制文件将自动转换为 MP4 格式”。
成员列表中,所有成员将可以看到用户的录制状态。
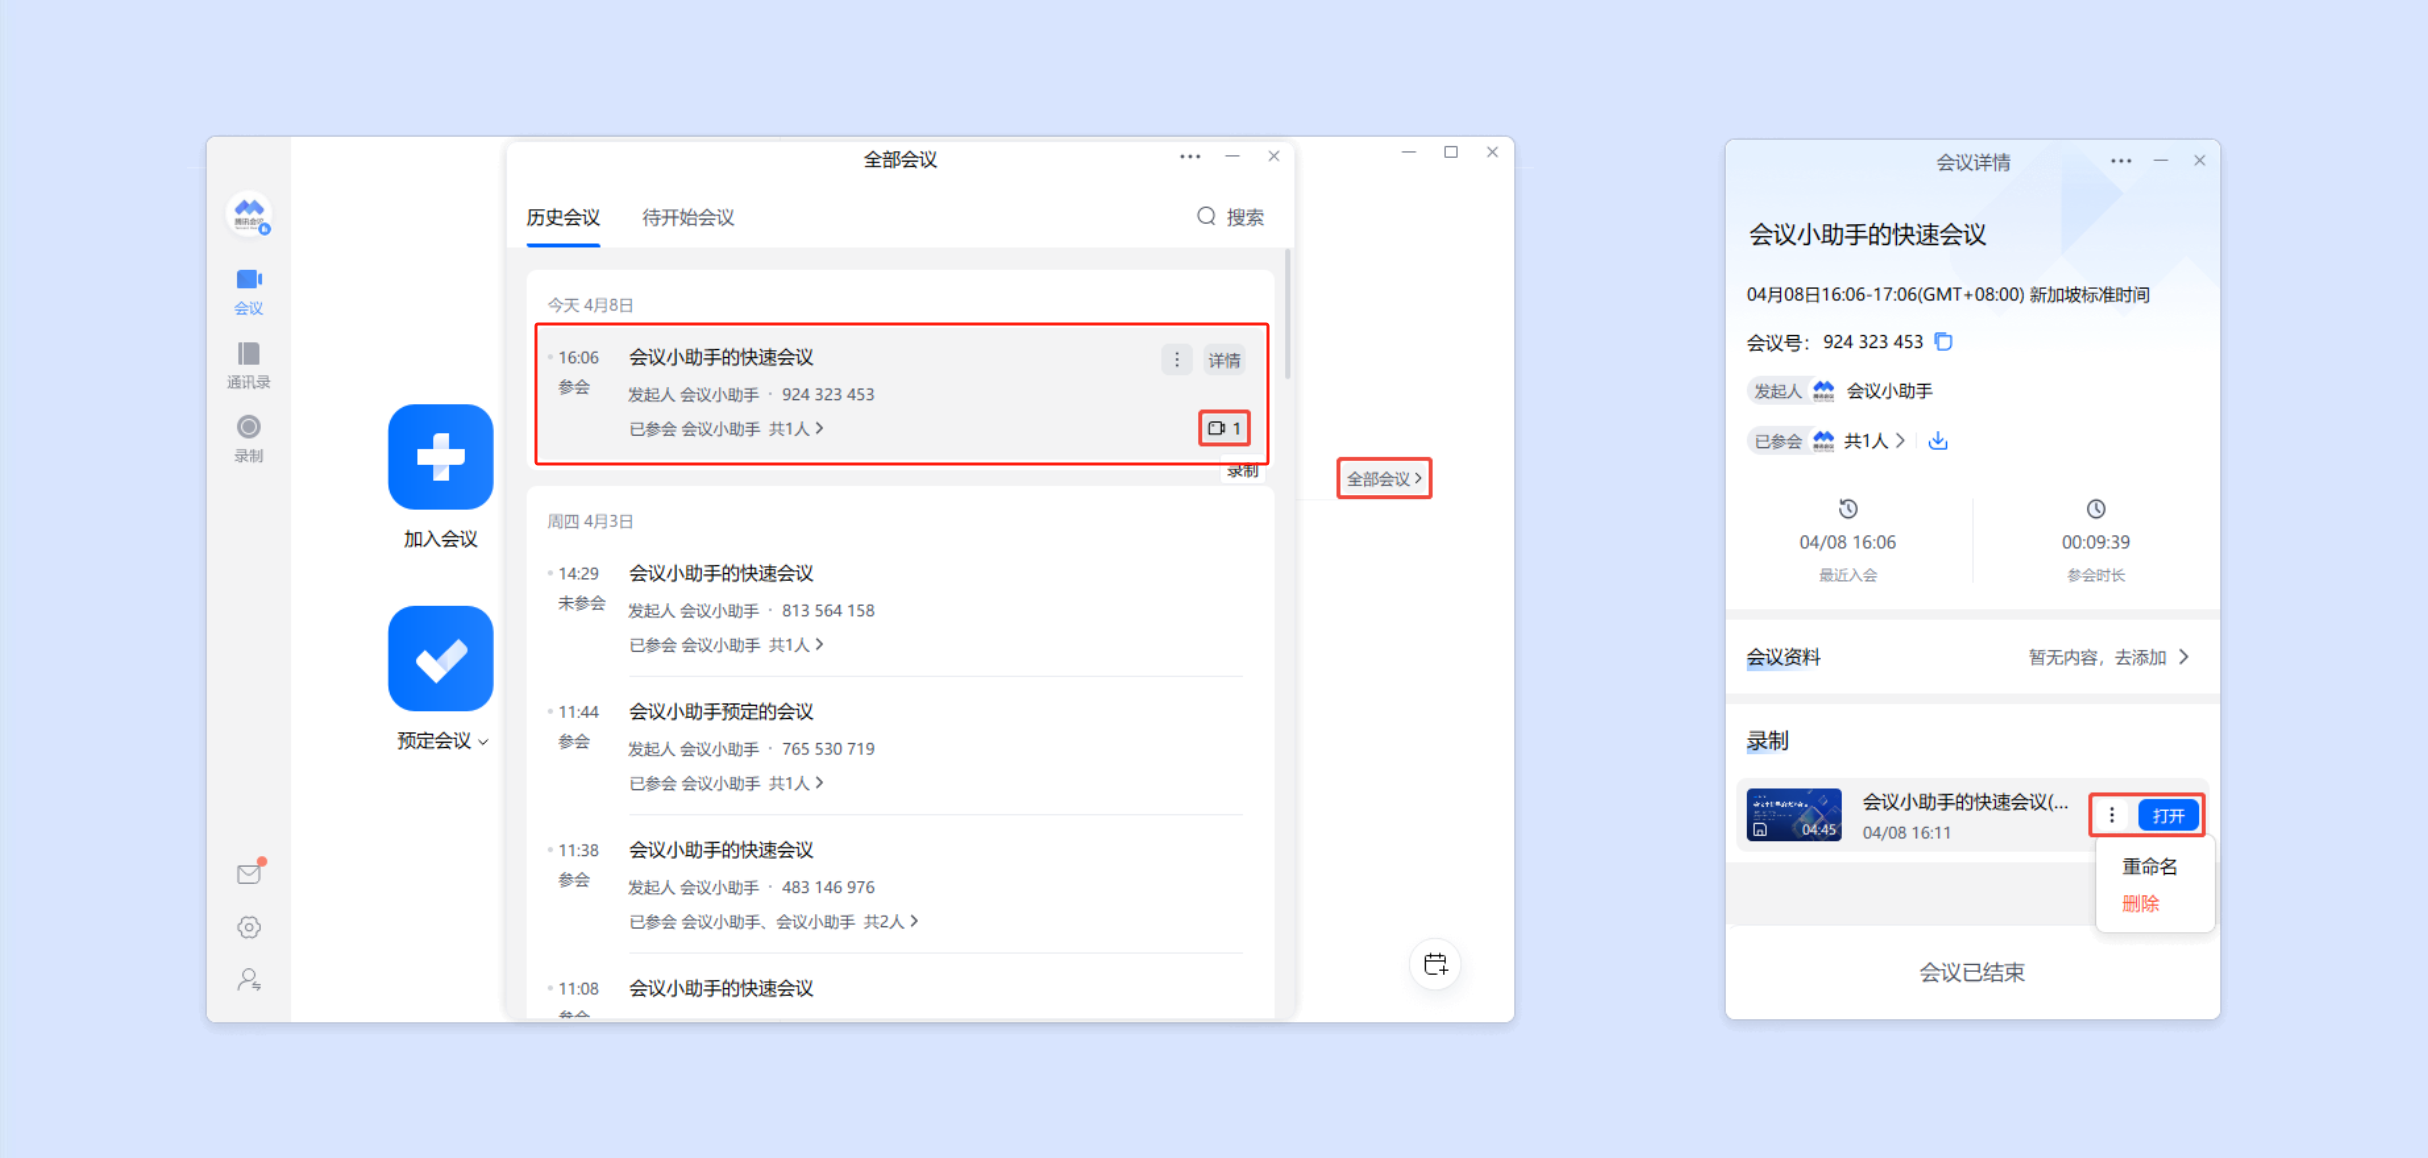
查看本地录制
会议结束后,系统会自动帮您进行录制转码为 MP4 格式,转码完成后即可在录制列表中单击查看。
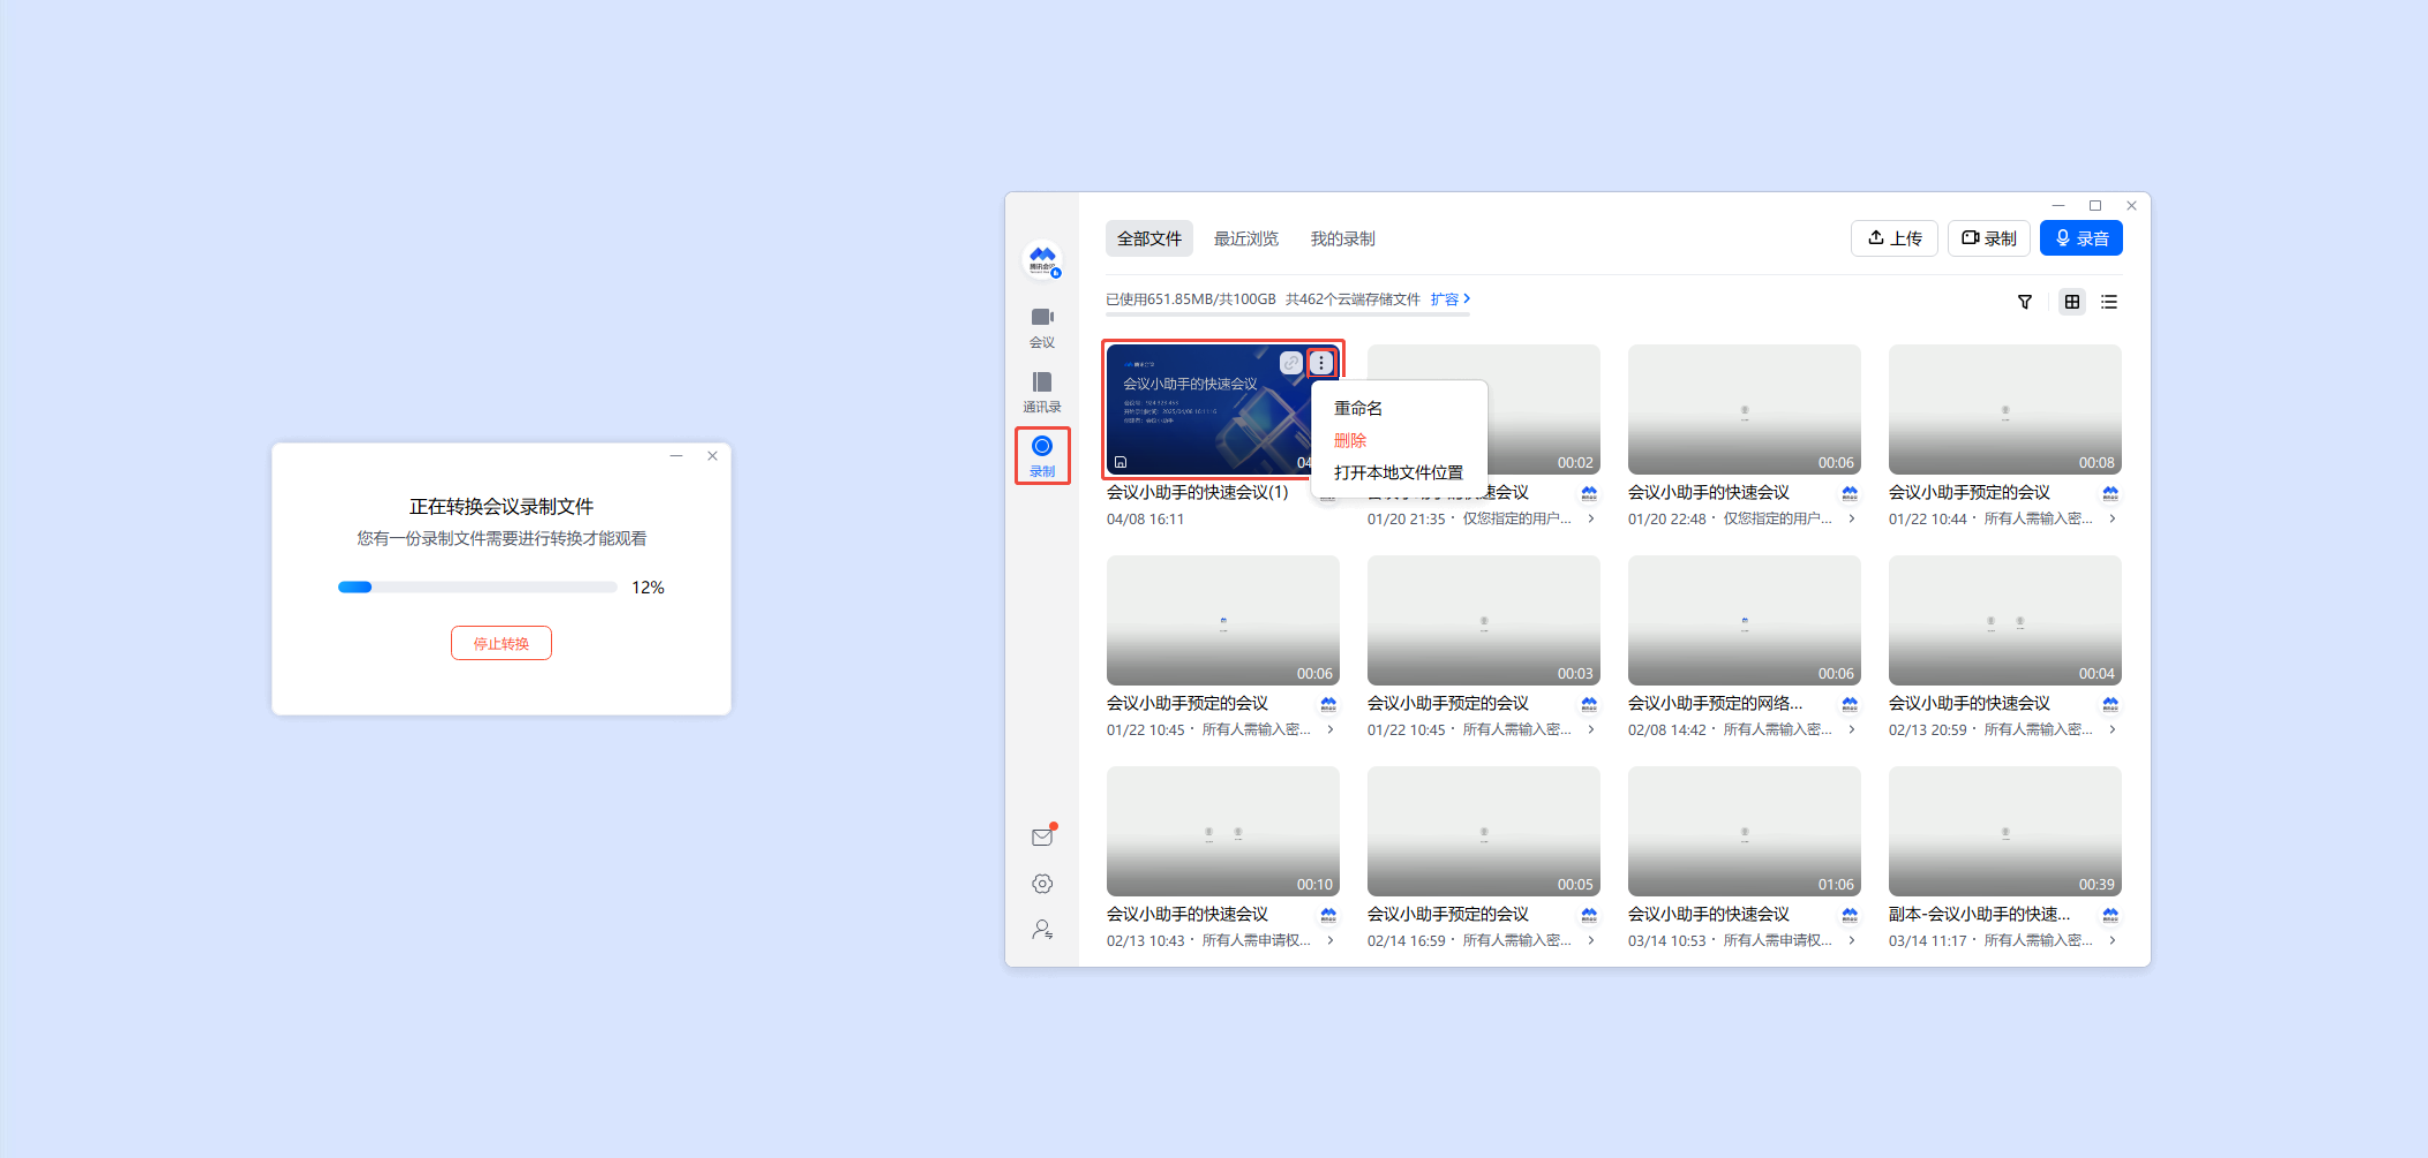
还可以在客户端主界面单击全部会议,选中会议后单击详情,在会议详情页选中录制文件单击打开查看录制内容,并支持重命名、删除录制文件。
设置本地录制
客户端主界面下选择设置 > 录制 > 本地录制,在录制文件保存地址右侧更改来修改保存地址,修改后您后续的本地录制文件都将保存到该地址中;单击打开即可查看该路径下所有本地录制文件。
本地录制所见即所得,并支持在屏幕共享期间同时录制视频窗口。

若在开启本地录制前勾选了同时录制音频文件,会议结束后,会将录制的语音单独形成一个音频文件,保存在文件夹中。
若在开启本地录制前勾选了保留临时录制文件,会议结束后,会将转码前的原始录制文件(格式:wemta、wemta.idx、wemtv、wemtv.idx)保存下来。您可以通过双击原始录制文件,手动进行转码。
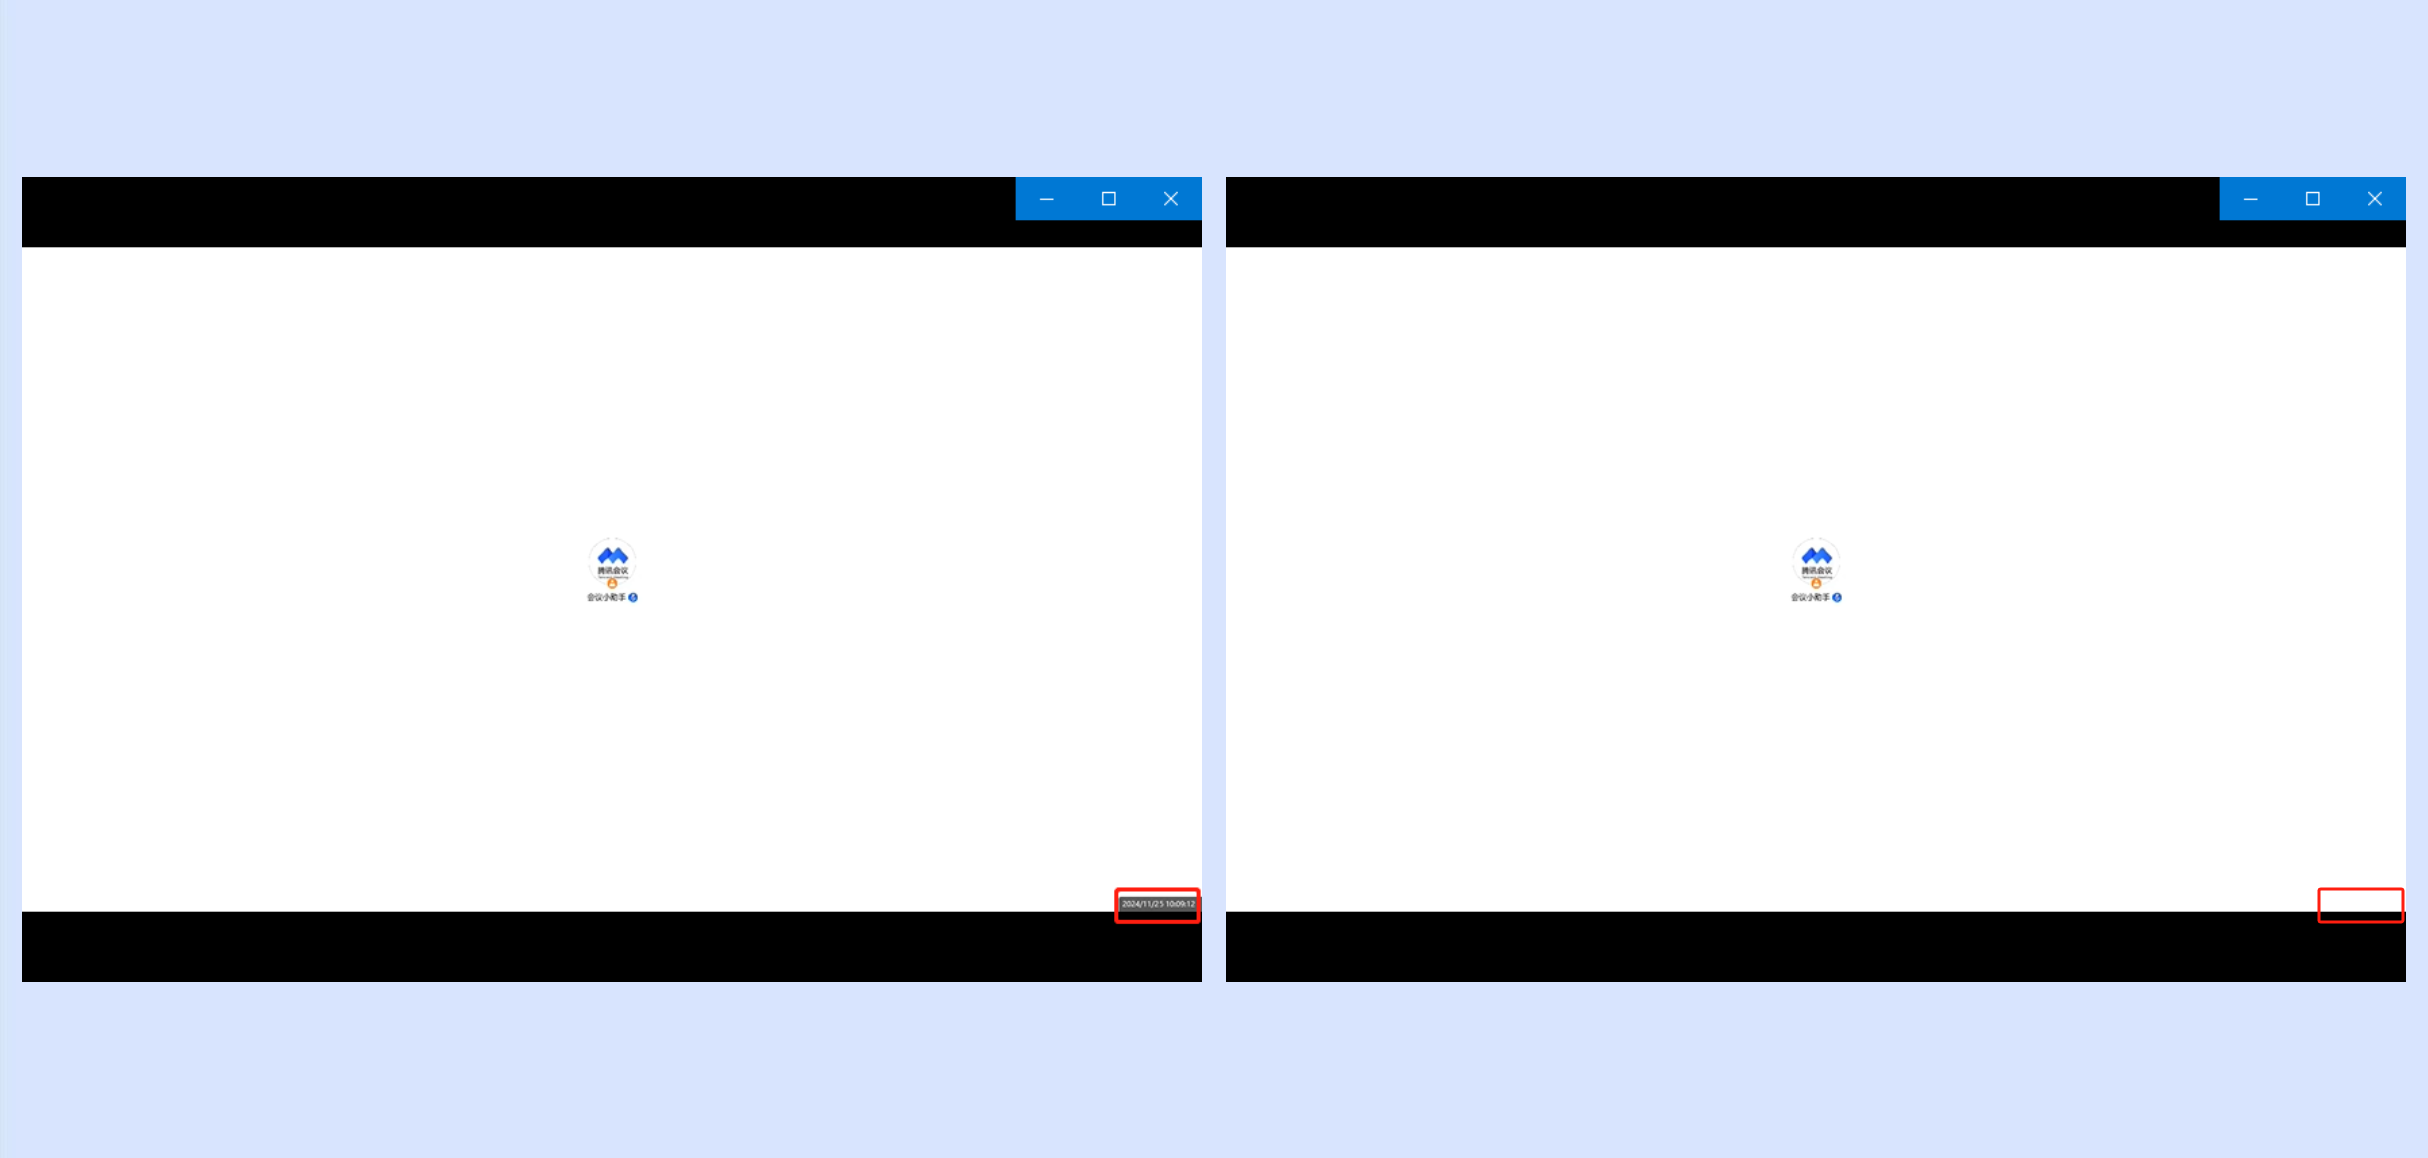
客户端3.30及以上版本支持取消显示本地录制时间,可通过设置在录制文件中嵌入当前日期和时间来控制是否显示本地录制时间,仅对设置后发起的本地录制生效。
本地录制视图
所见即所得,还原您在会中的视图画面,包含宫格、演讲者视图等。
当会议为纯音频状态时:显示当前会议成员头像,一屏最多显示25人。
当会议为视频状态时:若您设置宫格布局,显示当前会议视频宫格画面,一屏最多显示25人。若您设置为会聚模式、自定义布局,则录制会聚模式/自定义布局画面。
当您观看屏幕共享时:当前为演讲者视图,若您使用并排布局,则会展示成员列表画面。如果您使用悬浮窗布局,则大画面为屏幕共享,右上角小画面为说话人。以此类推。
当您发起屏幕共享时:大画面为屏幕共享,右上角小画面为说话人。


