本文为您介绍如何创建 VPN 网关,您可通过如下视频了解 VPN 网关的基本操作。
说明:
视频仅介绍 VPN 的基本功能,界面以实际控制台为准。
操作步骤
1. 登录 私有网络控制台。
2. 在左侧目录中单击 VPN 连接 > VPN 网关,进入管理页。
3. 选择地域,如示例中的广州,单击新建。
说明:
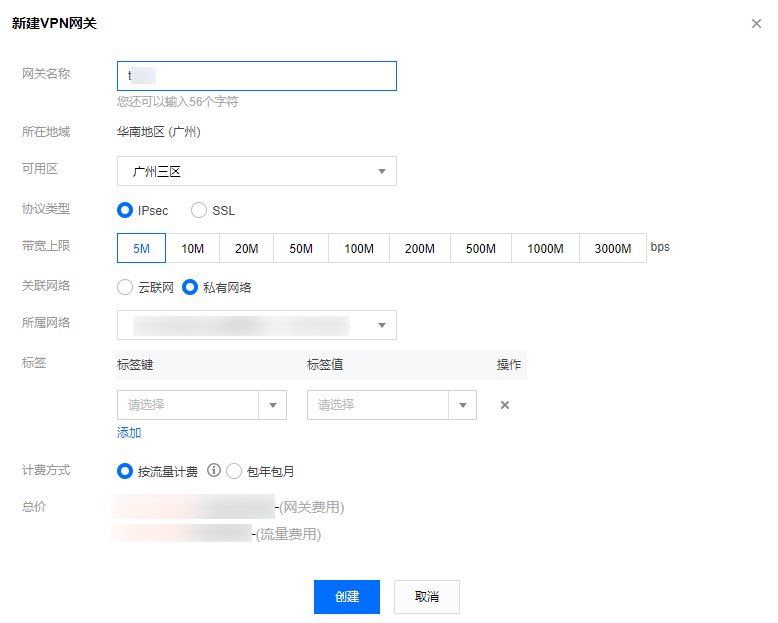
4. 填写 VPN 网关名称(如 TomVPNGw),选择关联网络、所属网络、带宽上限、标签、计费方式,单击创建即可。VPN 网关创建完成后,系统随机分配公网 IP,如:
203.195.147.82。说明:
200Mbps、500Mbps、1000Mbps和3000Mbps带宽仅支持新建网关,存量网关暂不支持。
如果 VPN 网关使用200Mbps、500Mbps、1000Mbps和3000Mbps规格的带宽,VPN 通道加密协议建议使用 AES128+MD5。
说明:
标签为选配,请保持默认。
相关文档


