本文介绍如何通过 Serverless 控制台使用层。
使用说明
层中的文件均在
/opt/目录下,可以在函数代码中通过绝对路径进行访问。除此之外,各运行时内置的环境变量中也包含了层路径,可以按照环境变量中层文件的路径上传文件,即可在代码中通过相对路径进行引用。Python、Java、Node.js 环境变量见下表:
相关环境变量 | 路径 |
PYTHONPATH | /var/user:/opt |
CLASSPATH | /var/runtime/java8:/var/runtime/java8/lib/*:/opt |
NODE_PATH | /var/user:/var/user/node_modules:/var/lang/node6/lib/node_modules:/opt:/opt/node_modules |
操作步骤
Node.js
以 Node.js 运行环境,在代码中引用层中的
node_modules 中的 cos-nodejs-sdk-v5 依赖为例:1. 参考 创建层 步骤将 
node_modules 上传生成层。本地函数目录结构如下图所示:
2. 参考 部署函数 将本地函数代码打包上传,打包时执行以下命令排除
node_modules 文件夹。zip -r 包名.zip . -x "node_modules/*"
如下图所示:

3. 参考 绑定云函数 步骤,将已创建的层绑定至部署好的函数。
4. 完成上述步骤后,即可开始在函数中引用层中的文件。
'use strict'var COS = require('cos-nodejs-sdk-v5')
注意:
由于 NODE_PATH 环境变量包含
/opt/node_modules 路径,所以无需指定依赖的绝对路径,SCF 运行时会按照环境变量中指定的路径加载文件。如层中文件路径和环境变量包含路径不一致,请在文件引用时使用绝对路径。
Python
以 Python 运行环境,在代码中引用层中的
cos-python-sdk-v5 依赖为例:1. 参考 创建层 步骤将
cos-python-sdk-v5上传生成层。2. 参考 部署函数 将本地函数代码打包上传,已经上传到层中的文件无需跟随函数代码再次进行上传。
3. 参考 绑定云函数 步骤,将已创建的层绑定至部署好的函数。
4. 完成上述步骤后,即可开始在函数中引用层中的文件。
# -*- coding: utf8 -*-import cos-python-sdk-v5
注意:
由于 PYTHONPATH 环境变量包含
/opt 路径,所以无需指定依赖的绝对路径,SCF 运行时会按照环境变量中指定的路径加载文件。如层中文件路径和环境变量包含路径不一致,请在文件引用时使用绝对路径。
使用示例
本示例介绍如何使用层和测试函数。
1.
前往
scf_layer_demo,选择 Clone or download > Download ZIP 下载示例到本地并解压。2. 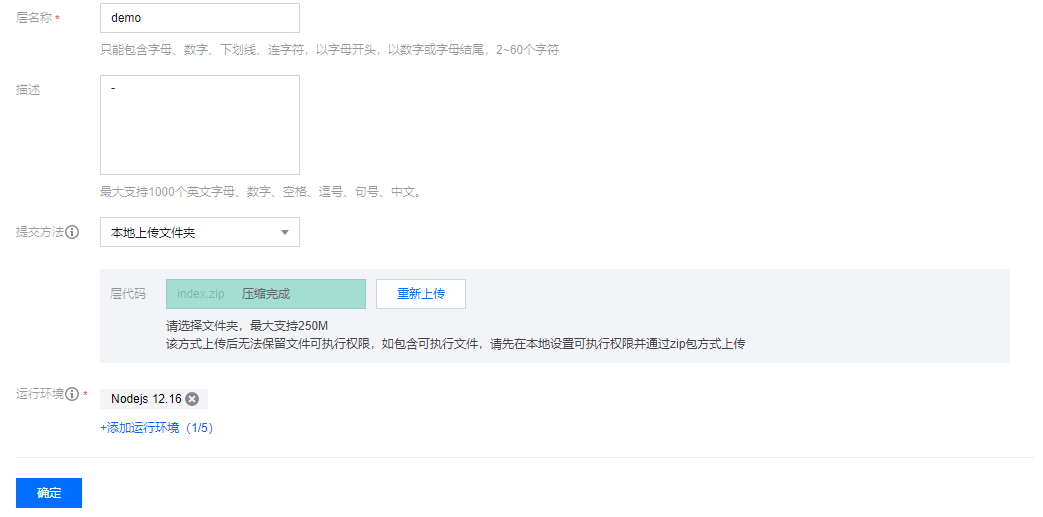
登录
Serverless 控制台,创建层。操作步骤详情请参见 创建层。参数设置如下图所示:
层名称:自定义,本文以
demo 为例。提交方法:选择本地上传文件夹,并选择上传 步骤1 中已获取文件夹中的
layer 文件夹。运行环境:选择 Nodejs 12.16。
3. 登录 Serverless 控制台,新建函数。操作详情见 创建函数。基础配置如下所示:
创建方式:选择从头开始。
函数类型:选择事件函数。
函数名称:本文以
layerDemo 为例。地域:地域默认填充。
运行环境:选择 Nodejs 12.16。
时区:云函数内默认使用 UTC 时间。
4. 在函数代码中,选择本地上传文件夹,并选择上传 步骤1 中已获取文件夹中的 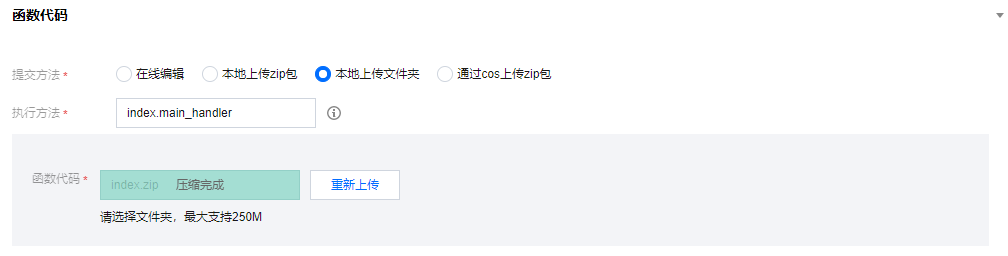
function 文件夹。如下图所示:
5. 在高级配置 > 层配置中,单击添加层。
6. 为函数选择层名称和层版本。如下图所示:
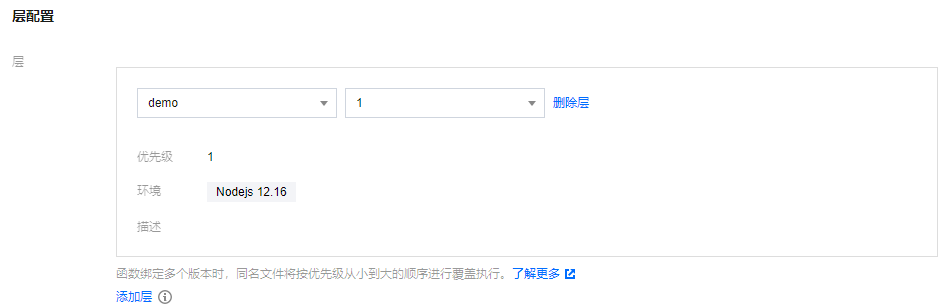
层名称:选择 步骤2 中已创建的层
demo。层版本:选择版本1。
7. 单击页面下方的完成。创建完成后即可查看函数详情。
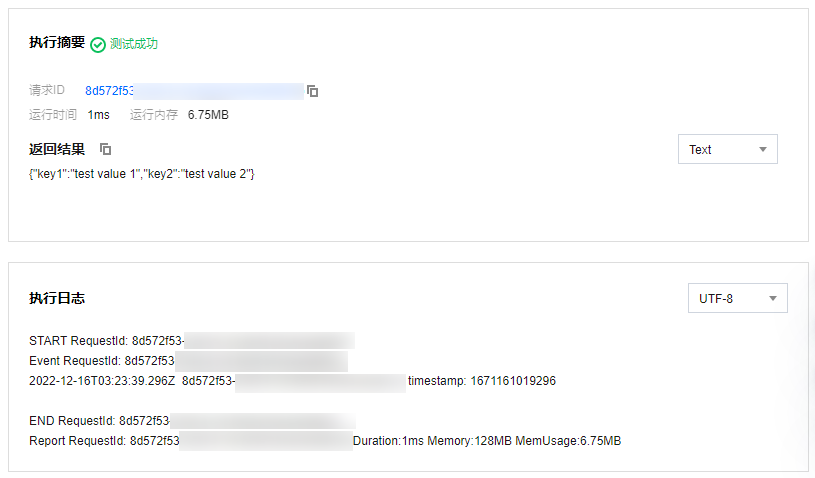
8. 在函数管理中选择函数代码页签,单击页面下方的测试即可查看结果。如下图所示: