如何部署企业内部Composer私有Packagist仓库
如何部署企业内部Composer私有Packagist仓库

正常情况使用PHP依赖包使用的都是官方公有仓库 https://packagist.org 公开可用的开源组件,但有时候如果公司使用内部开发的PHP组件,而基于许可证和安全方面的问题不能将其开源,就需要私有部署Packagist私有仓库。
假设你现在有一些需要在公司中被多个人使用的 package,但是并不想开源。OK,然后你看上了 Satis 来解决这个问题。那么首先你需要一个 JSON 格式的 Satis 配置文件,并在上面写明你的软件源。
Satis
Satis 是一个由Composer官方提供的开源工具,用于构建自定义的Composer仓库。通过Satis,你可以将你的私有依赖包和第三方依赖包打包成一个Composer仓库,使得你的项目可以从该仓库中获取依赖包,而不是从Packagist等公共仓库获取。
主要优点
- 私有仓库: 你可以将自己的私有依赖包发布到Satis生成的Composer仓库中,这样可以确保你的私有依赖包不会被公开发布到Packagist等公共仓库中。
- 加速依赖包下载: 通过Satis生成的Composer仓库,你可以将项目中需要的依赖包预先下载到本地或者内部网络中,从而加速项目的构建和部署过程。
- 自定义仓库: 你可以根据自己的需求定制Composer仓库的内容,只包含项目需要的特定依赖包,避免下载无用的依赖包。
要使用Satis,你需要在服务器上搭建一个Satis仓库,并将你的依赖包发布到该仓库中。之后,在你的项目中配置Composer,指定使用该Satis仓库作为依赖包源。这样你的项目就可以从Satis生成的Composer仓库中获取依赖包了。
总的来说,Satis是一个非常有用的工具,特别适合需要管理私有依赖包或者加速依赖包下载的场景。
安装部署
1、创建项目
$ composer create-project composer/satis --stability=dev --keep-vcs
Creating a "composer/satis" project at "./satis"

Installing composer/satis (2.x-dev 4d42fc6cc24df214a3c52af8ae7ea4a629fded56)
  - Syncing composer/satis (2.x-dev 4d42fc6) into cache
  - Installing composer/satis (2.x-dev 4d42fc6): Cloning 4d42fc6cc2 from cache
Created project in D:\dnmp\www\satis
2、配置 satis.json
{
    "name": "tinywan/repository",
    "homepage": "http://composer.tinywan.com",
    "repositories": [
        {"type": "git", "url": "git@github.com:Tinywan/hello.git"}
    ],
    "require-all": true,
    "require-dependencies": true,
    "require-dev-dependencies": true
}
3、构建 Satis UI界面
$ php bin/satis build satis.json dist

Scanning packages
Wrote packages to dist/include/all$305cec9908b59ed21d95da084eda138a2c7e8189.json
Wrote packages to dist/p2/doctrine/instantiator.json
...
Writing packages.json
Pruning include directories
Writing web view
构建成功后,会生成一个全前端静态文件目录dist。上传该目录到服务器以下目录下
/home/www/build/composer/dist
目录结构如下所示
.
├── include
│   └── all$305cec9908b59ed21d95da084eda138a2c7e8189.json
├── index.html
├── p2
│   ├── doctrine
│   ├── myclabs
│   ├── nikic
│   ├── phar-io
│   ├── phpunit
│   ├── sebastian
│   ├── theseer
│   └── tinywan
└── packages.json
4、配置NGINX
composer.tinywan.com.conf 虚拟主机配置
server {
    listen 80;
    server_name composer.tinywan.com;
    root /home/www/build/composer/dist;

    location / {
        index index.html index.htm;
        proxy_set_header HOST $host;
        proxy_set_header X-Real-IP $remote_addr;
        proxy_set_header X-Forwarded-FOR $proxy_add_x_forwarded_for;
        expires 1h;
        try_files $uri $uri/ /index.html;
    }

    location ~ .*\.(gif|jpg|jpeg|png|bmp|swf)$ {
        expires 30d;
    }

    location ~ .*\.(js|css)?$ {
        expires 12h;
    }

    location =/robots.txt {
        default_type text/html;
        add_header Content-Type "text/plain; charset=UTF-8";
        return 200 "User-Agent: *\nDisallow: /";
    }
}
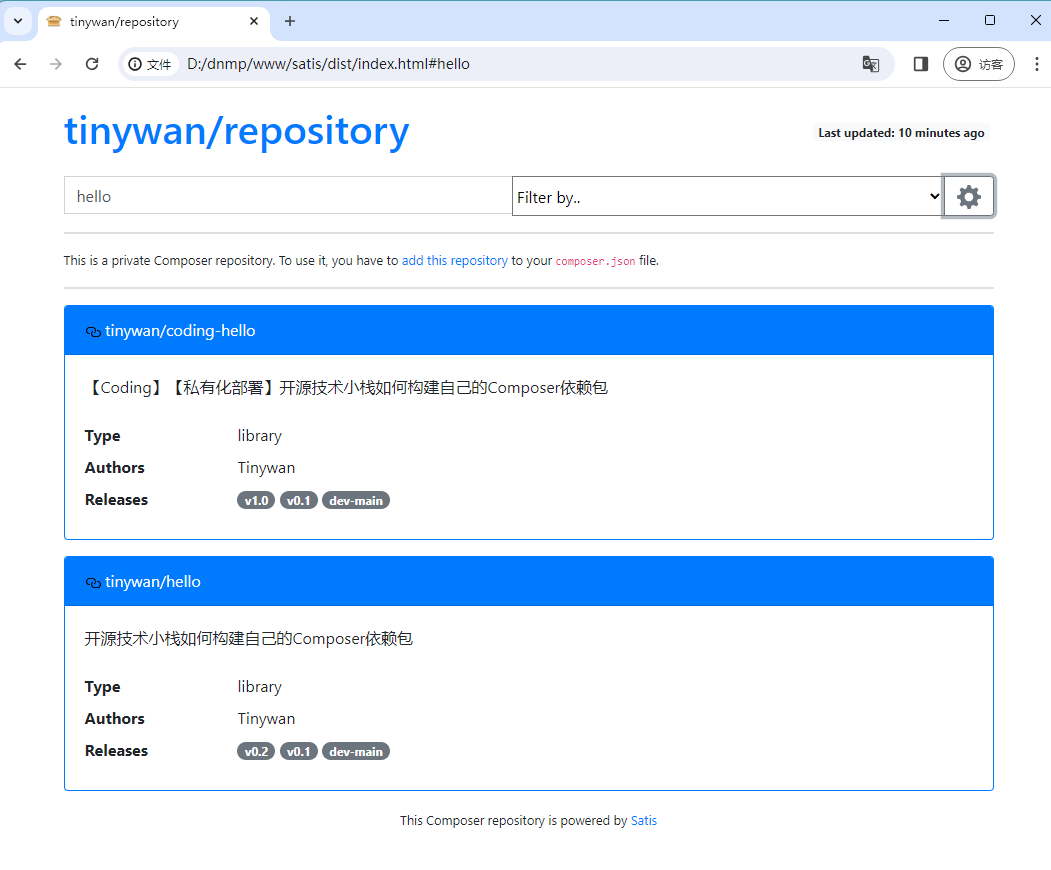
访问域名http://composer.tinywan.com 就可以看到私有化部署的仓库啦!

5、项目中配置使用
在webman-admin项目的依赖包配置文件composer.json中配置私有仓库源
仅修改当前工程配置,仅当前工程可使用该镜像地址:
composer config repo.packagist composer http://composer.tinywan.com
查看当前项目配置源
D:\dnmp\www\webman-admin>composer config -l
[repositories.packagist.org.type] composer
[repositories.packagist.org.url] http://composer.tinywan.com

或者添加多个镜像源
// 省略其它配置....

"repositories": [
    {
        "type": "composer",
        "url": "http://composer.tinywan.com"
    },
    {
        "type": "composer",
        "url": "https://mirrors.aliyun.com/composer/"
    }
]

// 省略其它配置....
如果提示以下错误
In Config.php line 582:
  Your configuration does not allow connections to http://composer.tinywan.com/packages.json. See https://getcomposer.org/doc/06-config.md#secure-http for details.
通过一下配置可以解决
composer config secure-http false
安装依赖包
D:\dnmp\www\webman-admin>composer require tinywan/hello
Warning: Accessing composer.tinywan.com over http which is an insecure protocol.
./composer.json has been updated
Running composer update tinywan/hello
Loading composer repositories with package information

Warning: Accessing composer.tinywan.com over http which is an insecure protocol.
Updating dependencies

Lock file operations: 0 installs, 1 update, 0 removals
  - Upgrading tinywan/hello (v0.1 c6f43d0 => v0.1)
Writing lock file
Installing dependencies from lock file (including require-dev)
Package operations: 0 installs, 1 update, 0 removals
  - Syncing tinywan/hello (v0.1) into cache
  - Removing tinywan/hello (v0.1)
  - Installing tinywan/hello (v0.1): Cloning c6f43d0bfc from cache
Generating autoload files
30 packages you are using are looking for funding.
Use the `composer fund` command to find out more!
No security vulnerability advisories found
Using version ^0.1.0 for tinywan/hello
代码仓库私有化
1、新建私有化代码仓库
这里使用腾讯Coding为代码私有仓库。直接通过从 GitHub 导入代码库。
选择
hello仓库进行导入

重命名仓库名称为
hello-coding

设置仓库为私有仓库

2、修改私有化代码仓库composer.json
{
    "name": "tinywan/coding-hello",
    "description": "【Coding】【私有化部署】开源技术小栈如何构建自己的Composer依赖包",
    "type": "library",
    "autoload": {
        "psr-4": {
            "tinywan\\hello\\": "src/"
        }
    },
    "authors": [
        {
            "name": "Tinywan",
            "email": "756684177@qq.com"
        }
    ],
    "require-dev": {
        "phpunit/phpunit": "^9.6"
    }
}
打个新标签 tag v1.0
D:\dnmp\www\hello-coding>git tag v1.0

D:\dnmp\www\hello-coding>git push origin v1.0

Total 0 (delta 0), reused 0 (delta 0), pack-reused 0
To e.coding.net:wiot/cloud/hello-coding.git
 * [new tag]         v1.0 -> v1.0

PS:同时给
Github的hello仓库打个标签tagv0.2。主要是为了区分公共和私有仓库
D:\dnmp\www\hello>git tag v0.2

D:\dnmp\www\hello>git push origin v0.2
To github.com:Tinywan/hello.git
 * [new tag]         v0.2 -> v0.2
3、配置文件satis.json
修改配置文件satis.json 添加以下内容
git@e.coding.net:wiot/cloud/hello-coding.git
{
    "name": "tinywan/repository",
    "homepage": "http://composer.tinywan.com",
    "repositories": [
        {"type": "git", "url": "git@github.com:Tinywan/hello.git"},
        {"type": "git", "url": "git@e.coding.net:wiot/cloud/hello-coding.git"}
    ],
    "require-all": true,
    "require-dependencies": true,
    "require-dev-dependencies": true
}
或者通过命令行添加一个coding私有仓库的新包
php bin/satis add git@e.coding.net:wiot/cloud/hello-coding.git satis.json dist

4、重新构建 Satis
// 构建指定的仓库包
// php bin/satis build --repository-url git@e.coding.net:wiot/cloud/hello-coding.git satis.json dist

php bin/satis build satis.json dist
5、预览和查看
访问域名 http://composer.tinywan.com

6、项目中使用私有包coding-hello
D:\dnmp\www\webman-admin>composer require tinywan/coding-hello
Warning: Accessing composer.tinywan.com over http which is an insecure protocol.
./composer.json has been updated
Running composer update tinywan/coding-hello
Loading composer repositories with package information
Warning: Accessing composer.tinywan.com over http which is an insecure protocol.
Updating dependencies
Lock file operations: 1 install, 0 updates, 0 removals
  - Locking tinywan/coding-hello (v1.0)
Writing lock file
Installing dependencies from lock file (including require-dev)
Package operations: 1 install, 0 updates, 0 removals
  - Syncing tinywan/coding-hello (v1.0) into cache
  - Installing tinywan/coding-hello (v1.0): Cloning 72c31d5fdf from cache
> support\Plugin::install
Generating autoload files
30 packages you are using are looking for funding.
Use the `composer fund` command to find out more!
No security vulnerability advisories found
Using version ^1.0 for tinywan/coding-hello
自动化
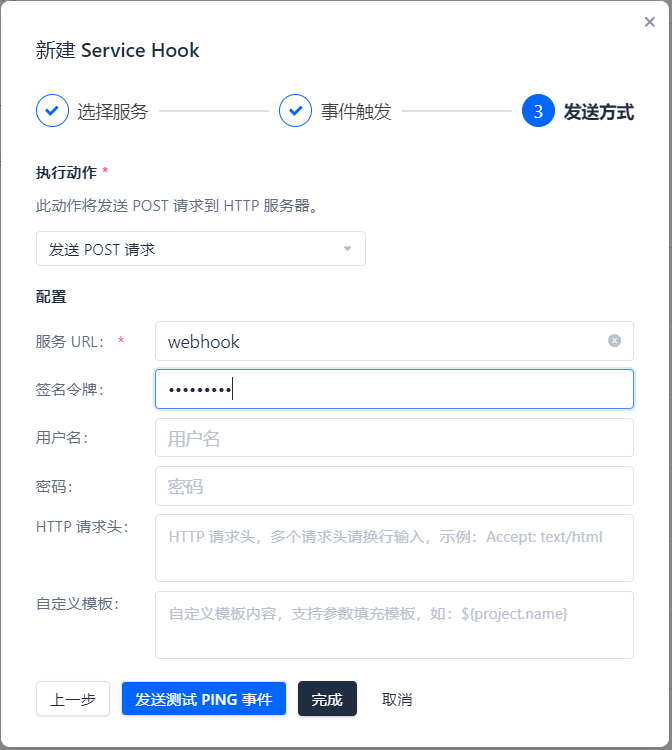
- webhook

- Jenkins
更多可以参考这里:https://github.com/Tinywan/webhooks

