基于腾讯云HAI + DeepSeek 开发企业知识库
原创基于腾讯云HAI + DeepSeek 开发企业知识库
原创
开发目的:
自从年后大家都开始关注deepseek,我们公司年后特别忙,上面的老板及其他部门都提出了需求。 之前各个部门对AI模型都不了解,经过网上铺天盖地的新闻后,大家都知道AI比较厉害,所以都提出来部门的想法看如何把deepseek引入到部门中,原因大家想必都知道,就是提高大家的工作效率,节省人力。
正题开始,我们根据部门的需要结合deepseek开发了我们企业内部的知识库。我给大家分享一下,开发的流程及开发后的使用体验。
开发流程:
使用腾讯云高性能应用服务(HAI)上使用 Python 结合 DeepSeek-R1 模型对企业内部文件进行微调,并构建一个能够回答行业领域专业问题的 AI 应用,可以按照以下步骤操作:
1. 准备工作
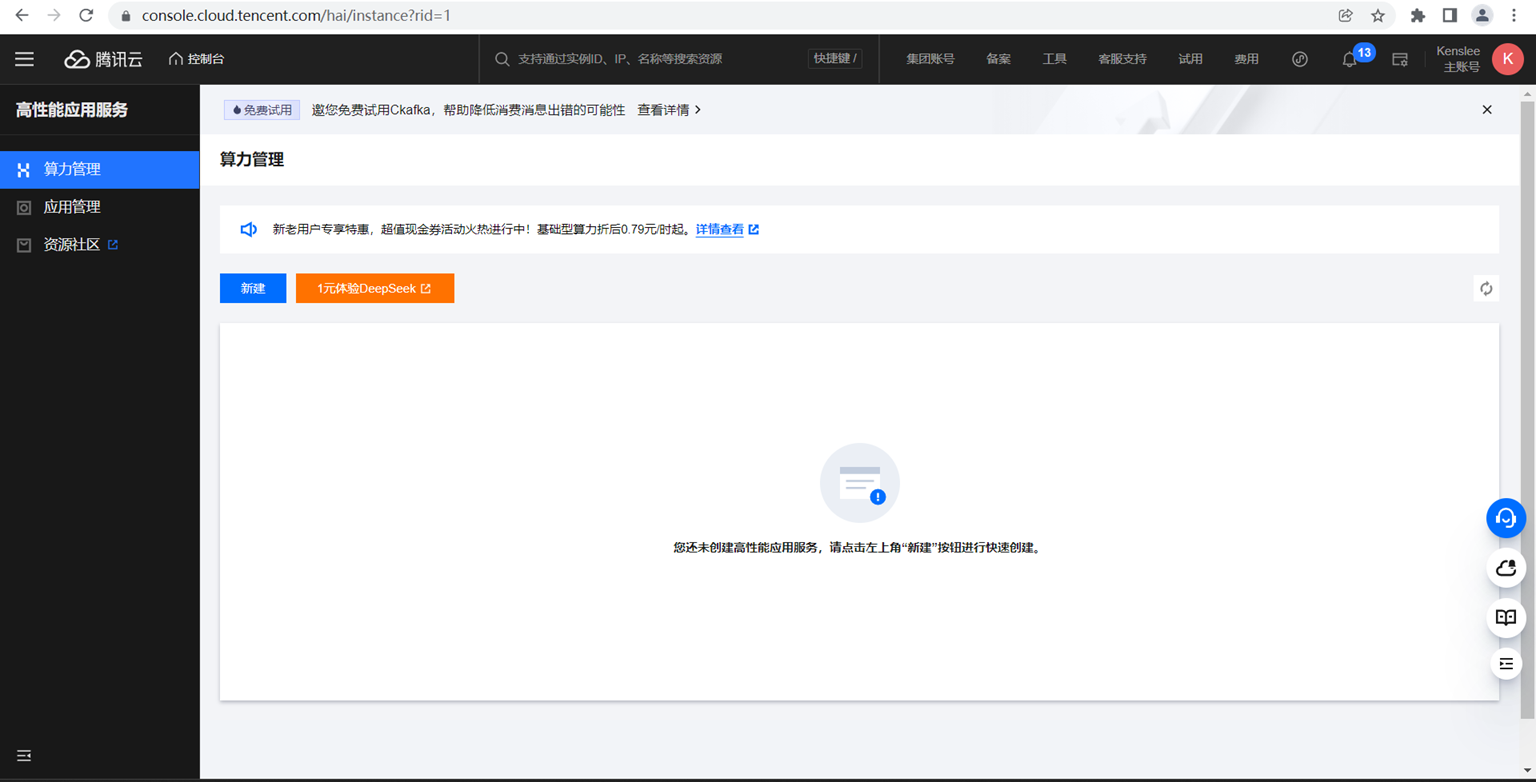
a. 注册并配置腾讯云 HAI
确保你已经在腾讯云上注册并开通了高性能应用服务(HAI),并且已经选择了支持 DeepSeek-R1 模型的预装环境。
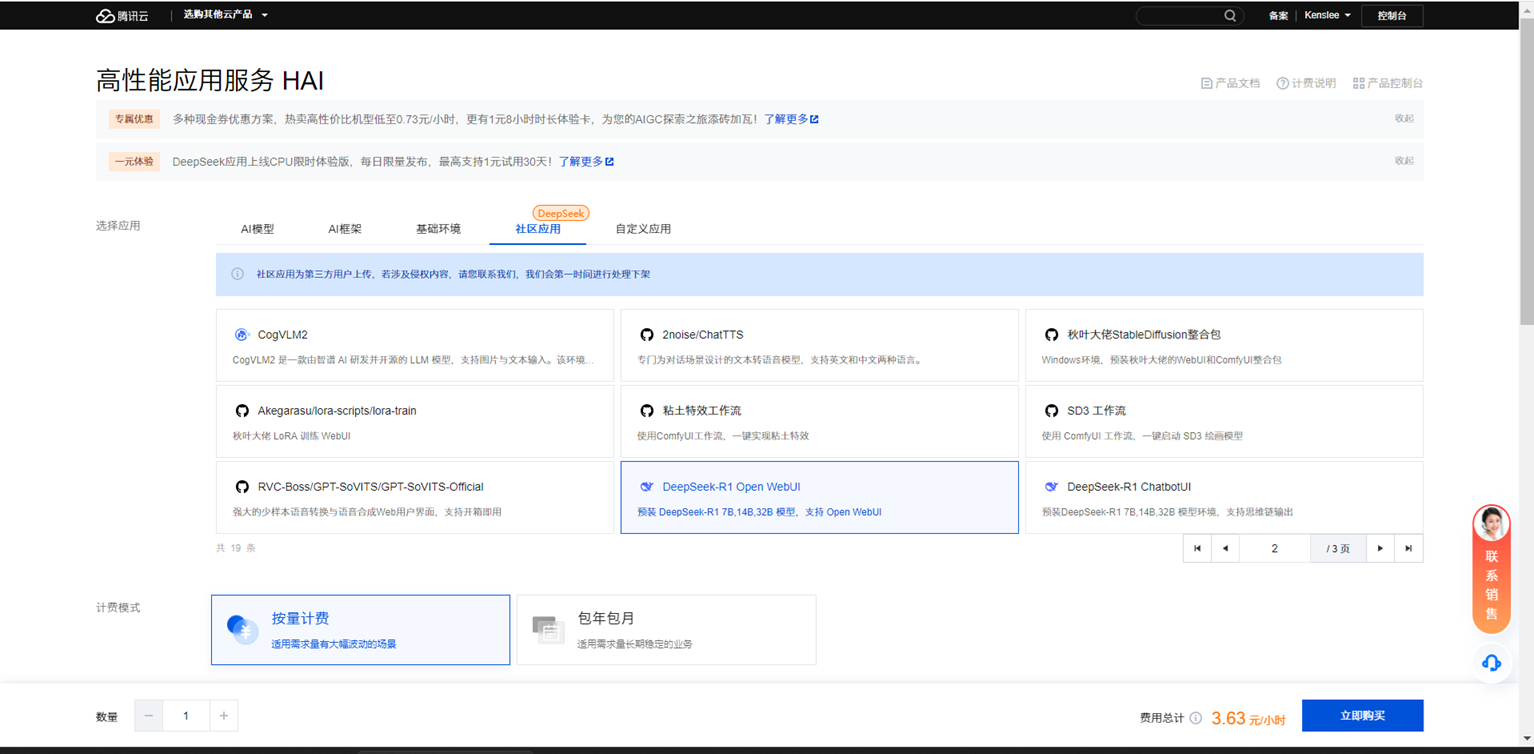
b. 选择DeepSeek-R1 模型
在 HAI 控制台中,选择 DeepSeek-R1 模型)。
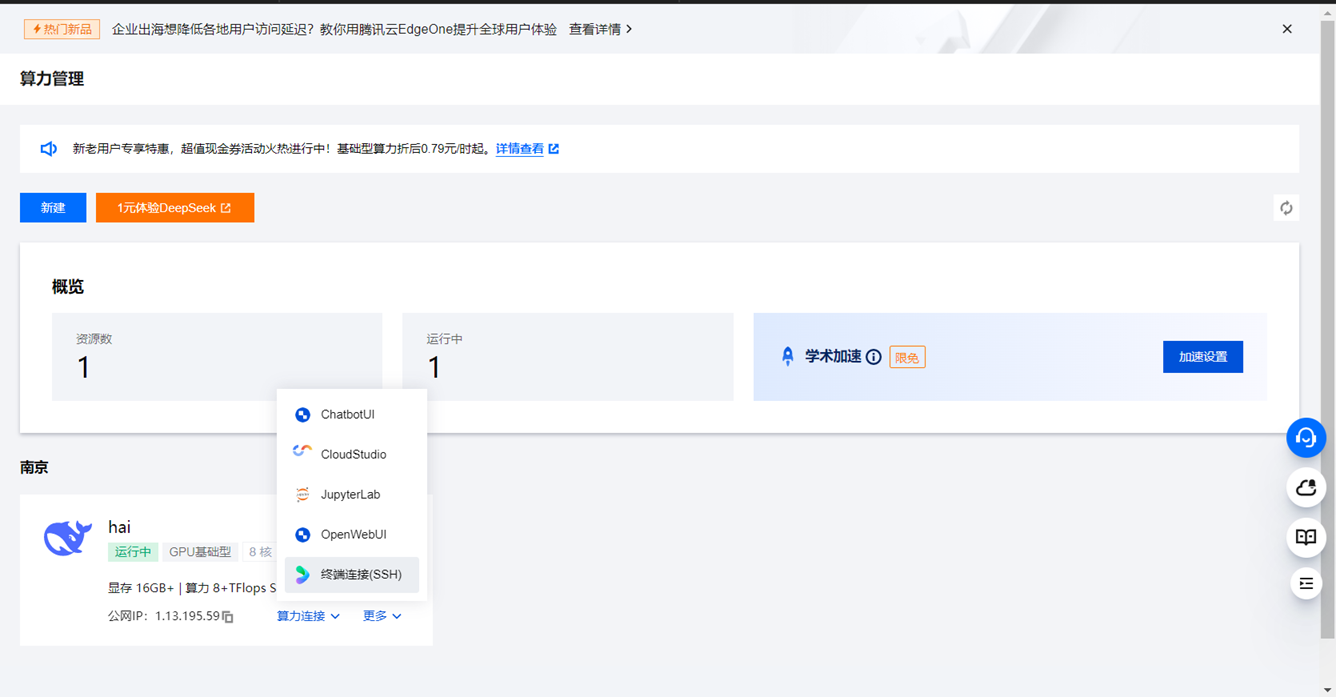
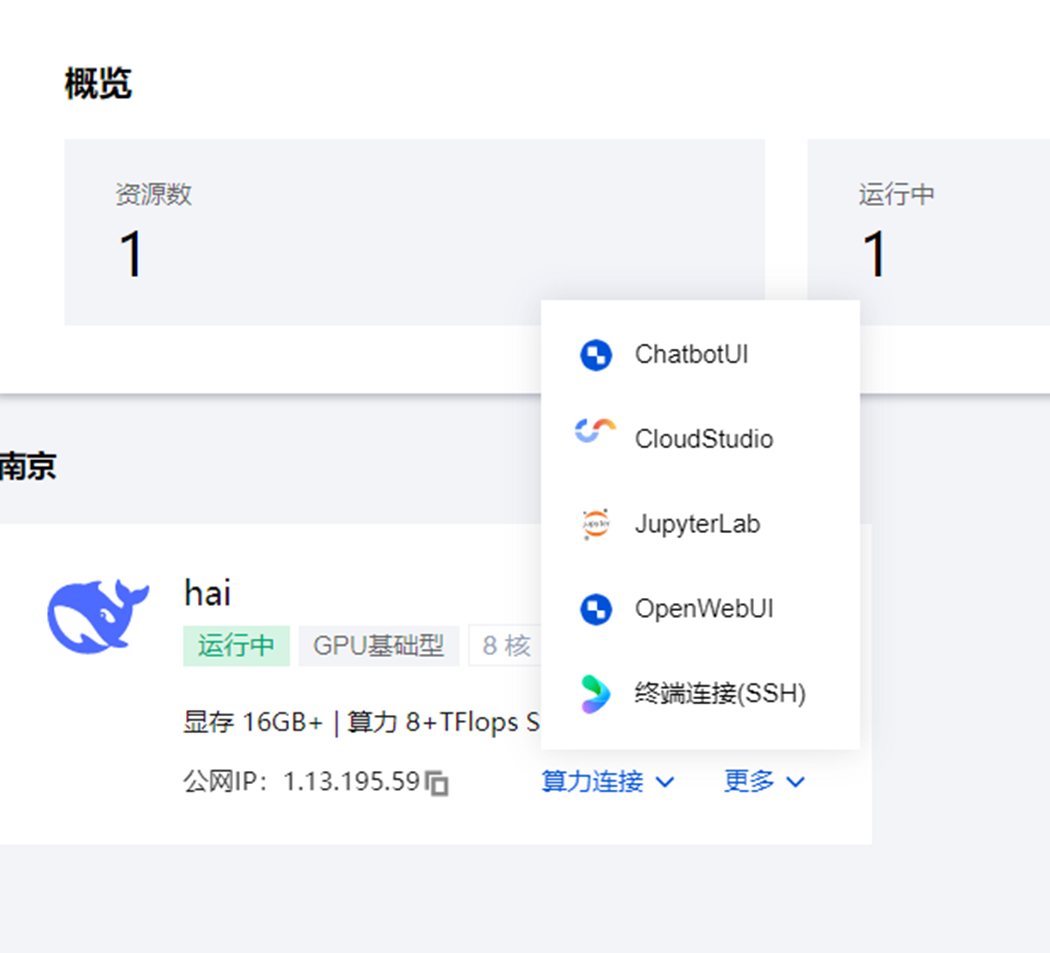
c. 选择openwebui连接方式
在 HAI 控制台中,选择 openwebui连接方式。
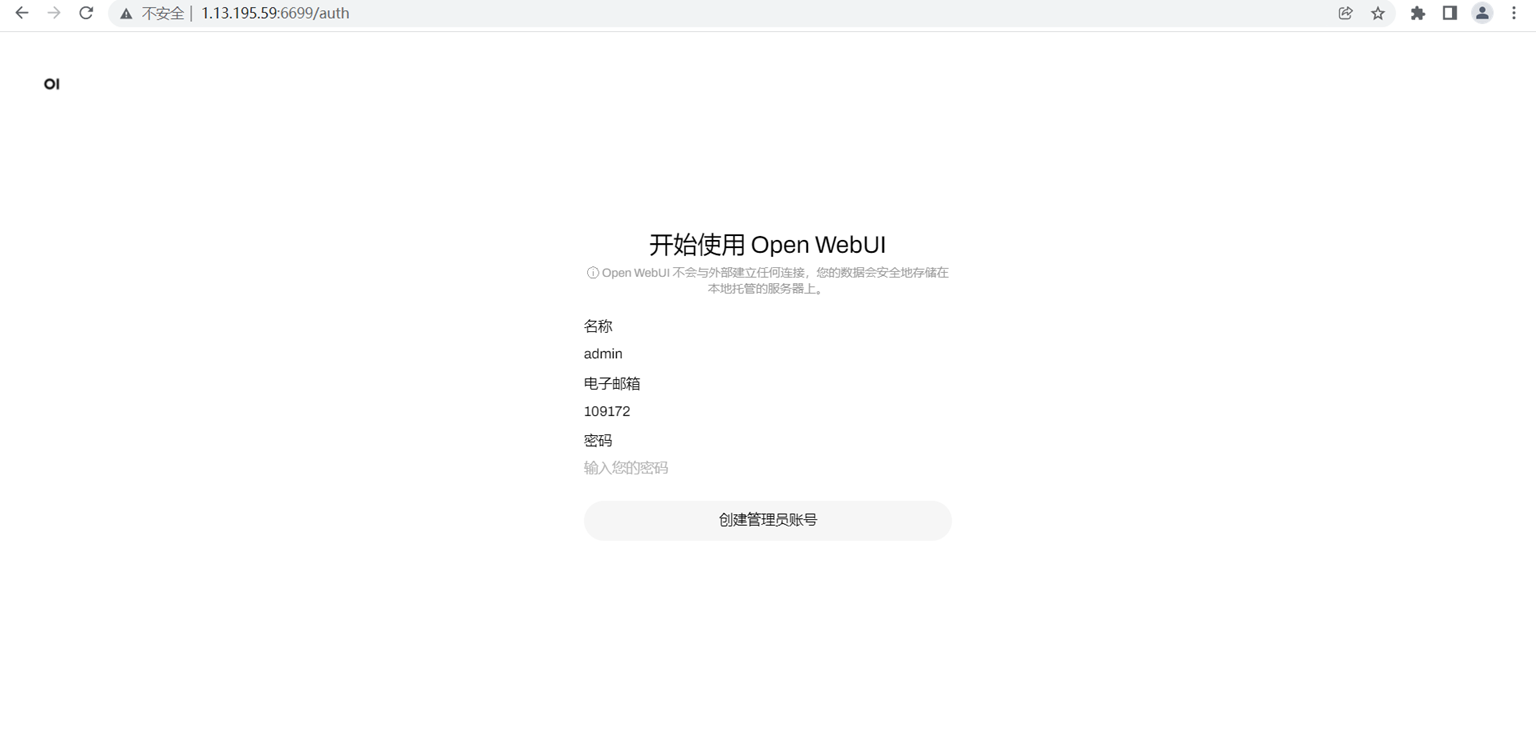
根据要求创建open web ui名称,邮箱及密码
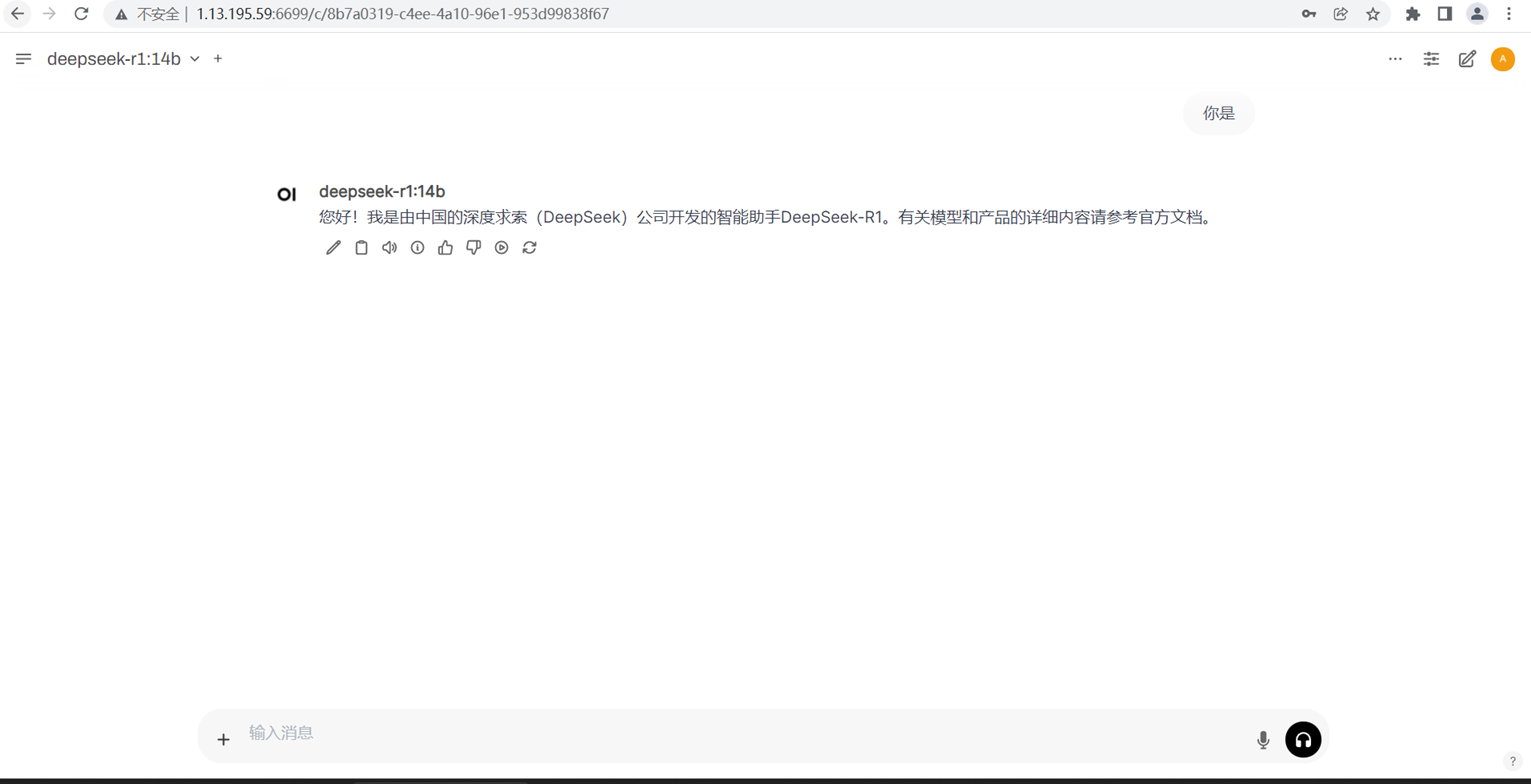
d. 进入deepseek
这样我们就成功部署deepseek模型
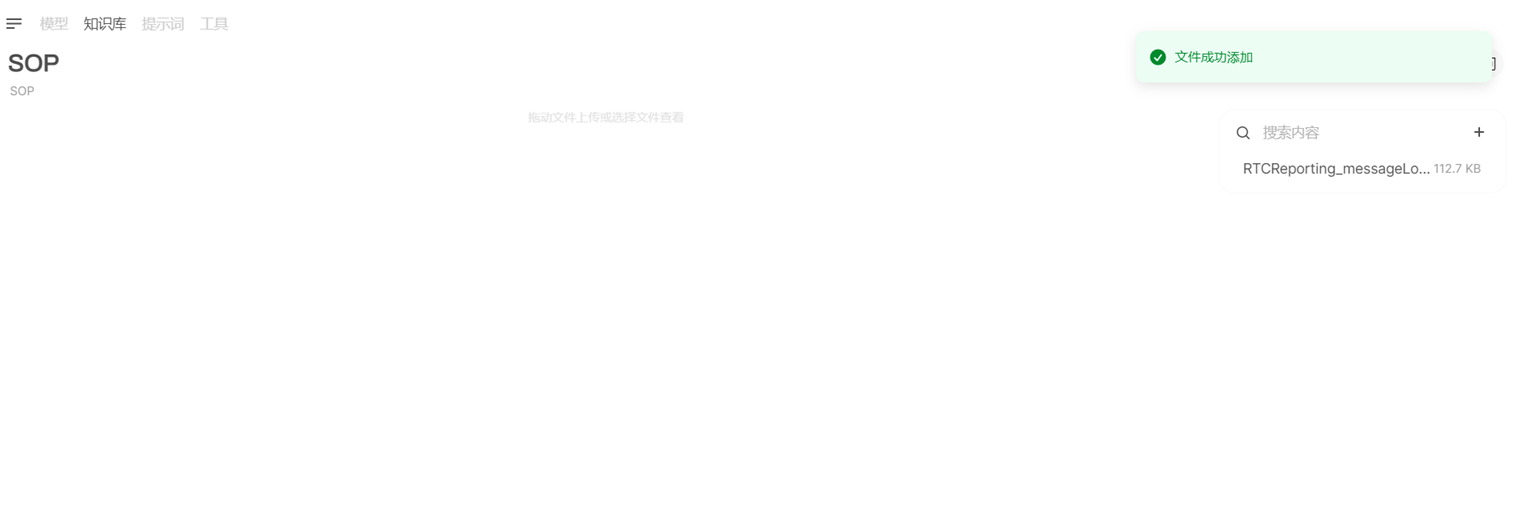
e. 建立知识库
在左上角选择知识库,我们就可以创建自己的知识库

f. 准备企业内部数据
将企业内部的知识库文件整理好,确保数据格式适合用于模型训练或微调。
将文件资料上传至模型中
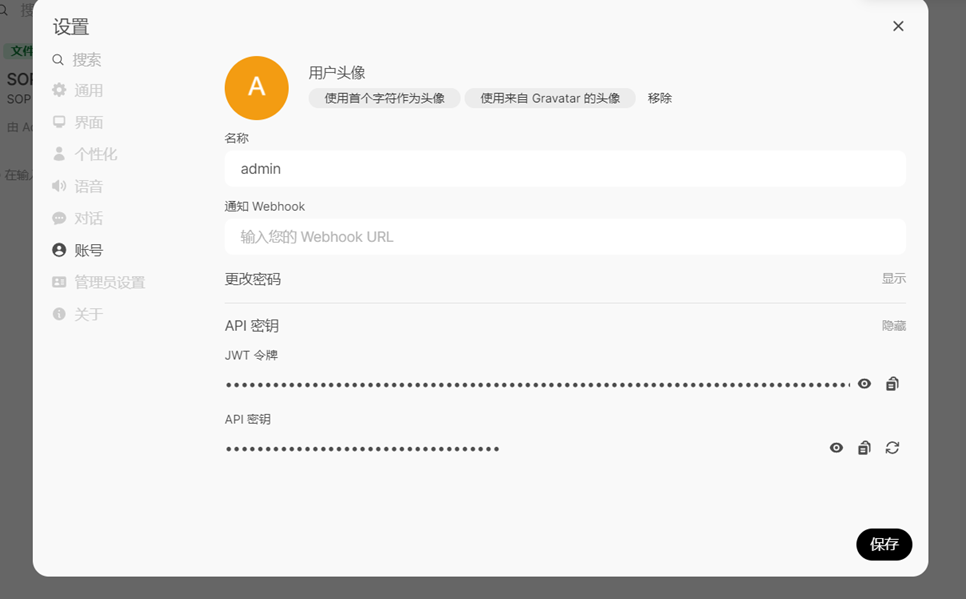
g. 创建deepseek API
在右下角我们选择账号,获取我们API秘钥
2. 设置开发环境
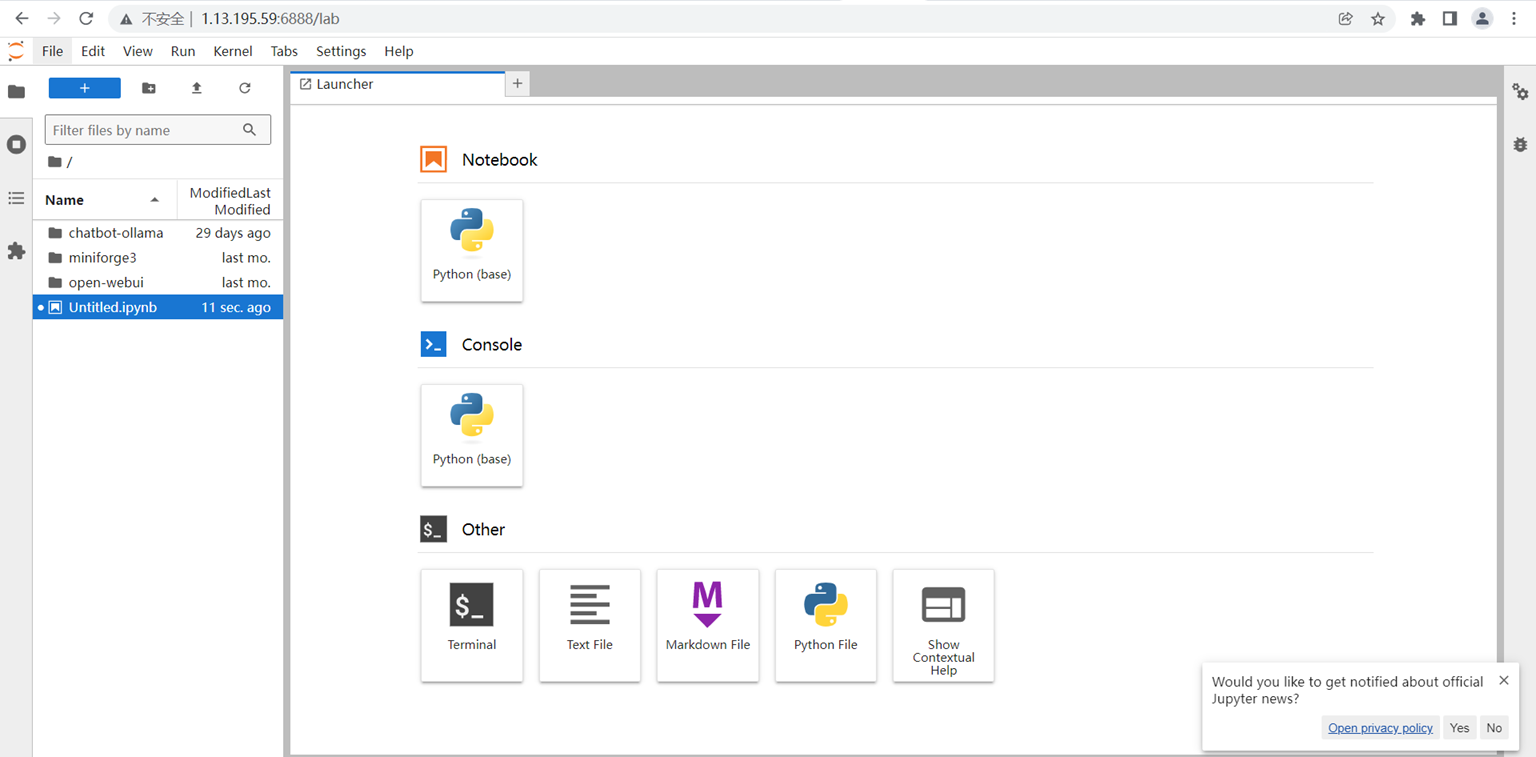
在 HAI 控制台中,选择 jupyterLab连接方式。
b. 配置 Python 环境
要选择Notbebook使用python
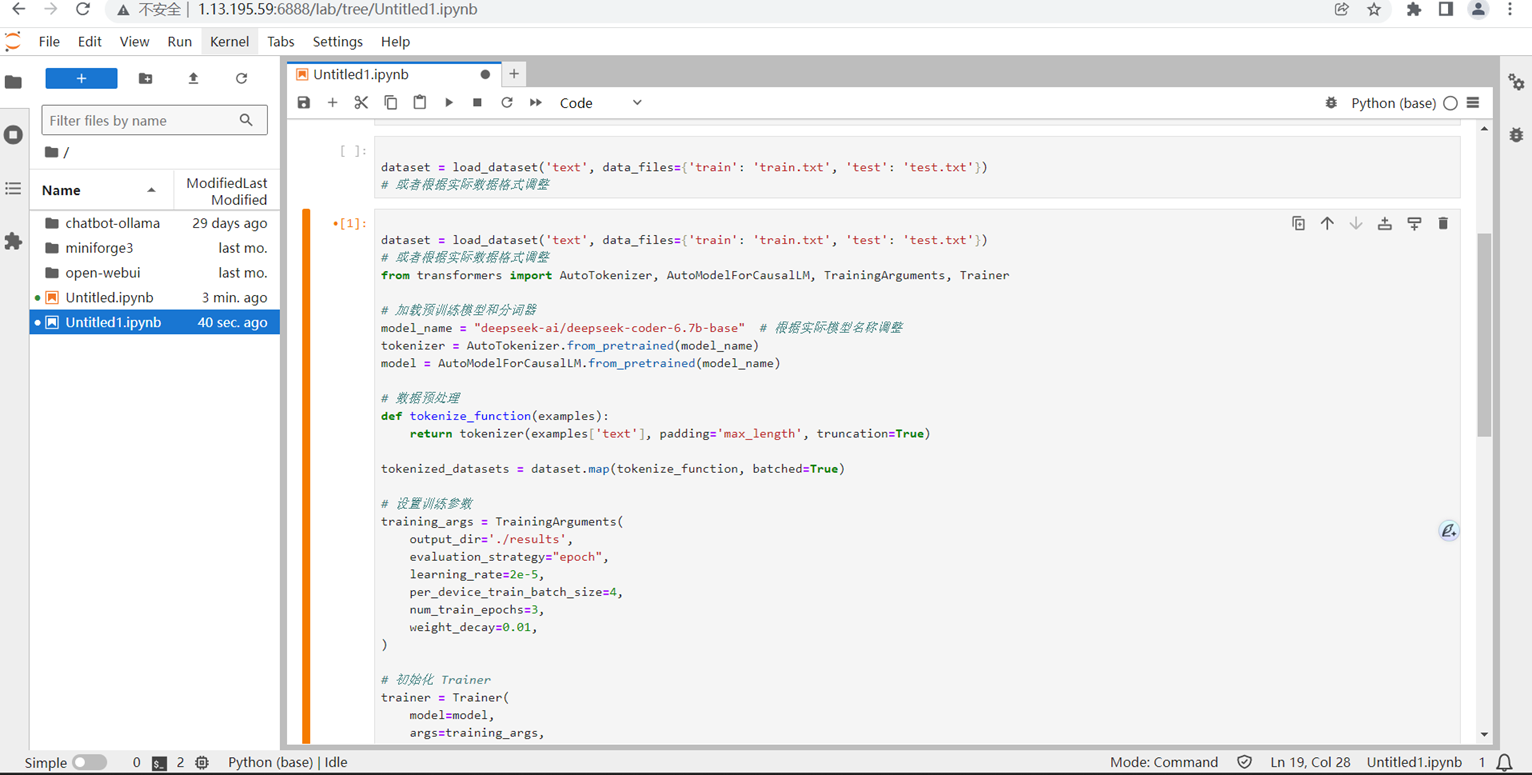
3. 代码
使用python开始写代码
from tencentcloud.common import credential
from tencentcloud.common.profile.client_profile import ClientProfile
from tencentcloud.common.profile.http_profile import HttpProfile
from tencentcloud.hai.v20230816 import hai_client, models

#  API 凭证
secret_id = "*********"
secret_key = "*******"
region = "ap-nanjing"

cred = credential.Credential(secret_id, secret_key)
http_profile = HttpProfile()
http_profile.endpoint = "hai.tencentcloudapi.com"

client_profile = ClientProfile()
client_profile.httpProfile = http_profile

client = hai_client.HaiClient(cred, region, client_profile)

req = models.DescribeInstancesRequest()
resp = client.DescribeInstances(req)
print(resp.to_json_string())
使用 Hugging Face 的 transformers库进行模型微调:
pythonfrom transformers import AutoTokenizer, AutoModelForCausalLM, TrainingArguments, Trainer

model_name = "deepseek-ai/deepseek"
tokenizer = AutoTokenizer.from_pretrained(model_name)
model = AutoModelForCausalLM.from_pretrained(model_name)

def tokenize_function(examples):
    return tokenizer(examples['text'], padding='max_length', truncation=True)

tokenized_datasets = dataset.map(tokenize_function, batched=True)
def preprocess_function(examples):
    inputs = [f"问:{q} 答:" for q in examples["question"]]
    targets = examples["answer"]
    model_inputs = tokenizer(inputs, max_length=512, truncation=True, padding="max_length")
    labels = tokenizer(targets, max_length=512, truncation=True, padding="max_length")
    model_inputs["labels"] = labels["input_ids"]
    return model_inputs
training_args = TrainingArguments(
    output_dir='./results',
    evaluation_strategy="epoch",
    learning_rate=2e-5,
    per_device_train_batch_size=4,
    num_train_epochs=3,
    weight_decay=0.01,
)

trainer = Trainer(
    model=model,
    args=training_args,
    train_dataset=tokenized_datasets['train'],
    eval_dataset=tokenized_datasets['test'],
)

trainer.train()from datasets import load_dataset from transformers import Trainer, TrainingArguments # 加载训练数据dataset = load_dataset("json", data_files="train_data.json")# 数据预处理defpreprocess_function(examples):    inputs =[f"问:{q} 答:"for q in examples["question"]]    targets = examples["answer"]    model_inputs = tokenizer(inputs, max_length=512, truncation=True, padding="max_length")    labels = tokenizer(targets, max_length=512, truncation=True, padding="max_length")    model_inputs["labels"]= labels["input_ids"]return model_inputs tokenized_datasets = dataset.map(preprocess_function, batched=True)# 设置训练参数training_args = TrainingArguments(    output_dir="./results",    evaluation_strategy="epoch",    learning_rate=2e-5,    per_device_train_batch_size=4,    num_train_epochs=3,    weight_decay=0.01,    save_strategy="epoch",    logging_dir="./logs",    logging_steps=10,)# 初始化 Trainertrainer = Trainer(    model=model,    args=training_args,    train_dataset=tokenized_datasets["train"],    eval_dataset=tokenized_datasets.get("validation"),)# 开始训练trainer.train()
模型评估与优化
训练完成后,评估模型性能并根据需要进行优化:
python
results = trainer.evaluate()
print(results)
4. 部署模型
将微调后的模型部署为 API 服务,以便前端或其他应用调用:
训练好的模型部署为 RESTful API。
使用 FastAPI 自行部署,部署到 HAI 平台或自行搭建服务器,确保 API 的可用性和安全性。
pythonfrom fastapi import FastAPI, Request
from transformers import pipeline
app = FastAPI(****************)
model = AutoModelForCausalLM.from_pretrained('./fine-tuned-model')
tokenizer = AutoTokenizer.from_pretrained(model_name)
generation_pipeline = pipeline('text-generation', model=model, tokenizer=tokenizer)
@app.post("/ask")
async def ask(question: Request):
data = await question.json()
prompt = data.get("question")
response = generation_pipeline(prompt, max_length=100)
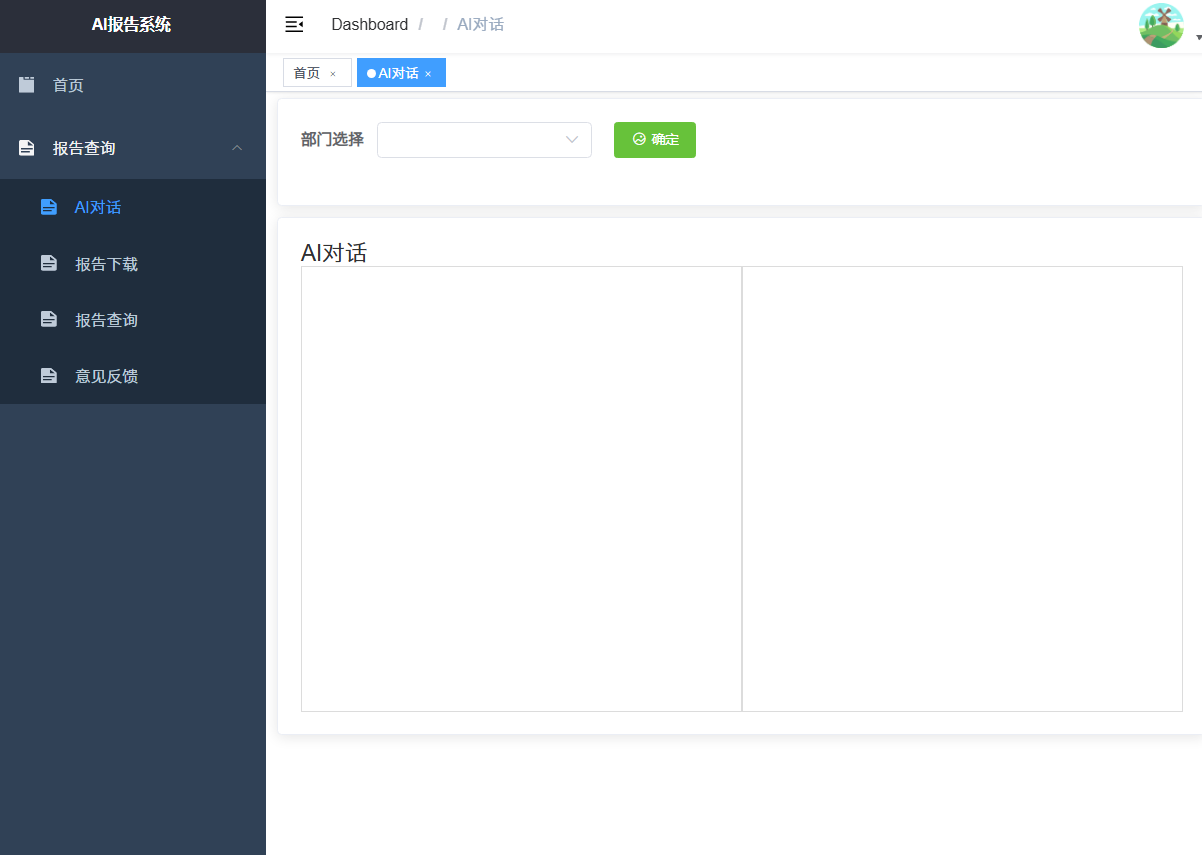
return {"answer": response[0]['generated_text']}5. 集成与测试
已经将部署好的 API 集成到企业的应用系统中,目前在测试其回答行业专业问题的准确性和效果。后续会根据反馈持续优化模型和系统。
体验结果:
以前,为了回答员工的专业问题,我们需要安排专门的人员进行信息检索和解答,这不仅占用了大量的人力,还可能因为人为因素导致回答的不及时和不准确。而现在,智能问答系统能够自动处理大部分的问题,只需少量的人力进行监控和维护即可。
在实际工作中,我们的客服团队就是一个很好的例子。在使用智能问答系统之前,客服人员每天需要花费大量的时间和精力来解答客户的咨询,工作压力较大。而现在,智能问答系统能够承担大部分的常见问题解答工作,客服人员可以将更多的精力放在处理复杂问题和提供个性化服务上,工作效率和服务质量都得到了显著提升。
此外,在知识管理和培训方面,智能问答系统也发挥了重要作用。新员工可以通过系统快速了解企业的业务知识和规章制度,减少了培训的时间和成本。同时,系统还可以根据员工的学习情况提供个性化的学习建议,帮助员工更好地掌握知识和技能。
在未来,我们将继续探索和应用这一技术组合,不断优化和完善智能问答系统,为企业创造更多的价值。同时,我们也期待腾讯云和DeepSeek能够在人工智能领域不断创新和发展,为我们提供更多先进的技术和解决方案,助力我们在数字化时代取得更大的成功。
原创声明:本文系作者授权腾讯云开发者社区发表,未经许可,不得转载。
如有侵权,请联系 cloudcommunity@tencent.com 删除。
原创声明:本文系作者授权腾讯云开发者社区发表,未经许可,不得转载。
如有侵权,请联系 cloudcommunity@tencent.com 删除。
腾讯云开发者
