基于腾讯云CVM(国内)搭建stable-diffusion-webui环境 三
原创基于腾讯云CVM(国内)搭建stable-diffusion-webui环境 三
原创
背景
本文主要是介绍在腾讯云CVM的中国大陆地区服务器中搭建stable-diffusion-webui(https://github.com/AUTOMATIC1111/stable-diffusion-webui)环境。为什么在中国大陆地区服务器需要另外一份教程了,就是【慢】。各种依赖,下载太慢了。
腾讯云CVM海外服务器相关版本,请见:
基于腾讯云CVM搭建stable-diffusion-webui环境
基于腾讯云CVM搭建stable-diffusion-webui环境 二
核心步骤
在腾讯云CVM的中国大陆区域,申请一台4核8GB内存的服务器,选择公共镜像CentOS-64位-CentOS 8.4 64位。系统盘选择100GB。网络安全组-入站规则需要打开7860端口。建议带宽值直接拉到100Mbps,因为需要下载的依赖非常多,非常大。具体也可以参考 基于腾讯云CVM搭建stable-diffusion-webui环境 一文。
ssh -o ServerAliveInterval=30 root@服务器IP地址 登录。
创建一个非root权限账户(sd不允许root运行)
adduser sd  (创建账户sd)
passwd sd  (创建密码)
usermod -aG wheel sd (增加sudo权限)
su - sd (切换为sd用户)
安装Conda
wget https://repo.anaconda.com/archive/Anaconda3-2023.03-Linux-x86_64.sh
sh Anaconda3-2023.03-Linux-x86_64.sh
安装完成后执行 “bash”命令,重新载入bash终端,确保conda命令可用
创建conda环境
conda create -n sd python=3.10.6创建完成后切换至sd环境
conda activate sd重头戏开始了,安装sd-ui
- 修改pip的源至清华源,创建文件 ~/.pip/pip.conf,内容如下:
[global]
index-url = https://pypi.tuna.tsinghua.edu.cn/simple
[install]
trusted-host = https://pypi.tuna.tsinghua.edu.cn- 修改launch.py 文件中github下载地址,使用github代理,加速下载:
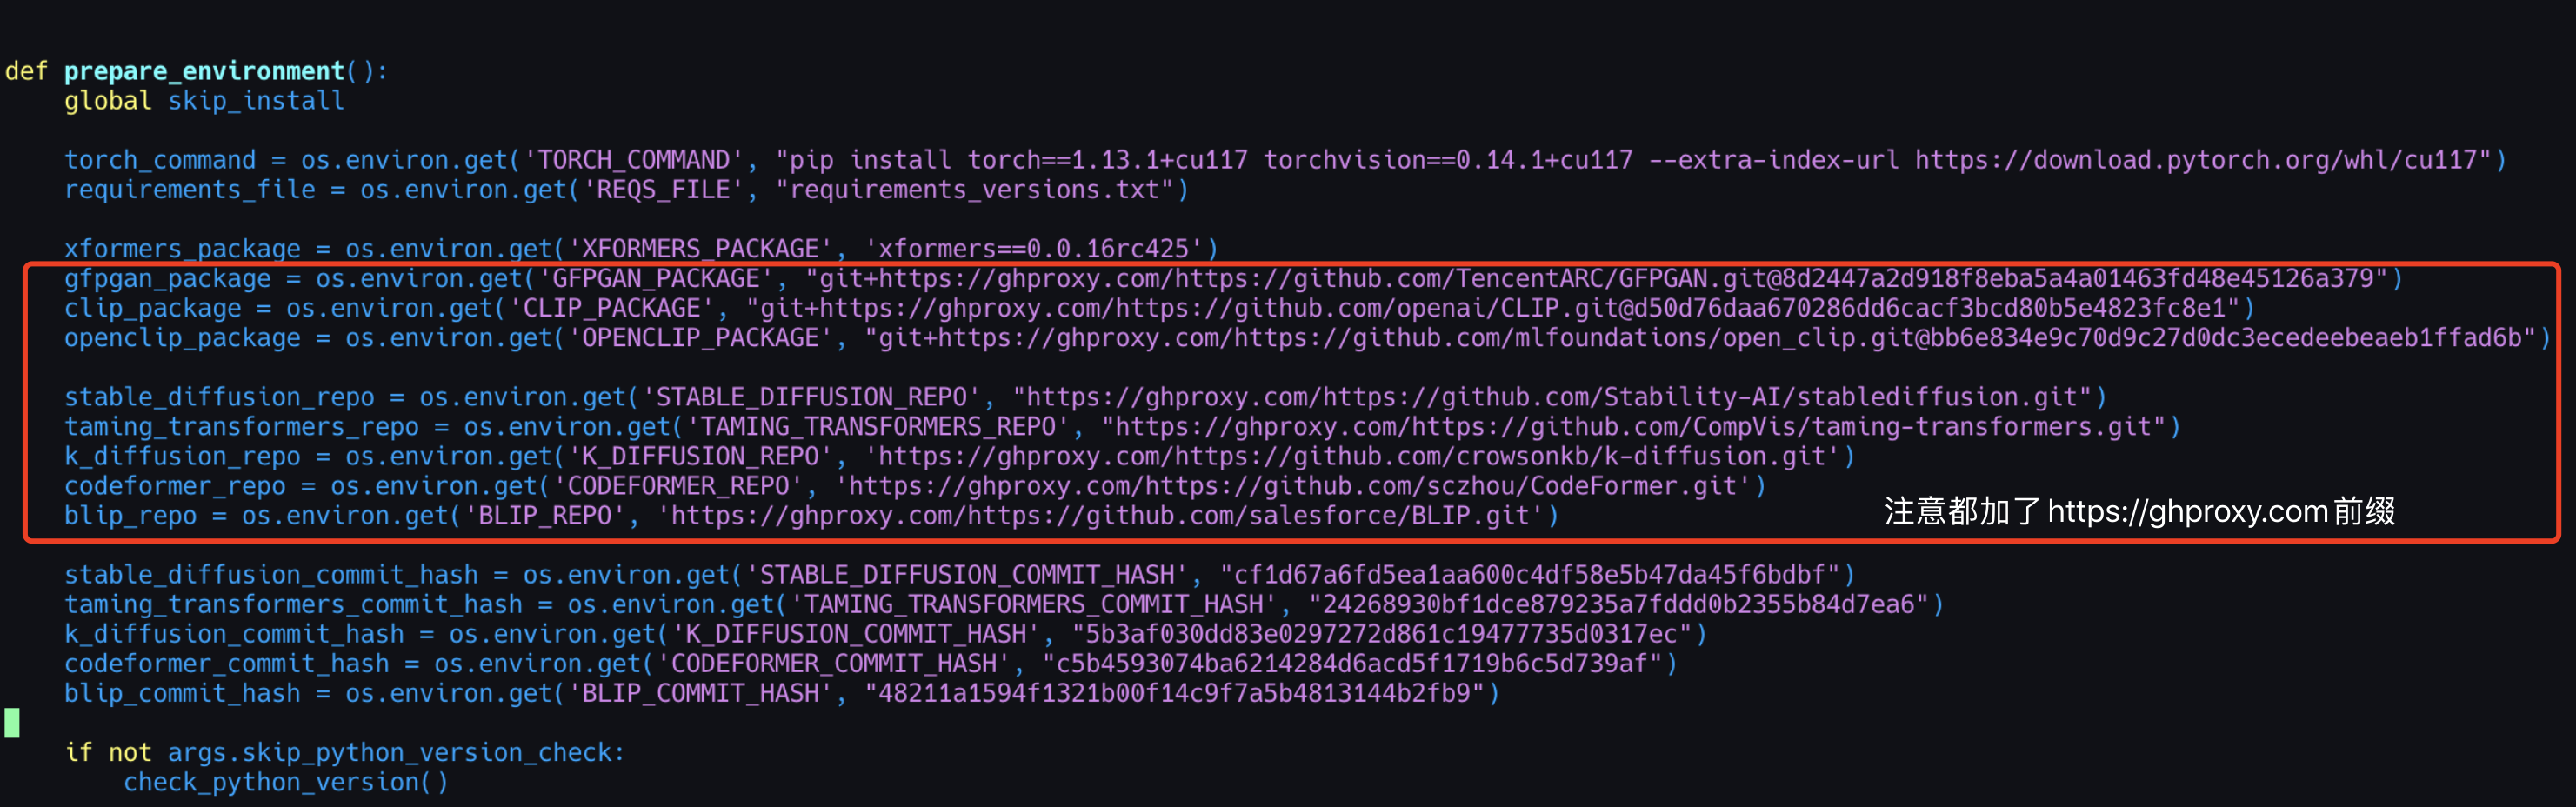
将其中github地址前加上代理路径:(github proxy加速:https://ghproxy.com/)
- 上面的github也可以本地clone下来,上传到服务器安装,举个例子: clip_package = os.environ.get('CLIP_PACKAGE', "git+https://github.com/openai/CLIP.git@d50d76daa670286dd6cacf3bcd80b5e4823fc8e1") 本地git clone https://github.com/openai/CLIP.git clone 完成后 git checkout d50d76daa670286dd6cacf3bcd80b5e4823fc8e1 压缩打包,上传到服务器解压。 到解压目录执行:/home/sd/stable-diffusion-webui/venv/bin/python setup.py install
- 下载webui.sh https://raw.githubusercontent.com/AUTOMATIC1111/stable-diffusion-webui/master/webui.sh
- 脚本上传至服务器,执行sh webui.sh
- pytorch 安装
离线下载pytorch安装文件:
https://download.pytorch.org/whl/cu117/torch-1.13.1%2Bcu117-cp310-cp310-linux_x86_64.whl
- 安装pytorch /home/sd/stable-diffusion-webui/venv/bin/pip install torch-xxxxx(上面下载的torch文件名)
如果依赖下载不下来都可以通过这种方式离线安装
- 上传models models有4个多G,可以把本地下载的直接打包上传到服务器
原创声明:本文系作者授权腾讯云开发者社区发表,未经许可,不得转载。
如有侵权,请联系 cloudcommunity@tencent.com 删除。
原创声明:本文系作者授权腾讯云开发者社区发表,未经许可,不得转载。
如有侵权,请联系 cloudcommunity@tencent.com 删除。