实战 | 使用YOLOv8图像分割实现路面坑洞检测(步骤 + 代码)

实战 | 使用YOLOv8图像分割实现路面坑洞检测(步骤 + 代码)

Color Space
发布于 2024-03-02 08:37:41
发布于 2024-03-02 08:37:41
视觉/图像重磅干货,第一时间送达!
导 读
本文主要介绍使用YOLOv8图像分割实现路面坑洞检测(步骤 + 代码)。
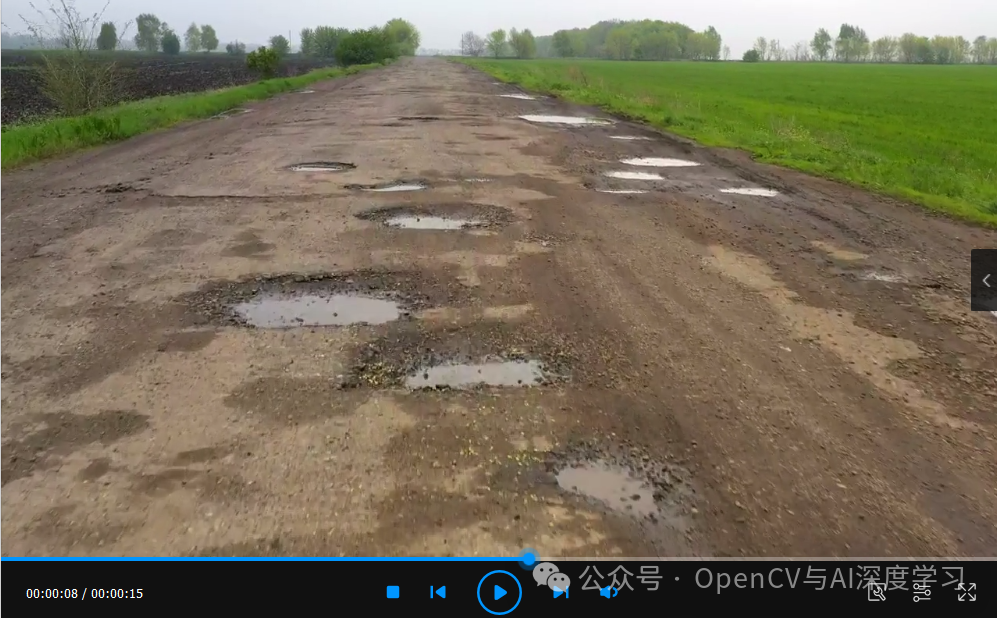
背 景
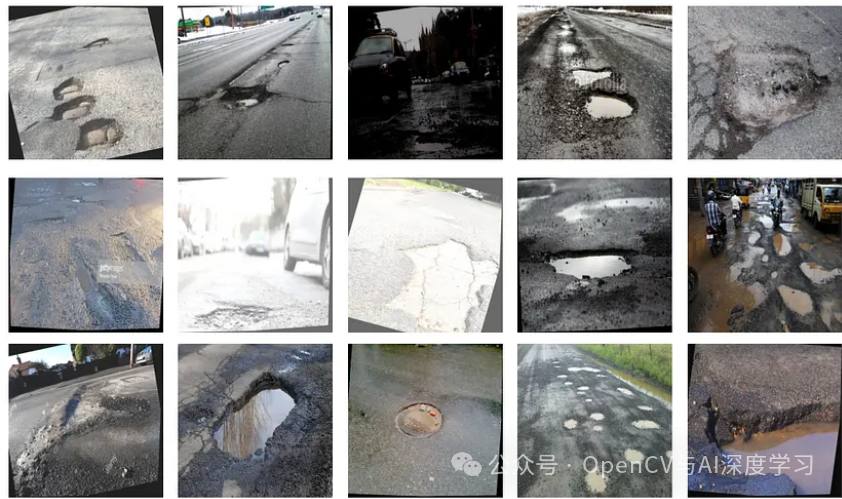
如上图所示,现实生活中路面坑洞对车辆和驾驶员安全来说存在巨大隐患,本文将介绍如何使用YoloV8图像分割技术来检测路面坑洞,从而提示驾驶员注意避让,尽可能保证安全。
实现步骤
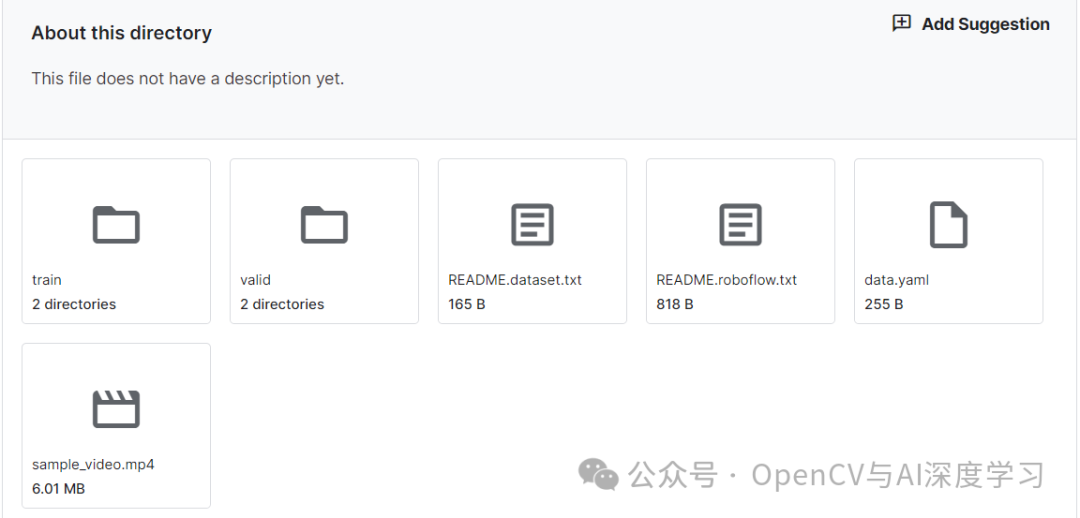
【1】准备数据集。
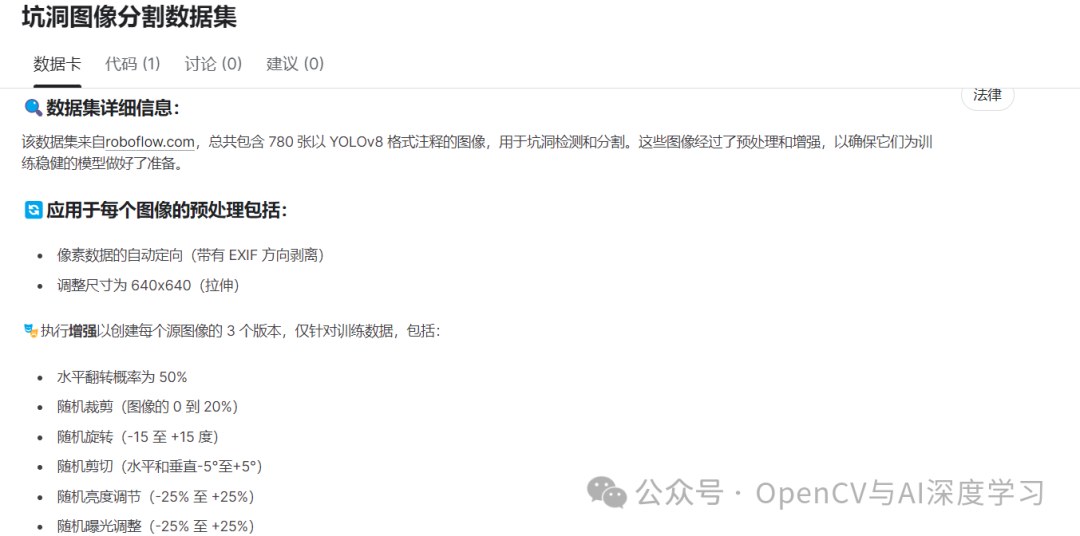
本教程中使用Pothole图像分割数据集。获取坑洼图像分割数据集。您可以从 Kaggle 访问它,这是一个流行的数据科学竞赛、数据集和机器学习资源平台。数据集下载链接:
https://www.kaggle.com/datasets/farzadnekouei/pothole-image-segmentation-dataset下载数据集后,如果数据集已打包,您可能需要从压缩格式(例如 ZIP 或 TAR 文件)中提取文件。
【2】安装Ultralytics,导入必要的库。
安装Ultralytics:
pip install ultralytics导入必要的库:
import pandas as pd
import numpy as np
import matplotlib.pyplot as plt
import seaborn as sns
import os
import warnings
from ultralytics import YOLO
import cv2
from PIL import Image
import yaml
import random
【3】设置数据路径。
dataDir = '/content/Pothole_Segmentation_YOLOv8/'dataDir目录路径“/content/Pothole_Segmentation_YOLOv8/”的变量。该变量表示存储图像分割任务的数据集的目录。
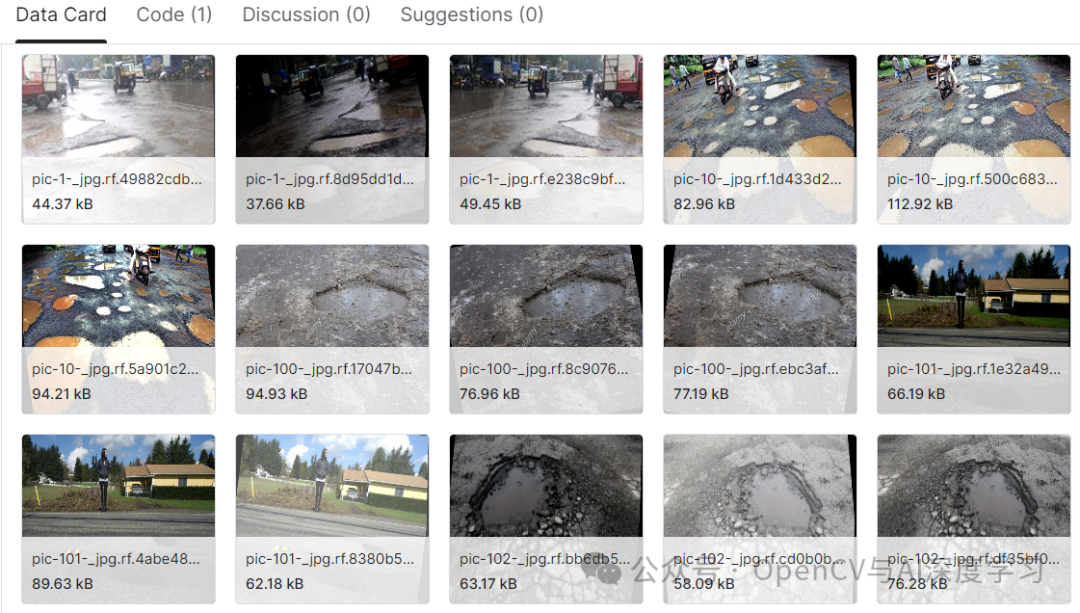
【4】加载并绘制图像。
trainImagePath = os.path.join(dataDir, 'train','images')

#list of the images
imageFiles = [f for f in os.listdir(trainImagePath) if f.endswith('.jpg')]

randomImages = random.sample(imageFiles, 15)

plt.figure(figsize=(10, 10))

for i, image_file in enumerate(randomImages):

    image_path = os.path.join(trainImagePath, image_file)
    image = Image.open(image_path)
    plt.subplot(3, 5, i + 1)
    plt.imshow(image)
    plt.axis('off')

  # Add a suptitle
plt.suptitle('Random Selection of Dataset Images', fontsize=24)

# Show the plot
plt.tight_layout()
plt.show()
设置训练图像路径:
trainImagePath = os.path.join(dataDir, 'train','images'):此行构造包含训练图像的目录的路径。它使用该os.path.join()函数将基本目录路径 ( dataDir) 与存储训练图像的子目录“train”和“images”连接起来。
列出图像文件:
imageFiles = [f for f in os.listdir(trainImagePath) if f.endswith('.jpg')]:此行在目录中创建图像文件列表trainImagePath。它使用列表理解来迭代目录中的文件,并仅过滤那些以“.jpg”扩展名结尾的文件。
选择随机图像:
randomImages = random.sample(imageFiles, 15):此行从上一步使用该函数获得的图像文件列表中随机选择 15 个图像random.sample()。
绘制图像:
- 以下代码行迭代随机选择的图像,使用 PIL ( Image.open()) 打开每个图像,然后用于matplotlib.pyplot创建显示所选图像的子图网格。
- 该plt.subplot()函数用于定位网格中的每个图像。
- plt.imshow()在子图中显示图像。
- plt.axis('off')删除轴标签以获得更清晰的可视化效果。
添加标题并显示绘图:
plt.suptitle('Random Selection of Dataset Images', fontsize=24):为整个情节添加标题。
plt.tight_layout()调整子图的布局以防止重叠。
plt.show()显示情节。
随机选择数据集图像
【5】下载并训练YoloV8分割模型。
model = YOLO('yolov8n-seg.pt')加载预训练权重:'yolov8n-seg.pt'传递给 YOLO 构造函数指定 YOLOv8n 模型预训练权重的文件路径。这些权重对于使用训练过程中学到的参数初始化神经网络至关重要。
yamlFilePath = os.path.join(dataDir,'data.yaml' )yamlFilePath = os.path.join(dataDir,'data.yaml')用于构造名为 的 YAML 文件的文件路径data.yaml。
results = model.train(
    data= yamlFilePath,
    epochs= 30 ,
    imgsz= 640 ,
    batch= 32 ,
    optimizationr= 'auto' ,
    lr0= 0.0001 ,               # 初始学习率
    lrf= 0.01 ,                 # 最终学习率 (lr0 * lrf)
     dropout = 0.25 ,           # 使用 dropout 正则化
    device= 0 ,                 # 运行的设备,即 cuda device=0
     seed= 42
 )
开始 YOLOv8 图像分割模型的训练过程。让我们分解一下传递给该model.train()方法的参数:
- data:此参数指定 YAML 文件 ( ) 的路径,yamlFilePath其中包含配置设置和有关用于训练的数据集的信息。YAML 文件可能包含图像文件路径、注释文件、类名等详细信息。
- epochs:该参数决定训练过程中的 epoch 数(完整遍历整个数据集)。在我们的例子中,模型将训练 30 个 epoch。
- imgsz:该参数指定训练时模型的输入图像大小。图像在输入网络之前可能会调整为 640x640 像素。
- batch:该参数设置训练期间使用的批量大小。它确定在训练过程的每次迭代中同时处理的图像数量。这里使用的批量大小为 32。
- optimizer:该参数指定用于训练模型的优化器。该值'auto'表明训练过程会根据模型架构或其他设置自动选择优化器。
- lr0:该参数设置优化器的初始学习率。指定学习率为 0.0001,这是许多优化任务的常见起始值。
- lrf:该参数指定最终学习率,其计算方式为初始学习率乘以lrf。它有助于在训练过程中逐渐降低学习率以稳定学习过程。
- dropout:该参数指定 dropout 率,这是一种用于防止训练期间过度拟合的正则化技术。丢弃率为 0.25 表示在每次训练迭代期间将随机丢弃 25% 的神经元。
- device:此参数指定模型将在其上进行训练的设备。值0通常表示在第一个 CUDA 设备 (GPU) 上进行训练(如果可用),否则将使用 CPU。
- seed:此参数设置用于训练期间再现性的随机种子。设置固定种子可确保每次执行代码时生成相同的随机数序列,这对于调试和结果再现性很有用。
【6】加载性能最佳的模型。
bestModelpath = '/content/runs/segment/train/weights/best.pt'
bestModel = YOLO(bestModelpath)
【7】加载图像做推理。
validImagePath = os.path.join(dataDir, 'valid', 'images')
imageFiles = [f for f in os.listdir(validImagePath) if f.endswith('.jpg')]
#select Random images
numImages = len(imageFiles)
selectedImage = [imageFiles[i] for i in range(0, numImages, numImages // 9)]
fig, axes = plt.subplots(3, 3, figsize=(10, 10))
fig.suptitle('Validation Set Inferences')
for i, ax in enumerate(axes.flatten()):
imagePath = os.path.join(validImagePath, selectedImage[i])
results = bestModel.predict(source= imagePath, imgsz=640)
annotatedImage = results[0].plot()
annotatedImageRGB = cv2.cvtColor(annotatedImage, cv2.COLOR_BGR2RGB)
ax.imshow(annotatedImageRGB)
ax.axis('off')
plt.tight_layout()
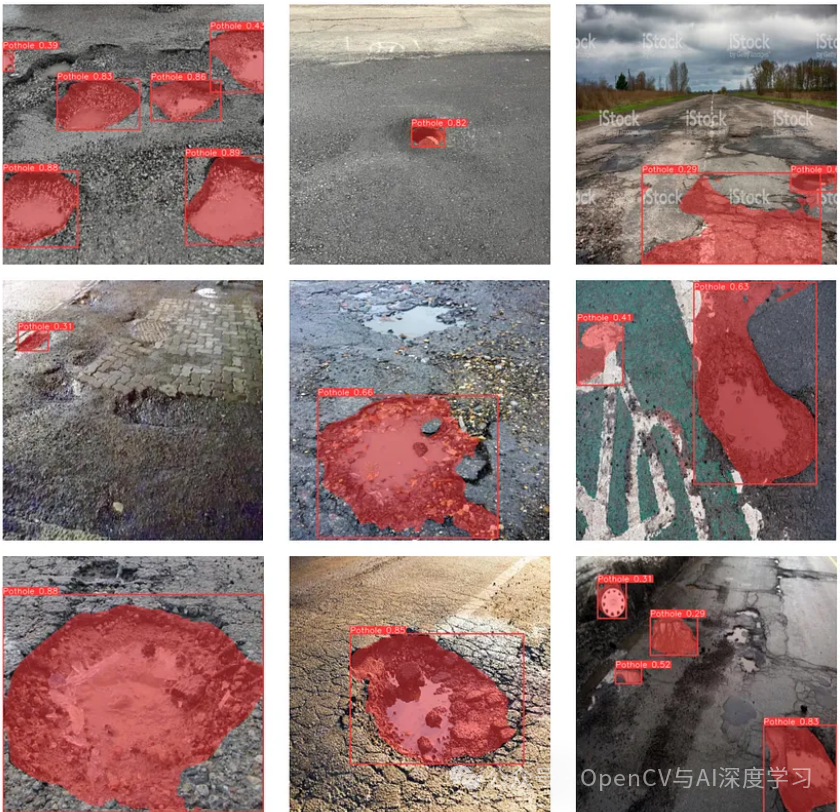
plt.show()使用训练期间获得的最佳模型对验证图像集进行推断。
设置验证图像路径:
- validImagePath = os.path.join(dataDir, 'valid', 'images'):此行构造包含验证图像的目录的路径。
列出验证图像文件:
- imageFiles = [f for f in os.listdir(validImagePath) if f.endswith('.jpg')]:此行在目录中创建图像文件列表validImagePath。
选择随机图像:
- numImages = len(imageFiles):此行计算验证集中的图像总数。
- selectedImage = [imageFiles[i] for i in range(0, numImages, numImages // 9)]:此行从验证集中选择图像的子集。似乎通过将图像总数 ( numImages) 除以 9 来选择 9 个图像。
绘制推断图像:
- 然后,代码继续使用 来创建 3x3 子图网格plt.subplots()。整个图的标题设置为“验证集推断”,使用fig.suptitle().
- 它使用 迭代子图enumerate(axes.flatten()),其中每个子图代表验证集中的一个图像。
- 对于每个子图,它使用 加载相应的图像os.path.join(validImagePath, selectedImage[i]),使用 方法执行推理bestModel.predict(),并使用 绘制带注释的图像results[0].plot()。
- OpenCV的cv2.cvtColor()函数用于将带注释的图像从BGR转换为RGB格式,适合用Matplotlib显示。
- 最后,它使用 隐藏每个子图的轴ax.axis('off')。
【8】加载视频做推理。
import shutil
videoPath = '/content/Pothole_Segmentation_YOLOv8/sample_video.mp4'

bestModel.predict(source=videoPath, save=True)import subprocess
# Convert AVI to MP4 using FFmpeg
subprocess.call(['ffmpeg', '-y', '-loglevel', 'panic', '-i', '/content/runs/segment/predict/sample_video.avi', 'output_video.mp4'])
from IPython.display import Video
# Display the converted MP4 video
Video("output_video.mp4", embed=True, width=960)结论:
当我们结束使用 YOLOv8 的图像分割迷人世界的旅程时,我们发现自己配备了新的见解、技能和可能性。在整个项目中,我们从数据管理到模型训练、推理和评估,揭示了图像分割的复杂性及其在计算机视觉中的变革潜力。
—THE END—
本文参与 腾讯云自媒体同步曝光计划,分享自微信公众号。
原始发表:2024-02-29,如有侵权请联系 cloudcommunity@tencent.com 删除
本文分享自 OpenCV与AI深度学习 微信公众号,前往查看
如有侵权,请联系 cloudcommunity@tencent.com 删除。
本文参与 腾讯云自媒体同步曝光计划 ,欢迎热爱写作的你一起参与!
评论
登录后参与评论
推荐阅读
目录
腾讯云开发者

Copyright © 2013 - 2026 Tencent Cloud. All Rights Reserved. 腾讯云 版权所有
深圳市腾讯计算机系统有限公司 ICP备案/许可证号:粤B2-20090059 ![]() 粤公网安备44030502008569号
粤公网安备44030502008569号
腾讯云计算(北京)有限责任公司 京ICP证150476号 | 京ICP备11018762号